Table of Contents >> Show >> Hide
- Why Chicken Wire Works for a Lamp Shade Makeover
- Before You Start: Check the Lamp Shade Basics
- What You Need for a Chicken Wire Lamp Shade DIY
- Step-by-Step: How to Give a Busted Lamp Shade New Life
- Design Ideas for a Chicken Wire Lamp Shade
- Common Mistakes to Avoid
- Is It Better to Repair or Replace?
- Real-World Experiences With a Busted Lamp Shade and Chicken Wire
- Conclusion
- SEO JSON
Some home projects begin with a vision board. This one begins with a sad, lopsided lamp shade that looks like it lost a bar fight with a vacuum cleaner. The good news? A busted shade does not always need a one-way ticket to the trash. With a little patience, a pair of gloves, and some chicken wire, you can turn a dented, torn, or downright tired lamp shade into a textured, artsy piece that looks more “boutique decor find” than “I fixed this at the kitchen table next to yesterday’s mail.”
This DIY lamp shade makeover is practical, affordable, and surprisingly stylish. It borrows from real-world lampshade recovering methods, basic wire-form crafting, and simple lighting best practices. The result is a custom shade with character, texture, and just enough imperfection to make it interesting. In other words, it stops looking broken and starts looking intentional, which is basically the secret sauce of half of home decor.
Why Chicken Wire Works for a Lamp Shade Makeover
If your original lamp shade fabric is ripped, stained, sagging, or hanging on by pure spite, chicken wire can give it a second life. The material is flexible enough to shape by hand, light enough for decorative use, and open enough to create an airy, sculptural look. It also pairs beautifully with farmhouse, cottage, industrial, rustic, boho, and eclectic interiors.
The smartest approach is to think of chicken wire as a decorative shell or structure rather than a random wrap-and-pray solution. It can reinforce an old frame, replace damaged panels, or create a whole new outer layer over the existing shape. If you want a slightly sturdier structure, hardware cloth can offer more rigidity, but many DIYers still use the term “chicken wire” for the overall look. Either way, the goal is the same: rescue the frame, create texture, and keep the finished shade safe and usable.
There is also a design bonus here. Traditional fabric shades soften a lamp. A chicken wire lamp shade adds depth, shadow play, and visual texture. During the day, it looks handmade and sculptural. At night, it throws a patterned glow that makes a plain corner feel a lot more charming. That is a lot of mileage from one humble roll of wire.
Before You Start: Check the Lamp Shade Basics
Before you perform cosmetic heroics, take a minute to inspect the shade and lamp. Not every shade is worth saving, and not every base will work with every style of replacement shade. Start with three things: size, fitter, and heat.
1. Measure the shade you already have
Take note of the top diameter, bottom diameter, slant, and height. These numbers matter if you want the repaired shade to sit properly and look proportional on the base. A wildly oversized shade can make a lamp look like it is wearing a sunhat indoors. A too-small shade leaves the bulb and hardware awkwardly exposed.
2. Confirm the fitter type
Lamp shades do not all attach the same way. The most common options are spider, uno, and clip-on fitters. If your busted shade uses a spider fitter, keep that frame or replace it with something compatible. This detail sounds boring until you finish your masterpiece and realize it has no way to sit on the lamp. That is a bad twist ending.
3. Think about bulb heat
If your revamped shade will include wire, trim, adhesive, or any decorative layer, use the cooler-running bulb option your lamp allows. LED bulbs are the obvious choice here. They generally run far cooler than old incandescent bulbs, which makes them a better match for DIY shades. Also follow the maximum wattage guidance for your fixture. Style is important, but not more important than not roasting your hard work.
What You Need for a Chicken Wire Lamp Shade DIY
- Old lamp shade frame or busted shade
- Chicken wire or small-gauge hardware cloth
- Work gloves
- Eye protection
- Wire cutters
- Needle-nose pliers
- Floral wire, thin craft wire, or zip ties
- Measuring tape
- Painter’s tape or clips
- Optional trim: ribbon, jute, fabric strips, cane webbing, beads, fringe, or bias tape
- Optional finish: spray paint suitable for metal
- LED bulb for final setup
One very unglamorous but important reminder: wire edges are sharp. Wear gloves. Wear eye protection. Your lamp shade should gain personality, not body count.
Step-by-Step: How to Give a Busted Lamp Shade New Life
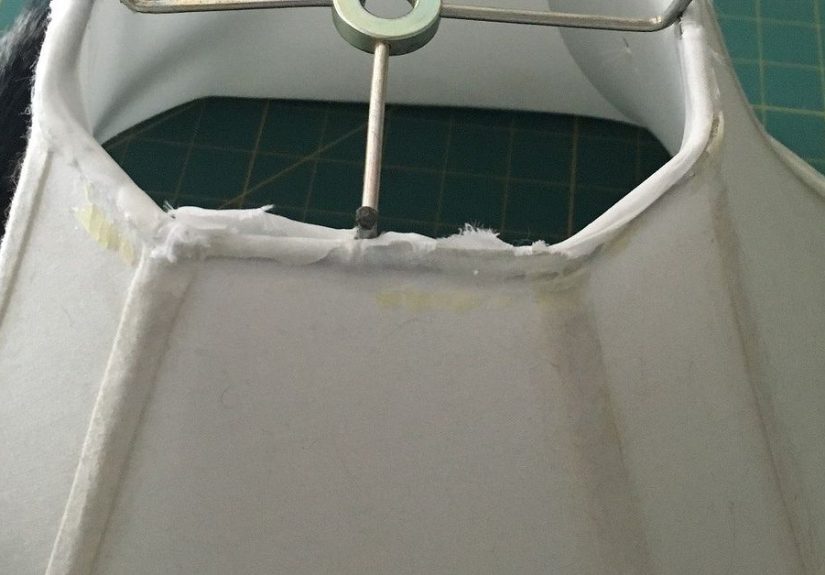
Step 1: Strip the old shade down to its useful parts
If the fabric is torn or stained, remove it carefully. Peel away trim, old glue, loose lining, and anything else that no longer deserves employment. What you want to keep is the frame, especially if it is still structurally sound and has the correct fitter for your lamp.
Do this slowly. Some older shades have brittle glue and fragile frame joints. If the frame is bent, gently reshape it with your hands or pliers. Minor wobble is fixable. Total collapse is a different lifestyle.
Step 2: Decide on your design direction
This is where the project gets fun. You have a few strong options:
- Full wrap: Cover the outside of the old frame in chicken wire for a textural cage effect.
- Panel replacement: Remove damaged side sections and replace them with wire.
- Open-frame makeover: Strip everything and use only the frame plus wire for a sculptural, airy shade.
- Mixed-material shade: Pair chicken wire with fabric, ribbon, rope, or fringe for a softer finished look.
If your room leans rustic or farmhouse, leave the metal visible or paint it matte black. If you want something more cottage-core or romantic, soften the look with ribbon edging, floral accents, or light fabric woven through the mesh. If you want industrial style, keep it simple and let the geometry do the talking.
Step 3: Cut the wire to fit
Measure the height and circumference of the area you want to cover, then cut your wire with a little extra for overlap. That overlap makes fastening easier and keeps you from discovering, too late, that you measured with “close enough” energy.
Lay the wire flat first, then roll it gradually around the frame. Chicken wire and hardware cloth can both be shaped by hand, but small adjustments work better than aggressive wrestling. You are forming a shade, not auditioning for a cage match.
Step 4: Attach the wire to the frame
Use floral wire, thin craft wire, or discreet zip ties to secure the mesh to the top and bottom rings of the shade. Fasten it at evenly spaced intervals so the structure stays balanced. If you want a cleaner look, twist the securing wire on the inside where it is less visible.
This is also the moment to fold or tuck sharp cut ends inward. Take the extra minute. Future you, dusting this lamp six weeks from now, will be deeply grateful.
Step 5: Refine the shape
Once the mesh is attached, step back and look at the silhouette. Is it symmetrical? Is one side bulging like it ate a sandwich bigger than the others? Adjust by gently pressing or pulling the wire until the overall shape looks intentional.
A handmade lamp shade does not need machine-perfect lines. In fact, a little irregularity is part of the charm. You want “artisan,” not “accident.”
Step 6: Add softness, polish, or personality
At this point, the shade is functional, but you can take it a lot further aesthetically. Consider these upgrades:
- Wrap the top and bottom edges with ribbon, jute, or bias tape
- Weave fabric strips through sections of the wire
- Add fringe to the lower edge for a vintage look
- Use cane webbing, lace, or linen in selected panels
- Spray-paint the wire for a unified finish
These details help the piece look finished rather than merely rescued. There is a fine line between “upcycled decor” and “garage leftovers tied together with hope.” Finishing touches are what move the project to the right side of that line.
Step 7: Reassemble and test it safely
Mount the finished shade back onto the lamp and install an LED bulb. Turn the lamp on and watch how the light moves through the mesh. Check that nothing touches the bulb, nothing sags toward the socket, and the shade sits level. If it looks crooked, do not tell yourself it is “quirky.” Fix it now while the tools are still out.
Design Ideas for a Chicken Wire Lamp Shade
Farmhouse favorite
Leave the wire visible, add a jute-wrapped edge, and pair it with a weathered wood or ceramic lamp base. This works beautifully in bedrooms, entryways, and cozy reading nooks.
Garden-inspired glow
Weave faux greenery, dried stems, or tiny fabric flowers around parts of the mesh. Keep embellishments away from the bulb area and use them sparingly so the shade still breathes.
Industrial edge
Paint the wire matte black, skip extra trim, and pair the shade with a simple metal base. This look works especially well on desks, side tables, or loft-style interiors.
Boho texture
Layer the wire with fringe, beads, or woven fabric strips. The wire provides structure while the soft materials add movement and warmth.
Thrifted statement piece
Use a dramatic shape from a vintage shade, then rebuild the body with chicken wire and a painted frame. Suddenly, your thrift store orphan becomes the room’s main character.
Common Mistakes to Avoid
Ignoring the fitter: A beautiful shade that does not fit the lamp is just a decorative hat for your shelf.
Using a hot bulb: Cooler-running LEDs are your best friend for this project.
Leaving sharp edges exposed: Tuck, fold, or cover them.
Overdecorating the mesh: Too many add-ons can make the shade look cluttered and block light.
Forgetting proportion: The finished shade still has to suit the lamp base and the room.
Rushing the final shaping: Most DIY lamp shade mistakes are not disasters; they are just unfinished details pretending to be style choices.
Is It Better to Repair or Replace?
Sometimes replacing a lamp shade is the easier choice. If the frame is badly warped, rusted through, or unstable around the fitter, a new shade may be more practical. But when the damage is mostly cosmetic, repairing it can save money and create something far more interesting than a store-bought basic shade.
A chicken wire lamp shade makeover also makes sense when you want a custom look without custom-shop pricing. Lampshades are one of those items that can be shockingly expensive for something so polite-looking. Upcycling a broken one lets you control the shape, texture, and finish without spending like you are lighting a small palace.
Real-World Experiences With a Busted Lamp Shade and Chicken Wire
One of the most relatable experiences with this project is the moment you realize the busted lamp shade has been sitting around for months because it feels too damaged to use but too potentially useful to toss. It is the decor version of a “maybe someday” pile. Then one weekend, usually after cleaning out a closet or wandering through leftover craft supplies, the idea hits: what if the broken part is actually the design opportunity?
That is often how these makeovers start. A shade gets dented in a move, the fabric yellows with age, the trim frays, or the cat decides it is a personal climbing wall. The lamp base is still great, though, and replacing only the shade feels smarter than buying a whole new lamp. Using chicken wire gives people freedom because it lowers the pressure. The result does not have to look factory-made. It just has to look deliberate and balanced.
Another common experience is discovering that the ugliest stage of the project happens right in the middle. First, the stripped frame looks tragic. Then the wire goes on and looks slightly alarming, like a tiny piece of farm fencing wandered indoors by mistake. Then the shaping gets refined, the edges are wrapped, the bulb goes in, the lamp gets switched on, and suddenly the whole thing makes sense. That turnaround is one of the most satisfying parts of the process.
People also tend to notice how much light changes the project. In daylight, a chicken wire shade reads as texture and structure. At night, it becomes about pattern and shadow. That is why many DIYers end up loving the lamp even more after dark. The glow feels warmer, the room feels moodier, and the shade casts a subtle grid or lace-like effect depending on the mesh and the embellishments. A once-busted object starts acting like custom ambient lighting. Not bad for something rescued from the “junk for now” corner.
There is usually a learning curve, too. The first cut of wire may be too big. The second may be too small. A side may lean. A tie may show. A finger may learn, quite memorably, why gloves were not optional. But those are normal DIY experiences, not signs of failure. In fact, the small corrections are what make the final result feel earned. By the time the lamp is finished, most people have a much better eye for proportion, texture, and how little details affect the whole look.
And perhaps the best experience tied to this project is the reaction from other people. Guests almost never say, “Ah yes, I see you repaired a damaged household object.” They say things like, “Where did you get that shade?” or “That looks expensive,” which is the kind of feedback every DIY project dreams of hearing. You do not need a workshop, a design degree, or a reality show montage. You just need a broken shade, some chicken wire, and the willingness to let imperfect materials become part of the charm.
Conclusion
Giving new life to a busted lamp shade with chicken wire is one of those rare DIY projects that checks every box: budget-friendly, creative, practical, and full of personality. It lets you rescue a useful object, customize your lighting, and add texture that off-the-shelf shades often lack. Better yet, it works with a wide range of decor styles, from farmhouse to industrial to relaxed boho.
The keys to success are simple: keep the correct fitter, measure before cutting, handle wire safely, refine the shape patiently, and use a cooler-running LED bulb when it is time to light things up. Do that, and your once-sad lamp shade can become a conversation piece with character instead of clutter with emotional baggage.
In other words, your busted shade is not the end of the story. It is just waiting for a wire plot twist.


