Table of Contents >> Show >> Hide
- Why Make Your Own Wood Frame?
- Tools and Materials You’ll Need
- Step 1: Measure Your Art or Poster
- Step 2: Select Your Wood
- Step 3: Cut the Wood to Size
- Step 4: Assemble the Frame
- Step 5: Sand and Finish the Frame
- Step 6: Add the Glass or Acrylic
- Step 7: Insert the Backing
- Step 8: Install Picture Hanging Hardware
- Step 9: Hang Your Artwork
- Conclusion
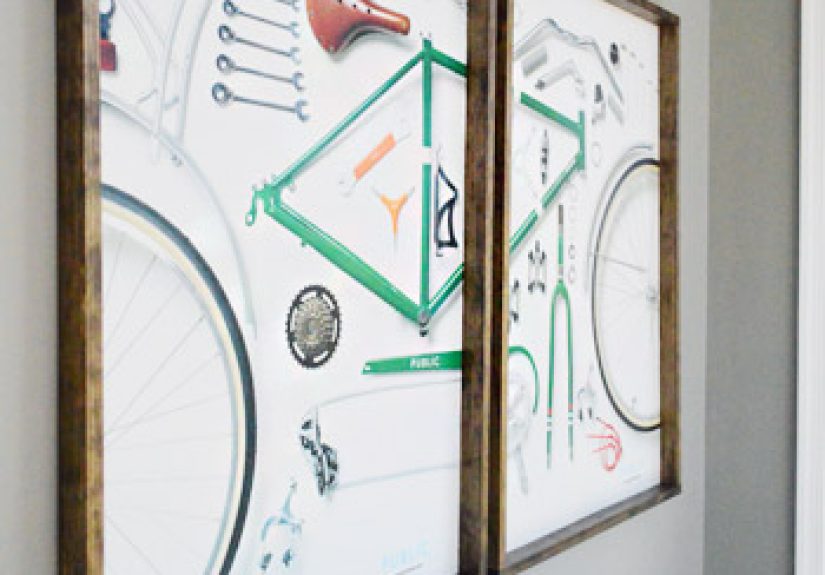
Framing large art or posters can be an expensive endeavor if you rely on commercial framing services. However, with a little time, effort, and a few basic tools, you can make your own custom wood frames that perfectly suit your style and budget. In this guide, we’ll walk you through the step-by-step process of creating wooden frames for large art or posters, inspired by the popular home improvement blog, Young House Love. Whether you’re hanging a cherished print, an oversized poster, or an original painting, this DIY project will give your artwork a professional look without the hefty price tag.
Why Make Your Own Wood Frame?
Making your own wood frame offers several advantages. Not only can you customize the frame to match your art’s style and your home’s décor, but you can also save a significant amount of money. Custom framing can easily cost hundreds of dollars, especially for large or unconventional pieces. By creating your own frame, you can achieve a high-end look at a fraction of the price. Plus, it’s a satisfying and creative project that allows you to add a personal touch to your artwork.
Tools and Materials You’ll Need
Before you begin, gather the following materials:
- Wood of your choice (we recommend pine or oak for an elegant, affordable look)
- Measuring tape
- Table saw or miter saw (for cutting the wood to size)
- Wood glue
- Clamps
- Wood screws or nails
- Painters tape or corner clamps (optional, for precise angles)
- Wood finish or paint (if you want to stain or paint the frame)
- Glass or acrylic (for covering the art)
- Backing material (such as foam board or cardboard)
- Picture hanging hardware
Step 1: Measure Your Art or Poster
Start by measuring the dimensions of your artwork or poster. It’s crucial to get accurate measurements, as the frame will need to fit perfectly. Measure the width and height of the art, adding a little extra room for the frame’s borders. This will ensure the frame sits neatly around the edges without obscuring any part of your artwork.
Step 2: Select Your Wood
Next, choose the wood for your frame. Softwoods like pine are easy to work with and can be stained or painted to match your desired aesthetic. If you’re going for a more rustic look, reclaimed wood could also work well. You can find wood at your local hardware store or purchase pre-cut lengths, depending on the size of your project.
Cut your wood pieces to size according to the dimensions of your artwork, ensuring that the corners are cut at precise 45-degree angles to form a clean, professional-looking frame. You’ll need four pieces in total: two for the vertical sides and two for the horizontal sides of the frame.
Step 3: Cut the Wood to Size
Using a table saw or miter saw, cut your wood pieces to the correct length. Be sure to use a saw with a fine tooth blade to achieve clean cuts, especially when working with hardwoods. If you’re new to using a saw, it’s helpful to practice on scrap wood first to get a feel for the tool.
When cutting the corners, use a miter box or miter saw to create precise 45-degree angles. This will help the frame fit together perfectly when you assemble it. If you don’t have a miter saw, a handsaw and miter box will also do the job.
Step 4: Assemble the Frame
Once your pieces are cut, it’s time to assemble the frame. Start by applying wood glue to the ends of each piece where the corners meet. Then, press the pieces together, ensuring that the angles are flush and aligned. Clamp the frame together and allow the glue to dry for at least 30 minutes before moving on to the next step.
If you want extra reinforcement, you can add wood screws or nails to the corners, securing the frame in place. Just be careful not to overdo it with screws, as this can cause the wood to split. The goal is to secure the frame without compromising its aesthetics.
Step 5: Sand and Finish the Frame
Once the frame is assembled and the glue has dried, it’s time to sand the edges and surface to smooth out any rough spots. Start with a medium-grit sandpaper, and then finish with a finer grit for a smooth, polished finish.
If you plan to paint or stain the frame, now is the time to apply your chosen finish. You can go with a classic wood stain for a natural look or paint it in a color that complements your artwork. Apply several coats for an even finish, allowing each coat to dry completely before applying the next.
Step 6: Add the Glass or Acrylic
After the frame is finished, cut the glass or acrylic to the dimensions of the frame’s opening. Make sure it fits snugly into the frame, and if necessary, secure it with glazing points or small nails along the edges.
If you prefer a lighter option, acrylic might be a better choice than glass. It’s shatter-resistant and more affordable, and it’s easier to work with than glass, especially for larger frames.
Step 7: Insert the Backing
Next, cut your backing material (foam board or cardboard) to fit the size of the frame. Place the artwork face down and then lay the backing on top. You can use picture hanging clips or adhesive strips to secure the artwork in place. This step will ensure that your art stays put inside the frame.
Step 8: Install Picture Hanging Hardware
To finish off the frame, add the necessary hanging hardware to the back. This could be picture hangers, D-rings, or wire, depending on the weight and size of the frame. For larger frames, be sure to use sturdy hardware to prevent the frame from falling off the wall.
Step 9: Hang Your Artwork
Now that your custom frame is complete, it’s time to hang your artwork. Use a level to make sure the frame is straight, and then use the appropriate nails or screws to mount it on the wall. Make sure it’s securely attached before stepping back to admire your work!
Conclusion
Making your own wood frame for large art or posters is an enjoyable and rewarding DIY project that can elevate your home’s décor. With just a few basic materials and tools, you can create a frame that fits your artwork perfectly and looks stunning on your wall. Not only does this project save you money, but it also gives you the opportunity to personalize the frame to your exact specifications. So grab your saw, some wood, and get started on framing your favorite pieces today!
Additional Experience: Tips and Tricks for Making Wood Frames
While making wood frames for large art or posters is relatively straightforward, a few additional tips can make the process smoother and more successful:
- Use a coping saw for intricate cuts: If you need to cut curved or more detailed shapes, a coping saw will give you better control than a standard saw.
- Don’t rush the drying time: Wood glue takes time to set. Allow it to fully dry before handling the frame to avoid accidents.
- Consider adding a mat: For extra visual appeal, you can add a mat around the artwork inside the frame. This can help the art stand out and give it a more polished look.
- Experiment with different wood finishes: Don’t be afraid to try unique finishes like distressed paint or metallic accents to match the vibe of your room.
Creating your own wood frames for large art or posters is a rewarding way to showcase your favorite pieces. It’s not just about saving moneyit’s about taking pride in the craftsmanship of something you’ve made yourself. With these tips and steps, you’re well on your way to mastering the art of framing!
sapo: Discover the simple and affordable way to make custom wood frames for your large art or posters. This DIY project offers a personalized touch without the high cost of professional framing.


