Table of Contents >> Show >> Hide
- First: A Quick (Important) Reality Check About Older Popcorn Ceilings
- Know Your Ceiling: Painted vs. Unpainted Changes Everything
- Supplies That Prevent Mess (and Save Your Neck)
- Prep the Room So the Mess Has Nowhere to Go
- Method 1: Vacuum First (The Least Messy “Deep Clean”)
- Method 2: Lint Roller (Perfect for Cobwebs and Localized Dust)
- Method 3: Microfiber or Feather Duster (Best for Maintenance)
- Spot Cleaning Stains (Without Turning Your Ceiling Into Oatmeal)
- What NOT to Do (Because the Ceiling Will Remember)
- When Cleaning Isn’t the Best Answer
- A Simple Maintenance Plan (So You Don’t Have to Deep-Clean Again Soon)
- Conclusion: Clean Ceiling, Calm House
- Experiences & Real-World Lessons: What People Learn After Cleaning Popcorn Ceilings
- 1) The vacuum is the hero, but only when it’s used like a feather
- 2) Kitchens are a different planet
- 3) The “one small stain” trap is real
- 4) Drop cloths are the difference between “done” and “why is there dust in my toaster?”
- 5) Lint rollers are surprisingly satisfying
- 6) The biggest win is prevention
Popcorn ceilings (a.k.a. acoustic ceilings, stipple ceilings, and the reason your cobwebs feel “emotionally supported”) are
excellent at hiding imperfections and equally excellent at collecting dust, smoke film, and mystery specks that seem to appear
the second you buy a white sofa.
The trick to cleaning a popcorn ceiling without turning your living room into a snow globe is simple:
go gentle, go dry first, and don’t fight the texture. This guide walks you through low-mess prep, the safest
cleaning methods, and how to handle stainswithout creating a bigger cleanup than the original problem.
First: A Quick (Important) Reality Check About Older Popcorn Ceilings
If your home is older, pause before you start dusting like you’re trying to win a speed-cleaning competition.
Some older textured ceilings may contain asbestos, and disturbing them can release tiny fibers into the air.
If you suspect asbestos, don’t scrape, sand, or aggressively brush the ceiling.
When in doubt, get it tested by a qualified professional before doing anything that creates dust.
How to tell if you should be cautious
- Home built decades ago? Treat the ceiling as “unknown” until you verify.
- Texture is flaking, powdery, or damaged? Avoid cleaning that involves friction or suction.
- Planned remodel or new light fixtures? Testing becomes even more important.
If your ceiling is in good shape and you’re doing light, careful cleaning, you can often reduce dust without drama.
But if it’s deteriorating or you’re unsure of its contents, the safest “mess-free” move is professional guidance.
Know Your Ceiling: Painted vs. Unpainted Changes Everything
Popcorn texture can be painted/sealed (more durable) or unpainted (more fragile).
Unpainted popcorn can crumble if you look at it the wrong wayokay, slight exaggerationbut moisture and pressure can break it down quickly.
Why it matters
- Dry cleaning methods (vacuum, duster, lint roller) are safest for almost all popcorn ceilings.
- Wet cleaning is only for small spot treatment, and is generally safer on painted/sealed ceilings.
- Heavy stains on unpainted texture often end up being a “prime and paint” project instead of a “scrub it out” project.
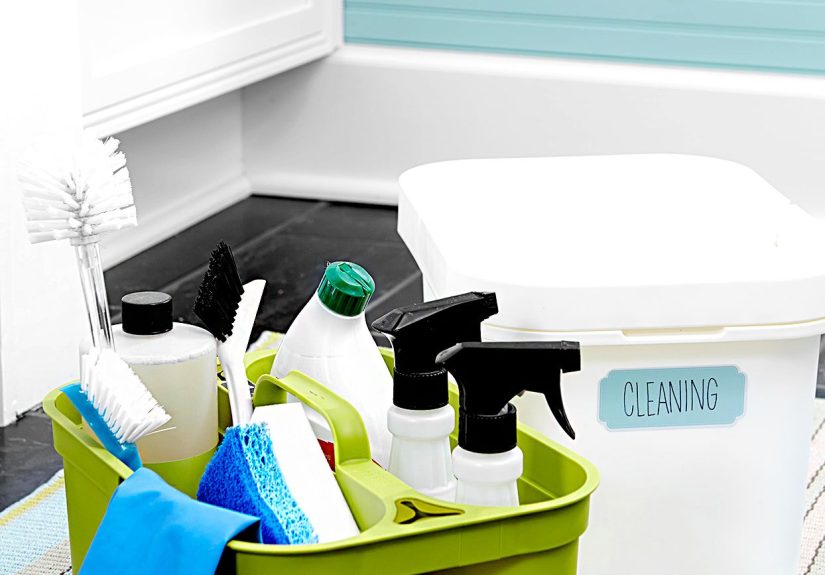
Supplies That Prevent Mess (and Save Your Neck)
Before you touch the ceiling, set yourself up to win. Here’s what helps most:
Cleaning tools
- Vacuum with a soft brush attachment (a HEPA-filter vacuum is a bonus).
- Long-handled microfiber duster (synthetic fibers tend to snag less).
- Lint roller on an extension pole (or duct tape wrapped sticky-side-out around a paint roller).
- Dry cleaning sponge (often called a chemical sponge or soot sponge) for smoke/soot marks.
Mess-control + safety basics
- Drop cloths (canvas is sturdier) or thick plastic sheeting for floors and furniture.
- Painter’s tape (to secure plastic and protect walls).
- Safety glasses, a hat, and a well-fitting mask (especially if dust bothers you).
- Step ladder (stable, rated for your weight, and not “that chair” you always regret using).
Prep the Room So the Mess Has Nowhere to Go
Most “popcorn ceiling disasters” aren’t caused by the ceiling. They’re caused by skipping prep.
Do this once and you’ll clean faster, safer, and with dramatically less rage.
Five-minute prep checklist
- Remove small items (lamps, decor, anything that can collect falling dust).
- Cover furniture with plastic or an old sheet. If you use plastic, tape it so it stays put.
- Protect the floor with a drop cloth you won’t slip on.
- Turn off HVAC/fans while you work so dust doesn’t circulate.
- Good lighting: aim a lamp upward so you can see cobwebs and dull patches.
Bonus mess-reducer: keep your vacuum running (on low suction if possible) nearby as you work.
Popcorn texture is basically a tiny dust shelf systemyour goal is to remove dust without launching it into orbit.
Method 1: Vacuum First (The Least Messy “Deep Clean”)
If you want the best balance of effectiveness and low mess, start with the vacuum.
The soft brush attachment lifts dust while the vacuum captures it immediatelymeaning less fallout onto your couch.
Step-by-step vacuum method
- Use a soft brush attachment (wide is better than narrow).
- Set suction to low if your vacuum allows it.
- Work in small sections (think: 3-by-3 feet).
- Touch lightlyyou’re guiding the brush, not exfoliating the ceiling.
- Move slowly in overlapping passes like mowing a lawn (a very boring, very dusty lawn).
- Stop if texture starts to flake. Switch to a lighter method (duster or lint roller).
Pro tips for fewer crumbs
- Hold the hose so the attachment stays flatangles can snag texture.
- Don’t “stab” at cobwebs. Approach them gently and let suction do the work.
- If your vacuum uses bags, consider swapping to a fresh bag before starting for stronger airflow.
Method 2: Lint Roller (Perfect for Cobwebs and Localized Dust)
A lint roller sounds almost too simple, which is exactly why it’s brilliant.
Sticky sheets pick up dust and spiderwebs without blowing them around.
It’s especially handy for corners, around vents, and near ceiling fans where dust likes to party.
How to use a lint roller without ripping texture
- Use a light touch and roll in one direction.
- Don’t press hardif it feels like you’re rolling dough, you’re doing it wrong.
- Change sheets often. A dirty sticky sheet smears instead of lifts.
- Work systematically so you don’t miss sections (and so you don’t keep re-rolling the same spot).
If you don’t have an extendable lint roller, wrap wide packing tape or duct tape (sticky side out) around a clean paint roller.
Keep it gentlethis is “collect dust,” not “wax the ceiling.”
Method 3: Microfiber or Feather Duster (Best for Maintenance)
For regular upkeep, a long-handled duster is the fastest option.
It won’t grab everything the way a vacuum does, but it’s low effort and low mess when used correctly.
Make dusting less messy
- Use a clean, dry duster. A dusty duster is just a dust redistributor.
- Move slowlyfast swipes flick dust into the air.
- Dust toward the center of the room, then vacuum the floor afterward.
- Wash or shake out the duster outside when you’re done.
If allergies are a concern, vacuuming is typically the better choice because it captures debris instead of sending it floating.
Spot Cleaning Stains (Without Turning Your Ceiling Into Oatmeal)
Stains are where people get into troublebecause the instinct is to scrub.
With popcorn texture, scrubbing usually turns into crumbling.
Your best strategy is blotting, minimal moisture, and a test spot first.
Rule of thumb
- If the stain is from water: fix the leak first, or it will come back.
- If the ceiling is unpainted: wet cleaning is risky; repainting may be the better solution.
- Always test a small, hidden area before treating a visible stain.
Water stains (roof leak, bathroom moisture, plumbing surprise)
Once the source is fixed and the area is fully dry, you can try a light stain treatment.
Use a spray bottle set to a fine mist and barely dampen the stained areadon’t soak it.
A common approach is a diluted bleach-and-water mix for discoloration, but use it carefully:
ventilate the room, wear gloves/eye protection, and never mix bleach with ammonia or other cleaners.
If the stain persists, many homeowners choose to seal with a stain-blocking primer and repaint the ceiling.
That route often looks cleaner than repeated spot treatments that risk damaging the texture.
Grease and cooking film (usually near kitchens)
Grease is sneakyit grabs dust and turns it into a sticky gray shadow.
On painted ceilings, lightly dab with a sponge that’s been dipped in warm water with a few drops of dish soap,
then wrung out until it’s only slightly damp. Blot; don’t rub.
Follow with a clean damp blot (plain water), then pat dry.
Smoke and soot marks (candles, fireplaces, “I swear it was one little candle”)
Start dry: a dry cleaning/soot sponge is made for this job.
Gently press and lift rather than dragging it across the texture.
If the stain is deep or widespread, cleaning may help, but repainting is often the real “reset button.”
Mold or mildew (bathrooms, humidity issues)
Mold and mildew are less about cleaning skill and more about moisture control.
Improve ventilation, run exhaust fans, and manage humidity.
For small surface areas on painted ceilings, careful spot treatment may work, but if growth is widespread,
keeps returning, or the ceiling is deteriorating, professional assessment is smart.
What NOT to Do (Because the Ceiling Will Remember)
- Don’t scrub with stiff brushes or abrasive pads.
- Don’t soak the ceiling with water or cleaner.
- Don’t steam clean popcorn texture.
- Don’t use high suction if the texture is fragile or flaking.
- Don’t scrape “just a little” to remove a dirty spotthis becomes a repair job fast.
- Don’t ignore stains from leaks; fix the source first or you’ll be in a loop.
When Cleaning Isn’t the Best Answer
Sometimes the cleanest-looking result doesn’t come from cleaningit comes from encapsulation
(sealing the texture with paint) or covering the ceiling with new drywall or ceiling panels.
This is especially true when:
- The ceiling is heavily stained across large areas.
- The texture is crumbling or has been patched repeatedly.
- You suspect asbestos and want to minimize disturbance.
- You’re remodeling and prefer a smooth ceiling.
If you’re considering removal, keep in mind that removal is inherently messier than cleaning.
It also carries additional safety considerationsparticularly in older homesso this is the moment to involve qualified pros.
A Simple Maintenance Plan (So You Don’t Have to Deep-Clean Again Soon)
Monthly (5 minutes)
- Quick pass with a microfiber duster in corners and around vents.
- Address cobwebs before they get thick and clingy.
Yearly (30–60 minutes, depending on room size)
- Vacuum with a soft brush attachment section-by-section.
- Spot-check for stains or moisture issues.
Always
- Run bathroom/kitchen exhaust fans to reduce humidity.
- Replace HVAC filters on schedule to cut down airborne dust.
- Keep an eye on roof/plumbing issueswater stains are a “symptom,” not the disease.
Conclusion: Clean Ceiling, Calm House
Cleaning a popcorn ceiling without making a mess isn’t about fancy toolsit’s about the right method and a gentle approach.
Prep the room, choose dry cleaning first (vacuum, duster, lint roller), and treat stains like delicate problems, not scrubbing contests.
And if your ceiling is older or deteriorating, prioritize safety and consider testing or professional help before disturbing the texture.
Experiences & Real-World Lessons: What People Learn After Cleaning Popcorn Ceilings
To make this guide extra practical, here are “been-there-done-that” experiences commonly shared by homeowners, renters,
and even the occasional brave soul who cleaned a popcorn ceiling two days before hosting family (a choice that truly builds character).
These aren’t personal anecdotes from meI’m not the one on a ladderbut they reflect the patterns people consistently report
when they try to clean textured ceilings without turning their home into a dust exhibit.
1) The vacuum is the hero, but only when it’s used like a feather
A lot of people start with a broom because it seems simpleuntil they realize they’re basically sweeping dust into the air
and then breathing it like an unwanted hobby. The vacuum-with-brush method usually wins because it collects dust immediately.
The catch? People who press too hard sometimes end up with little “popcorn sprinkles” on the floor. The common fix is lowering suction,
switching to a wider brush, and moving slower than feels necessary. The ceiling doesn’t need intensity; it needs patience.
2) Kitchens are a different planet
In living rooms and bedrooms, most mess is dry: dust and cobwebs. In kitchens, the “dust” often has a thin greasy film that makes it cling.
Many people report that dusting alone barely changes anything near the stove or above cabinets. What works better (on painted ceilings)
is a two-phase approach: first vacuum or lint-roll to remove loose debris, then do careful blotting with a barely damp, soapy sponge.
The lesson: if you jump straight to damp cleaning, you can create streaksespecially if the sponge is too wet or the area is large.
3) The “one small stain” trap is real
Water stains and smoke marks make people feel like they can “just fix that one spot.” The experience many share:
they treat the stain, it looks better while damp, and then it dries… and the stain is still there (or now has a faint ring).
That’s why the most successful approach is addressing the cause first (leak or smoke), testing a small patch, and deciding early
whether spot-cleaning is worth itor whether sealing and repainting is the cleaner long-term answer.
4) Drop cloths are the difference between “done” and “why is there dust in my toaster?”
People who skip covering furniture often end up doing a second cleaning sessionon everything below the ceiling.
The ones who feel like they “won” the project usually did three things: covered the floor, covered the big furniture,
and kept a vacuum handy to catch falling bits immediately. The ceiling might not dump a lot of debris, but the dust it releases
seems to have a supernatural ability to land on the darkest shirt you own.
5) Lint rollers are surprisingly satisfying
Many people are skeptical of lint rollers until they try them around vents and corners. It’s one of the few methods where you can
see the grime transferring onto the sticky sheet, which is oddly motivating. The best experiences tend to come from using a light touch,
changing sheets frequently, and treating the roller as a “detail tool,” not the only tool for the whole ceiling.
6) The biggest win is prevention
The most consistent “next time I’ll do this differently” advice is: don’t wait years.
People who do quick maintenance (a gentle dusting pass a few times a year and a careful vacuum once a year) report that deep cleaning
becomes almost unnecessary. It also reduces allergy flare-ups and keeps the texture looking brighter, especially in rooms with ceiling fans
that constantly move air and redeposit dust.
In other words: the cleanest popcorn ceiling is the one you never let get gross in the first place.
If you adopt a light, repeatable routine, you’ll spend less time on ladders and more time enjoying your homewithout the surprise
of “ceiling confetti” every time you look up.


