Table of Contents >> Show >> Hide
- Before You Cut: Should You DIY or See a Stylist?
- Tools You Need to Cut Long Hair Short
- How to Cut Long Hair Short: 14 Steps
- Step 1: Decide How Short You Really Want to Go
- Step 2: Consider Your Hair Texture and Shrinkage
- Step 3: Decide Whether to Donate Your Hair
- Step 4: Wash, Dry, and Detangle Your Hair
- Step 5: Put on a Towel or Cape and Set Up Mirrors
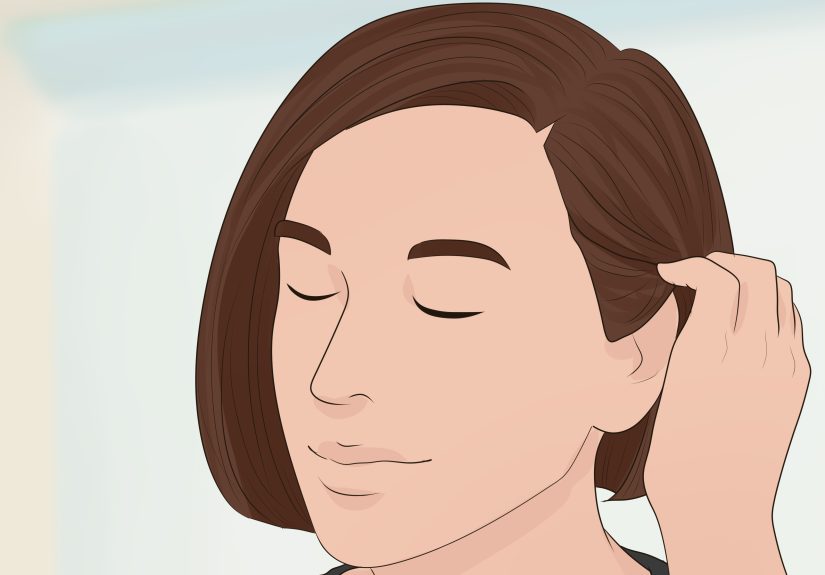
- Step 6: Section Your Hair Carefully
- Step 7: Make the First Big Cut Longer Than Your Final Goal
- Step 8: Establish Your Guide Length
- Step 9: Cut Small Sections to Match the Guide
- Step 10: Use Point Cutting to Soften the Ends
- Step 11: Check Both Sides for Balance
- Step 12: Refine the Back
- Step 13: Dry and Style Before Final Adjustments
- Step 14: Clean Up the Details and Stop
- Best Short Haircuts to Consider When Cutting Long Hair
- Common Mistakes to Avoid
- How to Care for Short Hair After the Cut
- Experience Notes: What It Really Feels Like to Cut Long Hair Short
- Conclusion
Cutting long hair short is not just a haircut. It is a tiny life event with scissors. One minute you are tossing your hair into a bun for the 847th time this month, and the next you are wondering whether you are ready for a bob, lob, shag, pixie, or something stylish enough to make your bathroom mirror applaud.
The good news: you can cut long hair short with a plan, the right tools, and a calm approach. The not-so-good news: panic-cutting at midnight with kitchen scissors is how people accidentally invent hats as a lifestyle. Whether you are doing a careful DIY cut at home or preparing for a salon appointment, this guide walks you through the process step by step.
This article covers how to cut long hair short in 14 practical steps, including choosing a style, sectioning hair, making the first major cut, blending the shape, checking balance, and caring for your new short haircut. You will also find real-world experience tips at the end, because the emotional side of losing six, ten, or twelve inches deserves its own little support group.
Before You Cut: Should You DIY or See a Stylist?
Let us start with the honest answer: if you want a dramatic transformation, a pixie cut, a sharp bob, heavy layers, bangs, or a precision shape, a professional stylist is usually the safest choice. Short hair shows mistakes more clearly than long hair because there is less length available to hide uneven spots. Long hair can forgive a slightly crooked trim. A chin-length bob? Not always so generous.
However, a simple long-to-short cut at home can work if you are aiming for a basic blunt cut, a shoulder-length chop, or a soft lob. The secret is to remove length gradually, use proper hair-cutting shears, and avoid trying to become a celebrity stylist in one afternoon. Confidence is helpful. Overconfidence is how bangs happen.
Tools You Need to Cut Long Hair Short
Before you begin, gather everything. A haircut should not turn into a scavenger hunt while one side of your hair is already six inches shorter than the other.
Essential Tools
- Sharp haircutting shears, not kitchen scissors
- A fine-tooth comb
- Hair clips or sectioning clips
- Two mirrors, ideally one front mirror and one hand mirror
- Spray bottle with water
- Hair ties or small elastics
- A towel or cape
- A ruler or measuring tape
- A broom or vacuum for the emotional confetti afterward
Hair-cutting shears matter because dull household scissors can crush the ends of the hair instead of slicing cleanly. That can leave the finished cut looking frayed, uneven, or fuzzy. A clean blade gives you more control and a softer finish.
How to Cut Long Hair Short: 14 Steps
Step 1: Decide How Short You Really Want to Go
Do not begin by saying, “I just want it shorter.” That is how haircuts become surprise parties. Choose a specific target length: collarbone, shoulder, chin, jawline, nape, or pixie. Look at photos of people with a similar hair texture, density, and face shape. A sleek chin bob on fine straight hair may behave very differently from the same bob on thick curls.
If you are unsure, start longer than your dream length. You can always cut more. You cannot glue the ponytail back on, despite what your panic brain may suggest.
Step 2: Consider Your Hair Texture and Shrinkage
Hair texture changes everything. Straight hair often shows lines clearly, so precision matters. Wavy hair may need soft shaping to avoid a triangle effect. Curly and coily hair can shrink significantly once dry, so cutting it wet may lead to a much shorter result than expected.
For curly hair, consider cutting dry or only slightly damp so you can see how the curls naturally sit. If you cut curls while stretched or soaking wet, the final length may bounce up dramatically. That cute shoulder-length plan can become “hello, cheekbones” very quickly.
Step 3: Decide Whether to Donate Your Hair
If you are cutting off a lot of length, check whether your hair can be donated before you start. Many hair donation organizations require ponytails or braids to meet a minimum length, and the hair usually needs to be clean, dry, bundled securely, and cut above the elastic.
Measure from the top elastic to the ends. Some programs accept around 10 inches, while others prefer 12 inches or more. Requirements vary, so check the organization’s rules before cutting. If donation is your goal, do not sweep your hair off the floor and hope for the best. Donation hair needs to be kept neat, dry, and contained.
Step 4: Wash, Dry, and Detangle Your Hair
Start with clean, detangled hair. If your hair is straight or slightly wavy, you can cut it damp for better control. If your hair is curly, coily, or highly textured, you may prefer cutting it dry in its natural pattern. Either way, remove knots first so your sections lie evenly.
Use conditioner if needed, but avoid heavy styling products before the cut. Gel, wax, or thick creams can make the hair clump in ways that hide its true shape. You want the hair to behave honestly, even if honesty is sometimes rude.
Step 5: Put on a Towel or Cape and Set Up Mirrors
Good lighting is essential. Stand or sit where you can see the front, sides, and back as clearly as possible. A second mirror helps you check the nape and back sections. If you only use one mirror, you may accidentally create a haircut that looks great from the front and mysterious from behind.
Wear a button-up shirt or something easy to remove without dragging hair clippings over your face. Tiny hair pieces on the neck are somehow more annoying than a mosquito with a personal agenda.
Step 6: Section Your Hair Carefully
Divide the hair into manageable sections. A simple method is to create four sections: front left, front right, back left, and back right. Clip each section securely. For very thick hair, make more sections. For fine hair, four may be enough.
Clean sectioning is one of the biggest differences between a decent haircut and a chaotic one. Do not grab random chunks and hope they become friends. Controlled sections help you cut evenly and compare both sides.
Step 7: Make the First Big Cut Longer Than Your Final Goal
If you are removing major length, tie each section with an elastic slightly below where you want the first cut. Cut below the elastic, not above it, especially if you are donating the hair. Leave extra length for refining. For example, if you want a chin-length bob, make the first cut closer to the shoulders or lower jaw, depending on your comfort level.
This first cut is not the final haircut. It is the rough draft. Think of it as clearing the forest before landscaping the garden. The first chop removes weight, but the shaping happens afterward.
Step 8: Establish Your Guide Length
Once the bulk of the length is gone, choose a guide section. This is the piece that determines your final length. Many people start at the center back or just below the chin in front, depending on the haircut shape.
Comb the section straight down with gentle tension. Hold the hair between your fingers and trim small amounts. Your guide should be slightly longer than your ideal result because refining will remove more length. Haircuts have a sneaky way of getting shorter during “just one more tiny adjustment.”
Step 9: Cut Small Sections to Match the Guide
Work slowly from your guide section outward. Take a small piece of already-cut hair into the next section so you can match the length. This technique helps create consistency around the head.
Keep your head position neutral. Looking down while cutting can make the back too short. Tilting to one side can create accidental asymmetry. Stand straight, breathe, and remember that your mirror is your coworker, not your enemy.
Step 10: Use Point Cutting to Soften the Ends
For a softer finish, use point cutting. Hold the scissors vertically or at a slight angle and make tiny snips into the ends rather than cutting straight across. This can help remove a harsh shelf-like line, especially on thick hair.
Point cutting should be gentle. Do not jab wildly into the hair like you are tenderizing a steak. Small, controlled snips create texture. Big, aggressive cuts create regret.
Step 11: Check Both Sides for Balance
Bring the front pieces forward and compare the left and right sides. Check the length near the jaw, collarbone, or shoulders. If one side is longer, trim tiny amounts from the longer side. Do not keep switching sides endlessly or the haircut will slowly climb toward your ears.
For a bob or lob, look at where the weight sits. If it feels too heavy at the bottom, you may need slight texturizing or professional shaping. If the line is uneven by more than a little, pause and reassess before cutting more.
Step 12: Refine the Back
The back is the hardest part of a DIY short haircut. Use a hand mirror or ask someone you trust to check the shape. Comb the back straight down and look for obvious longer pieces. Trim only what you can clearly see and control.
If you are creating a very short bob, stacked cut, pixie, or undercut shape, this is the point where a stylist becomes extremely helpful. The back of the head has curves, growth patterns, and cowlicks that can make short hair tricky.
Step 13: Dry and Style Before Final Adjustments
If you cut damp hair, dry it before making final changes. Hair can shift as it dries, especially if it has waves, curls, or natural bends. Blow-dry or air-dry it the way you normally wear it. Then check the shape again.
Do not chase every single strand. Hair moves. Hair bends. Hair occasionally behaves like it has a tiny personal agenda. The goal is a balanced, wearable shape, not mathematical perfection.
Step 14: Clean Up the Details and Stop
Trim small uneven pieces, soften any heavy edges, and check the neckline. Then stop. This final instruction is important. Many home haircuts are not ruined by the first cut; they are ruined by the twentieth “micro-fix.”
Put the scissors down, style your new hair, and live with it for a day before making more changes. Short hair often looks different after you wash it, sleep on it, and style it in your normal routine.
Best Short Haircuts to Consider When Cutting Long Hair
The Long Bob
The long bob, or lob, is one of the easiest short styles to transition into because it usually sits around the collarbone or shoulders. It still allows ponytails, clips, waves, and updos, but it removes the heaviness of long hair.
The Classic Bob
A classic bob usually falls between the chin and jawline. It can look polished, modern, and dramatic, but it requires more precision. If your hair is thick, you may need internal weight removal so the ends do not puff outward.
The Shaggy Cut
A shag works well for people who like texture, volume, and an intentionally undone look. It usually includes layers, movement, and sometimes curtain bangs. This is a good salon choice because blending layers at home can be challenging.
The Pixie Cut
A pixie is bold, beautiful, and low on drying time, but it is not always low maintenance. It often needs regular trims to keep its shape. If you are going from long hair to a pixie, book a stylist unless you have haircutting experience.
Common Mistakes to Avoid
Cutting Too Much at Once
The biggest mistake is removing too much length immediately. Always cut less than you think you need. Hair looks longer when pulled straight and shorter when released, especially if it has texture.
Using Dull Scissors
Dull scissors can make the ends look rough. If you want your short haircut to look intentional instead of hacked, invest in haircutting shears.
Ignoring Natural Part and Growth Patterns
Cut your hair close to the way you actually wear it. If you always part it to the side, do not cut everything from a strict center part and expect it to fall perfectly later.
Trying Complicated Layers Without Practice
Layers can be gorgeous, but uneven layers are hard to hide in short hair. If you want a heavily layered bob, wolf cut, shag, or pixie, a stylist can customize the shape to your texture and face.
How to Care for Short Hair After the Cut
Short hair often needs a slightly different routine than long hair. Because the ends sit closer to the scalp, oil can travel through the hair faster. Some people find they wash short hair more often, while others use less conditioner or lighter styling products.
Use a gentle shampoo, condition the ends if needed, and avoid overloading the roots with heavy creams. If you heat-style your hair, apply heat protectant. A short haircut can look amazing with a flat iron wave, round-brush blowout, diffuser, or texturizing spray, but heat damage still counts, even when the hair is cute.
Plan trims based on your style. A pixie or sharp bob may need maintenance every four to eight weeks. A lob can usually go longer. The shorter and more structured the cut, the more often it needs shaping.
Experience Notes: What It Really Feels Like to Cut Long Hair Short
Cutting long hair short can feel strangely emotional. Even when you are excited, the first major snip may cause a tiny internal gasp. That is normal. Hair becomes part of your identity, your routine, your photos, and sometimes your security blanket. Going short is not just about removing inches; it is about changing how you see yourself.
One of the most common experiences is the “phantom hair” moment. You reach behind your back expecting long hair and find nothing there. You try to pull it into a bun and remember that the bun has retired. You use too much shampoo because your hands have not received the memo. For a few days, your routine may feel awkward, but then the benefits arrive. Drying time shrinks. Detangling becomes easier. Your neck feels lighter. Your shower drain throws a small celebration.
Another real experience is discovering your actual hair texture. Long hair can weigh waves and curls down. Once the length is removed, hair may spring up, bend differently, or gain volume you did not know it had. This can be exciting, but it can also require product changes. A cream that worked on waist-length hair may be too heavy for a bob. A mousse you ignored for years may suddenly become your best friend. Short hair often asks you to experiment.
Styling also changes. With long hair, the emergency plan is usually a ponytail. With short hair, you may need new emergency plans: clips, headbands, texture spray, a mini flat iron, or the noble art of pretending messy hair was intentional. The first week is the learning curve. Try styling it straight, wavy, tucked behind one ear, air-dried, blow-dried, and with different partings. Short hair is surprisingly versatile when you stop expecting it to act like long hair.
There is also the social reaction phase. People will notice. Some will love it immediately. Some will say, “Wow, you cut your hair,” which is less of a compliment and more of an eyewitness report. Try not to let every reaction decide how you feel. A dramatic haircut can take a little time to settle into your self-image. What feels shocking on day one may feel perfect by day seven.
If you cut your hair at home, the experience can be empowering, but it helps to keep expectations realistic. A DIY cut can be clean, stylish, and practical, especially for simple shapes. But salon cuts usually have more polish because stylists understand angles, density, head shape, and movement. If your home cut is close but not perfect, consider booking a small refinement appointment. That is not failure. That is teamwork.
The best advice from experience is to cut in stages. Go from very long to shoulder length first, then decide whether you want a bob. Live with a lob before choosing a pixie. This staged approach reduces shock and gives you a chance to learn how your hair behaves at each length. It also gives you more room to correct mistakes.
Finally, enjoy the change. Short hair can make earrings more visible, outfits feel fresher, and mornings less tangled. It can also feel like a reset button. Whether you are cutting your hair for convenience, style, donation, damage removal, or a new chapter, the most important part is making the choice intentionally. Good scissors help, but a good plan helps more.
Conclusion
Learning how to cut long hair short is all about planning, patience, and knowing when to stop. Choose your target length, respect your hair texture, section carefully, cut gradually, and refine only after you see the shape dry. If you want a simple shoulder-length cut or basic lob, a careful DIY approach can work. If you want a precision bob, pixie, heavy layers, or a major style transformation, a professional stylist is worth it.
Short hair can be freeing, stylish, and easier to manage, but the best results come from preparation. Measure twice, cut once, and remember: the scissors are powerful, but they do not need to be dramatic.