Table of Contents >> Show >> Hide
- Why Turn Vertical Blinds into a Headboard?
- What Style Does a Woven Blind Headboard Create?
- Materials You Will Need
- Step 1: Clean and Inspect the Vertical Blinds
- Step 2: Build the Wood Frame
- Step 3: Sand and Finish the Frame
- Step 4: Plan the Weaving Pattern
- Step 5: Cut the Blind Slats to Size
- Step 6: Start the Vertical Rows
- Step 7: Weave the Horizontal Rows
- Step 8: Secure the Weave
- Step 9: Add Finishing Details
- Step 10: Mount the Headboard Safely
- Design Tips for a Better-Looking DIY Headboard
- Common Mistakes to Avoid
- Is This DIY Headboard Durable?
- Budget Breakdown
- Real-Life Experience: What This Project Teaches You
- Conclusion
Some DIY projects begin with a grand design vision. Others begin with someone staring at a pile of old vertical blinds and thinking, “Surely these plastic noodles deserve a second act.” This woven headboard project lives delightfully in the second category. It takes something many homeowners remove, replace, or toss during a room refresh and turns it into a textured, modern, budget-friendly bedroom feature.
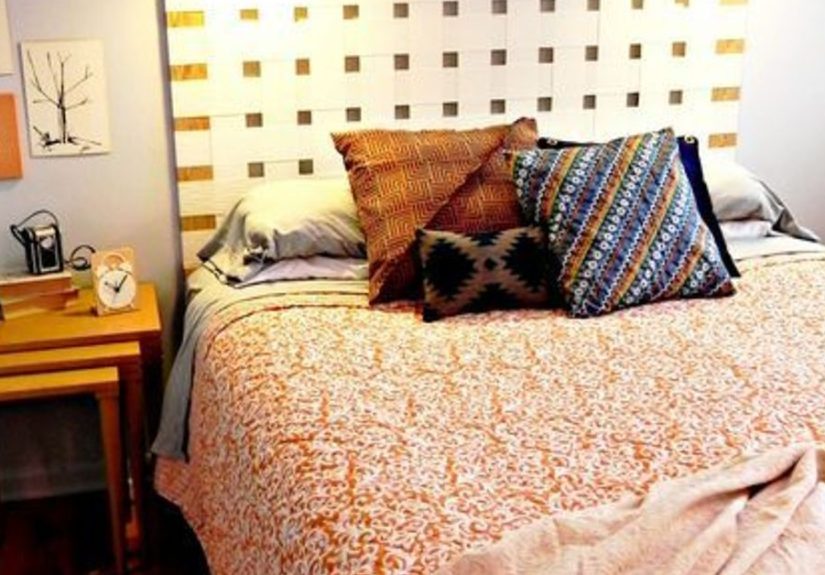
A DIY woven headboard from vertical blinds is exactly what it sounds like: a wood frame filled with interlaced blind slats, usually arranged in a basket-weave pattern. The result can look surprisingly high-end, especially when stained, painted, or styled with soft bedding, warm lighting, and a “yes, I absolutely meant to do that” level of confidence.
This project is ideal for anyone who loves upcycled home decor, affordable bedroom makeovers, and furniture that does not require selling a kidney. It is also a smart way to add visual height, texture, and personality behind the bed without buying a bulky store-bought headboard. With basic lumber, old vertical blind slats, brackets, screws, and patience, you can create a woven statement piece that feels custom, creative, and just a little bit smugin the best way.
Why Turn Vertical Blinds into a Headboard?
Vertical blinds are often viewed as the beige socks of window treatments: practical, common, and rarely invited to the design party. But their long, flexible slats make them surprisingly useful for weaving. They are already cut into consistent strips, they bend more easily than thin wood, and they can create a crisp grid pattern when woven through a frame.
The biggest advantage is cost. If you already have unused blinds, your main expenses are lumber, fasteners, stain or paint, and hanging hardware. Even if you buy secondhand or clearance blinds, the project can still cost far less than many ready-made headboards. A woven headboard also adds texture, which is one of the easiest ways to make a bedroom feel layered rather than flat.
There is also the sustainability bonus. Reusing old blinds keeps material out of the trash and gives your bedroom a one-of-a-kind focal point. It is not exactly saving the planet single-handedly, but it is better than sending a perfectly usable stack of slats to landfill retirement.
What Style Does a Woven Blind Headboard Create?
A woven vertical-blind headboard can lean modern, coastal, bohemian, farmhouse, minimalist, or even hotel-chic depending on the finish. White or cream slats create a breezy, beach-house look. Black paint gives the weave a graphic, contemporary edge. Natural wood framing with tan or beige slats feels warm and relaxed. A stained frame paired with painted slats can look like cane furniture without the cane-furniture price tag.
The woven pattern gives the piece depth. Instead of a plain board behind the bed, you get shadows, rhythm, and texture. In a room with solid bedding and simple walls, that texture becomes the star. In a busy room, the headboard can still work if you keep the colors neutral and let the pattern do the talking.
Materials You Will Need
Before you start, measure your mattress and wall space. A queen-size headboard is often around 60 inches wide, but you can adjust the width and height to suit your bed, ceiling height, and personal drama level. Taller headboards feel more luxurious; shorter ones are easier to build and mount.
Basic Supplies
- Old vertical blind slats, cleaned and trimmed
- 1×4 pine boards for the outer frame
- 1×3 pine boards or similar support boards for the inner structure
- Corner brackets and straight brackets
- Wood screws and finishing nails
- Wood glue, if desired
- Wood stain, paint, or clear protective finish
- Foam brush, rag, or paintbrush
- Measuring tape and pencil
- Miter saw, circular saw, or handsaw
- Drill and drill bits
- Clamps
- Sandpaper or sanding block
- Wall-mounting hardware, French cleat, or heavy-duty brackets
Helpful Optional Extras
- Painter’s tape for marking a weaving guide
- Spray paint for changing the color of blind slats
- Felt pads for the back of the frame
- Stud finder for safer wall mounting
- Safety glasses and work gloves
Step 1: Clean and Inspect the Vertical Blinds
Start by removing the vertical blind slats from the headrail. Wipe them down with mild soap and water, then dry them completely. Blinds collect dust, cooking residue, pet hair, and mystery particles that nobody wants woven permanently behind their pillow. If the blinds are cracked, brittle, sticky, or warped, skip those pieces.
If the blinds are made from vinyl or PVC, work in a well-ventilated area when cutting, sanding nearby wood, painting, or spraying finishes. Older vinyl products may have additives you do not want to heat, sand, or breathe in as dust. You are weaving the slats, not turning them into confetti.
Step 2: Build the Wood Frame
The frame is the backbone of the project. Use 1×4 boards for a sturdy outer frame. For a polished look, cut the corners at 45-degree angles. If you do not want to miter the corners, straight butt joints can still work, especially if you reinforce them well and paint the frame afterward.
Lay the frame pieces on a flat surface and check that everything is square. Secure the corners with brackets on the back side. Add inner support boards across the frame where needed. These supports help hold the weave in place and prevent the headboard from feeling flimsy. If the frame wobbles at this stage, the finished headboard will wobble too, and nobody wants a headboard that behaves like a nervous folding chair.
Step 3: Sand and Finish the Frame
Sand the wood until the edges are smooth. Pay special attention to corners and any areas your hands will touch while weaving. Wipe away dust before staining or painting. A medium wood stain creates a warm, furniture-like look. White paint feels clean and cottage-inspired. Matte black gives the headboard a designer feel, especially in a room with crisp white bedding.
Let the finish cure fully before weaving. This is not the glamorous part, but it matters. If you rush, the blind slats can stick to tacky stain or paint, leaving marks that will haunt you every time you make the bed.
Step 4: Plan the Weaving Pattern
The simplest pattern is a classic over-under basket weave. Lay several blind slats vertically across the opening, then weave horizontal slats through them: over one, under the next, over one, under the next. On the next row, reverse the pattern. This creates the familiar checker-like woven effect.
You can make the weave tight and uniform for a modern look or slightly looser for a relaxed handmade feel. If you want a more dramatic pattern, angle the slats diagonally or create a wide-spaced grid. For a first attempt, however, the basic basket weave is your friend. It is straightforward, forgiving, and much less likely to make you mutter at furniture.
Step 5: Cut the Blind Slats to Size
Measure the inside of your frame and cut the vertical blind slats slightly longer than the opening so the ends can tuck or fasten behind the frame. Use sharp scissors, a utility knife, or snips, depending on the thickness of the slats. Cut slowly to avoid jagged edges.
Test a few pieces before cutting the whole batch. If the slats are too short, they may pop out during weaving. If they are too long, they may buckle. The goal is gentle tension: snug enough to stay put, flexible enough to weave without turning into a wrestling match.
Step 6: Start the Vertical Rows
Attach the first set of slats vertically along the top and bottom of the frame. You can secure them with finishing nails, staples, small screws with washers, or strong adhesive depending on the material and frame design. Keep spacing even. A small scrap of wood or cardboard can work as a spacing guide.
Do not pull the slats so tight that they warp. Vertical blind slats are flexible, which is useful, but they can bow if forced. Think “firm handshake,” not “arm-wrestling champion.”
Step 7: Weave the Horizontal Rows
Now weave the horizontal slats through the vertical slats. Start at one side and work across, alternating over and under. Push each horizontal row into place, keeping it straight and evenly spaced. On the next row, reverse the pattern so the weave locks visually.
This is where the project starts to feel magical. A pile of old blinds slowly becomes a headboard with texture and movement. It is also where patience helps. If one row looks crooked, fix it early. Tiny mistakes have a sneaky habit of inviting their friends.
Step 8: Secure the Weave
Once the woven panel looks even, secure the loose ends on the back of the frame. Add small nails, staples, or screws as needed. If the slats are slippery, washers can help keep fasteners from pulling through. You can also add thin trim pieces on the back to sandwich the slat ends in place.
Flip the headboard carefully and inspect the front. Adjust any rows that shifted. The weave should look intentional, not like it lost a fight with a laundry basket.
Step 9: Add Finishing Details
Trim stray edges, touch up paint or stain, and add felt pads to the back corners if the headboard will rest against the wall. If you painted the slats, inspect for scratches and recoat where needed. A clear protective finish can help the wood frame resist scuffs, especially if the headboard will sit in a guest room, child’s room, or rental property.
At this point, you can customize the look. Add a narrow border trim for a more polished edge. Paint the inner supports the same color as the slats so they disappear. Or contrast the frame and weave for a bolder design.
Step 10: Mount the Headboard Safely
A woven headboard may be lighter than a solid wood version, but it still needs secure mounting. The safest option is to attach it to wall studs using appropriate hardware. A French cleat is an excellent choice because it distributes weight and makes the headboard easier to remove later. Heavy-duty D-rings or metal brackets can also work when properly installed.
If you cannot hit studs, choose wall anchors rated for more than the headboard’s actual weight. Avoid relying on tiny picture hooks or light-duty plastic anchors for a large piece above a bed. When in doubt, go stronger. Your headboard should be a design feature, not a midnight surprise.
Design Tips for a Better-Looking DIY Headboard
Keep the Color Palette Simple
Because the weave already adds pattern, simple colors often look best. Try a natural wood frame with white slats, a white frame with beige slats, or an all-black finish for a sleek modern bedroom. If your bedding is bold, let the headboard stay quiet. If your bedding is neutral, the headboard can carry more visual weight.
Make It Slightly Wider Than the Mattress
A headboard that extends a few inches beyond the mattress on each side usually looks more generous and finished. It frames the bed instead of looking like it is hiding behind the pillows.
Use Lighting to Show Off the Texture
Wall sconces, bedside lamps, or warm LED strips can highlight the shadows in the weave. Texture looks best when light can graze across it. Without lighting, the woven pattern may flatten visually, especially in a dark room.
Common Mistakes to Avoid
The first mistake is skipping the cleaning step. Dusty blinds do not become charming just because they are woven. The second mistake is building a weak frame. Even lightweight materials need structure. A square, reinforced frame makes the whole project look more professional.
Another common issue is uneven spacing. A woven headboard does not need machine-level perfection, but the rows should look balanced. Use a spacer, step back often, and adjust as you go. Finally, do not ignore safety. Remove any old cords, loops, or hardware from the blinds before repurposing them, especially in homes with children or pets.
Is This DIY Headboard Durable?
Yes, if it is built carefully. Vertical blind slats are not as rigid as wood strips, so the frame and fastening method matter. The woven center should be decorative rather than load-bearing. Do not lean your full body weight into the weave, and do not use it as a climbing wall, even if your cat strongly disagrees.
For everyday use, the headboard should hold up well if the slats are in good condition and the ends are secured properly. It works best as a wall-mounted or bed-frame-adjacent decorative panel. If you like to sit up in bed reading, add pillows for comfort rather than pressing directly into the weave.
Budget Breakdown
The cost depends on what you already own. If you have leftover vertical blinds, scrap wood, and basic hardware, this can be an extremely inexpensive bedroom upgrade. If you need to buy everything new, it may still be cheaper than many store-bought woven, cane, or rattan-style headboards.
Expect to spend money on lumber, brackets, screws, finish, and mounting hardware. Do not cheap out on the mounting hardware. Saving a few dollars is not worth wondering whether your headboard is slowly plotting against you from above the pillows.
Real-Life Experience: What This Project Teaches You
One of the best things about making a woven headboard from vertical blinds is that it changes how you see everyday materials. At first, the blinds look like leftovers from a rental apartment makeover. Then you cut them, clean them, weave them, and suddenly they become part of a bedroom focal point. That transformation is the addictive part of DIY. It whispers, “What else in this house has secret furniture potential?” Be careful. That is how people end up saving jars, cabinet doors, and one suspiciously useful piece of cardboard.
The project also teaches patience in a very practical way. Weaving sounds simple until row six decides to slide sideways and row seven develops an attitude. The trick is to slow down, use consistent spacing, and keep checking the front view. DIY rewards the person who steps back often. It punishes the person who says, “I’ll fix it at the end,” because the end is where small mistakes become permanent roommates.
Another lesson is that lightweight materials still need strong structure. The blind slats may not weigh much, but the headboard is only as good as the frame holding them. A sturdy wood frame makes the finished piece feel intentional instead of temporary. Reinforced corners, straight supports, and proper wall mounting turn a craft project into something that belongs in a real bedroom, not just in the “I tried” corner of the garage.
Color choice can also surprise you. Many people assume the slats must be painted, but sometimes the original off-white or beige finish works beautifully with natural wood. Before painting everything, hold a few slats against your bedding and wall color. You may discover that the existing shade has a relaxed, organic feel. Or you may discover it looks like office blinds from 1997, in which case paint is your friend and possibly your emotional support tool.
The most satisfying moment comes when the headboard is mounted and the bed is made. Add pillows, a textured throw, and warm bedside lighting, and the whole room changes. It feels less like you placed a bed against a wall and more like you designed a sleeping zone. That is the quiet power of a headboard: it gives the bed presence. This DIY version adds an extra layer of pride because you did not just buy styleyou built it from something almost nobody would have looked at twice.
In real life, the best DIY projects are not perfect. They have a slightly uneven row, a tiny touch-up spot, or a back side that looks less glamorous than the front. That is fine. The goal is not factory perfection. The goal is a beautiful, useful, personal piece that makes your bedroom feel more like you. And if anyone asks where you bought it, you get to smile and say, “Actually, those used to be vertical blinds.” That sentence alone is worth at least half the effort.
Conclusion
A DIY woven headboard from vertical blinds is creative, affordable, and surprisingly stylish. It turns overlooked window-treatment slats into a textured bedroom centerpiece with personality and charm. With a sturdy wood frame, clean slats, careful weaving, and safe wall mounting, this project can deliver the look of a custom woven headboard without the custom furniture price.
Whether your bedroom style is coastal, modern, boho, farmhouse, or “I finally cleaned the chair where clothes go,” this project can be adapted to fit your space. Keep the colors simple, measure carefully, secure everything properly, and let the woven texture do the heavy lifting. The final result is proof that good design does not always start at a furniture store. Sometimes it starts with old blinds, a drill, and a brave little thought: “I can make that.”