Table of Contents >> Show >> Hide
- What “lower back strength” really means (and why your glutes are involved)
- Safety rules that make strengthening actually work
- Warm-up: 3–5 minutes to make your back feel less grumpy
- 10 lower-back-friendly strengthening exercises (with form you can actually use)
- 1) Glute Bridge (a.k.a. hip bridge)
- 2) Bird Dog
- 3) Dead Bug
- 4) Side Plank (knees or full)
- 5) McGill-Style Curl-Up (spine-sparing core strength)
- 6) Hip Hinge (bodyweight “good morning” pattern)
- 7) Chair Squat (sit-to-stand with control)
- 8) Clamshell (glute med strength for pelvic stability)
- 9) Suitcase Carry (one-sided carry)
- 10) Pallof Press (anti-rotation, band or cable)
- Beginner, intermediate, and advanced plans (pick your level)
- How to know you’re doing it right (without needing a PhD)
- Common “why does my back still feel weird?” fixes
- Don’t forget the secret weapon: walking and daily movement
- Frequently asked questions
- Experiences that people commonly have when strengthening their lower back (about )
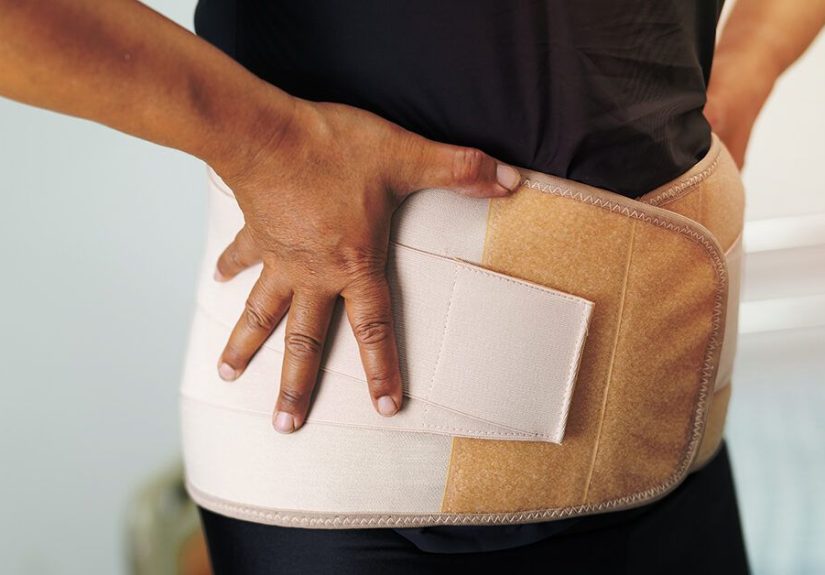
Quick note before we get moving: This article is for general education, not a diagnosis. If you have severe pain, pain after a fall/car accident, fever, unexplained weight loss, new numbness/weakness, or bowel/bladder changes, don’t “stretch it out.” Get medical care.
Let’s talk about your lower back like it’s the VIP it is. Your lumbar spine is basically the middle manager of your body: it has to keep everyone happy (hips, ribs, pelvis, legs) while also dealing with the daily chaos of sitting, bending, carrying, and the occasional “I’ll just move this couch by myself” decision.
The good news: you can strengthen the muscles that support your lower backand you don’t need fancy machines, extreme yoga poses, or the pain tolerance of a movie stunt double. What you do need is smart, consistent training focused on spinal stability, core control, and strong hips/glutes.
What “lower back strength” really means (and why your glutes are involved)
When people say “strengthen my lower back,” they often picture the muscles running along the spine (erector spinae). Those matterbut a resilient back usually comes from a team effort:
- Deep core (like the transverse abdominis) helps create a supportive “brace” around your trunk.
- Multifidus (small stabilizers near the spine) helps control tiny movements between vertebrae.
- Glutes (especially glute max and glute med) help your hips do hip work, so your back doesn’t have to.
- Hip mobility lets you bend and rotate where you’re supposed to (hips and upper back), not where you’re least happy (low back).
Think of your spine as a valuable package. Your job is to give it great bubble wrap (core stability) and strong delivery drivers (hips and legs).
Safety rules that make strengthening actually work
Strength training is supposed to build you up, not audition you for a role as “person who walks like a question mark.” Use these rules:
- Train the “good effort” zone: You can feel muscles working and mild discomfort from effort, but avoid sharp, shooting, or worsening pain.
- Neutral spine beats extreme range: Most back-friendly strengthening happens with your spine controllednot cranked into deep flexion or extension.
- Slow is strong: If you can’t control the movement, the movement is controlling you. (Rude, but true.)
- Progress gradually: Add reps/sets first, then harder variations, then load (like bands or weights).
- Stop if symptoms travel: Pain that starts spreading down the leg, new tingling, or weakness is a “scale back and get guidance” signal.
Warm-up: 3–5 minutes to make your back feel less grumpy
This isn’t “extra.” It’s your body’s way of saying, “Thanks for not throwing me into work with zero notice.”
- Brisk walk in place (60 seconds): Get blood moving. Swing arms. Look proud.
- Diaphragmatic breaths (5 slow breaths): Inhale through the nose, expand your belly and ribs; exhale and gently tighten your lower abs like you’re zipping snug jeans.
- Pelvic tilts (8–10 reps): Lying on your back with knees bent, gently flatten your low back into the floor, then release to neutral.
- Hip hinge practice (8 reps): Hands on your hips, push hips back like you’re closing a car door with your butt, keeping your ribs stacked over your pelvis.
10 lower-back-friendly strengthening exercises (with form you can actually use)
Pick 4–6 exercises per session, 2–4 times per week. If you’re new, start with the “Beginner Plan” later in the article.
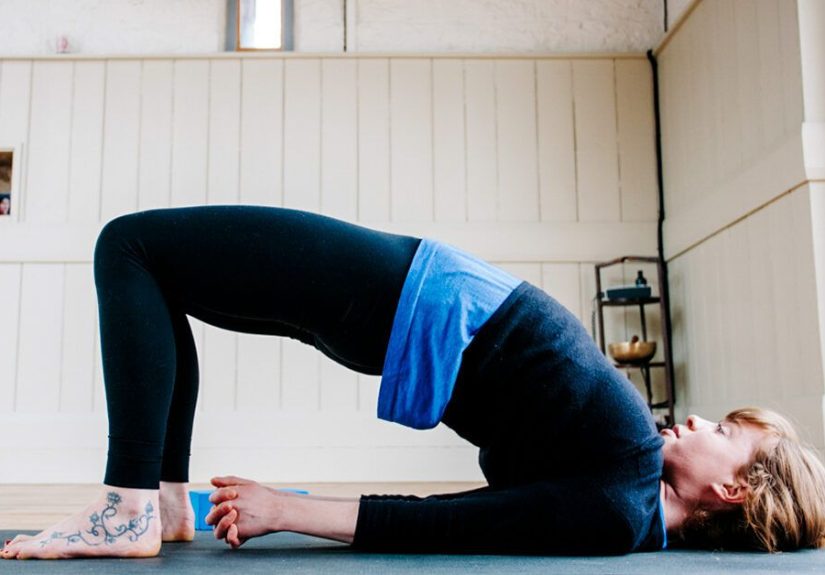
1) Glute Bridge (a.k.a. hip bridge)
Why it helps: Strong glutes reduce strain on the lower back during walking, lifting, and standing.
How to do it: Lie on your back, knees bent, feet hip-width. Brace your core gently. Squeeze your glutes and lift your hips until your body forms a line from shoulders to knees. Pause 1–2 seconds. Lower slowly.
Do: 2–3 sets of 8–12 reps.
Make it easier: Smaller range of motion.
Make it harder: Add a pause at the top, or try a single-leg bridge (only if you can keep hips level).
2) Bird Dog
Why it helps: Trains core stability, glute control, and spinal coordinationwithout a lot of spinal motion.
How to do it: Start on hands and knees (wrists under shoulders, knees under hips). Brace gently. Extend one leg straight back and the opposite arm straight forward. Keep hips level (no wobbling like a shopping cart). Hold 2–5 seconds. Return and switch.
Do: 2–3 sets of 6–10 reps per side.
Common mistake: Arching the low back. Keep ribs “down” and move slower.
3) Dead Bug
Why it helps: Builds deep core control while teaching your spine to stay steady as your arms/legs movegreat for lumbar stabilization.
How to do it: Lie on your back, arms up, hips and knees bent to 90 degrees. Gently press your low back toward the floor (neutral-to-slightly-flat, not forced). Slowly lower one heel toward the floor while reaching the opposite arm overhead. Return. Switch sides.
Do: 2–3 sets of 6–10 reps per side.
Make it easier: Only move legs, keep arms still.
Make it harder: Longer lever (straighten the leg more) while maintaining back control.
4) Side Plank (knees or full)
Why it helps: Strengthens obliques and lateral hip muscles that prevent your spine from collapsing sideways (a sneaky cause of back irritation).
How to do it (kneeling version): Lie on your side, elbow under shoulder, knees bent. Lift hips to create a straight line from shoulders to knees. Hold.
Do: 2–3 holds of 15–30 seconds per side.
Make it harder: Full side plank (legs straight) or add a top-leg lift if you’re stable.
5) McGill-Style Curl-Up (spine-sparing core strength)
Why it helps: Trains abdominal strength without repeated deep spinal flexion.
How to do it: Lie on your back with one knee bent and the other leg straight. Place hands under your low back to support a neutral curve. Brace your core, then lift your head and shoulders slightly (think “sternum up,” not “crunch to your knees”). Hold 5–10 seconds. Lower with control.
Do: 2–3 sets of 5–8 reps (with holds).
6) Hip Hinge (bodyweight “good morning” pattern)
Why it helps: Teaches you to bend from the hipsone of the most back-saving skills on Earth.
How to do it: Stand tall. Soften knees. Push hips back while keeping your spine long and ribs stacked over pelvis. You should feel hamstrings and glutes load. Return by squeezing glutes and standing tall.
Do: 2–3 sets of 8–12 reps.
Tip: Imagine your hips moving back like a drawer sliding shut.
7) Chair Squat (sit-to-stand with control)
Why it helps: Strengthens legs and hips, which reduces the workload your lower back takes during daily life.
How to do it: Sit back onto a chair slowly, tap lightly, and stand up by pushing through heels and squeezing glutes. Keep your torso braced and avoid collapsing forward.
Do: 2–3 sets of 8–12 reps.
Make it easier: Use higher chair or push lightly from armrests.
Make it harder: Lower chair or slow the lowering phase to 3–4 seconds.
8) Clamshell (glute med strength for pelvic stability)
Why it helps: A stable pelvis makes your lower back’s job easierespecially for walking, running, and standing on one leg.
How to do it: Lie on your side with hips and knees bent, feet together. Keep hips stacked. Open the top knee without rolling your pelvis backward. Pause, then close.
Do: 2–3 sets of 10–15 reps per side.
Make it harder: Add a mini-band above the knees.
9) Suitcase Carry (one-sided carry)
Why it helps: Trains your core to resist side bendingvery functional for real life (groceries, backpacks, luggage, your friend who “packed light”).
How to do it: Hold a moderately heavy object on one side (dumbbell, kettlebell, or a sturdy bag). Stand tall. Walk slowly without leaning. Switch sides.
Do: 3–5 walks of 20–40 steps per side.
Form cue: “Zip up” your ribs over your pelvis and stay tall.
10) Pallof Press (anti-rotation, band or cable)
Why it helps: Your spine loves when your core can resist unwanted twisting.
How to do it: Stand sideways to an anchored band, hold it at your chest, then press straight out and hold 1–2 seconds without rotating. Return slowly.
Do: 2–3 sets of 8–12 reps per side.
No band? Swap in an extra set of side planks and suitcase carries.
Beginner, intermediate, and advanced plans (pick your level)
Beginner Plan (2–3x/week, ~15 minutes)
- Glute Bridge: 2 x 10
- Bird Dog: 2 x 6/side
- Dead Bug: 2 x 6/side
- Side Plank (knees): 2 x 20 seconds/side
- Hip Hinge practice: 2 x 8
Progression goal: Add 1–2 reps per week or hold side planks 5 seconds longer.
Intermediate Plan (3x/week, ~20 minutes)
- Glute Bridge (pause at top): 3 x 10
- McGill Curl-Up: 3 x 6 (5–10 sec holds)
- Side Plank (full or knees): 3 x 25–35 sec/side
- Chair Squat: 3 x 10
- Suitcase Carry: 4 x 30 steps/side
Advanced Plan (3–4x/week, ~25 minutes)
- Single-Leg Bridge (only if stable): 3 x 8/side
- Dead Bug (longer lever): 3 x 8/side
- Pallof Press: 3 x 10/side
- Chair Squat (slow lower): 3 x 10
- Suitcase Carry (heavier): 5 x 40 steps/side
How to know you’re doing it right (without needing a PhD)
- You feel work in the right places: glutes, abs/obliques, hipsnot pinching in the low back.
- You can breathe: If you’re holding your breath like you’re underwater, reduce the difficulty.
- You finish better than you started: Mild muscle fatigue is fine; feeling “locked up” is not.
Common “why does my back still feel weird?” fixes
If bridges hit your low back
Try a smaller lift and emphasize glute squeeze. Keep ribs down. Make sure feet are close enough that you can drive through heels.
If planks feel awful
Do side planks from knees and dead bugs first. Planks are not a moral requirement for fitness.
If your hamstrings cramp
That’s often “glutes not fully online yet.” Warm up more, reduce range, and gradually build bridge strength.
If you’re sore the next day
Muscle soreness can be normal when starting. Keep the next session lighter, focus on form, and add easy walking to loosen up.
Don’t forget the secret weapon: walking and daily movement
If strengthening exercises are the “construction crew,” walking is the “maintenance team” that keeps tissues moving, reduces stiffness, and builds baseline endurance. If you sit a lot, try short movement breaks5 minutes of walking can be more powerful than you’d think.
Frequently asked questions
How long until I feel stronger?
Many people notice better control and less stiffness in a few weeks, but meaningful strength changes typically build over 6–8 weeks of consistent practice. The fastest results usually come from doing the basics regularly, not doing the fanciest exercise once.
Should I stretch or strengthen first?
Do a short warm-up (gentle mobility) first, then strengthen. If you love stretching, keep it brief before training and save longer stretches for after or separate days.
Are “back extension” exercises like supermans required?
Not required. Many people do better starting with stabilization (bird dog, side plank, bridges) before adding higher-load back extension work. If an exercise causes pinching or sharp pain, skip it and get guidance.
Experiences that people commonly have when strengthening their lower back (about )
When people start a lower-back strengthening routine, the first “result” is often surprisingly not pain reliefit’s awareness. You’ll hear folks say things like, “Wow, I didn’t realize how much I was hanging on my lower back when I stand,” or “My hips feel tight, not my back.” That shift matters because it changes how you move all day, not just during workouts.
In the first week or two, a common experience is that the exercises feel almost too simple… right up until they don’t. A dead bug can look like a relaxed beetle on its back, but once you try to keep your spine steady, you realize it’s a coordination challenge. Many beginners notice shaking during side planks or bird dogs. That shaking isn’t “weakness shame”it’s your nervous system learning a new skill, like balancing on a bike for the first time.
Another frequent observation: people expect their lower back to feel the burn, but they end up feeling glutes and obliques the most. That’s usually a good sign. A lot of everyday back irritation happens when hips and core aren’t sharing the load. Once glutes get stronger, activities like standing in line, carrying a backpack, or climbing stairs often feel less “compressed” in the low back.
Desk workers often describe a specific win: getting up from a chair feels smoother. After a few weeks of bridges, hinge practice, and sit-to-stands, they notice less hesitation when standing up, and fewer “I need a minute to unfold myself” moments. People who do a lot of liftingparents picking up kids, retail workers, athletesoften report that practicing the hip hinge changes everything. Instead of bending like a folding chair from the middle, they start moving from the hips, and their back feels more like a stable support beam than a stressed-out rubber band.
It’s also common to have a “two steps forward, one step back” week. Maybe you slept weird, carried something heavy, or did a long car ride, and your back feels cranky again. People who stick with the plan often learn a useful lesson: backing off doesn’t mean quitting. They reduce reps, switch to easier versions, add gentle walking, and return to full training once things settle. That ability to adjust is a real-world strength skill, too.
Finally, many people notice that strengthening their lower back is weirdly good for confidence. Not because you suddenly become invincible, but because you have a repeatable routine. When your back complains, you’re not guessing or panickingyou’ve got a plan: warm up, stabilize, strengthen, walk, and progress gradually. That kind of calm consistency is often the most underrated “exercise benefit” of all.