Table of Contents >> Show >> Hide
- First: What “Plant Food” Really Means (Spoiler: It’s Not Banana Peels)
- Before You Feed Anything: Make Sure It’s Not a “Care” Problem
- The Best “Easy Homemade Plant Food DIY” Options (Low Effort, High Payoff)
- Kitchen-Scrap Plant Food: What Works, What’s Overhyped, and What Backfires
- 5-Minute DIY Liquid “Plant Foods” That Are Actually Practical
- Epsom Salt: Helpful Sometimes, Myth Most of the Time
- How Often to Feed: A Simple Schedule That Won’t Burn Your Plants
- Signs You Overdid It (And How to Fix It)
- Easy Homemade Plant Food DIY Recipes (Simple, Safe, and Repeatable)
- When DIY Plant Food Isn’t Enough
- Real-World Experiences With Easy Homemade Plant Food DIY (500+ Words)
- Conclusion
Your plants don’t need a five-course tasting menu. They need the basicsconsistently.
Still, if you’ve ever looked at a pricey bottle of “miracle” plant food and thought,
I could probably do something smarter with my kitchen scraps, you’re not wrong.
An easy homemade plant food DIY routine can absolutely help, especially for houseplants and
light-feeding garden bedsas long as you understand what’s actually happening in the soil.
This guide breaks down the safest, most effective DIY options, what the internet gets hilariously wrong,
and how to feed plants without turning your kitchen into a science fair that smells like regret.
First: What “Plant Food” Really Means (Spoiler: It’s Not Banana Peels)
Plants “eat” sunlight. That’s the whole photosynthesis thing. Fertilizerhomemade or store-boughtis better
thought of as plant nutrients: nitrogen (N) for leafy growth, phosphorus (P) for roots and flowering,
potassium (K) for overall vigor, plus micronutrients like magnesium, calcium, iron, and more.
Homemade options usually provide gentle nutrition and improve soil structure and microbial life.
They’re fantastic for steady, low-stress plant care. They’re not always strong enough for heavy feeders
(hello, tomatoes) or depleted container soil that’s been in the same pot since the last season of your life.
Before You Feed Anything: Make Sure It’s Not a “Care” Problem
Fertilizer won’t fix low light, overwatering, underwatering, compacted potting mix, or a pot that’s basically a
tiny plastic prison with no drainage. Before you DIY your way into a nutrient smoothie:
- Check light: Slow growth and pale leaves often come from not enough light.
- Check watering: Yellow leaves + soggy soil usually means too much water, not too little food.
- Check roots: If roots are circling the pot, repotting helps more than feeding.
- Check timing: Many houseplants slow down in winter and don’t want extra fertilizer then.
Think of DIY plant food like vitamins. Helpful when the basics are solid. Not a substitute for sleep, water,
and leaving the plant alone occasionally.
The Best “Easy Homemade Plant Food DIY” Options (Low Effort, High Payoff)
1) Compost: The MVP of DIY Plant Nutrition
If you do one thing, do compost. Finished compost adds small amounts of nutrients, improves soil texture,
and supports beneficial microbes. It’s also the least likely option to burn plants, stink up your home, or
attract every fruit fly in a three-mile radius.
How to use compost (easy mode):
- Houseplants: Top-dress with a thin layer (about 1/4–1/2 inch) and lightly mix into the surface.
- Garden beds: Add 1–2 inches on top and gently work it into the top few inches of soil.
Compost is also the best destination for “DIY fertilizer ingredients” like coffee grounds, eggshells, and banana peels.
In compost, they break down into something plants can actually use.
2) Worm Castings: A Houseplant-Friendly Upgrade
Worm castings (aka “worm poop,” which is somehow both gross and wonderful) are a gentle soil amendment that
provides mild nutrients and supports healthy soil biology. They’re especially handy for houseplants because
they’re low-risk and easy to apply.
How to use worm castings:
- Top-dress: Sprinkle a thin layer over the soil surface and water as usual.
- Mix-in: Blend castings into potting mix when repotting for a slow, steady boost.
3) Compost “Extract” or Compost Tea (Done Safely)
Compost tea is basically a liquid made by steeping compost in water to pull out soluble nutrients and microbes.
It can be usefulbut it’s also the DIY option most likely to go wrong if you treat it like a mystery potion.
Important safety note: Because compost tea can carry pathogens if made or handled poorly, many garden
safety resources advise using it on ornamental plants unless you’re confident your methods minimize contamination risk.
If you grow edible plants, favor finished compost in the soil instead of spraying homemade tea on leaves.
Simple compost extract (lowest drama version):
- Put a shovel-full of finished compost in a bucket (or a breathable bag like cheesecloth).
- Add water (a common starting point is about 1 part compost to 5–10 parts water).
- Stir well. Let sit 12–24 hours, stirring a few times.
- Strain and use immediately. Dilute until it looks like weak tea.
- Apply to soil, not leaves, especially for houseplants and ornamentals.
If it smells awful (like “swamp smoothie”), that’s a sign it went anaerobic. Translation: don’t use it.
Plants don’t need a beverage that scares the neighbors.
Kitchen-Scrap Plant Food: What Works, What’s Overhyped, and What Backfires
Coffee Grounds: Great for Compost, Not a Standalone Fertilizer
Used coffee grounds contain some nutrients, but they’re not a balanced fertilizer. In soil, they can tie up nitrogen
as microbes break them down, and some guidance warns that direct application may suppress growth for certain plants.
The best move is simple: compost them.
Do this: Add coffee grounds to compost in moderation, mixing with “browns” like dry leaves or shredded paper.
Not this: Dump a thick layer of wet grounds on top of your potting soil and call it “breakfast for begonias.”
Eggshells: A Slow Calcium Source (Think “Retirement Plan,” Not “Quick Fix”)
Eggshells are mostly calcium carbonate, but they break down slowlyespecially in chunky pieces.
If you want them to help, grind them finely and add them to compost or soil as a long-term amendment.
Best use: Rinse, dry, and crush/grind eggshells; mix into compost or the soil surface.
Banana Peels: Better in Compost Than Buried Whole
Banana peels do contain potassium, but burying whole peels can backfire: as they decompose,
microbes may temporarily use nitrogen that plants would otherwise access. Composting peels with other materials
is the more reliable approach.
Do this: Chop peels and compost them.
Not this: Plant a banana peel under a rose and expect a rom-com transformation montage.
5-Minute DIY Liquid “Plant Foods” That Are Actually Practical
If you want something fast, safe, and not fermented in a jar that you’ll forget behind the cereal,
try these gentle options. They won’t replace a balanced fertilizer for heavy feeders, but they’re solid for maintenance.
1) Aquarium Water (Freshwater Only)
If you have a freshwater fish tank, the old water from water changes often contains nitrogen compounds and other nutrients
plants can use. Use it on houseplants or ornamentals.
- Skip it if the tank is salty (marine tanks) or you add lots of water conditioners you’re unsure about.
- Use it like a normal wateringno special rituals required.
2) Unsalted Cooking Water (Cooled)
Water left over from boiling vegetables can contain small amounts of minerals. Let it cool completely and use it like normal water.
Only use it if it’s unsaltedsalt buildup is a real issue in containers.
3) “Dilute and Consistent” Feeding (The Secret Most Plant Pros Use)
One of the safest approachesDIY or notis weak, regular feeding during active growth.
For houseplants, that means spring through early fall for many common varieties.
A gentle compost extract or worm-casting soak used occasionally fits this idea well.
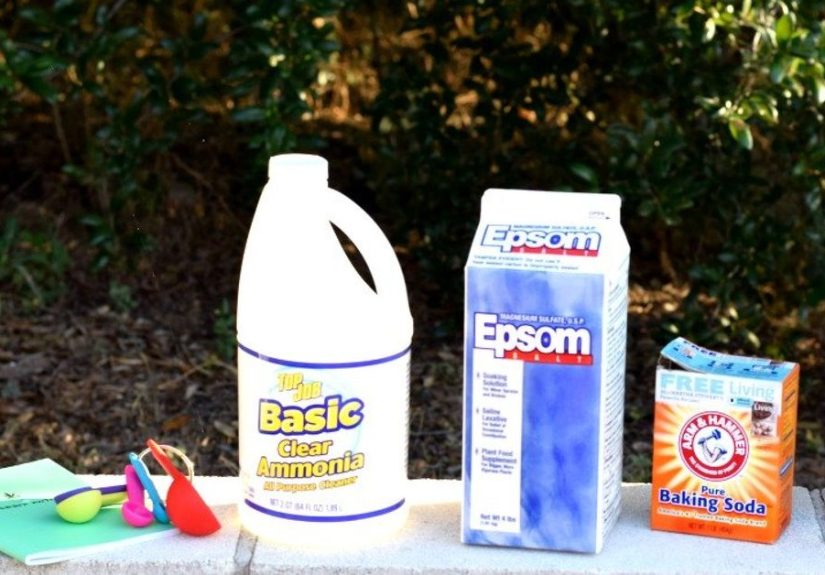
Epsom Salt: Helpful Sometimes, Myth Most of the Time
Epsom salt is magnesium sulfate. Magnesium is essential, but plants need it in small amounts. If your soil already has enough,
adding more can create nutrient imbalancesespecially interfering with calcium uptake in some cases.
Use Epsom salt only if there’s a known magnesium deficiency (a soil test or clear diagnosis),
not as a routine “plant health hack.”
How Often to Feed: A Simple Schedule That Won’t Burn Your Plants
Houseplants
- Spring–summer: Light feeding every 2–4 weeks (or weaker weekly options) can work for many plants.
- Fall–winter: Reduce or stop feeding if growth slows.
- Flush salts: Every 4–6 months, run plenty of plain water through pots to reduce salt buildup (especially if you ever use soluble fertilizers).
Outdoor Garden Beds
- Compost: Add seasonally (spring and/or fall).
- DIY liquids: Use sparingly as a supplement, not a replacement for soil-building.
Signs You Overdid It (And How to Fix It)
Over-fertilizing is surprisingly easy in containers. Watch for:
- Brown leaf tips or crispy edges
- White crust on soil or pot rims
- Sudden wilting even when soil is moist
Fix: Stop feeding, flush the soil with plain water, and let the plant recover. Most plants prefer “underfed and stable” over “overfed and stressed.”
Easy Homemade Plant Food DIY Recipes (Simple, Safe, and Repeatable)
Recipe A: Gentle Compost Extract (For Ornamentals & Houseplants)
- Add 1 part finished compost to 5–10 parts water in a bucket.
- Stir well; steep 12–24 hours, stirring occasionally.
- Strain and dilute to weak-tea color.
- Water the soil (avoid foliar spraying if you’re unsure about food-safety practices).
Recipe B: Worm Casting Soak (A.K.A. “Plant Spa Water”)
- Mix a small handful of worm castings into a watering can.
- Fill with water, stir, and let sit for an hour or two.
- Water your plants as usual.
Recipe C: Compost Top-Dress (Zero Brewing, Zero Smell)
- Sprinkle 1/4–1/2 inch of finished compost on top of soil.
- Lightly scratch it in and water normally.
- Repeat every 6–8 weeks during active growth if plants respond well.
When DIY Plant Food Isn’t Enough
DIY feeds shine for steady maintenance, soil health, and gentle nutrition. But you may want a balanced fertilizer if:
- You’re growing heavy feeders in containers (tomatoes, peppers, many flowering annuals).
- Your potting mix is old and depleted and repotting isn’t an option right now.
- You need precise nutrients (like correcting a documented deficiency).
The goal isn’t to prove you can run a plant on banana peels and vibes. The goal is healthy growth.
Sometimes that means compost. Sometimes that means a measured, boring, effective fertilizer. Boring works.
Real-World Experiences With Easy Homemade Plant Food DIY (500+ Words)
Here’s what people typically discover after trying DIY plant foods for a few monthsespecially with houseplants and small gardens.
Think of this as the “what actually happens on Tuesday” section, not the “perfect plan on Pinterest” section.
1) Compost wins because it’s hard to mess up. A common experience is that compost feels almost too simpleuntil you notice
plants looking steadier over time. Leaves often look a bit richer, watering becomes easier because soil holds moisture more evenly,
and plants handle minor stress better. It’s not a dramatic overnight glow-up; it’s more like good sleep and hydration.
People who switch from random DIY teas to regular compost top-dressing often say the biggest benefit is consistency: fewer mystery problems,
fewer stinky experiments, and fewer “why is my pothos mad at me?” moments.
2) The “kitchen scrap directly in the pot” phase usually ends quickly. Many DIYers start by burying banana peels,
sprinkling coffee grounds, or tossing eggshells into pots. Then reality arrives: fungus gnats throw a party, mold appears,
and the soil surface becomes a weird compost layer that doesn’t break down fast enough indoors. The typical lesson is that
pots are not compost piles. Indoor containers don’t have the microbial diversity, airflow, and volume needed to process raw scraps cleanly.
After a couple of gnat invasions, most people learn the most effective path is: scraps → compost → plants.
3) “Tea” is where enthusiasm meets biology. DIY compost tea tends to produce two kinds of stories:
the “this was fine and my plants looked a little happier” story and the “this smelled like a swamp and I questioned my life choices” story.
The difference usually comes down to oxygen, cleanliness, and time. People who keep it short (hours, not weeks), stir it, and use finished compost
tend to have better outcomes. People who forget a bucket in the sun for several days often create an anaerobic brew that plants don’t love.
A lot of DIYers end up preferring compost extract (brief steep, strain, dilute, use right away) over longer “brews,” because it’s easier
and less likely to go gross.
4) Dilution is the quiet hero. Another common experience is realizing that plants respond better to gentle, repeated feeding
than to occasional “big doses.” When DIYers dilute compost extract until it’s the color of weak iced tea and apply it during active growth,
they often report fewer signs of stress. When they apply strong solutions (especially in dry soil), leaf tips can brown, growth can stall,
and they end up flushing the pot anyway. Over time, many people adopt a simple rule:
when in doubt, go weaker. You can always repeat later; you can’t un-burn a root system overnight.
5) The best DIY routine is boringin a good way. People who stick with DIY plant food the longest usually settle into a rhythm:
seasonal compost top-dressing, occasional worm castings, a gentle liquid option only when plants are actively growing,
and regular pot flushing to prevent salt buildup. It’s not flashy. It doesn’t make for a viral video.
But it tends to keep plants stable, which is the actual flex.
The takeaway from these real-world patterns is simple: DIY works best when it’s clean, mild, consistent, and compost-centered.
The moment it becomes complicated, smelly, or based on myths, it stops being “easy homemade plant food DIY” and becomes “indoor swamp management.”
Choose the path that keeps you and your plants happiest.
Conclusion
If you want an easy homemade plant food DIY method that’s effective and low-risk, start with compost and worm castings.
Use kitchen scraps as compost ingredientsnot as direct pot toppingsand treat compost tea like a “use carefully” option,
especially around edible plants. Keep feedings gentle, watch how your plants respond, and remember:
the best fertilizer in the world won’t replace good light and sane watering.


