Table of Contents >> Show >> Hide
- Why Cold Weather Makes a Workshop Feel Worse Than It Should
- Upgrade #1: Air-Seal the Workshop Before You Buy More Heat
- Upgrade #2: Insulate the Shell, Not Just Your Ego
- Upgrade #3: Choose the Right Heat Source for the Way You Work
- Upgrade #4: Control Moisture Before Rust Becomes Your Shop Assistant
- Upgrade #5: Install Better Lighting for Dark Winter Afternoons
- Upgrade #6: Fix the Electrical Setup While You Are at It
- Upgrade #7: Make the Floor and Work Zones More Comfortable
- Upgrade #8: Create a Winter-Ready Storage and Finishing Zone
- The Best Upgrade Path by Budget
- Common Cold-Weather Workshop Mistakes
- Real-World Cold Weather Workshop Experiences
- Conclusion
Note: This article is formatted as HTML body-only content for web publishing.
A workshop in winter has a special talent: it can turn your favorite creative space into a giant, tool-filled refrigerator. One minute you are ready to build a cabinet, tune an engine, or finally organize that glorious wall of clamps. The next minute, your fingers are stiff, the floor feels like a block of ice, and every metal tool in the room seems determined to steal body heat like a tiny chrome vampire. The good news is that the best cold weather workshop upgrades are not just about making the room warmer. They are about making it smarter, safer, brighter, and easier to work in all season long.
If you want a workshop that stays comfortable in January instead of feeling like a punishment for liking DIY projects, focus on a handful of high-impact changes: air sealing, insulation, heating, moisture control, lighting, electrical upgrades, and a few creature-comfort improvements that make a cold shop feel downright civilized. The trick is not to throw money at the biggest heater you can find and hope for the best. A workshop works better in winter when the whole space is treated like a system.
Why Cold Weather Makes a Workshop Feel Worse Than It Should
Cold-weather discomfort is not only about low air temperature. In most garages, sheds, and detached workshops, the real culprits are air leaks, uninsulated doors, cold concrete floors, poor lighting during shorter days, and humidity swings that lead to condensation. That is why one shop can feel miserable even with a heater running, while another feels cozy with a smaller system and better insulation.
Concrete is a major offender. It stays cold, pulls warmth out of your feet and knees, and makes the whole room feel cooler even if the thermostat says otherwise. Add a drafty garage door, exposed framing, and a few extension cords zigzagging across the floor, and suddenly your “productive winter workspace” feels more like a survival game with power tools.
Upgrade #1: Air-Seal the Workshop Before You Buy More Heat
If your workshop leaks air like a gossip leaks secrets, your heating bill will always lose the argument. Air sealing is the upgrade that makes everything else work better. Before you think about heat output, check the obvious weak points: around service doors, garage doors, windows, sill plates, utility penetrations, attic hatches, and any place where wires or pipes enter the space.
What to seal first
Start with weatherstripping on doors that rattle in the wind. Add a better threshold sweep if daylight is visible under the bottom edge. Use caulk or foam at small penetrations, especially around outlets, conduit, and pipe openings on exterior walls. If the workshop is attached to the house, pay extra attention to the wall and door between the garage and living space. That boundary should be tight, because it affects both comfort and safety.
This is one of the least glamorous upgrades on the list, but it is often the most cost-effective. The difference can feel immediate. Drafts calm down, heaters cycle less often, and the room stops having those weird microclimates where your left shoulder is in winter and your right shoulder is in spring.
Upgrade #2: Insulate the Shell, Not Just Your Ego
Once the air leaks are handled, insulation becomes dramatically more effective. The best cold weather workshop upgrades almost always include the workshop envelope: walls, ceiling, garage door, and sometimes the floor or slab edge. If you only heat the space without improving the shell, you are basically paying to warm the outdoors, which is generous but not especially practical.
Walls and ceiling
Insulating unfinished walls and ceilings can make a huge difference in both comfort and energy use. In cold weather, the goal is to slow heat loss and reduce cold surface temperatures that cause the room to feel drafty and uncomfortable. Even a modest upgrade in wall and ceiling insulation can change a workshop from “I can last 20 minutes in here” to “I forgot it was freezing outside.”
Garage door insulation
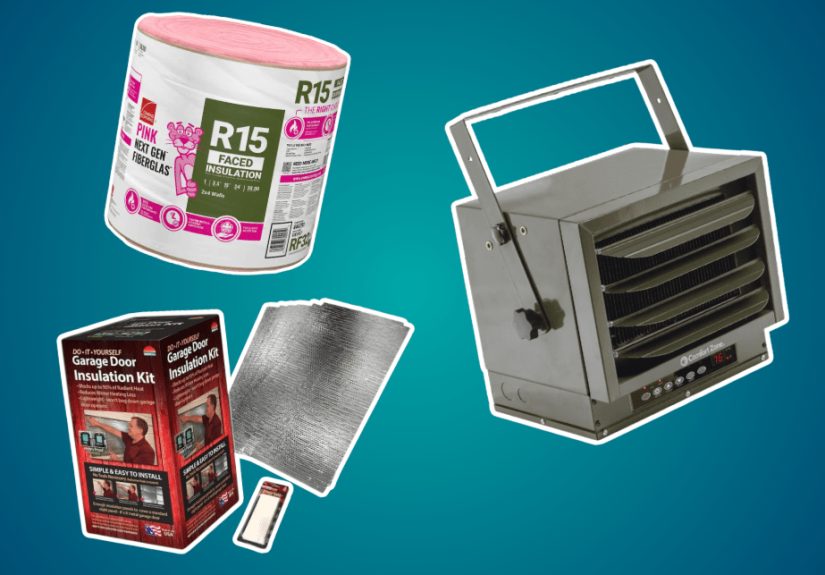
If your workshop lives in a garage, the door is often the giant weak link. Adding garage door insulation or replacing an older door with an insulated model can help with temperature control, noise reduction, and overall comfort. It is not magic, but it is often one of the most noticeable winter upgrades because the garage door is such a large, thin surface.
Do not forget the floor
You may not be ready to install radiant heat under a slab, and that is perfectly reasonable because most people would like to keep both kidneys and some savings. But you can still reduce heat loss and make the space feel warmer by adding interlocking floor tiles, anti-fatigue mats, insulated subfloor panels in selected zones, or heavy-duty runners where you stand the most. Even partial coverage around workbenches and machines can make the shop feel significantly better.
Upgrade #3: Choose the Right Heat Source for the Way You Work
Not every workshop needs the same kind of heating. A small hobby shop used on weekends has different needs than a daily-use woodworking or automotive space. The smartest approach is to match the heater to how often you use the room, how fast you need warmth, and how well insulated the shop already is.
Electric ceiling-mounted garage heaters
For many workshops, a ceiling-mounted electric unit heater is a strong choice. It saves floor space, reduces trip hazards, and can provide steady warmth without taking up bench area. It is especially useful in insulated garages where you want a reliable source of heat but do not want portable equipment constantly underfoot.
Infrared or radiant heaters
If you work in one main zone, radiant heat can feel fantastic. Instead of trying to warm every cubic foot of chilly air in the room, radiant systems warm people and surfaces more directly. That makes them appealing for shops where quick comfort matters more than full-room temperature balance.
Ductless mini-split systems
If you use your workshop year-round, a ductless mini-split is one of the best premium upgrades. It provides both heating and cooling, runs quietly, and brings a level of climate control that makes the space feel like a real room rather than a seasonal outpost. In a well-insulated workshop, a mini-split can be the upgrade that changes everything, especially if you also do finishing work or store sensitive materials.
What to avoid or use with caution
Fuel-burning heaters can be effective, but they require thoughtful installation, proper venting where needed, and close attention to safety. Some options can add moisture to the air, which is bad news for rust-prone tools, stored lumber, and finishes. In small workshops, that moisture can quietly create a second problem while solving the first one. Always think about combustion safety, clearance, and ventilation before going that route.
Upgrade #4: Control Moisture Before Rust Becomes Your Shop Assistant
A cold workshop is annoying. A damp cold workshop is a villain. Moisture management matters just as much as heat because winter condensation can damage tools, affect wood movement, and create mold risks. If warm air hits cold surfaces, condensation can form on windows, doors, metal cabinets, cast-iron tool tops, and even inside wall cavities if the space is not well managed.
Simple moisture-control moves
Use a hygrometer so you know what the room is doing instead of guessing. In many shops, a dehumidifier is worth its weight in gold-plated socket wrenches. If you store lumber, use finishes, or own cast-iron machinery, controlling humidity becomes even more important. Tool surfaces also benefit from protective wax or rust-prevention coatings, especially in spaces with temperature swings.
Another overlooked moisture strategy is consistency. A workshop that swings wildly between freezing and overheated conditions can develop more condensation problems than one kept at a stable baseline temperature. Even maintaining a modest background temp when the shop is not in use can help reduce those dramatic swings.
Upgrade #5: Install Better Lighting for Dark Winter Afternoons
Winter does not only make workshops colder. It makes them dimmer. If your current lighting setup consists of one tired ceiling fixture doing its best impression of a candle in a wind tunnel, now is the time to upgrade. Good lighting improves safety, accuracy, and mood. It is easier to cut to a line, inspect finishes, read measuring marks, and stay productive when your shop actually looks awake.
Why LEDs win
Modern LED shop lighting is efficient, bright, long-lasting, and much better than the old flickery fluorescent setups that used to dominate garages. For most workshops, the best approach is layered lighting: bright general overhead lighting, task lighting at benches and machines, and a few targeted fixtures where shadows are common.
Examples work well here. A magnetic LED gooseneck light near a drill press, bandsaw, or lathe can make precision work much easier. Under-cabinet or under-shelf lights brighten work surfaces that overhead fixtures miss. White or light-colored wall and ceiling finishes can also help reflect light and make the whole room feel less cave-like.
Upgrade #6: Fix the Electrical Setup While You Are at It
Cold-weather upgrades often reveal electrical weaknesses that were easy to ignore in milder seasons. Heaters draw power. Dehumidifiers draw power. Better lighting needs power. And if your current strategy involves one overloaded circuit and an extension cord that has achieved honorary citizenship in the shop, it is time for a grown-up solution.
Electrical improvements worth making
Add more outlets where you actually need them, especially around benches and machine stations. Surface-mounted conduit can be a practical way to add power in a finished garage without tearing open walls. Keep lighting on a separate circuit from major tools when possible, so tripping a breaker does not leave you standing in instant darkness with a spinning blade and a new respect for planning.
Garages and workshops also benefit from proper GFCI protection where required. And extension cords should stay what they were always meant to be: temporary helpers, not the backbone of your shop’s infrastructure. A safer, cleaner electrical layout improves both convenience and winter reliability.
Upgrade #7: Make the Floor and Work Zones More Comfortable
The workshop floor deserves more respect in winter. A cold slab can make a heated room still feel unpleasant, especially if you stand for long periods. One of the smartest cold weather workshop upgrades is to improve the surfaces your body touches most often.
Anti-fatigue mats at benches reduce stress on your back and knees while adding a warmer standing surface. Interlocking rubber or foam-based tiles can be useful in selected areas, particularly near hand-tool benches or assembly tables. For mechanics, a better creeper pad or insulated kneeling pad is a tiny upgrade that pays you back every single time you drop a bolt and have to go looking for it under the truck.
Also look at your seating and work posture. A padded stool, a heated seat pad, or simply repositioning your most-used work area away from the garage door can change how the whole room feels in winter.
Upgrade #8: Create a Winter-Ready Storage and Finishing Zone
Cold weather is hard on more than people. Glue, finishes, batteries, paints, and certain adhesives can all misbehave when stored in freezing conditions. If your workshop doubles as a catch-all storage room, winter is the season to get strategic.
Create a protected cabinet or indoor-adjacent storage area for temperature-sensitive materials. Keep battery chargers and frequently used hand tools in a drier, warmer zone. If you do paint or finish work, remember that many products have recommended temperature ranges for application and curing. Trying to finish a project in a freezing shop is a great way to invent new words that should not be published on a family website.
The Best Upgrade Path by Budget
Budget-friendly wins
Start with weatherstripping, caulk, door sweeps, anti-fatigue mats, a hygrometer, and better task lighting. These are relatively affordable, easy to install, and immediately useful.
Mid-range improvements
Add garage door insulation, improve wall or ceiling insulation where accessible, install a dehumidifier, and upgrade to brighter LED overhead lighting. This tier usually gives the best balance of cost and comfort.
Premium upgrades
Go for a ductless mini-split, dedicated electrical improvements, insulated wall systems, or radiant floor solutions if the workshop is a long-term space you use constantly. These changes cost more, but they can turn a seasonal garage into a truly all-weather workspace.
Common Cold-Weather Workshop Mistakes
The biggest mistake is buying heat before fixing leaks. The second biggest mistake is ignoring moisture. The third is assuming every winter problem can be solved by standing closer to the heater. Other common errors include storing finishes in freezing conditions, using extension cords as permanent wiring, overloading circuits, and neglecting lighting because “I can still see.” Friend, that is exactly what people say right before cutting a board 1/4 inch short.
The right workshop upgrades make the space safer, not just warmer. That is why the smartest improvements are usually the boring-sounding ones first. Seal. Insulate. Light. Power. Then heat. That order may not be thrilling, but it works.
Real-World Cold Weather Workshop Experiences
Anyone who has spent serious time in a cold workshop learns the same lesson sooner or later: winter exposes every weakness in the room. In October, a small draft by the side door feels harmless. In January, it feels like the workshop has secretly opened a portal to the Arctic. That is why the best winter upgrades are so satisfying in real life. They are not abstract improvements on a checklist. You feel them the moment you walk in.
One of the biggest quality-of-life changes usually comes from sealing and insulating first. People often expect a new heater to create the dramatic before-and-after moment, but the real surprise is how much more comfortable the shop feels when cold air stops sneaking in from five different places at once. Suddenly the room warms up faster, the heater runs less often, and the cold corners are not nearly as nasty. It is one of those upgrades that makes the whole shop feel calmer.
Lighting is another winter game changer that people underestimate. During summer, a mediocre shop can coast on long daylight hours. In winter, those weak fixtures get exposed fast. Adding brighter overhead LEDs and a couple of targeted task lights can make evening work sessions feel completely different. The shop feels cleaner, safer, and more professional, even if the only thing you built that day was a jig for another jig. Which, to be fair, is a very workshop thing to do.
Moisture control tends to be the sneaky hero. Many shop owners do not think about humidity until they see rust freckles on cast iron, sticky lumber, or a finish that refuses to cooperate. A dehumidifier and a simple routine for protecting tool surfaces often make winter maintenance far easier. It is the kind of upgrade you appreciate more and more over time, especially when your tools survive the season without looking like they were stored at the bottom of a lake.
The floor changes matter too. People who add mats or insulated flooring in work zones almost always say the same thing: they should have done it sooner. Standing on bare concrete for hours drains energy in a way that is hard to describe until you fix it. Once those key areas are warmer and softer underfoot, longer shop sessions become much more realistic.
And then there is the emotional side of it. A comfortable winter workshop gets used more often. Projects stop being postponed until spring. Maintenance jobs get done. Creative momentum stays alive. Instead of dreading the first blast of cold air when you open the door, you start looking forward to stepping into a space that is ready for work. That is really the point of all these upgrades. A good winter workshop does not just protect tools and lower discomfort. It keeps your habits, hobbies, and plans moving forward when the weather outside is trying its absolute best to talk you out of them.
Conclusion
The best cold weather workshop upgrades are the ones that solve problems in the right order. Air sealing keeps heat from escaping. Insulation helps the whole shop hold temperature. A smart heating system makes the space comfortable without wasting energy. Moisture control protects tools and materials. Better lighting and electrical improvements make the room safer and more usable. Comfort upgrades at the floor and bench level turn the workshop from merely survivable into genuinely pleasant.
That is the real goal. A winter workshop should not feel like an endurance sport. It should feel like a place where you can think clearly, work safely, and enjoy the process. When the space is warm, dry, bright, and organized, cold weather loses a lot of its drama. Your hands work better, your tools behave better, and your projects are far more likely to get finished before spring shows up acting like it had the answer all along.


