Table of Contents >> Show >> Hide
- Why a Terra Cotta Pot Lighthouse Is the Perfect DIY Garden Project
- Supplies You’ll Need for a Clay Pot Lighthouse With Solar Light
- Step-by-Step: How to Make a Terra Cotta Pot Lighthouse
- Design Ideas to Make Your Clay Pot Lighthouse Unique
- Best Places to Display Your Terra Cotta Pot Lighthouse
- Maintenance, Weather, and Safety Tips
- Common Questions About Clay Pot Lighthouses
- Real-Life Experiences and Extra Tips for a Better Lighthouse
If you’ve ever scrolled Hometalk or Pinterest and thought, “I could totally make that,”
the terra cotta pot lighthouse with a solar light on top is that project. It’s
cute, cheap, surprisingly sturdy, and it makes your porch or garden look like a tiny
seaside village moved in overnight. Even better, the solar light clicks on at dusk, so
your handmade clay pot lighthouse actually works.
In this guide, we’ll walk through everything you need to know to create your own terra
cotta pot lighthouse with a solar light, from choosing pot sizes and paint colors to
stacking, gluing, and weatherproofing. We’ll also dig into design ideas, smart placement,
maintenance tips, and some real-life lessons you only learn after you’ve had one sitting
outside through wind, rain, and curious neighbors.
Why a Terra Cotta Pot Lighthouse Is the Perfect DIY Garden Project
Terra cotta pot lighthouses are a favorite on DIY and home decor sites for a few very
practical reasons:
- Beginner-friendly: If you can stack blocks and use a paintbrush, you can make one.
- Budget-conscious: Clay pots, a solar light, and a few bottles of outdoor craft paint are all you really need.
- Customizable: Classic red-and-white stripes, coastal blue, farmhouse neutrals, kid-themed colorsanything goes.
- Functional: The solar light on top isn’t just cute; it actually glows at night and adds ambiance to your porch, balcony, or flower bed.
- Compact: Great for small yards, patios, apartment balconies, or even as a centerpiece on an outdoor table.
Whether you’re trying to dress up a plain porch, add a nautical touch to a garden bed,
or just need a fun weekend craft, a clay pot lighthouse checks all the boxes.
Supplies You’ll Need for a Clay Pot Lighthouse With Solar Light
Before you start painting, gather everything in one spot so you’re not running back and
forth with wet, painty hands. Here’s a solid starter list:
Basic Materials
-
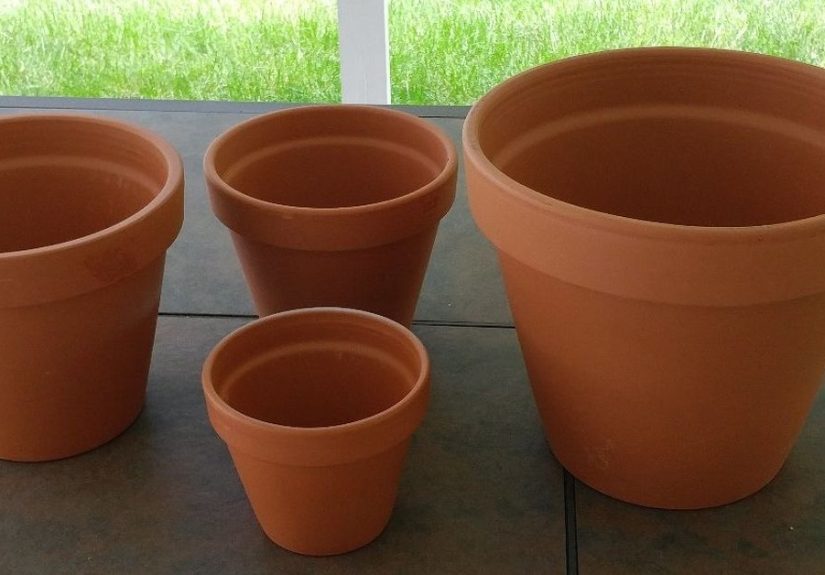
Terra cotta pots in graduated sizes (for example: 10", 8", 6", and 4").
You can scale up or down depending on how tall you want your lighthouse. - 1–2 terra cotta saucers (one larger for the base, one small for the “lantern room” under the light).
-
Outdoor acrylic or multi-surface paint in your chosen colors
(white, red, navy, black, or gray are classic lighthouse shades). - Clear outdoor sealer or Mod Podge Outdoor to protect the paint.
- Strong waterproof adhesive such as E6000 or construction adhesive suitable for ceramics.
- Solar garden light (stake-style or a small solar lantern that fits into the top saucer or pot).
Helpful Extras
- Painter’s tape for crisp stripes and clean edges.
- Fine-tip brushes for windows, doors, and details.
- Sandpaper to smooth rough spots on the pots.
- Decorative elements like shells, pebbles, rope, or house numbers for extra personality.
Once you have your materials ready, clear a work surface, cover it with a drop cloth or
cardboard, and you’re good to go.
Step-by-Step: How to Make a Terra Cotta Pot Lighthouse
Step 1: Plan the Size and Style
Stack your pots upside downlargest on the bottom, smallest on topwithout glue first.
This “dry fit” lets you see how tall your lighthouse will be and how the proportions look.
Take a quick picture with your phone so you can remember your arrangement once you start
painting.
Next, decide on a style:
- Classic beacon: White base with bold red or navy stripes, black windows, and a red cap.
- Coastal cottage: Soft blues, sandy beige, and white trim for a beachy feel.
- Modern farmhouse: Matte black and white, maybe with stenciled numbers or a family initial.
- Kids’ version: Bright colors, whimsical windows, maybe even cartoonish waves at the base.
Step 2: Clean and Prep the Pots
Wipe down the pots with a damp cloth to remove dust and clay residue. If they’ve been
outside or reused, a gentle scrub and full dry time are essentialpaint and glue stick
best to clean, dry surfaces. If your climate is very wet or you get hard freezes in
winter, consider giving the inside and outside of each pot a light coat of sealer before
painting to reduce water absorption and cracking.
Step 3: Paint the Base Colors
Flip the pots upside down so the open end is resting on your work surface. Apply your
main base color first. Most outdoor paints will need 2–3 thin coats to look solid and
even. Let each coat dry according to the label instructions before adding another.
For stripes:
- Once the base color is fully dry, wrap painter’s tape around the pots where you want bands of a second color.
- Press the tape edges firmly so paint doesn’t bleed underneath.
- Paint your accent color between the taped areas and peel the tape off while the paint is still slightly tacky for the crispest lines.
Step 4: Add Windows, Doors, and Details
This is where your clay pot lighthouse starts to look like a real structure instead of a
colorful tower of pots:
- Use a pencil to lightly sketch windows and a door so you can adjust spacing before painting.
- Paint the door on the lowest pot and small windows on the middle and top pots.
- Fill in with white or yellow for “lit” windows and outline with black or a dark color using a fine brush.
- Add railings, bricks, or stone effects if you’re feeling extra fancyshort horizontal lines or dabs of paint can suggest texture without a lot of effort.
Let all the details dry completely before you move on to gluing.
Step 5: Glue and Stack the Lighthouse
Once the paint is fully dry, it’s time to build your tower for real:
- Place your largest saucer (face-up) where the lighthouse will sit while it cures.
- Apply a generous bead of outdoor adhesive around the bottom rim of the largest pot (which is upside down) and press it into the center of the saucer.
- Repeat with each pot, stacking them from largest to smallest, making sure they’re straight as you go. Check alignment from multiple angles.
- Let the whole stack cure according to your adhesive instructionsthis is not the time to rush; you want it rock solid.
For the “lantern room,” glue a smaller saucer or ring at the very top if you want a
ledge for your solar light to sit in. Some people like to add a small final pot or cap,
leaving a space for the light in the center.
Step 6: Add the Solar Light
Most DIYers use a simple stake-style solar path light:
- Remove the stake portion so you’re left with just the solar light head.
- Test fit it in the top saucer or pot opening. If needed, add a bead of adhesive around the base of the light head to secure it.
- Make sure the solar panel on top isn’t shaded by the pot or any decorative ring.
Once the glue sets, leave the lighthouse in a sunny spot during the day. At dusk, the
light should automatically turn on, giving your little tower a realistic glow.
Step 7: Seal for Outdoor Durability
To keep your paint looking fresh through rain and sun, apply a clear outdoor sealer over
the whole lighthouse. Choose matte, satin, or gloss depending on the look you prefer.
Follow the label instructions for dry time and any needed re-coats.
Design Ideas to Make Your Clay Pot Lighthouse Unique
One of the best parts of this project is how easy it is to personalize. A few ideas to
spark your creativity:
-
Beach house style: Soft white and pale blue stripes, tiny painted waves
around the base, and real shells glued onto the saucer. -
Rustic coastal: Off-white base, muted navy or charcoal stripes, and a
jute or rope “railing” wrapped under the top saucer. -
Family lighthouse: Add your house number or family initial to the
middle pot so it doubles as a porch marker. -
Mini lighthouse village: Make several shorter lighthouses using smaller
pots and group them together on a deck or by a pathway. -
Planter–lighthouse combo: Use the base saucer as a shallow planter for
succulents or groundcover plants to look like “shoreline” around the tower.
You can also coordinate the lighthouse colors with your patio furniture cushions, front
door paint, or existing garden decor for a pulled-together look.
Best Places to Display Your Terra Cotta Pot Lighthouse
Because of the solar light, location matters. You want it to charge well during the day
and glow nicely at night. Good spots include:
- On a front porch or entryway, where guests see it as they arrive.
- At the edge of a flower bed or rock garden.
- Beside a set of stairs or pathway for a subtle “guide light” effect.
- On a deck or patio table as a centerpiece for evening hangouts.
Just make sure the solar panel can catch enough direct or indirect sunlight. If your
porch is deeply shaded, consider placing the lighthouse where it gets good daytime sun
and is still visible from your favorite evening seating spot.
Maintenance, Weather, and Safety Tips
Terra cotta and outdoor weather have a complicated relationship. With a few smart
habits, your lighthouse will last much longer:
- Bring it in for extreme winters if you live in a freeze–thaw climate; frozen moisture in clay pots can cause cracking.
- Clean gently with a soft damp clothavoid harsh scrub pads that might scratch the paint.
- Replace the solar light if it grows dim over time; the tower itself is reusable, so you can just swap the light head.
- Check stability once in a while, especially if kids or pets play nearby, and reinforce with extra adhesive if needed.
- Re-seal the surface every year or two if the finish looks dull or chalky.
If your space is very windy or you have rambunctious pets, you might place the
lighthouse on a heavier stone paver or use landscape adhesive between the saucer and
its base for extra security.
Common Questions About Clay Pot Lighthouses
Do I have to use terra cotta, or can I use plastic pots?
Terra cotta is heavier and looks more like real masonry, which is why it’s the classic
choice. Plastic pots are lighter and less likely to crack, but you may need to weigh
them down and use a primer designed for plastic before painting.
What if I’m not good at painting details?
Keep it simple. You can stick with solid stripes and use adhesive vinyl shapes, stencils,
or even waterproof markers for windows. Imperfect details often make the lighthouse look
more charming and handmade.
Can I make a tabletop version for indoors?
Yes. Use smaller pots, skip the solar light, and use a battery-operated tealight or LED
puck light on top instead. Just make sure all materials you use indoors are safe and
don’t create a fire hazard.
Real-Life Experiences and Extra Tips for a Better Lighthouse
Once you’ve built and lived with a terra cotta pot lighthouse for a while, you notice
little things that don’t always make it into quick tutorials. Here are some
experience-based tips that can save you time, frustration, and a few “oops” moments.
Dry Fit Is Not Optional
The biggest rookie mistake is skipping the dry fit. On paper, four pots in descending
sizes sound fine. In reality, the proportions can feel offmaybe one pot is too tall,
or the top looks too bulky. Taking two minutes to stack the pots before painting helps
you decide whether you want a taller, slimmer lighthouse or a shorter, sturdier one.
When you find a shape you like, snap a quick photo. That photo will be your blueprint
when everything is painted and you’re trying to remember which pot went where.
Mark Your Alignment Before You Glue
Pots don’t always sit perfectly straight the first time you drop them onto adhesive. A
simple hack is to line up the pots the way you want them, then lightly mark a tiny dot
or pencil line at the back of each pot where they meet. When you add glue and stack for
real, you can quickly rotate each pot so those marks line up and everything stays
vertical instead of leaning.
Don’t Skimp on the Sealer
Without a good outdoor sealer, your lighthouse might look great for one season and tired
by the next. Sun, moisture, and temperature changes will slowly fade and crack paint.
Sealing the whole pieceincluding the edges and around the solar lightadds an extra
layer of protection. Think of it as sunscreen for your project.
Think About Weight and Wind
A tall clay pot lighthouse looks impressive, but if the base pot is too small or the
whole structure is very narrow, a strong gust of wind can tip it. Using a wider base
saucer, a heavier bottom pot, or even a stepping stone underneath adds stability.
Situating it near a wall or railing also helps break the wind.
Match the Style to Your Space
When people are disappointed with their finished lighthouse, it’s often not the quality
of the paint jobit’s the style mismatch. A bright red-and-white striped lighthouse can
look out of place next to a neutral, minimalist modern home. If your house leans warm
and rustic, try soft whites, creams, and muted blues. If your porch decor is playful
and colorful, go all in with bold stripes and fun details.
Use It as a Conversation Starter
One of the underrated joys of this project is how often people comment on it. Guests
walking up to your door or neighbors passing by at night will notice the little solar
light glowing and ask, “Did you make that?” It’s a great way to share your love for DIY
and maybe even inspire someone else to try a project of their own.
Make It a Family or Group Project
Kids love painting the base coats, choosing colors, or “designing” the windows. Adults
can handle glue, sealer, and anything involving sharp tools or breakable materials. If
you’re crafting with friends, each person can create their own version using similar
suppliesby the end of the afternoon, you’ll have a whole “harbor” of lighthouses
ready to go home.
Plan for Future Tweaks
Over time, you might decide to change the look. Maybe you want to repaint to match new
patio furniture or swap in a brighter solar light. The good news is that terra cotta
takes paint well, so you can gently sand any rough or peeling areas, repaint, and reseal
to give your lighthouse a second life. Think of it less as a one-and-done craft and more
as a piece you can refresh every few seasons.
In the end, a terra cotta pot lighthouse with a solar light is more than just a cute
decoration. It’s a small, satisfying reminder that you can turn simple materials into
something magicalone coat of paint and one stacked pot at a time.


