Table of Contents >> Show >> Hide
- The quick answer (so you don’t scroll with sore thumbs)
- What “nail gun” actually works for hardwood floors?
- When nail-down hardwood installation makes sense (and when it doesn’t)
- Subfloor reality check: your floor is only as good as what’s under it
- Fasteners: nails vs. staples, and why brads aren’t the main character
- Fastener spacing and placement: what’s commonly recommended
- So… can you use a nail gun? Yeshere’s the smart way to think about it
- Common mistakes (a.k.a. how hardwood floors roast people)
- Safety note (because nail guns don’t do “oops”)
- What about engineered hardwoodcan I nail that down too?
- of real-world “experience” (what people tend to learn the hard way)
- Conclusion: yes, you canjust use the right nail gun (and the right expectations)
Yesif the “nail gun” you mean is the right kind. Hardwood flooring is picky like that friend who only drinks sparkling water
that’s “aggressively bubbly.” If you show up with the wrong tool (hello, framing nailer), your floor can respond with squeaks, gaps, cracked tongues,
and a general attitude problem.
This guide breaks down which nail gun works for hardwood, when nail-down installation makes sense, what fasteners and spacing are commonly
recommended, and how to avoid the classic DIY plot twist: “It looked perfect… until humidity season arrived.”
The quick answer (so you don’t scroll with sore thumbs)
- Yes: You can install many hardwood floors using a flooring nailer (or flooring stapler), designed for tongue-and-groove boards.
- Sometimes: A finish nailer or brad nailer is used for the first and last rows where a flooring nailer won’t fittypically with predrilling/face-nailing and careful filling.
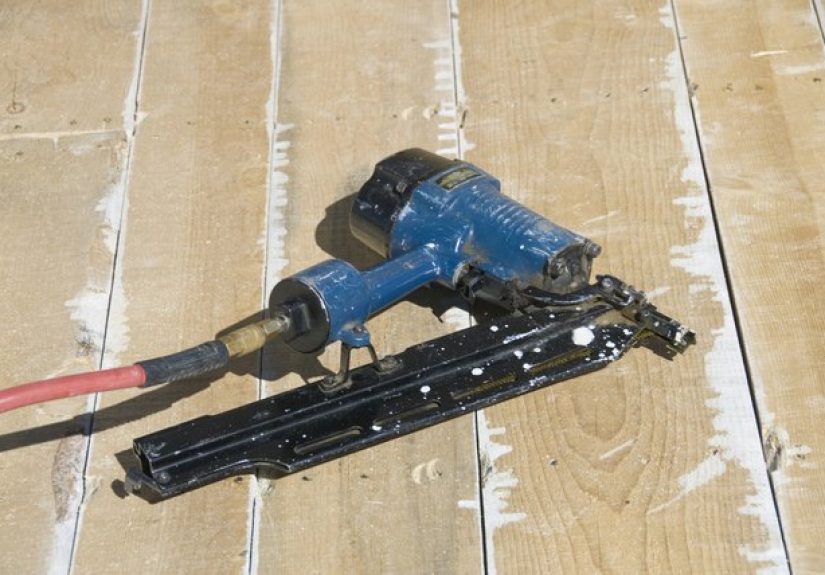
- Nope: A framing nailer is not the tool for hardwood flooring installation. It’s powerful, but that’s the problem.
- Also no: Random brads as the primary fastener for a full floor. They’re great for trim, not for holding a living, breathing wood floor in place.
What “nail gun” actually works for hardwood floors?
Hardwood flooring (especially tongue-and-groove) is typically installed with mechanical fasteners that pull boards tight while minimizing surface damage.
That’s why flooring tools existbecause wood floors demand consistent placement, proper angle, and repeatable depth.
1) Flooring nailer (cleats)
A flooring nailer drives specialized fasteners called cleats (often L-shaped or T-shaped) through the tongue at an angle.
Cleats are popular because they provide strong holding power while still allowing the floor to move seasonally without turning into a wavy mess.
2) Flooring stapler (flooring staples)
A flooring stapler drives flooring staples (commonly wider-crown than typical office staples… unless you work at a very intense office).
Staples can hold extremely well, but the best choice often depends on wood species, plank width, and the flooring manufacturer’s warranty requirements.
3) Finish nailer or brad nailer (for edges, not the whole floor)
Finish and brad nailers can be useful for tight spaces near walls where the flooring tool can’t reach. Many installation guides describe
predrilling and using finish nails along the perimeter and final rows, then countersinking and filling.
The big takeaway: a hardwood flooring job is usually a “flooring nailer/stapler” project first, with a finish/brad nailer playing a small supporting role.
When nail-down hardwood installation makes sense (and when it doesn’t)
Nail-down is usually a good match when:
- You’re installing solid hardwood or an engineered product approved for nail-down over a wood subfloor.
- Your subfloor is thick, flat, clean, and well-fastened (no bounce, no squeaks, no mystery dips that swallow a level).
- The home is enclosed and climate-controlled and the flooring is properly conditioned to the space.
Nail-down is usually not the right move when:
- You’re on concrete without an appropriate underlayment/subfloor system.
- The flooring is too thin or the manufacturer specifically says “glue-down or float only.”
- Moisture conditions are questionable (like a damp basement or a crawl space that smells like it’s hiding a swamp).
Industry guidance emphasizes that jobsite conditions, moisture testing, and acclimation matterbecause wood doesn’t care about your schedule.
It cares about moisture and temperature, and it will “communicate” with gaps, cupping, or squeaks if you ignore that.
Subfloor reality check: your floor is only as good as what’s under it
Nail-down hardwood needs a subfloor that can hold fasteners reliably. Plywood and OSB can work, but thickness and joist spacing matter.
In general, thicker panels are needed as joist spacing increasesand some pros prefer plywood for better fastener-holding performance.
Common subfloor themes to get right
- Thickness & stiffness: The subfloor must meet minimum thickness and be rigid enough to prevent flexing.
- Flatness: A “mostly flat” subfloor is not the same as “flat enough.” High spots and dips can create hollow sounds and gapping.
- Fastening: Loose panels cause squeaks. Secure them before you install expensive wood on top.
- Clean & dry: Dust, drywall mud, and moisture are not flooring-friendly ingredients.
Fasteners: nails vs. staples, and why brads aren’t the main character
Flooring nailers/staplers commonly use fasteners in specific gauges and lengths (often in the 1-1/2″ to 2″ range depending on flooring thickness and tool),
and many tools are designed around common combinations (for example, 15.5-gauge flooring staples and 16-gauge L-cleats on certain 2-in-1 tools).
Cleats
- Designed for hardwood flooring installation.
- Typically driven through the tongue (blind nailing) on tongue-and-groove floors.
- Often chosen to reduce the chance of splitting in some species compared with staples (manufacturer confirmations varyalways check your floor’s documentation).
Staples
- Designed for hardwood flooring staplers and some combo tools.
- Strong holding power, but results can vary by wood density, plank width, and correct tool setup.
- Some floors (especially harder or wider boards) may have specific requirements.
Brad/finish nails
- Useful for perimeter rows where a flooring nailer can’t reach.
- Not typically used for the entire field of a tongue-and-groove hardwood floor.
- Usually paired with predrilling, countersinking, and filling to keep things neat.
Fastener spacing and placement: what’s commonly recommended
Fastener schedules vary by product type and plank dimensions, but many guidelines share similar patterns:
fasteners placed near board ends and then spaced regularly along the length.
Typical spacing ranges (examples you’ll see in guidance)
- Solid strip T&G (common widths): fasteners often spaced about 8–10 inches apart, with additional fasteners near ends (often within a few inches).
- Engineered (depending on width/thickness): some manufacturer instructions call for tighter spacing (for example, 4–6 inches along the tongue side for certain products) and near ends.
- Wide planks: may call for closer spacing and/or additional strategies (like adhesive assist) because wide wood moves more.
The “best” schedule is the one your specific flooring manufacturer requiresbecause that’s what your warranty (and your future self) cares about.
So… can you use a nail gun? Yeshere’s the smart way to think about it
If you’re writing this for DIY readers, the safest, most accurate framing is:
use a flooring nailer or flooring stapler for the main installation, and treat other nail guns as specialty tools for limited situations.
A hardwood floor is a system: subfloor + moisture control + correct fastener + correct spacing + correct environment.
One weak link and the system starts composing its own squeaky soundtrack.
A practical decision checklist
- What floor is it? Solid vs. engineered, thickness, plank width, and manufacturer-approved installation methods.
- What’s underneath? Plywood/OSB thickness, joist spacing, flatness, and how well the subfloor is fastened.
- What’s the moisture plan? Crawl space vapor retarder, underlayment, and moisture testing where required.
- What tool matches the fastener spec? Flooring nailer/stapler that fits the floor thickness and approved fasteners.
- How will you handle edges? First/last rows and transitions often require alternate fastening approaches.
Common mistakes (a.k.a. how hardwood floors roast people)
Using the wrong nail gun
A framing nailer is designed for speed and brute force. Hardwood flooring demands precision and controlled fastening.
Mixing those up is like using a fire hose to water a bonsai.
Skipping moisture testing and acclimation
Wood is hygroscopicit exchanges moisture with its environment. If boards aren’t reasonably aligned with the home’s living conditions,
gaps and movement become more dramatic after installation.
Ignoring subfloor flatness
Even a small hump can cause boards to bridge, creating hollow sounds, visible gaps, or stress on joints. Flatness targets vary by product and fastener length,
but the theme is consistent: prep wins.
Wrong fastener length or spacing
Too short: weak holding power. Too long: risk of hitting things you’d rather not hit. Too far apart: movement and squeaks.
Too close: splitting risk, especially near ends, especially in harder species.
Safety note (because nail guns don’t do “oops”)
Nail guns can cause severe injuries. Use manufacturer instructions, wear eye protection, keep hands away from the firing area,
and understand your trigger type (sequential firing is generally considered safer than contact/bump firing in many safety resources).
If you’re not trained and supervised appropriately, this is one of those projects where “watching a few videos” is not the same as being ready.
For readers under 18: treat nail gun use as an adult-supervised, safety-trained activity. If that’s not available, the safe recommendation is
to hire a pro or choose an installation method that doesn’t involve powered fasteners.
What about engineered hardwoodcan I nail that down too?
Often yes, but it depends. Some engineered planks are designed for nail-down installation; others are floating or glue-down only.
Manufacturer instructions may also change fastener type and spacing based on plank width and thickness.
If you’re creating content for homeowners, the most responsible phrasing is:
“Many engineered hardwood floors can be nailed down with a flooring nailer/stapler, but always follow the manufacturer’s approved method and nailing schedule.”
of real-world “experience” (what people tend to learn the hard way)
1) The “I thought my subfloor was fine” moment
A common story: everything looks solid until the first few rows go inand suddenly you hear squeaks that weren’t obvious before.
That’s because hardwood acts like an amplifier. A slightly loose panel or a fastener that missed a joist becomes a soundtrack once the floor starts
getting walked on. People who take time to re-fastening loose areas, address squeaks, and flatten transitions before installing the hardwood
tend to report a noticeably quieter, more “finished” feel. The lesson is boring but true: subfloor prep is where a great floor begins.
2) The “wrong tool, wrong expectations” tale
DIYers sometimes assume any nail gun will do, because a nail is a nail… right? Then they discover hardwood is not impressed by that logic.
Flooring nailers exist because tongue-and-groove boards need consistent fastening that pulls boards tight while minimizing damage.
People who switch to the correct flooring tool often describe the difference as going from “wrestling boards into place” to “ohthis is what it’s supposed to feel like.”
Even when a finish or brad nailer is used, it’s usually for the edge rows where space is tight, not for the entire floor.
3) The “humidity season reveal”
Floors installed during a dry season can look perfectthen the humid months show up like an uninvited guest who rearranges your furniture.
Gaps can tighten or boards can press together; in some cases, movement highlights where spacing, expansion gaps, or acclimation decisions weren’t ideal.
Homeowners often say the biggest surprise is how much wood “moves” when indoor conditions change.
That’s why experienced installers obsess over indoor climate stability, moisture measurement, and leaving proper expansion space.
The floor isn’t failingit’s doing what wood does. The trick is to build in room for that movement so it happens quietly and invisibly.
4) The “my knees didn’t sign up for this” reality
Installing hardwood is physical. Even with ergonomic flooring nailers designed for standing use, there’s still measuring, cutting, carrying bundles, and working close to the floor.
People who plan for knee protection, breaks, and a clear layout strategy tend to finish happier (and less grumpy) than the “I’ll just power through” crowd.
The funniest part is that the floor doesn’t care if you’re tired; it still wants straight lines, tight seams, and clean cuts around doorways.
The best “experience-based” advice is to make the job easier on your body so you don’t start making rushed mistakes in the last third of the room.
5) The “edges are where confidence goes to die” joke (but also true)
The field of the floor can feel surprisingly smooththen you reach the last rows near the wall, and suddenly the flooring nailer won’t fit.
That’s where many installers shift to other fastening methods, careful face-nailing, or alternate tools as recommended in installation instructions.
People often report this is the point they wish they had planned transitions, trim, and edge-row strategy earlier.
The best outcomes happen when the “hard parts” are treated as part of the plannot a surprise boss fight at the end.
Conclusion: yes, you canjust use the right nail gun (and the right expectations)
Using a nail gun to install a hardwood floor is absolutely doable, but the winning move is choosing a flooring nailer or flooring stapler designed for the job,
pairing it with the approved fasteners and spacing for your specific floor, and treating moisture and subfloor prep as non-negotiable.
If your plan is “I’ll just wing it,” hardwood has a long history of responding with squeaks and sass.
If you’re writing content for homeowners, a strong final tip is simple:
Follow the flooring manufacturer’s instructions and recognized industry guidance, and prioritize safetyespecially with powered fasteners.


