Table of Contents >> Show >> Hide
- Why this works (and why your neighbors will love it)
- Materials and tools
- Choose the right glue (glass-to-wood, outdoors, no regrets)
- Step-by-step: Glue a mason jar to a wooden spoon
- Step 1: Pick the orientation (upright “vase” vs. sideways “lantern”)
- Step 2: Prep the spoon (sand, clean, seal)
- Step 3: Prep the jar (clean like you mean it)
- Step 4: Dry fit and mark your spot
- Step 5: Apply adhesive correctly
- Step 6: Press, align, and clamp
- Step 7: Add the “seatbelt” support (recommended for outdoor hanging)
- Step 8: Final weatherproofing
- How to hang it in your yard (without it bonking anyone)
- Fun ways to fill the jar (aka: where the smiles really happen)
- Troubleshooting: common issues and easy fixes
- Cost and time (the honest version)
- Conclusion: A tiny project with big “aww” energy
- of Real-World Experience: What I Learned After Hanging These Outside
Some yard decorations whisper, “I’m tasteful.” This one laughs, waves, and practically offers your mail carrier a lemonade. We’re taking two humble itemsa mason jar and a wooden spoonand turning them into a whimsical hanging yard accent that’s part lantern, part bud vase, part “wait… why is that so cute?”
The magic isn’t just the ideait’s making it actually survive outdoors. Sun. Rain. Wind. That one squirrel who thinks everything is either food or a personal challenge. So we’ll do this the right way: pick the right adhesive, prep the surfaces, clamp it like we mean it, and add a simple “seatbelt” so your jar doesn’t perform an unscheduled gravity test.
Why this works (and why your neighbors will love it)
Mason jars are classic Americana. Wooden spoons are cozy, kitcheny, and a little nostalgic. Together, they look like a tiny cottagecore signpost that says, “Welcomeyes, we have snacks.” Hang a few along a fence, from a shepherd’s hook, or under a porch eave, and you’ve got instant charm without the “I spent my whole weekend building a pergola” level of commitment.
Materials and tools
The basics
- 1 mason jar (pint size is easiest to hang; wide-mouth or regular-mouth both work)
- 1 large wooden spoon (a sturdy serving spoon, not a flimsy freebie)
- Outdoor-capable adhesive (see the best options below)
- Sandpaper (120–220 grit)
- Rubbing alcohol or glass cleaner + lint-free cloth
- Clamps (or heavy rubber bands + painter’s tape if you’re improvising)
- Wire, twine, or a mason jar handle (for hanging and for the “seatbelt” support)
Optional upgrades (highly recommended for outdoor life)
- Exterior clear sealer (spar urethane or outdoor polyurethane)
- Outdoor paint (if you want color) + small brush
- LED tea light or mini fairy lights (safer than real flames when hanging)
- Drill + small bit (only if you want to add drainage or a hanging hole in the lid)
- Decor bits: ribbon, faux greenery, stickers, tiny painted “faces,” etc.
Choose the right glue (glass-to-wood, outdoors, no regrets)
The internet is full of “just hot glue it!” advice. Hot glue is wonderfulfor indoor crafts, quick mockups, and temporarily attaching things until you find the real adhesive. Outdoors? Heat, cold, and moisture can turn hot glue into a sad science experiment.
Best adhesive choices
- Clear epoxy (two-part) – A top choice for bonding glass to wood with a rigid, strong bond. Great for outdoor décor when fully cured.
- Industrial craft adhesive (flexible, waterproof) – Strong, clear, slightly flexible adhesives designed for multi-surface crafting can hold up well outside when labeled waterproof/all-weather.
- Marine adhesive/sealant (advanced, serious) – If your yard gets hammered by weather (or you just love overkill), marine-grade adhesive/sealant can create a weather-resistant seal and strong bondthough some versions are very permanent.
What not to use (unless you enjoy re-doing projects)
- Standard school glue or basic wood glue (not designed for glass bonds)
- Cheap super glue alone (often brittle; can fail with moisture and temperature swings)
- Hot glue as the only bond (fine for decor add-ons, not for supporting a jar’s weight outdoors)
Pro tip: For anything hanging outdoors, think in layers: adhesive for bonding + a simple mechanical support for safety. That combo keeps your project cute and durable.
Step-by-step: Glue a mason jar to a wooden spoon
Step 1: Pick the orientation (upright “vase” vs. sideways “lantern”)
Decide what your jar will do:
- Upright jar (bud vase / fairy-light holder): Jar stands up, spoon bowl acts like a cradle underneath.
- Sideways jar (whimsical lantern look): Jar lies slightly angled, spoon bowl “hugs” one side of the jar.
Upright is the easiest and most stable. Sideways is extra quirky (and extra likely to make strangers say, “Wait… that’s adorable.”) but needs better support.
Step 2: Prep the spoon (sand, clean, seal)
- Sand the spoon bowl where the jar will attach. You’re not carving a canoejust roughing it up so glue grips.
- Wipe off dust with a dry cloth.
- Seal (optional but smart): Apply an exterior clear sealer to the spoon, especially the handle and edges. Let it dry fully per label directions. This helps protect the wood from moisture and swelling over time.
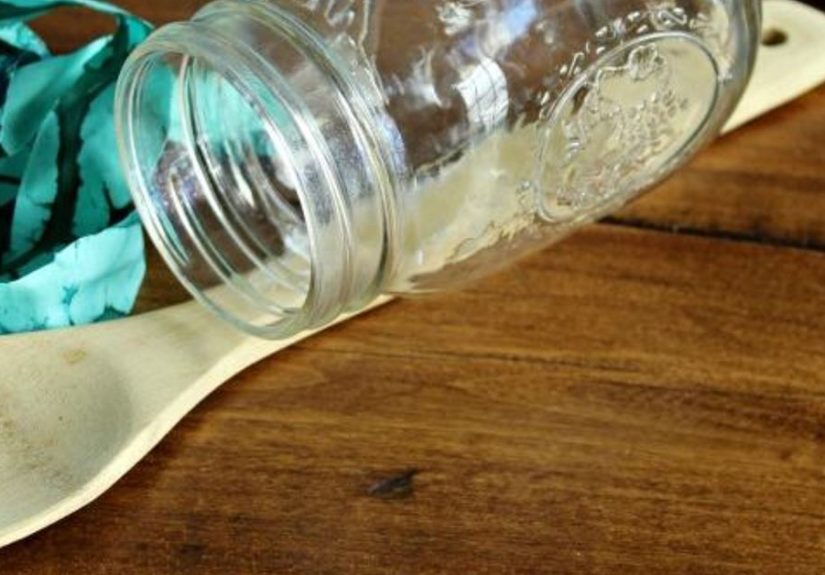
Step 3: Prep the jar (clean like you mean it)
- Wash and dry the jar.
- Wipe the bonding area with rubbing alcohol to remove oils and invisible “why won’t this stick?” residue.
- Let it dry completely. Adhesives love clean, dry surfaces.
Step 4: Dry fit and mark your spot
Place the jar on the spoon the way you want it to sit. Mark the spoon lightly with pencil where the jar will touch. This prevents the classic “I glued it… and now it’s crooked… and now I live with it forever” scenario.
Step 5: Apply adhesive correctly
Follow your adhesive’s label, but here’s the general playbook:
- Epoxy: Mix thoroughly, apply a thin-but-complete layer, and work within the set time.
- Flexible craft adhesive: Apply a consistent bead, press firmly, and expect a longer cure time.
- Marine adhesive/sealant: Apply a bead, press together, and remember: some versions cure slowly but brutally strong.
Step 6: Press, align, and clamp
- Press the jar to the spoon at your marked area.
- Hold steady for 30–60 seconds (or per label).
- Clamp the bond so it cures without shifting. If clamps are awkward, use painter’s tape + a snug rubber band “harness” around the jar and spoon bowl.
Important: “Set time” is not “hang-it-in-your-yard time.” Many strong adhesives reach full strength after hours (or a full day). Be patient. Your future self will thank you.
Step 7: Add the “seatbelt” support (recommended for outdoor hanging)
Even with excellent glue, hanging projects face wind and constant micro-movement. Add a simple support so the jar isn’t relying on glue alone:
- Wire wrap: Wrap wire around the jar’s neck (below the threads) and twist tight, then attach that wire to the spoon handle.
- Jar handle: Use a store-bought mason jar handle and tie it into the spoon handle with wire or weatherproof twine.
- Twine cradle: Create a macramé-style or simple knotted cradle that holds the jar and ties to the spoon.
This support is your project’s invisible superhero cape. It keeps things safe without stealing the spotlight.
Step 8: Final weatherproofing
- Touch up the spoon with another thin coat of exterior sealer if needed (avoid smearing fresh glue).
- If you painted the spoon, make sure paint is fully cured before sealing.
- Let everything cure fully before it goes outside.
How to hang it in your yard (without it bonking anyone)
Great hanging spots
- From a shepherd’s hook near a garden path
- Under a porch eave (less direct rain = longer life)
- On a fence post using a screw-in cup hook
- From a sturdy tree branch using outdoor-rated rope or chain
Hanging safety checklist
- Keep it out of head-height walkways (your neighbors have enough going on).
- Use outdoor-rated hooks and hardware.
- Hang it where wind won’t slam it into siding or a fence.
- If using a candle, don’t hang near dry plants or anything flammableLED is the safer move.
Fun ways to fill the jar (aka: where the smiles really happen)
1) The “tiny lantern”
Add fairy lights or an LED tea light. Toss in a few glass stones for sparkle. At dusk, it looks like your yard is hosting a miniature festival.
2) The “bud vase”
Pop in a few cut flowers from your garden. For extra practicality, add a little water and keep it out of direct sun so it doesn’t turn into flower soup by noon.
3) The “mosquito politely relocate” jar
Use the jar as a citronella-style LED display (again: LED over flame for hanging). You get ambiance without the “is my craft on fire?” suspense.
4) Seasonal mini-scenes
Spring: faux blossoms. Summer: mini flags or beachy shells. Fall: tiny pinecones. Winter: battery fairy lights and a little ribbon. Your spoon-jar becomes a rotating neighborhood mood booster.
Troubleshooting: common issues and easy fixes
“My jar slid while curing.”
Use more secure clamping and less glue next time (too much can act like a lubricant before it cures). Mark alignment lines with painter’s tape so you can see if it shifts.
“The bond popped after a week outside.”
The usual culprits: poor surface prep, not fully cured adhesive, or no mechanical support. Sand the wood, clean the glass, use an outdoor-rated adhesive, and add the wire/twine “seatbelt.”
“The spoon looks rough after rain.”
Seal it. Exterior clear finishes are your friend. If the spoon swells or cracks, swap in a new spoon and re-seal before assembly.
Cost and time (the honest version)
- Cost: Often under $15 if you have a jar, spoon, and basic supplies. More if you buy premium adhesive and exterior sealer.
- Active time: 20–40 minutes
- Wait time: Several hours to a full day for curing (worth it!)
Conclusion: A tiny project with big “aww” energy
Gluing a mason jar to a wooden spoon sounds like a joke your crafty friend made at brunchuntil you hang it outside and catch someone smiling at it as they walk by. It’s simple, nostalgic, and just weird enough to be memorable.
Do the prep. Pick an outdoor-capable adhesive. Clamp it. Add the little support wrap. Then hang it somewhere it can gently sway and quietly improve your corner of the world.
of Real-World Experience: What I Learned After Hanging These Outside
The first time I made a spoon-and-jar hanger, I treated it like a quick craft: rinse the jar, dab on glue, stick it together, and immediately start planning where to hang it. That optimism lasted exactly until the next breezy afternoon, when the jar started wobbling like it was auditioning for a low-budget disaster movie. It didn’t fall (miraculously), but it taught me something important: outdoor décor isn’t just about looking cuteit’s about surviving the elements and the occasional “helpful” wildlife.
My biggest lesson was that prep is not optional. A jar looks clean until you remember it’s been handled, washed with soap that leaves residue, and touched again while you’re deciding if it should be a lantern or a vase. Once I started wiping the glass bonding area with rubbing alcohol and lightly sanding the spoon bowl, the difference was dramatic. The bond felt more confidentlike it went from “maybe” to “I have a plan.”
The second lesson was about patience. I used to think “sets in five minutes” meant “ready for the Olympics.” Not quite. Set time is when it stops sliding around; full cure is when it’s strong enough to resist wind, temperature swings, and the constant micro-vibration that comes from hanging. When I let the piece cure overnight (and sometimes a full 24 hours), the project stopped feeling fragile and started feeling like actual yard décor.
Then there’s the neighborhood effect. Hanging one looks quirky. Hanging three in a line looks intentional. That’s when people start commenting. I’ve had neighbors ask if it was a tiny bird feeder, a lantern, or “some kind of garden art.” (Yes.) One person told me it made them smile on their evening walk because it looked like the jar was “riding” the spoon like a little cart. Another neighbor asked if I could make one with a blue spoon to match their porch cushionsproof that once you start, you may become the unofficial supplier of wholesome yard whimsy.
Finally, the best upgrade I ever made was adding a simple wire or twine support around the jar neck. It doesn’t ruin the look; it just makes the whole thing calmer in the wind. Think of it like a seatbelt: you hope you never need it, but you sleep better knowing it’s there. After that, I stopped worrying about surprise crashes and started enjoying what the project was supposed to be: a low-effort, high-smile decoration that makes the yard feel a little more human.


