Table of Contents >> Show >> Hide
- Before You Touch a Wire: Safety Rules That Keep You Famous for the Right Reasons
- What “Double Switch” Means (and Which One You Probably Have)
- Tools & Materials Checklist
- Step-by-Step: How to Wire a Double (Combination) Switch
- Step 1: Identify your wires (line, load(s), neutral, ground)
- Step 2: Turn off the breaker and test for power
- Step 3: Remove the old switch and label everything
- Step 4: Understand the break-off tab (the tiny piece that causes giant confusion)
- Step 5: Connect the ground first
- Step 6: Connect the incoming hot (LINE) to the common feed side
- Step 7: Connect the two load wires (the wires going to each light)
- Step 8: Deal with neutrals correctly (usually: leave them bundled)
- Step 9: Check box fill and wire management
- Step 10: Mount, cover, and test
- Common Wiring Scenarios (and How to Spot Them)
- Troubleshooting: When the Switch Acts Like It Has Opinions
- Code & Quality Notes (The Boring Stuff That Prevents Exciting Problems)
- FAQ
- Real-World Wiring Experiences & Lessons Learned (The “Stuff Nobody Mentions Until You’re On a Ladder” Section)
- Conclusion
Quick reality check: a “double switch” usually means two separate switches in one device (often called a combination, stacked, or 2-function switch) so you can control two lights from one wall box. It can also mean a double-pole switch for 240V loadsdifferent animal, different stakes. This guide focuses on the most common DIY scenario: one wall box, one device, two independent on/off controls.
Also: electricity doesn’t care if you “watched a video once.” If anything here feels confusing, your best tool is a licensed electricianbecause the only thing worse than a light that won’t turn on is a wall that does.
Before You Touch a Wire: Safety Rules That Keep You Famous for the Right Reasons
- Turn off the breaker for the circuit (not just the switch).
- Verify power is off with a non-contact voltage tester and a real test (like a multimeter or plug-in tester where applicable). “I’m pretty sure” is not a measurement.
- Use proper PPE: safety glasses, insulated tools if you have them, and no jewelry that wants to become a conductor.
- If you see aluminum wiring (often dull gray, not copper), stopspecial connectors and methods are required.
- If the box is crowded (wire-nut city), consider box-fill limitsstuffing wires like a suitcase can create heat and failure points.
- Permits and code: many areas require a permit/inspection for electrical work. It’s not bureaucracyit’s “someone double-checked you didn’t invent a new way to start a fire.”
Pro tip: Turn the lights on before shutting off the breaker. When they go dark, you know you picked the right breaker. (Still test anyway.)
What “Double Switch” Means (and Which One You Probably Have)
Here are the common meanings:
1) Combination / stacked double switch (most common)
Two single-pole switches in one yoke. Typically used to control two separate lights (like vanity + fan light, or porch + hallway).
2) Double-pole switch (less common for lighting)
Used to switch two “hot” legs at once (often 240V loads). If your project is 240V (water heater, some pumps), stop and follow device-specific instructions and local codeor hire a pro.
In this article, we’ll assume you’re installing a combination/stacked double switch that controls two separate 120V loads.
Tools & Materials Checklist
- Non-contact voltage tester and/or multimeter
- Insulated screwdrivers (flat and Phillips)
- Wire strippers (for your wire gauge: usually 14 AWG on 15A circuits or 12 AWG on 20A circuits)
- Lineman pliers / needle-nose pliers
- Wire connectors (wire nuts) sized for your conductors
- Electrical tape (for labeling and re-identifying wires where allowed)
- New combination (double) switch rated for your circuit (amperage/voltage), preferably a reputable, safety-listed brand
- Wall plate that matches your device style (toggle vs Decora/rocker)
- Optional but helpful: a headlamp (because ceiling lights will be offask me how everyone learns this)
Buy smart: Make sure the device is properly safety-listed (common markings include UL/ETL). In a wall box, “mystery-brand bargain bin” is not the vibe.
Step-by-Step: How to Wire a Double (Combination) Switch
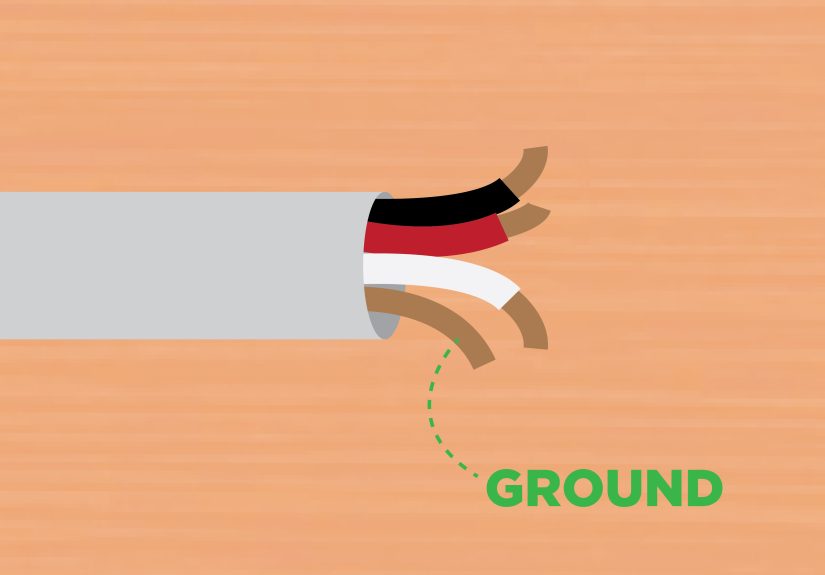
Step 1: Identify your wires (line, load(s), neutral, ground)
Open the switch box and look at what’s inside. Most residential cables have:
- Black (or red): typically “hot” (line feed or switched hot to a fixture)
- White: typically neutral (often bundled together with a wire nut)
- Bare copper or green: ground
Important: Colors are conventions, not guarantees. Older wiring and switch loops can use a white wire as a hot (it should be re-identified). When in doubt, test and label.
Step 2: Turn off the breaker and test for power
Flip the breaker OFF. Then test the switch terminals and wires. Test your tester on a known live source before and after (“test before touch,” and “test your tester” is the sequel nobody wants to star in).
Step 3: Remove the old switch and label everything
- Remove the wall plate.
- Remove the mounting screws holding the switch to the box.
- Gently pull the switch out (don’t yank the wires like you’re starting a lawn mower).
- Take a clear photo of how wires are connected.
- Use tape to label wires: LINE (incoming hot feed), LOAD 1, LOAD 2, and GROUND.
Step 4: Understand the break-off tab (the tiny piece that causes giant confusion)
On many combination switches, the two “line” terminals are connected by a break-off tab. If the tab is intact, one hot feed can power both switches. If the tab is removed, the two switches can be powered by separate feeds/circuits.
Most DIY installs: You want the tab intact (one circuit powering both switches). Only remove the tab if you know you’re feeding the device with two separate hots/circuits and your setup is code-compliant.
Step 5: Connect the ground first
Grounding is non-negotiable. Connect the bare/green ground wire(s) to the switch’s green ground screw. If multiple grounds are present, keep them properly bundled with an approved connector and use a pigtail to the device if needed.
Step 6: Connect the incoming hot (LINE) to the common feed side
If your combination switch is designed with a shared feed (tab intact), connect the incoming hot (usually black) to the terminal that feeds both switches.
- If there’s only one hot feed and the tab is intact, you can land the hot on one of the feed terminals and the tab shares it.
- If your box has multiple hot wires tied together (typical when power passes through), keep that splice with a wire nut and add a short pigtail to the switch. This avoids stuffing multiple conductors under one screw.
Step 7: Connect the two load wires (the wires going to each light)
Now connect each fixture’s switched-hot wire to its own switch terminal:
- LOAD 1 (often black or red going to light #1) → output terminal for switch #1
- LOAD 2 (often black or red going to light #2) → output terminal for switch #2
On a standard mechanical switch, the neutral wires typically remain bundled together and do not connect to the switch.
Step 8: Deal with neutrals correctly (usually: leave them bundled)
If you see a wire nut joining multiple white wires, that’s your neutral bundle. Leave it intact. Do not “borrow” neutrals from other circuits. If you’re installing a smart switch, it may require a neutral connectionmake sure your device and wiring method match code and manufacturer instructions.
Step 9: Check box fill and wire management
Before you shove everything back in:
- Make sure wire nuts are tight and conductors are fully inserted.
- Fold wires neatly (accordion style) so they don’t press hard against terminals.
- Confirm the electrical box isn’t overcrowded. Overfilled boxes can overheat and stress connections.
Step 10: Mount, cover, and test
- Carefully push the switch into the box without pinching insulation.
- Secure mounting screws.
- Install the wall plate.
- Turn the breaker back on.
- Test each switch: Light 1 ON/OFF, Light 2 ON/OFF.
Common Wiring Scenarios (and How to Spot Them)
Scenario A: One circuit powers both switches (most common)
What you’ll see: one incoming hot feed (or a hot splice), two separate load wires, a neutral bundle, and grounds.
What you do: keep the break-off tab intact, feed the combo switch from the hot (or a pigtail), connect each load to its own output.
Scenario B: Two separate circuits in the same box (advanced / caution)
What you’ll see: two different hot feeds (sometimes from different breakers) and two loads.
What you do: only if you’re certain it’s designed for it, remove the tab and wire each switch to its correct feed. Many jurisdictions require specific disconnect/handling rules when multiple circuits share a box. If you’re not 100% sure, this is a “call a pro” moment.
Scenario C: Older switch loop (white used as hot)
What you’ll see: fewer neutrals in the box, and a white wire connected to the old switch as if it were hot.
What you do: treat the re-identified white as a hot conductor (with proper marking) and follow the circuit logic carefully. If your box has no neutral and you planned a smart switch, you may need different hardware or rewiring.
Troubleshooting: When the Switch Acts Like It Has Opinions
Problem: One switch only works when the other is ON
This often happens when the device isn’t properly fed:
- The break-off tab was removed accidentally (or never existed for your model).
- The hot feed was landed on the wrong terminal.
- A pigtail/hot splice isn’t actually powering the feed side.
Fix: power off, verify the feed path, and ensure the correct terminal(s) are energized according to the device diagram.
Problem: Breaker trips immediately
- Hot is shorting to ground (pinched insulation, stray strands).
- Hot is contacting neutral in a way it shouldn’t (miswire).
- Wrong device type (e.g., confusing double-pole vs combo).
Fix: stop, inspect all connections with power off. If you can’t spot it quickly, call an electricianrepeated trips are a warning, not a challenge.
Problem: Buzzing, burning smell, warm wall plate
That’s your house asking for help. Turn the breaker off and get it inspected. Loose terminations and damaged conductors can overheat.
Problem: LEDs glow faintly when “off”
This can be caused by the tiny current leakage through certain LED driver designs or long cable runs. It’s usually not a wiring “mistake,” but you may need a compatible dimmer/LED, a different bulb brand, or (for some setups) a bypass devicefollow manufacturer guidance.
Code & Quality Notes (The Boring Stuff That Prevents Exciting Problems)
- Use the device’s wiring diagram: combination switches vary slightly by brand and style.
- Use copper conductors only unless the device explicitly allows otherwise.
- Torque matters: terminal screws should be tightened to manufacturer specs when provided.
- Ground metal boxes: metal enclosures generally must be bonded/grounded properly.
- Box fill isn’t optional: too many conductors/devices in one box can violate code and increase heat risk.
- Neutral considerations: modern code has rules about providing neutrals in certain switch locationsespecially relevant for electronic controls and future upgrades.
FAQ
Can I wire a double switch without a neutral?
Most basic mechanical double switches don’t use a neutral. Many smart switches do. Whether a neutral must be present in the box depends on wiring method, local adoption of code rules, and device type.
Do I need two separate hot wires for a double switch?
Usually no. A typical combo switch uses one hot feed to power both switches (tab intact), and then sends switched power out on two load wires.
What if my box has only two wires and a ground?
You may have a switch loop or a different wiring method. Don’t guessidentify line vs load with proper testing.
Real-World Wiring Experiences & Lessons Learned (The “Stuff Nobody Mentions Until You’re On a Ladder” Section)
Let’s talk about the “experience” side of wiring a double switchbecause in real homes, the wiring rarely shows up like a perfect textbook diagram. If you’ve ever opened a switch box and thought, “Wow, this looks like a plate of spaghetti that pays taxes,” congratulations: you’re living in a normal house.
The first common experience: discovering that the colors don’t always match the roles. People expect black = hot, white = neutral, end of story. Then they find a white wire connected to a switch. In many older setups, that white wire is part of a switch loop and is actually being used as a hot conductor (and should be re-identified). The lesson most DIYers share: don’t trust color aloneverify function with testing and labeling before disconnecting anything.
The second experience: realizing that a double switch “mystery problem” is often a tiny metal tab. Many folks wire everything neatly, flip the breaker back on, and find that one switch only works when the other is onlike the lights formed a codependent relationship. This is frequently caused by feeding only one side when the break-off tab is missing, broken, or on the opposite side than expected. The fix is usually simple, but the takeaway is big: read the device diagram and physically inspect the tab before you assume the wiring is cursed.
The third experience: the box is too small for the “upgrade.” A combination switch seems like it should save space, but adding pigtails and extra connectors can make an already crowded box feel impossible. DIYers often learn (sometimes mid-project, sometimes after a few creative words) that neat folding and correct box fill matter. A good habit is to pre-shape conductors, keep wire nut splices compact, and avoid overlong stripped ends. If the box truly can’t comfortably hold the conductors and the device, the “experienced” move is not to force itit’s to upgrade the box size or get help.
The fourth experience: the “I forgot the light was off” moment. People start the job at dusk, remove the only switch controlling the room light, and suddenly they’re wiring by flashlight like they’re defusing a movie bomb. The practical lesson: set up temporary lighting first. A headlamp or a work light plugged into a different circuit makes the entire job calmer and safer.
The fifth experience: discovering that the best troubleshooting tool is often a phone camera. Taking a photo before disconnecting anything is one of the most repeated “wish I did that sooner” lessons. Even if you think you’ll remember where each wire goes, five minutes later every black wire looks like it’s related to every other black wire. Labeling + photos turns panic into a quick fix.
In short, people who’ve done this a few times don’t succeed because they’re fearlessthey succeed because they’re methodical: power off, test, label, follow the device diagram, and stop if something doesn’t add up. That’s the real “experience” upgrade.
Conclusion
Wiring a double (combination) switch is a very doable home improvement task when you respect the basics: shut off power, verify de-energization, identify line vs loads, keep grounds and neutrals correct, and follow the device’s wiring diagramespecially the break-off tab details. If anything in your box looks unusual (multiple circuits, aluminum wiring, missing neutrals for a smart device, crowded box), don’t force it. The goal isn’t just “it works today”it’s “it’s safe for years.”


