Table of Contents >> Show >> Hide
- What “Homebrew Not A Hakko” Really Means
- Why T12-Style Tips Became So Popular
- The Thermocouple Mystery: Not Every Tip Tells the Same Story
- Key Design Goals for a Smart Homebrew Soldering Station
- How It Compares With Commercial Hakko Stations
- Soldering Quality: The Tool Helps, But Technique Still Matters
- Safety: Hot Tools, Flux Fumes, and Common Sense
- Why Makers Build Tools Instead of Just Buying Them
- Practical Lessons From the Homebrew Not A Hakko Idea
- Experience Section: What Building and Using a “Not A Hakko” Teaches You
- Conclusion: Not A Hakko, Still A Great Maker Story
Homebrew Not A Hakko sounds like the title of a garage-band album recorded between burnt flux fumes and questionable coffee. In reality, it is the perfect phrase for one of the most satisfying corners of the electronics hobby: building a soldering iron or soldering station that borrows the best ideas from professional tools without pretending to be a factory-made Hakko.
The phrase comes from a clever maker project that used Hakko-style T12 soldering tips, a compact controller, a screen, movement sensing, temperature feedback, alarms, and enough stubborn curiosity to turn “I wonder how this works” into a functioning tool. That is the real spirit of homebrew electronics. It is not about copying a famous brand. It is about understanding the parts, respecting the engineering, and making something useful with your own handspreferably without melting the bench mat into modern art.
For electronics hobbyists, repair fans, and makers who spend weekends rescuing old boards from the drawer of forgotten gadgets, a good soldering iron is not a luxury. It is the magic wand. A weak iron turns every joint into a negotiation. A temperature-controlled station makes solder flow cleanly, protects delicate components, and helps prevent the dreaded cold joint: that dull, suspicious blob that looks like it was applied with a tiny garden trowel.
What “Homebrew Not A Hakko” Really Means
Hakko is one of the best-known names in soldering, desoldering, hot air, rework, and fume extraction tools. Many professional and hobbyist benches include models such as the FX-888D or FX-951 because they combine temperature control, strong thermal recovery, interchangeable tips, and a durable station design. But a homebrew station inspired by Hakko parts is not automatically a Hakko, and that distinction matters.
A homebrew soldering station can use a compatible cartridge tip, a custom PCB, an Arduino, STM32, or other microcontroller, a rotary encoder, a small OLED or LCD, and external DC power. The result may look like a tiny lab instrument that went to maker school. The beauty is not just the tool itself, but the learning journey behind it: measuring temperature, decoding sensor behavior, tuning control loops, designing menus, choosing safe power supplies, and building an enclosure that does not look like it escaped from a lunchbox.
Why T12-Style Tips Became So Popular
T12-style tips are loved because they place the heating element and temperature sensing close to the working tip. That makes the iron more responsive than older designs where heat must travel farther from heater to tip. Faster thermal response means the iron can recover more quickly when touching a ground plane, large connector, or copper pour. In plain English: the solder melts when you want it to melt, not after you have aged three years.
Good thermal recovery also lets users work at sensible temperatures instead of cranking the station to “volcano mode.” In soldering, hotter is not always better. Excess heat can lift pads, cook flux, darken boards, and make small components regret their life choices. A responsive tip helps transfer heat efficiently so the joint reaches soldering temperature quickly, then you can get out before damage occurs.
The Difference Between Heat and Control
A cheap iron can get hot. A toaster can get hot. A meteorite can get very hot. That does not make any of them a precision electronics tool. What matters is control. A useful soldering station measures tip temperature, responds to changes, and sends enough power to maintain stability without overshooting wildly.
Commercial stations use carefully engineered feedback systems. Homebrew builders must recreate that behavior through good sensing, firmware, calibration, and hardware layout. A station that displays 350°C but actually delivers 420°C at the tip is not “powerful.” It is a tiny chaos machine with a cable.
The Thermocouple Mystery: Not Every Tip Tells the Same Story
One fascinating part of the original Homebrew Not A Hakko project was the temperature-sensing detective work. The builder discovered that online information about the Hakko T12 tip sensor was inconsistent. Some people claimed the built-in thermocouple behaved like Type K. Others said it did not, but stopped there, which is roughly as helpful as a map labeled “somewhere.”
To investigate, the builder compared measurements from the T12 tip against known thermocouple behavior and external temperature readings. By heating oil and comparing voltage readings, he concluded that the sensor response did not match a Type K thermocouple and appeared closer to another type or custom material behavior. The broader lesson is more important than the label: when building a temperature-controlled tool, assumptions can ruin accuracy.
Thermocouples create tiny voltages based on temperature differences. Those voltages are small, nonlinear, and sensitive to reference-junction temperature. That is why serious designs often require amplification, analog-to-digital conversion, cold-junction compensation, filtering, and calibration. In a soldering station, the sensor reading becomes the brain’s view of reality. If that view is wrong, the firmware may confidently control the wrong temperature. Confidence is charming in people. In thermal control loops, it can be expensive.
Key Design Goals for a Smart Homebrew Soldering Station
A well-designed homebrew soldering station should be more than a box with a knob and a glowing number. The best projects start with clear goals. The original project included ideas such as compact size, external power from a broad voltage range, a backlit display, rotary encoder controls, T12 tip support, motion-based standby, PCB temperature monitoring, audio alerts, and usage statistics. That is an ambitious list, but it shows what makes a modern soldering station feel smart.
1. Compact Size Without Cramped Thinking
Small tools are great on a crowded bench. The problem is that small enclosures punish sloppy layout. Power handling, heat dissipation, connectors, display placement, and safe strain relief all need attention. A tiny station should still be easy to read, easy to adjust, and stable enough that tugging the iron cord does not drag it across the desk like an excited puppy.
2. External DC Power
Many homebrew designs use external DC power supplies instead of putting mains voltage inside the station. This can make the project simpler and safer, especially for hobbyists who are not trained to design mains-powered equipment. A DC input range, such as 9V to 30V in the original project goals, gives flexibility. The station can run from a bench supply, laptop-style adapter, or suitable battery system, depending on the design.
However, power flexibility does not remove responsibility. A soldering iron draws real current. Undersized adapters, thin wires, poor connectors, and bargain-bin power modules can cause voltage drops, heat, or shutdowns. The power system should be treated as part of the tool, not as an afterthought hiding behind the curtain.
3. Display and User Interface
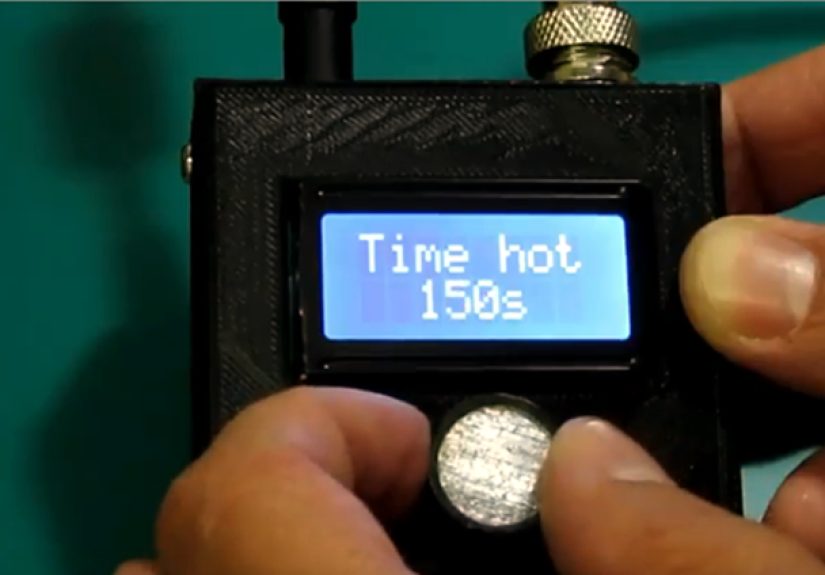
A small LCD or OLED display can show set temperature, measured temperature, input voltage, standby status, error messages, and statistics. A rotary encoder is a practical control because it lets users adjust values quickly without turning the interface into a button-mashing workout.
Good interface design keeps common actions simple. Set temperature should be obvious. Standby should be visible. Alarms should be understandable. Nobody wants a soldering station that throws cryptic codes like “ERR-7B” while the user wonders whether it means “tip unplugged” or “summon an electrician.”
4. Motion-Based Standby
Motion sensing is one of those features that sounds fancy until you use it, then it feels obvious. If the iron has not moved for a while, the station can lower the temperature to reduce oxidation, save energy, and improve safety. When the iron is picked up again, the controller can return to working temperature.
Modern soldering tools, including USB-C smart irons, often include sleep modes, motion sensing, or automatic standby. A homebrew station can do something similar with an accelerometer or vibration sensor. The real trick is tuning the behavior so it saves the tip without annoying the user. If the iron falls asleep every time you pause to find tweezers, the station becomes less smart and more passive-aggressive.
How It Compares With Commercial Hakko Stations
A commercial Hakko station earns its reputation through reliability, safety, thermal performance, parts availability, and years of refinement. For example, official Hakko specifications for models such as the FX-951 list a temperature range around 200°C to 450°C, while other popular stations like the FX-888D are known for broad temperature control and fast heat recovery. These tools are designed to work day after day, not just survive one triumphant YouTube demo.
A homebrew station can be excellent, but it should be judged honestly. Does it heat quickly? Does it hold temperature under load? Does it overshoot? Does it recover after touching a large copper area? Does it enter standby reliably? Does it warn about overheating? Is the handle comfortable? Are the connectors durable? Can tips be changed without drama? Does the enclosure protect the electronics and the user?
The goal is not to beat Hakko at being Hakko. The goal is to build a tool that fits your own bench, teaches you something, and performs well enough for real work. In that sense, “not a Hakko” is not an insult. It is a badge of maker honesty.
Soldering Quality: The Tool Helps, But Technique Still Matters
Even the best soldering station cannot rescue bad technique forever. Clean surfaces, the right tip size, fresh solder, useful flux, proper temperature, and good timing all matter. Educational soldering guides often recommend temperature-controlled irons, clean and tinned tips, and avoiding abrasive cleaning methods that damage tip plating.
A good solder joint usually looks smooth, shiny, and slightly concave around the lead and pad. The main idea is to heat both surfaces so solder flows between them. If solder balls up, refuses to wet, or forms a dull lump, the problem may be oxidation, insufficient heat transfer, dirty surfaces, poor flux, or moving the joint before it cools.
Tip Shape Matters More Than Beginners Expect
Many beginners obsess over wattage and ignore tip geometry. A fine conical tip looks precise, but it may transfer heat poorly to larger pads. A small chisel or bevel tip often works better for general electronics because it provides more contact area. T12-style systems shine here because there are many tip shapes for different jobs: conical for fine work, chisel for through-hole joints, bevel for drag soldering, knife tips for certain surface-mount tasks, and larger tips for heavier copper.
Choosing the right tip is like choosing the right spoon. You can eat soup with a fork if you are determined, but nobody will respect your schedule.
Safety: Hot Tools, Flux Fumes, and Common Sense
A soldering iron is simple, but it is still a hot electrical tool. Tip temperatures commonly sit in the 300°C to 400°C range during electronics work. That is more than enough to burn skin, scorch surfaces, and damage plastics. Always use a stable stand, keep flammable materials away, avoid touching the metal shaft or tip, and unplug or power down the station when finished.
Flux fumes deserve respect too. The smoke you see while soldering usually comes mostly from heated flux, not boiling metal. Rosin-based flux fumes can irritate the eyes and respiratory system, and workplace safety references treat rosin flux decomposition products as an exposure concern. Good ventilation or local fume extraction is not optional bench bling; it is part of responsible soldering.
Lead-containing solder also requires careful hygiene. Do not eat at the soldering bench, do not touch your face while working, and wash hands thoroughly after handling solder or old electronics. Lead-free solder removes one concern but often requires slightly different technique and may need higher working temperatures or more active flux. Either way, clean habits are cheaper than medical surprises.
Why Makers Build Tools Instead of Just Buying Them
Buying a ready-made soldering station is practical. Building one is educational. The homebrew path teaches temperature sensing, power electronics, firmware logic, user interface design, calibration, mechanical design, and failure analysis. It also teaches humility, usually right after the first enclosure cutout ends up two millimeters too far left.
There is also emotional value. A self-built station turns every repair into a small victory lap. When you use your own tool to fix a board, you are not only repairing the device in front of you. You are proving that your earlier problem-solving created something useful. That feeling is hard to put on a product page.
Practical Lessons From the Homebrew Not A Hakko Idea
The biggest lesson is that parts are not magic. A Hakko-style tip does not automatically create Hakko-like performance. A bright display does not guarantee accuracy. A powerful supply does not guarantee stable control. A firmware menu does not mean the thermal model is correct. Every part of the system must support the same goal: reliable, predictable heat at the solder joint.
Another lesson is that measurement matters. The builder who questioned the T12 thermocouple type did the right thing: he tested instead of trusting random posts. The internet is full of useful knowledge, but it is also full of confident guesses wearing a fake mustache. When building a tool, verify the important assumptions.
Finally, the project shows that a soldering station is not just a heater. It is a complete system. The handle, tip, sensor, power stage, enclosure, display, firmware, connector, stand, cable flexibility, and safety features all affect the experience. A great station disappears into the workflow. A bad one makes every joint feel like a tiny courtroom argument.
Experience Section: What Building and Using a “Not A Hakko” Teaches You
The first experience most people have with a homebrew soldering station is excitement followed immediately by suspicion. The display lights up, the number climbs, the tip gets hot, and for about five seconds you feel like a wizard. Then the practical questions arrive. Is the displayed temperature real? Why does the handle feel warmer than expected? Why does the tip recover slowly on a ground plane? Why does the station beep like it has opinions?
That is where the real learning begins. A homemade station forces you to pay attention to the details commercial tools hide. You start noticing how much difference a tip shape makes. A skinny conical tip may be perfect for touching a tiny resistor pad, but it struggles with a chunky connector tied to a large copper pour. Switch to a chisel tip and suddenly the same joint behaves. It feels less like soldering and more like convincing physics to stop being dramatic.
Calibration is another memorable experience. Many builders begin by trusting the thermocouple reading or firmware table, only to discover that the tip temperature is not exactly what the screen claims. A few degrees may not matter for casual work, but large errors can affect joint quality and component safety. Comparing the station against a known reference, checking behavior at several temperatures, and watching recovery under load can reveal whether the controller is genuinely useful or merely decorative.
Then comes standby tuning. On paper, automatic sleep is easy: if the iron stops moving, lower the temperature. In real use, timing is everything. Too aggressive, and the iron cools while you are positioning a component. Too slow, and the feature barely protects the tip. The best setting feels invisible. The iron waits patiently during short pauses, sleeps during long pauses, and wakes before you can complain. That is when a homebrew station starts to feel like a real bench companion.
The enclosure teaches its own lessons. A project can work perfectly as a naked PCB on the bench, then become awkward once placed in a box. Buttons may sit too close to the edge. The display angle may be wrong. The connector may interfere with the stand. The cable may pull the station around. Suddenly, mechanical design becomes just as important as the circuit. Many makers learn that the “last 10 percent” of a tool build is actually 40 percent, wearing a fake nose and glasses.
Using the finished station also changes how you think about commercial tools. You appreciate why a Hakko, Weller, JBC, iFixit FixHub, Pinecil, or other polished tool costs what it costs. You see the value of reliable connectors, safe stands, good grips, clear menus, stable control, replacement tips, and documentation. At the same time, you appreciate the freedom of your own build. Maybe your station runs from a battery. Maybe it has a custom startup screen. Maybe it logs usage statistics. Maybe it plays a tiny beep that says, in spirit, “I am ready; please stop scrolling and solder something.”
The most rewarding experience is using the homebrew station to complete another project. The tool stops being the project and becomes part of the workshop. It fixes a loose cable, solders headers onto a dev board, repairs a toy, replaces a capacitor, or helps assemble a sensor module. That moment is the payoff. The station is not a Hakko, and it does not need to be. It is yours, it works, and it has probably taught you more than a shopping cart ever could.
Conclusion: Not A Hakko, Still A Great Maker Story
Homebrew Not A Hakko is more than a clever headline. It captures the playful seriousness of DIY electronics. A maker looked at a professional tool category, chose respected components, questioned confusing information, tested assumptions, and built a compact soldering station with smart features. That is exactly what makes hardware hacking so addictive.
For readers thinking about their own soldering setup, the takeaway is simple: buy a quality commercial station if you need dependable performance right away. Build a homebrew station if you want to learn deeply, experiment responsibly, and understand what makes a good tool good. Either path can lead to better solder joints, cleaner repairs, and fewer moments where a component launches into the carpet dimension.
The best soldering iron is not always the most expensive one. It is the one that gives you controlled heat, suits your work, keeps you safe, and makes you want to build more. If it happens to be homebrewed, compact, slightly nerdy, and proudly not a Hakko, that is not a flaw. That is the charm.
Note: This article is for educational and informational web publishing. Soldering involves high temperatures, electrical power, and flux fumes, so readers should use proper ventilation, safe power supplies, stable stands, and responsible work habits.


