Table of Contents >> Show >> Hide
- Why You Should Shape Eyebrows Before Waxing
- Tools You’ll Want Nearby
- How to Shape Eyebrows Before Waxing: 15 Steps
- Step 1: Start with clean, makeup-free skin
- Step 2: Make sure your skin is calm before you do anything
- Step 3: Brush the brow hairs into place
- Step 4: Study your natural brow line before trying to improve it
- Step 5: Map where the brow should begin
- Step 6: Find the highest point of the arch
- Step 7: Mark where the tail should end
- Step 8: Connect the dots with a soft outline
- Step 9: Keep the fronts soft
- Step 10: Trim only the hairs that truly stick out
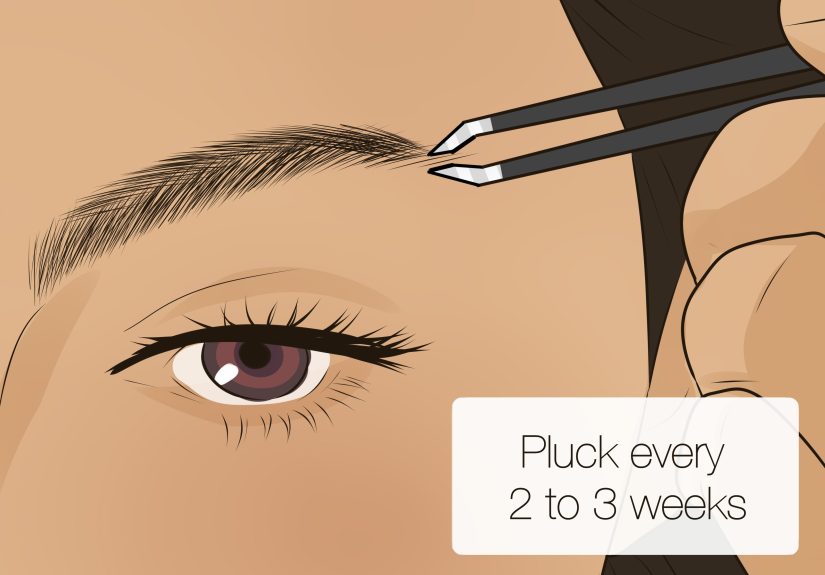
- Step 11: Tweeze obvious strays outside the map
- Step 12: Step back from the mirror and compare both brows
- Step 13: Fill lightly to preview the finished shape
- Step 14: Decide exactly what the wax should remove
- Step 15: Pause and check your skin, products, and timing one last time
- Extra Tips for Better Eyebrow Shaping Before Waxing
- Common Mistakes to Avoid
- What to Do Right After Waxing
- Who Should Be More Careful Before Brow Waxing?
- Final Thoughts
- Experiences and Lessons From Shaping Eyebrows Before Waxing
If your eyebrow routine usually begins with courage, a magnifying mirror, and a speech that sounds suspiciously like “I’ll only remove one little hair,” welcome. You are among friends. Shaping eyebrows before waxing is the part that decides whether your brows look polished, natural, and face-framingor like they got into a small but dramatic disagreement with your face.
The good news is that shaping your eyebrows before waxing does not have to feel like advanced geometry mixed with mild panic. With the right prep, a steady plan, and a healthy respect for your natural brow line, you can create a clean guide that makes waxing easier, safer, and far less likely to end in regret. This step-by-step guide walks you through exactly how to shape eyebrows before waxing, including brow mapping, trimming, cleanup, common mistakes, and practical tips for getting a soft, balanced result.
Whether your brows are thick, sparse, straight, curly, or currently recovering from a bad decision made under fluorescent bathroom lighting, these 15 steps will help you shape them with more confidence and fewer “oops” moments.
Why You Should Shape Eyebrows Before Waxing
Waxing removes multiple hairs at once, which is exactly why it is efficient and exactly why it can go sideways fast. Shaping first gives you a visual plan. Instead of waxing blindly, you decide where the brow should begin, where the arch should sit, and where the tail should end. That makes the wax a cleanup toolnot a surprise plot twist.
Pre-shaping also helps you avoid common brow mistakes like taking too much off the tail, making the fronts too far apart, over-lifting the arch, or creating two completely different eyebrows that suddenly need “sisters, not twins” to do a lot of heavy lifting.
Tools You’ll Want Nearby
- A spoolie brush
- Small brow scissors
- A brow pencil
- Slant-tip tweezers
- A clean cotton pad or tissue
- Gentle cleanser
- Good lighting, ideally natural light
- A regular mirror, not a magnifying mirror for every step
You do not need a giant beauty arsenal. You need a few clean, precise tools and the emotional maturity to stop before removing “just one more.”
How to Shape Eyebrows Before Waxing: 15 Steps
Step 1: Start with clean, makeup-free skin
Wash your face gently and remove brow makeup, sunscreen residue, and skincare buildup from the eyebrow area. Clean skin lets you see your real shape more clearly and helps wax adhere better later. If your brows are coated in gel, pencil, or skin cream, your shape can look different than it really is.
Step 2: Make sure your skin is calm before you do anything
Do not shape or wax over skin that is sunburned, broken, peeling, irritated, or freshly exfoliated. If the area feels sensitive, looks red already, or stings when you touch it, that is your cue to postpone the mission. Also be cautious if you use retinol or prescription retinoids on your face. Skin treated with those ingredients can be more delicate, which makes facial waxing riskier.
Step 3: Brush the brow hairs into place
Use a spoolie to brush the hairs upward and outward. This simple step shows the true density of your brows, reveals gaps, and makes it easier to see which hairs actually belong to the shape. A messy brow can look larger than it is, so brush first before deciding what counts as a stray.
Step 4: Study your natural brow line before trying to improve it
Before you start drawing ideal arches inspired by people who were blessed by the eyebrow gods, take a minute to look at your real brow bone and existing shape. Your best eyebrow shape usually follows your natural structure. That does not mean you cannot refine it. It means you should work with it instead of fighting it like it insulted your family.
Step 5: Map where the brow should begin
Take your brow pencil and hold it vertically from the side of your nose up toward the inner corner of your eye. Where that line meets your brow is your ideal starting point. Mark it lightly. This step helps keep the fronts from drifting too close together or being over-plucked into startled little commas.
Step 6: Find the highest point of the arch
Angle the pencil from the side of your nose through the center or outer edge of your iris while looking straight ahead. Where the line crosses your brow is usually where the arch should peak. Mark that point softly. The goal is not to create a dramatic mountain range. The goal is a natural lift that flatters your features.
Step 7: Mark where the tail should end
Now angle the pencil from the side of your nose to the outer corner of your eye. Where that line hits the brow is where the tail should end. This matters more than people realize. When the tail is too short, brows can look unfinished. When it is too long or droopy, the whole face can seem visually dragged downward.
Step 8: Connect the dots with a soft outline
Lightly sketch the top and bottom edges of each brow with your brow pencil. Do not create a thick stencil unless you are purposely using one. A thin guide is enough. The outline gives you a visual boundary so you know which hairs belong to the shape and which ones are fair game for cleanup before waxing.
Step 9: Keep the fronts soft
The inner part of the brow should usually look softer and fluffier than the arch and tail. Avoid boxing in the front too harshly. A rigid front can make the brows look severe, even if the rest of the shape is fine. Think feathered and natural, not “I stamped these on in a hurry before a villain monologue.”
Step 10: Trim only the hairs that truly stick out
Brush the brow hairs upward. If a few hairs extend far beyond the top edge of your desired shape, trim only the tips with small brow scissors. Then brush the hairs downward and snip any overly long strays beneath the line. Trim conservatively. Brows usually need less cutting than people think, and over-trimming can create patchy spots that take time to grow back.
Step 11: Tweeze obvious strays outside the map
Before waxing, remove only the most obvious rogue hairs that sit clearly outside your outline. This is not the time to go digging into the main body of the brow. Tweezing a few strays first helps you see the final shape more accurately and reduces the temptation to use wax as a bulldozer.
Step 12: Step back from the mirror and compare both brows
Do not judge your brows from two inches away. Lean back and look at your whole face. Check whether the brows start at similar points, rise in roughly the same place, and end with comparable length. They do not need to match perfectly. Eyebrows are sisters, not clones made in a secret eyebrow lab. But they should look balanced from a normal viewing distance.
Step 13: Fill lightly to preview the finished shape
Use a brow pencil or powder to fill sparse areas within your outline. This preview helps you decide whether the shape feels right before wax touches your skin. Sometimes a brow seems uneven because of sparse spots, not because it actually needs more hair removed. Makeup can save you from overcorrecting.
Step 14: Decide exactly what the wax should remove
Once your shape is mapped and lightly filled, identify only the hair outside the finished brow line that the wax should take away. Usually that means the obvious strays under the arch, between the brows, and sometimes a few hairs at the tail. Keep the top line conservative unless a few clear outliers disrupt the shape. Most at-home brow disasters happen because people wax too much from the top or tail.
Step 15: Pause and check your skin, products, and timing one last time
Before waxing, ask yourself three quick questions. Is my skin calm? Have I avoided retinoids, strong exfoliants, or harsh acne products recently? Am I shaping with patience instead of revenge? If the answer to any of those is no, wait a day or two. A delayed wax is annoying. A damaged patch of facial skin is much worse.
Extra Tips for Better Eyebrow Shaping Before Waxing
Use natural light whenever possible
Direct natural light shows the true color and density of your brows and makes it easier to spot asymmetry. Overhead bathroom lighting often creates shadows that confuse the shape.
Be extra careful with the tail
The tail of the brow is where people often remove too much. A too-short tail can make the brow look stubby and unfinished. Keep more length than you think you need, then refine slowly.
Do not rely on trends more than structure
Straight brows, ultra-arched brows, fluffy brows, laminated browstrends come and go. Your brow bone and hair growth pattern are not obligated to participate in every trend cycle. A polished version of your natural shape usually looks best in real life.
Avoid over-tweezing between waxes
If you constantly “tidy up” every tiny regrowth, it becomes harder to see your real pattern. Let the brows grow in enough that you can map them accurately next time.
Common Mistakes to Avoid
- Shaping while wearing heavy brow makeup
- Using a magnifying mirror for the entire process
- Removing too much from the inner corners
- Creating an arch that is too high for your natural brow line
- Cutting too many hairs during trimming
- Waxing over irritated or freshly exfoliated skin
- Ignoring skincare products that make skin more sensitive
- Trying to make both brows perfectly identical
What to Do Right After Waxing
Once your brows are shaped and waxed, keep the area calm. Skip harsh exfoliants, aggressive rubbing, and heavy fragrance right away. If the skin feels warm or looks pink, use a cool compress and a gentle moisturizer. Avoid picking at the area or layering on strong active ingredients immediately after waxing. Your skin just went through a tiny drama. Let it recover with dignity.
Who Should Be More Careful Before Brow Waxing?
You should be especially cautious if you have sensitive skin, eczema around the brow area, active acne near the brows, recent sunburn, or a history of strong reactions to waxing. People using retinoids or other strong exfoliating products should also slow down and read product instructions carefully before any facial waxing. If your skin is reactive, having your brows shaped by a skilled professional may be the safer move.
Final Thoughts
Learning how to shape eyebrows before waxing is less about chasing a perfect brow and more about creating a smart plan. When you clean the skin, map the shape, trim conservatively, and preview the finished result before waxing, you dramatically lower your odds of overdoing it. Your brows stay fuller, your shape looks more natural, and your face still resembles your face, which is always a nice outcome.
The biggest secret is this: great brows are usually edited, not reinvented. A little structure, a little restraint, and a little stepping away from the mirror can take you very far. And if you ever feel the urge to remove one more hair after everything already looks good, that is usually your sign to put the tweezers down and go have a snack.
Experiences and Lessons From Shaping Eyebrows Before Waxing
One of the most common experiences people have with eyebrow shaping before waxing is realizing that the brows they thought were “uneven” were not actually uneven at all. They were simply growing in differently, or one brow had a few sparse spots that made it look flatter than the other. Once a person fills those sparse areas lightly with pencil before waxing, the shape suddenly makes more sense. This is why previewing the brow matters so much. It helps you distinguish between hair that should stay and hair that truly belongs outside the line.
Another very real experience is the classic over-correction spiral. You remove a few hairs from one brow, then try to “match” the other, then go back to the first one, and suddenly both brows are thinner than planned. Many people learn the hard way that shaping should be done slowly, with breaks. Looking at each brow separately for too long can make tiny differences seem enormous. Stepping back from the mirror often fixes that mental distortion immediately.
People with thick brows often report a different challenge: they assume waxing alone will clean everything up, but without trimming and brushing first, the result can still feel bulky or messy. Once they start brushing brow hairs upward and trimming only the longest tips, the finished shape looks softer and more polished without losing fullness. In other words, thickness is not the enemy. Lack of preparation usually is.
Those with sparse or over-tweezed brows tend to have the opposite experience. They may approach shaping too aggressively because they want stronger definition right away. But removing more hair rarely solves sparseness. In fact, many people say their best eyebrow results came when they stopped trying to carve out a dramatic arch and instead let the brows grow in for several weeks, using pencil or powder to fake the structure in the meantime. Patience is not glamorous, but it works.
Sensitive skin also teaches valuable lessons. Some people discover that the issue is not the waxing itself, but what they used on their face the night before. Retinol, exfoliating acids, acne treatments, and even harsh scrubs can leave the skin more vulnerable than expected. After one rough experience with redness or lifted skin, many become much more careful about timing, product use, and patch testing. It is not the most exciting beauty revelation, but it is a wise one.
Probably the biggest takeaway from real-life brow shaping is that natural structure wins almost every time. The brows that look best are usually not the trendiest or the most dramatic. They are the ones that suit the face, follow the brow bone, and keep enough fullness to look believable. People often start out wanting perfect brows and end up wanting brows that simply look clean, balanced, and easy to maintain. Honestly, that is a much better goal.


