Table of Contents >> Show >> Hide
- Quick Diagnosis: What’s Wrong (and Why) in 2 Minutes
- Tools and Supplies That Make This Easier
- Step 1: Clean the Track Like You Mean It
- Step 2: Adjust the Rollers (The Fix That Solves a Lot)
- Step 3: Remove the Sliding Panel (When Cleaning and Adjusting Aren’t Enough)
- Step 4: Clean, Lubricate, or Replace Sliding Door Rollers
- Step 5: Fix a Worn or Damaged Track (Without Replacing the Whole Door)
- Step 6: Fix a Sliding Door That Won’t Lock
- Step 7: Replace Weatherstripping to Stop Drafts, Rattles, and Bugs
- Step 8: Repair the Screen Door (Because Mosquitoes Love Your Home)
- Step 9: Reinstall, Fine-Tune, and Do a “Door Test Drive”
- When to Call a Pro (and Feel Completely Fine About It)
- Preventive Maintenance: Keep It Sliding Smoothly
- Real-World Experiences: What People Learn After Repairing a Sliding Door
- 1) “I cleaned the track… and it still stuck.”
- 2) “The lock was ‘broken’… but the door was just sagging.”
- 3) “Replacing rollers was easy… until I had to buy the right ones.”
- 4) “I used the wrong lubricant and my track turned into a dirt magnet.”
- 5) “The screen door was the real villain all along.”
- 6) “Once it worked, I realized maintenance is the secret.”
- Conclusion
A sliding door should glide like it’s late for brunchsmooth, quiet, and not picking a fight with you every time you
want fresh air. If yours sticks, grinds, rattles, or refuses to lock, the good news is that most sliding door repairs
come down to three things: gunk, rollers, and alignment. The even better news?
You can fix a lot of it with basic tools, a little patience, and the confidence to say, “Not today, Door Drama.”
This guide walks you through diagnosing the issue, cleaning the track properly, adjusting or replacing patio door rollers,
fixing a sliding door lock that won’t catch, replacing weatherstripping, and even rescuing a saggy screen door.
Quick Diagnosis: What’s Wrong (and Why) in 2 Minutes
Before you start unscrewing things like you’re on a home-improvement game show, match the symptom to the likely cause:
| Symptom | Most Common Cause | Best First Fix |
|---|---|---|
| Door is hard to slide / feels “gritty” | Dirt in the track, dry rollers, worn rollers | Deep-clean track + silicone lube; adjust rollers |
| Door drags at the bottom / rubs the frame | Rollers out of adjustment, door out of level | Adjust roller height to re-level the panel |
| Door wobbles or rattles | Rollers set too low, loose hardware | Raise rollers slightly; tighten handle/fasteners |
| Won’t lock / latch doesn’t line up | Door height/level off; strike plate misaligned | Adjust rollers; reposition strike plate |
| Drafts, water, or bugs getting in | Worn weatherstripping, poor seal, dirty track | Replace weatherstripping; clean & align door |
| Screen door sags or screen is torn | Loose rollers/springs, damaged screen material | Adjust screen rollers; re-screen panel |
If you’re dealing with shattered glass, a bent frame, severe rot, or a door that looks like it was installed during a full moon,
you may want professional help. But for everyday “my door hates me” problems, keep going.
Tools and Supplies That Make This Easier
Basic tools
- Vacuum (shop vac is ideal) + crevice tool
- Putty knife (or stiff plastic scraper)
- Rags or paper towels
- Screwdrivers (Phillips and flathead; long-shaft helps)
- Allen key/hex key (some doors use these for adjustments)
- Soft brush or old toothbrush
- Gloves + eye protection
Helpful extras (depending on your issue)
- Denatured alcohol (for cutting sticky grime)
- Silicone-based lubricant (spray or liquid)
- Replacement rollers (patio door rollers / roller assemblies)
- New weatherstripping (correct profile for your door)
- Fine file or sandpaper (for small burrs on track)
- Screen spline + spline roller tool (if repairing the screen)
Lubricant note: You want a product that helps parts glide without turning your track into a lint magnet.
Silicone-based lubricants are popular for sliding door track maintenance because they don’t stay tacky like some oils and greases.
Step 1: Clean the Track Like You Mean It
Most sticky sliding doors aren’t “broken.” They’re just trying to slide over a crunchy trail mix of sand, pet hair, pollen,
and whatever else has been living in the track rent-free.
Deep-clean method (worth the extra 5 minutes)
- Vacuum the track thoroughly. Get into corners and along both rails.
- Scrape stubborn buildup. Use a putty knife to lift packed dirt and old residue.
- Wipe until clean. Use a rag dampened with denatured alcohol (or a mild cleaner) to remove remaining grime.
- Check the full length. Pay extra attention where the door “hangs up”that’s usually where the dirt is thickest.
Small but mighty check
Look for tiny pebbles, metal burrs, or dents in the rail. Even a small raised edge can feel like a speed bump when the rollers hit it.
If you find a burr, gently smooth it with a fine file. Don’t go wildyou’re polishing, not reshaping.
Step 2: Adjust the Rollers (The Fix That Solves a Lot)
Sliding doors ride on rollers at the bottom of the movable panel. If the door is dragging, rubbing, or refusing to latch,
the rollers are often the reason. Roller adjustment screws are typically near the bottom corners of the sliding panel,
sometimes hidden behind small plastic caps or plugs.
How to adjust roller height safely
- Find the adjustment access. Look along the bottom edge or lower side edge of the sliding panel. Pop out any plastic plug if present.
- Use a hand screwdriver (not a drill). Slow control beats stripped screws every time.
- Turn in small increments. Quarter-turns are your friend.
-
Watch the gap (“reveal”). The vertical gap between the door edge and the frame should look even from top to bottom.
If the top gap is wider than the bottom (or vice versa), adjust one side until it’s consistent. - Test slide + latch. After a few small adjustments, slide the door and check if it locks smoothly.
Typical direction: On many doors, turning the screw clockwise raises that corner and counterclockwise lowers it.
But designs varyso confirm by observing whether the panel lifts or drops as you turn.
If the door wobbles
A shaky sliding panel often means the rollers are set too low, leaving the door loose in the frame. Raise the rollers slightly
until the door feels stable but still glides smoothly.
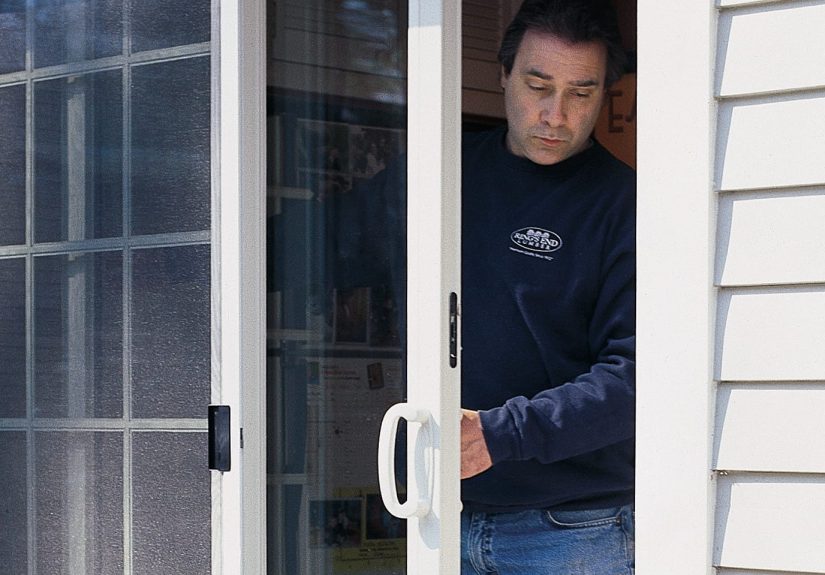
Step 3: Remove the Sliding Panel (When Cleaning and Adjusting Aren’t Enough)
If your rollers are worn, cracked, or just refusing to spin like they’re supposed to, you’ll need to remove the sliding panel.
This is very doablejust respect the fact that glass doors are heavy and awkward. If you can recruit a helper, do it.
Safe removal basics
- Retract the rollers fully. Turn the roller adjustment screws to lower the rollers and create clearance.
- Remove the head stop (if present). Many doors have a stop or trim piece at the top that prevents removal. Unscrew it.
- Lift and tilt. Slide the panel partway open, lift it up into the top track, then tilt the bottom toward you to clear the lower track.
- Set it down gently. Place the panel on padded sawhorses or a blanket on a flat surface.
Safety tip: Wear gloves and eye protection. Keep kids and pets away from the work area. A sliding panel doesn’t need an audience.
Step 4: Clean, Lubricate, or Replace Sliding Door Rollers
Option A: Clean and lubricate rollers
If rollers are intact and spin freely after cleaning, you may be able to restore smooth movement without replacing parts.
- Inspect the rollers. Look for flat spots, cracks, bent housings, or wheels that barely turn.
- Clean thoroughly. Wipe off grime with alcohol and a rag; brush out stubborn dirt.
- Lubricate lightly. Apply silicone-based lubricant to the wheel/axle area (avoid soaking everything).
Option B: Replace worn rollers (often the “new door” feeling fix)
Roller replacement is common because rollers wear faster than most other sliding door parts. The key is getting the right match.
- Identify the door manufacturer. Look for a stamp/etching on hardware or a corner of the glass panel.
- Measure the roller. Note wheel diameter, roller type (concave/flat), and housing dimensions.
- Remove the old roller assembly. This usually involves removing screws and sliding the assembly out of its pocket.
- Install the new rollers. Seat them firmly in the pocket and secure screws snugly (not “gorilla tight”).
- Reinstall the door and adjust. Put the panel back in, then fine-tune roller height until the door slides and seals properly.
Common mistake to avoid
Don’t buy rollers “that look close enough” without measuring. A small mismatch can make the door bind, wobble,
or chew up the track. When in doubt, remove one roller and match it precisely.
Step 5: Fix a Worn or Damaged Track (Without Replacing the Whole Door)
Tracks take a beating. Dirt acts like sandpaper. Worn rollers act like tiny demolition machines. Over time, tracks can develop grooves,
dents, or rough spots that cause sticking.
Start with the simple track fixes
- Remove debris and buildup (yes, againtracks love collecting chaos).
- Smooth minor burrs with a fine file.
- Check for dents that interrupt the roller path. Small dents can sometimes be carefully coaxed back, but deep damage may need a track repair solution.
When a track cover or repair cap makes sense
If your aluminum track is deeply grooved where the rollers ride, a track repair cap/cover can provide a new running surface without a full frame replacement.
This is especially helpful when the door is otherwise in good shape but the “road” it rides on is wrecked.
When to stop DIY-ing the track
If the door frame is out of square, the track is separating, or water is consistently entering at the sill, you may have an installation or structural issue.
At that point, the right repair may involve frame realignment or replacement.
Step 6: Fix a Sliding Door That Won’t Lock
A lock that won’t catch is usually an alignment problemnot a “the lock is cursed” problem. The latch tongue has to meet the strike plate opening.
If the door has sagged, the latch may hit too high or too low.
Fix #1: Re-level the door (roller adjustment)
If the latch is barely missing the strike plate, adjust the rollers until the door sits square and the latch meets the opening cleanly.
This is often the fastest fix.
Fix #2: Adjust the strike plate
- Locate the strike plate. It’s on the frame where the latch engages.
- Remove any cover/cap. Some designs pop off with a putty knife to reveal adjustment screws.
- Loosen the screws slightly. You typically can move the strike plate up or down.
- Reposition and retighten. Move it so the latch engages smoothly, then secure it and test.
Quick security upgrades (simple, effective)
- Sliding door security bar in the track (fast, strong, renter-friendly).
- Pin lock (adds a secondary locking point).
- Better weatherstripping (also helps reduce “door wiggle” that can stress the lock).
Step 7: Replace Weatherstripping to Stop Drafts, Rattles, and Bugs
Weatherstripping is the unsung hero of sliding doors. When it wears out, your door may still slide finebut you’ll feel drafts,
see daylight where daylight shouldn’t be, or notice the door rattling in wind.
Simple replacement steps
- Remove old weatherstripping. Pry carefully with a putty knife so you don’t damage the channel.
- Clean the surface. Adhesive and dirt reduce the seal of new material.
- Install the new weatherstrip. Cut to length and press into place per the product design (adhesive-backed or channel-fit).
- Check the seal. Close the door and confirm an even, snug contact along the full length.
Pro move: If the new weatherstrip feels “too tight,” don’t immediately blame the material.
Re-check roller height and door alignmentan out-of-plumb door can make any seal feel wrong.
Step 8: Repair the Screen Door (Because Mosquitoes Love Your Home)
Sliding screen doors commonly sag, derail, or get torn. The frame is lightweight, which is great for your arms and terrible for durability.
Luckily, screen repairs are typically straightforward and budget-friendly.
Common screen door repairs
- Derailing or sagging: Adjust screen rollers (similar idea to the main door, just lighter hardware).
- Torn screen: Replace the mesh using new screen and spline (or patch small holes).
- Hard to slide: Clean the screen track and add a light silicone lubricant to rollers.
Picking screen material (quick guide)
- Fiberglass: Easier to work with, common choice for DIY.
- Aluminum: Stronger but can be trickier to install and may cost more.
- Pet-resistant mesh: Great if claws and zoomies are part of your household ecosystem.
Step 9: Reinstall, Fine-Tune, and Do a “Door Test Drive”
Once rollers are cleaned or replaced, the final outcome depends on alignment. A sliding door can have brand-new parts and still feel awful
if it’s sitting crooked.
Reinstallation checklist
- Set the top first. Lift the panel into the top track, then swing the bottom in and set it onto the lower track.
- Reinstall the head stop. If you removed it, put it back before the door auditions for an escape act.
- Adjust rollers for smooth glide. Raise or lower corners until the door is parallel to the jamb and moves easily.
- Confirm the latch and lock. If it doesn’t engage, tweak roller height or strike plate position.
- Listen for grinding. If you still hear scraping, re-check the track for burrs and confirm rollers are seated correctly.
When to Call a Pro (and Feel Completely Fine About It)
DIY is greatuntil it stops being great. Consider professional service if:
- The frame is severely out of square or visibly warped
- The door has cracked glass or compromised structural integrity
- Water intrusion persists after cleaning, sealing, and alignment
- You can’t source compatible replacement rollers or hardware
- The track/frame requires major structural correction
Sometimes the smartest repair is preventing the “small problem” from becoming “why is my flooring bubbling?”
Preventive Maintenance: Keep It Sliding Smoothly
- Monthly: Vacuum the track and wipe out debris.
- Every 6 months: Lightly lubricate rollers and track with silicone-based lubricant.
- Seasonally: Inspect weatherstripping, tighten loose screws, and confirm the door still locks smoothly.
- Any time it feels “off”: Adjust rollers earlysmall alignment issues get worse when ignored.
Real-World Experiences: What People Learn After Repairing a Sliding Door
The mechanical steps are one thing. The real wisdom comes from the little surprises that show up once you’re actually doing it.
Below are common experiences homeowners and repair pros often describeso you can skip the frustration and go straight to the win.
1) “I cleaned the track… and it still stuck.”
This is probably the #1 emotional plot twist. The track looks cleaner, you feel victorious, and then the door still grinds like it’s chewing gravel.
What’s usually happening is that the rollers have flat spots or the track has a deep groove right where the rollers ride most often.
Sliding doors don’t use the whole track evenlythey wear one “lane” like a favorite highway commute. In these cases, cleaning helps,
but the real breakthrough comes from either replacing the rollers or addressing track wear (sometimes with a repair cap).
2) “The lock was ‘broken’… but the door was just sagging.”
Many people assume a lock that won’t latch means the lock is bad. But the latch and strike plate only meet properly when the door is level.
If one roller has dropped even slightly, the latch tongue can hit above or below the strike opening. A few careful roller adjustments can make
the lock magically “work again,” which feels suspiciously like sorcery until you realize it’s just geometry. If roller tweaks don’t do it,
moving the strike plate a small amount is often the finishing touch.
3) “Replacing rollers was easy… until I had to buy the right ones.”
The physical replacement can be straightforward; the shopping can be the headache. Roller assemblies vary by brand, door era,
wheel diameter, housing style, and even screw placement. A common success story starts when someone takes one roller out, measures it,
notes the manufacturer label (often etched somewhere subtle), and matches the replacement precisely instead of guessing.
That one stepbringing the old part (or detailed measurements) into the processoften saves a second trip and a lot of creative vocabulary.
4) “I used the wrong lubricant and my track turned into a dirt magnet.”
People mean well: they grab something oily, spray generously, and celebrate… until the track collects dust and hair like it’s auditioning
for a cleaning product commercial. Many homeowners report better long-term results with a light silicone-based lubricant and a “less is more”
approachespecially after a thorough clean. The goal is to help rollers and surfaces glide, not to create a sticky runway for every speck
of debris in your zip code.
5) “The screen door was the real villain all along.”
Sometimes the main sliding glass door works fine, but the screen door is the one that derails, scrapes, and generally behaves like a shopping cart
with one chaotic wheel. Screen doors are lighter and more prone to frame twist, sagging rollers, and torn mesh.
Many homeowners find that adjusting the screen rollers and re-screening (using new spline) is one of the most satisfying “small repairs”
because the improvement is instant: smoother sliding, better airflow, and fewer uninvited flying guests.
6) “Once it worked, I realized maintenance is the secret.”
After the first successful repair, people often adopt a tiny routine: quick vacuum of the track every so often,
a light lubricant touch-up a couple times a year, and an occasional roller tweak when the door feels slightly off.
That habit is what keeps the door gliding for yearsbecause sliding doors don’t usually fail all at once.
They slowly get gunky, slightly misaligned, and progressively harder to use until one day you’re shoulder-checking a door
just to get outside. A little maintenance prevents the whole dramatic arc.
Conclusion
Repairing a sliding door isn’t about having magical handyman powersit’s about working the basics in the right order.
Start with a deep track cleaning. Then adjust the rollers to restore smooth movement and proper alignment. If it still struggles,
remove the panel and clean or replace worn rollers. Finally, fine-tune the lock and weatherstripping so the door seals and secures the way it should.
Do those steps, and your sliding door can go back to being what it was meant to be: a quiet, easy gateway to the outdoorswithout the daily argument.