Table of Contents >> Show >> Hide
- Before You Start: What Makes Slime So Stubborn?
- How to Remove Slime from Clothes: 12 Steps
- Step 1: Check the Care Label
- Step 2: Remove Excess Slime Gently
- Step 3: Test Your Cleaning Solution on a Hidden Spot
- Step 4: Saturate the Slime with White Vinegar
- Step 5: Let It Sit for 5 to 10 Minutes
- Step 6: Work the Area with a Soft Toothbrush or Your Fingertips
- Step 7: Rinse from the Back with Cool Water
- Step 8: Apply Liquid Laundry Detergent as a Pretreat
- Step 9: Use Rubbing Alcohol for Stubborn Dyed or Sticky Residue
- Step 10: Soak Tough Stains if Needed
- Step 11: Wash in the Warmest Water Safe for the Fabric
- Step 12: Inspect Before Drying
- How to Remove Dried Slime from Clothes
- What About Glitter Slime, Butter Slime, or Colored Slime?
- Mistakes to Avoid When Removing Slime from Clothing
- Best Fabric-by-Fabric Advice
- Real-Life Examples of Slime Stain Rescue
- Extra Experience and Practical Tips from the Laundry Front Lines
- Conclusion
- SEO Tags
Slime is fun right up until it leaves your shirt looking like a science fair exploded on it. One minute you are stretching a neon-green masterpiece. The next, your hoodie has become part craft project, part crime scene. The good news: slime stains are usually fixable. The even better news: you do not need a secret lab, a hazmat suit, or laundry superpowers.
If you act quickly and use the right method, you can get slime out of clothing without wrecking the fabric. In most cases, the winning combo is simple: remove the excess, loosen the goo, pretreat the stain, wash carefully, and keep that item far away from the dryer until you are sure the stain is gone. This guide walks you through 12 practical steps for how to remove slime from clothes, plus troubleshooting tips for dried slime, glitter slime, and stubborn dyed residue.
Whether the mess landed on a cotton T-shirt, school uniform, jeans, leggings, or your favorite “I was not prepared for this” sweatshirt, these steps will help you clean it up without panic-laundering the whole wardrobe.
Before You Start: What Makes Slime So Stubborn?
Most slime contains glue and other ingredients that help it cling, stretch, and stick. That is great for playtime and terrible for fabric. Some slimes also include food coloring, pigment, glitter, lotion, or foam beads, which means you may be dealing with both a sticky residue and a dye stain. That is why a quick rinse alone often does not solve the problem.
The trick is to treat the slime in layers. First, get off what you can see. Then break down what is clinging to the fibers. After that, wash away whatever is left. Laundry is not glamorous, but this is where method beats drama.
How to Remove Slime from Clothes: 12 Steps
Step 1: Check the Care Label
Before you grab every bottle under the sink, read the garment’s care tag. This tells you whether the fabric can handle water, warm temperatures, or more aggressive cleaning. If the label says “dry clean only,” skip the DIY heroics and take it to a professional cleaner. For washable items, the care label helps you choose the safest wash temperature later.
Step 2: Remove Excess Slime Gently
Use a spoon, dull knife, old gift card, or the edge of a plastic scraper to lift off as much slime as possible. Do not mash it deeper into the fabric. Think “careful excavation,” not “angry scrubbing.” Work from the outside of the blob inward so you do not spread the mess to a larger area.
Step 3: Test Your Cleaning Solution on a Hidden Spot
Before applying vinegar, detergent, or rubbing alcohol, test it on an inside seam or another hidden area. This is especially important for dark colors, delicate fabrics, spandex blends, rayon, or anything you would cry over if it faded. A two-minute test can save a full-size fashion tragedy.
Step 4: Saturate the Slime with White Vinegar
Pour a small amount of distilled white vinegar directly onto the slime stain until the area is damp but not dripping everywhere like a salad gone wrong. Vinegar helps loosen slime residue from the fibers, which makes the next steps much easier. For a lighter treatment, you can dilute it slightly with water, but full-strength vinegar often works well on washable fabrics.
Step 5: Let It Sit for 5 to 10 Minutes
Give the vinegar time to do its job. This is the moment where patience earns its paycheck. Letting the stain sit for a few minutes helps soften dried bits and loosen sticky residue. Do not leave it for an hour and wander off into another dimension of household chores. Five to ten minutes is usually enough.
Step 6: Work the Area with a Soft Toothbrush or Your Fingertips
Use a soft toothbrush, soft cloth, or your fingers to gently work the vinegar into the stain. Focus on loosening the slime, not roughing up the fabric. A light circular motion or short strokes is better than intense scrubbing. If bits of slime start lifting, wipe them away as you go.
Step 7: Rinse from the Back with Cool Water
Hold the stained area under cool running water, ideally with the back side of the fabric facing up. Rinsing from the back helps push the slime out instead of driving it further in. Cool water is usually the safer bet for mystery messes and sticky residues, especially before the stain is fully removed.
Step 8: Apply Liquid Laundry Detergent as a Pretreat
Rub a small amount of liquid laundry detergent directly into the affected area. Choose a detergent designed for stain removal if you have one. Work it in gently and let it sit for 5 to 15 minutes. This step helps break down leftover residue after the vinegar loosens the slime. If the slime was loaded with lotion, oils, or colored additives, this pretreat step matters even more.
Step 9: Use Rubbing Alcohol for Stubborn Dyed or Sticky Residue
If the slime is gone but a sticky or colorful stain remains, dab a little rubbing alcohol onto the area using a cotton ball or clean cloth. This can help lift stubborn residue, especially on durable fabrics. Always spot-test first, and use this carefully on stretchy, delicate, or vividly dyed garments. Blot rather than scrub, then rinse again with cool water.
Step 10: Soak Tough Stains if Needed
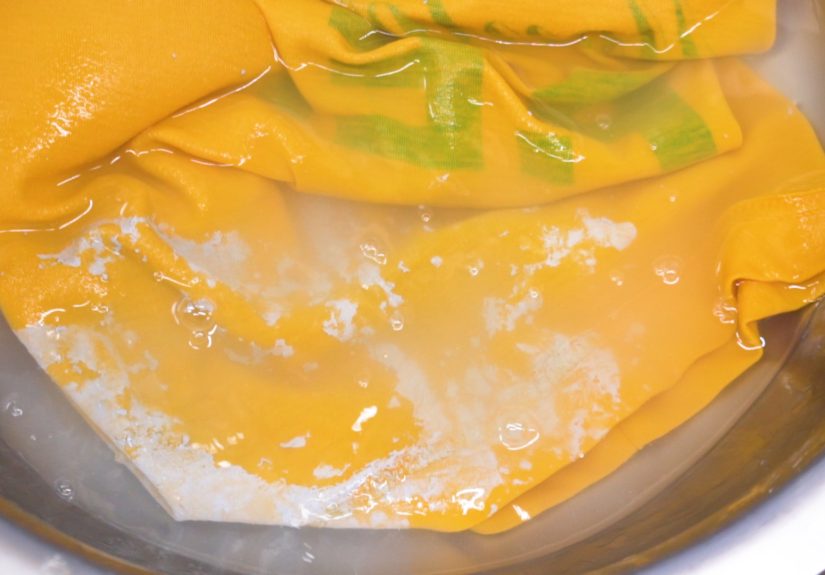
For dried slime or set-in residue, soak the garment in water with a small amount of liquid detergent. If the fabric is washable and color-safe, an oxygen-based bleach product can help with lingering discoloration. Follow the product label, and never mix vinegar with bleach or combine random stain removers like you are inventing a chemistry final exam. One method at a time is the safe method.
Step 11: Wash in the Warmest Water Safe for the Fabric
Once the stain is loosened and pretreated, wash the item according to the care label. In many cases, the warmest water safe for the fabric helps remove the last traces of residue. Use a good liquid detergent and choose a normal wash cycle unless the garment requires something gentler. If you are washing a delicate item, keep the cycle mild and skip any harsh extras.
Step 12: Inspect Before Drying
This final step is the one people skip and then regret with the force of a thousand lint rollers. Check the stained area while the garment is still wet. If you still see slime, stickiness, or color, repeat the treatment before drying. Heat from the dryer can set the remaining stain and make it much harder to remove. If the fabric looks clean, air-dry first if you want to play it extra safe.
How to Remove Dried Slime from Clothes
Dried slime is a little more dramatic, but it is not unbeatable. Start by scraping off the hardened material as carefully as possible. Next, apply white vinegar and let it sit long enough to soften the residue. Work the area gently with a toothbrush, rinse, and pretreat with liquid detergent. If needed, follow with a detergent soak and a second wash.
The key with dried slime is not to rush the loosening phase. If you go straight to aggressive scrubbing, you may rough up the fibers without actually removing the residue. Slow and steady wins this oddly sticky race.
What About Glitter Slime, Butter Slime, or Colored Slime?
Some slime is not just sticky. It is sticky with opinions. Glitter slime can leave shiny residue. Colored slime may leave dye behind. Butter slime and lotion-heavy slime can behave more like an oily stain.
- Glitter slime: Remove the slime first, then rewash if loose glitter remains. A lint roller can help pick up stray sparkle after drying.
- Colored slime: Pretreat quickly, and consider an oxygen-based bleach for washable, color-safe fabrics if discoloration remains.
- Butter or lotion-heavy slime: Use liquid detergent thoroughly, and a drop of dish soap may help on washable fabrics before laundering.
Mistakes to Avoid When Removing Slime from Clothing
Sometimes the stain is not the problem. The panic is.
- Do not rub fresh slime aggressively. That only spreads it.
- Do not toss the garment straight into the washer without pretreating.
- Do not dry the item until you know the stain is gone.
- Do not skip the spot test on delicate or dark fabrics.
- Do not mix bleach, vinegar, and other products together.
- Do not assume one wash will solve every case of dyed or dried slime.
Best Fabric-by-Fabric Advice
Cotton and Polyester
These everyday fabrics are usually the easiest to treat. Vinegar, liquid detergent, and a regular wash cycle often do the trick. Just follow the care label for water temperature.
Jeans and Durable School Clothes
Denim and sturdier fabrics can usually handle gentle brushing and a stronger pretreat. These are often the easiest “saveable” items after a slime disaster.
Leggings, Spandex, and Performance Fabrics
Be more cautious here. Use a spot test before vinegar or rubbing alcohol, avoid very hot water, and skip harsh brushing. Stretchy fibers do not appreciate rough treatment.
Wool, Silk, or Dry-Clean-Only Pieces
When in doubt, stop and call the professionals. Removing slime is satisfying. Shrinking your sweater into doll clothing is less satisfying.
Real-Life Examples of Slime Stain Rescue
Example 1: A child gets bright pink slime on a white cotton T-shirt after school. The parent scrapes off the slime, applies white vinegar, waits 10 minutes, rinses from the back, rubs in liquid detergent, and washes the shirt. The slime comes out, but a faint pink shadow remains. A second treatment with color-safe oxygen bleach and another wash clears the stain.
Example 2: Glitter slime lands on black leggings and dries overnight. The dried chunks are scraped away, vinegar is applied, the area is gently brushed, and liquid detergent is used as a pretreat. After washing on a gentle cycle, the stain is gone, although the leggings still look like they attended a tiny disco. A lint roller finishes the job.
Example 3: Butter slime gets mashed into denim shorts during a summer playdate. Because the slime contains oily add-ins, the stain is treated with liquid detergent, a drop of dish soap, and warm-water laundering according to the care label. The shorts survive, and the playdate remains mostly diplomatic.
Extra Experience and Practical Tips from the Laundry Front Lines
Anyone who has ever cleaned slime out of clothing learns two things fast: first, slime travels farther than common sense suggests; second, the laundry room becomes a place of character development. If you are dealing with this mess for the first time, you may be tempted to think you did something wrong. You did not. Slime has a special talent for finding sleeves, pockets, knees, couch cushions, and any item of clothing that was expensive enough to matter.
One of the most useful real-world lessons is that speed matters, but panic does not. A rushed response often leads people to scrub too hard, toss the item into hot water immediately, or run it through the dryer before checking the stain. That is usually how a temporary mess becomes a permanent souvenir. A calm five-minute pretreat is worth far more than a dramatic laundry sprint.
Another common experience is discovering that slime stains are often two problems hiding in one. You remove the sticky blob and feel victorious, only to notice a faint blue, pink, or neon green shadow still clinging to the fabric. That is normal. The slime may be gone while the dye remains. In those cases, repeating the pretreat or soaking step is often what saves the garment. The first pass removes the mess you can feel. The second pass removes the mess you can still see.
People also learn quickly that “washable” does not mean “indestructible.” Hoodies, jeans, uniforms, and cotton tees can handle a pretty standard stain-removal routine, but leggings, athletic wear, and anything soft and stretchy need a gentler touch. A toothbrush can be helpful, but it should behave more like a helpful assistant than a demolition crew.
Perhaps the most universal experience is the moment you hold up the garment after washing and inspect it like a detective under fluorescent lighting. Is that slime? Is that just water? Is that glitter? Is glitter ever truly gone? These are the great laundry mysteries of modern life. Still, when you catch the stain before drying, your odds improve dramatically.
Over time, many households end up with a simple slime-removal routine: scrape, vinegar, rinse, detergent, wash, inspect. It is not glamorous, but it works. And once you have done it a couple of times, you stop viewing slime as a wardrobe-ending disaster and start treating it like a messy little plot twist. Annoying, yes. Permanent, not necessarily.
The best experience-based advice is this: keep a bottle of white vinegar, a good liquid detergent, and a soft toothbrush where you do laundry. That tiny kit can handle a surprising number of messes, slime included. And the next time someone says, “It is okay, the slime barely touched my shirt,” you will know exactly what to do. You may not feel joy. But you will feel prepared. In laundry terms, that is basically wisdom.
Conclusion
Learning how to remove slime from your clothing is less about magic and more about order. Get the excess off first, loosen the residue with vinegar, pretreat with liquid detergent, wash carefully, and never dry the item until you know the stain is gone. Those simple habits can rescue everything from kids’ T-shirts to leggings, jeans, and hoodies.
Slime stains look dramatic, but they are often fixable when handled the right way. So the next time a blob of goo lands where it absolutely should not, skip the panic, grab the vinegar, and remind yourself that laundry disasters are temporary. Mostly. Glitter is still on probation.