Table of Contents >> Show >> Hide
- Step 1: Assess Your Slope (Before You Grab a Shovel)
- Step 2: Plan Safe Access and a Basic Layout
- Step 3: Slow the Water Down
- Step 4: Improve the Soil (Gently)
- Step 5: Choose the Right Plants for Slopes
- Step 6: Create Planting Pockets and Mini Terraces
- Step 7: Plant in a Staggered, Contour Pattern
- Step 8: Water In and Mulch for Erosion Control
- Step 9: Add Erosion Control Blankets or Netting (Optional but Powerful)
- Step 10: Maintain Lightly but Consistently
- Step 11: Watch, Adjust, and Upgrade Over Time
- Visualizing the “Pictures” (Even Without Actual Photos)
- Extra Tips for Planting on a Slope
- Real-World Experiences and Lessons from Slope Planting
- Conclusion
If your backyard feels more like a ski slope than a calm garden, you’re not alone. Sloping yards are
common, and they’re also drama queens: soil washes away, plants sulk, and mowing becomes an extreme sport.
The good news? With a smart plan, you can turn that hillside into a beautiful, stable, and low-maintenance
garden that actually works with gravity instead of losing to it.
Below are 11 practical, beginner-friendly steps for how to plant on a slope, inspired by real landscape
and erosion-control practices. Imagine each step as one “picture” in your mental slideshow: from bare
dirt to thriving hillside garden.
Step 1: Assess Your Slope (Before You Grab a Shovel)
Start by playing detective. Not all slopes are created equal, and what works on a gentle bank won’t be
enough for a near-vertical hillside.
- Check steepness: Gentle slopes (under about 30%) can often be handled with plants and mulch alone. Very steep slopes may need terracing, rock walls, or professional help.
- Observe water flow: After a rain, does water sheet down the surface, carve channels, or soak in slowly? Fast runoff means higher erosion risk.
- Note sun and wind: Is the slope baking hot and sunny, or cool and shaded? South- or west-facing slopes usually dry out quickly.
- Look at your soil: Sandy soil drains fast but erodes easily; clay holds water and may become slippery and compacted.
Snap a few photos and sketch a quick map. Mark trouble spots where soil is already sliding or where you
can see tree roots. Those will need extra care.
Step 2: Plan Safe Access and a Basic Layout
Before thinking about plant varieties, think about your feet. If you can’t safely stand on the slope,
you can’t plant it or maintain it.
- Add paths or steps: Simple timber steps, stone slabs, or gravel paths zig-zagging up the hill make planting and weeding far safer.
- Divide the slope: Mentally break it into top, middle, and bottom zones. Water tends to run down and collect at the base, so plants at the bottom often get more moisture.
- Follow contour lines: Try to place future planting rows and features roughly across the slope (side-to-side), not straight up and down. This slows water and reduces erosion.
Think of this as your “floor plan” for the hill. Even simple changes like a few steps and a curved path
can turn a scary slide into a workable garden.
Step 3: Slow the Water Down
Erosion is really just water and gravity teaming up against your soil. Your job is to slow that water
down so it has time to soak in.
- Create small berms and swales: Use a hoe or shovel to carve shallow, horizontal dips (swales) with slight ridges (berms) on the downhill side. These catch and hold rainwater.
- Think “speed bumps” for water: Fallen branches, logs, or placed stones laid across the slope act like mini dams that break up runoff.
- Consider terracing for very steep slopes: Terraces turn a tall slope into a series of short “steps” of level soil, which dramatically reduces erosion and makes planting easier.
You don’t have to engineer a vineyard hillside. Even modest swales and berms combined with plants can make
a big difference.
Step 4: Improve the Soil (Gently)
Good soil gives roots something to grab ontoliterally. However, you don’t want to strip the slope bare or
till deeply, because that can actually trigger more erosion.
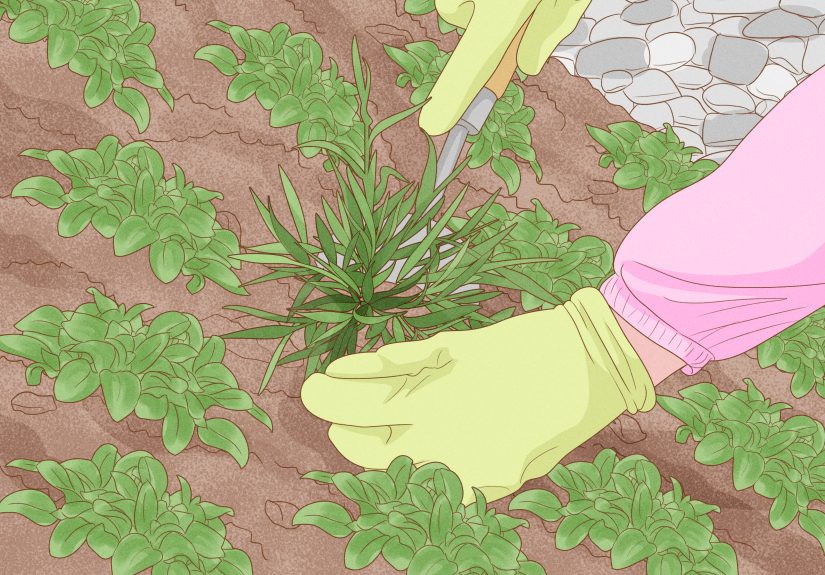
- Remove weeds strategically: Hand-pull aggressive weeds, but don’t leave large areas completely bare for long.
- Add compost on top: Spread a thin layer (about 1–2 inches) of compost over the soil surface instead of turning it in everywhere.
- Loosen only planting pockets: Where you’ll place each plant, dig an individual hole or small pocket and loosen soil there, rather than rototilling the whole hill.
This “spot improvement” approach maintains the existing soil structure that’s already holding the slope
together while still giving new plants a good start.
Step 5: Choose the Right Plants for Slopes
On a slope, plant choice is about roots, not just pretty flowers. You want plants that knit the soil
together and don’t mind your quirky conditions.
Look for these traits
- Dense, fibrous roots or spreading runners: Ground covers, native grasses, and suckering shrubs create living nets that stabilize soil.
- Drought tolerance for sunny slopes: Think creeping thyme, sedums, ornamental grasses, or tough shrubs in hot, dry areas.
- Moisture lovers for lower zones: At the base of the slope, plants that can handle periodically wetter soil are often happier.
- Mostly natives: Native plants are adapted to local rainfall and temperatures, often need less care, and support pollinators.
Avoid relying only on turf grass for steep slopes; its roots are relatively shallow and can pull away like
a mat. A mixed planting of shrubs, perennials, and ground cover is usually more stable and lower
maintenance over time.
Step 6: Create Planting Pockets and Mini Terraces
Now it’s time to give each plant its own little “balcony” on the hillside.
- Cut small shelves: When you dig a planting hole, carve a slight flat spot into the slope so the plant isn’t leaning downhill.
- Build a mini berm on the downhill side: Use the extra soil you removed to form a low lip or ring, creating a tiny basin that will catch water.
- Stabilize with rocks or logs: Nestle stones or pieces of wood around new plants to support the soil and further slow water.
Imagine each plant sitting in its own shallow bowl instead of on a tilted plate. That bowl is what keeps
water and soil in place while the roots establish.
Step 7: Plant in a Staggered, Contour Pattern
When planting on a slope, spacing and pattern matter as much as plant selection.
- Stagger plants: Instead of planting in straight columns up and down the hill, offset each row so plants form a zig-zag pattern.
- Follow the contour: Keep each row roughly level across the slope so the plants act like a living, layered barrier to water.
- Space generously: Ground covers can often be planted 12–24 inches apart. Shrubs may need 3–6 feet, depending on mature size.
This layout helps break up runoff energy and encourages water to spread out instead of racing straight
downhill.
Step 8: Water In and Mulch for Erosion Control
Planting is only half the story; the way you mulch and water on a slope can make or break your success.
Watering tips for hillsides
- Water slowly and deeply: Use a soaker hose, drip irrigation, or a gentle spray. Fast, heavy watering just recreates a rainstorm and washes soil away.
- Use basins: Remember those mini berms? Fill them and let water soak in before refilling.
- Watch for runoff: If water starts to run off before soaking in, slow down or cycle your watering (water a little, wait, and repeat).
Mulching like a pro
- Apply 2–4 inches of mulch: Shredded bark, wood chips, or straw are common choices. Spread it around plants without burying the stems.
- Anchor the mulch: On steeper slopes, use shredded mulch instead of big bark chunks, which slide more easily. You can also use jute netting over mulch to hold it in place.
- Keep mulch off trunks: Leave a small mulch-free “donut” around plant bases to prevent rot.
Mulch is your first line of defense against raindrop impact and evaporation, helping plants stay moist and
soil stay put.
Step 9: Add Erosion Control Blankets or Netting (Optional but Powerful)
For freshly planted, bare, or very steep slopes, erosion control blankets are like training wheelsthey
keep things steady until your plants can take over.
- Choose natural fabrics: Jute, coir (coconut fiber), or straw blankets are biodegradable and designed to break down as the plants mature.
- Install before or after planting: Some blankets are laid over the soil and then slit to tuck plants through; others go on after planting.
- Pin them securely: Use landscape staples to anchor the blanket according to the manufacturer’s pattern so wind and water can’t lift it.
This step is especially helpful if you’re seeding a slope with grass or wildflowers, or if you have loose
soil that hasn’t stabilized yet.
Step 10: Maintain Lightly but Consistently
Once the hillside is planted, the goal is not constant babying but smart, light maintenanceespecially in
the first year or two.
- Weed early and often (but gently): Pull small weeds before they get large root systems that disturb the slope.
- Top up mulch: Replace mulch that has washed away or broken down, especially in high-traffic or high-rain areas.
- Avoid soil compaction: Don’t stomp around on the slope more than necessary. Stick to paths and steps you created earlier.
- Prune, don’t rip: Trim shrubs or ground covers that are getting unruly, but avoid yanking big sections out all at once.
Think of this stage as coaching your hillside team until it becomes a self-reliant ecosystem.
Step 11: Watch, Adjust, and Upgrade Over Time
Your slope will change with the seasons and the years. Instead of expecting perfection right away, treat
this as an ongoing conversation with your landscape.
- Look for problem spots: After heavy rains, check for new channels, exposed roots, or mulch piles at the bottom of the hill.
- Patch with more plants: Bare spots are invitations for weeds and erosion. Fill them with additional ground cover or shrubs.
- Upgrade if needed: If a section continues to slide or wash out, consider adding rocks, more defined terraces, or a low retaining wall.
Over time, you’ll find a balance where the plants, mulch, and structure of the slope all work together
and you get to just enjoy the view instead of constantly fighting erosion.
Visualizing the “Pictures” (Even Without Actual Photos)
Since we’re working in words, imagine a quick slideshow to go with the 11 steps:
- Picture 1: A bare, uneven hill with a few weeds and muddy streaks of erosion.
- Picture 2: A simple sketch showing paths, contour lines, and zones (top, middle, bottom).
- Picture 3: Someone carving shallow swales and berms with a shovel.
- Picture 4: Bags of compost and a light layer spread over the surface.
- Picture 5: A flat lay of chosen plantsground covers, ornamental grasses, and small shrubs.
- Picture 6: Planting pockets cut into the slope with mini basins on the downhill side.
- Picture 7: A staggered planting pattern following the contour lines.
- Picture 8: Drip lines or soaker hoses snaking across the hill.
- Picture 9: A fresh blanket of mulch, held in place with jute netting.
- Picture 10: The slope a few months later, plants filling in and soil staying put.
- Picture 11: A lush, fully grown hillside garden buzzing with pollinators.
Extra Tips for Planting on a Slope
- Check local rules: In some areas, steep slopes or properties near streams have regulations about grading and planting. A quick call to your local extension office or municipality can prevent headaches later.
- Start small: You don’t have to tackle the entire hill in one weekend. Plant a section at a time and observe how it behaves in rain.
- Prioritize safety: Wear shoes with good traction, use tools with long handles, and avoid working on wet, slippery slopes.
Real-World Experiences and Lessons from Slope Planting
Theory is great, but planting on a slope gets real the first time you skid down the hill holding a tray of
plants. Here are experience-based insights that don’t always show up on a neat “how-to” list.
1. The Slope Rarely Behaves the Same Everywhere
Many gardeners discover that one part of the slope is constantly dry and crumbly, while another section
stays damp days after it rains. That’s normal. Tiny changes in shade, soil depth, and water flow can make
big differences. In practice, this means:
- Plants that thrive in one corner might sulk just a few feet away.
- You may end up with mini “microclimates” and plant accordinglysun-loving ground covers up high, moisture-tolerant plants near the bottom.
Don’t take it personally if a plant fails on the slope. It’s feedback, not failure. Swap it for something
better suited to that exact spot.
2. Water Management Is a Long Game
The first season, most people underestimate how quickly water runs off a hillside. You might think you’ve
watered thoroughly, only to see the soil dry again in a day. Over time, you learn:
- Drip irrigation or soaker hoses are worth the setup, especially if you’re covering a large area.
- Those little basins around each plant really do helpgardens where someone patiently filled basins for the first few months often establish faster and hold up better in drought.
- Slow, repeated watering cycles soak in more effectively than one long blast from the hose.
Eventually, once roots are deep and plants are dense, the slope becomes more forgivingbut that first year
is all about thoughtful watering.
3. Mulch Will Move (and That’s Okay)
On a slope, mulch almost never stays exactly where you put it. Wind, rain, and even wildlife will rearrange
it. Gardeners with successful slopes tend to accept this and work with it:
- They choose shredded, fibrous mulch that tangles and locks together better than large bark nuggets.
- They get in the habit of raking mulch back uphill now and then, especially after storms.
- They treat erosion control netting as a short-term helper, not an eyesore.
If you expect some movement and plan for seasonal touch-ups, you won’t be disappointed when mulch naturally
drifts a bit.
4. Ground Covers Are the Quiet Heroes
Shrubs and ornamental grasses get most of the attention, but ground covers are usually what tip the slope
from “high-maintenance” to “self-managing.” People who have lived with a hillside for years often report:
- Once a tough, spreading ground cover fills in, the need for weeding drops dramatically.
- Soil stops disappearing because roots and foliage form a living mat over the hill.
- The slope looks good even in “in-between” seasons when perennials are cut back.
The trick is choosing non-invasive varieties suited to your region and giving them enough time to knit
together. Patience here literally pays off in less work later.
5. Terraces Don’t Have to Be Fancy
When people hear “terrace,” they picture expensive stonework. In reality, many successful slope gardens use
modest, informal terracing:
- Short dry-stacked rock edges that hold back just a foot or two of soil.
- Treated wood or landscape timbers stepped gently down the slope.
- Log or branch edging that slowly decomposes as plants take over the job of holding soil.
These mini terraces break a tall slope into smaller sections. They might not look like a magazine spread on
day one, but combined with strong plants and mulch, they age into a natural, attractive hillside.
6. Your Future Self Will Thank You for Paths
One of the most common regrets people mention is not planning enough access from the beginning. It’s easy
to get excited about plants and skip the “boring” details like steps, landings, or railings. But future
youthe one carrying pruning shears, a watering can, or a wheelbarrowwill love:
- A safe way to move up and down the slope without sliding.
- A few flat landings where you can stand, rest, or park a hose.
- Handholds or rails on very steep areas.
When your slope is comfortably walkable, you’re far more likely to maintain itand a maintained slope is a
stable slope.
7. The Payoff: A Garden That Looks Like It “Belongs”
The biggest non-technical lesson from slope planting is this: a well-designed hillside looks like it fits
the land. Instead of a forced, high-maintenance lawn clinging to a steep angle, you get:
- Layered textures of shrubs, grasses, and ground covers.
- Birds, bees, and butterflies using the plants as habitat.
- Far less mud, runoff, and erosion than you started with.
Planting on a slope is definitely more work than planting a flat bed, especially at first. But once your
plants are established and the soil is anchored, you’ll have one of the most striking features in your
landscapea hillside that finally looks intentional, not accidental.
Conclusion
Planting on a slope is really about partnering with gravity instead of fighting it. By assessing your
hillside, choosing the right plants, arranging them thoughtfully, and giving them some early support with
mulch and erosion controls, you can turn a problem area into a standout feature. The 11 steps above guide
you from planning to long-term care, and the extra real-world tips help you dodge the most common
frustrations.
With a bit of patience and a good pair of grippy shoes, your once-intimidating slope can become a resilient,
green backdrop that frames your whole yardand you’ll never look at a “difficult” hillside quite the same
way again.


