Table of Contents >> Show >> Hide
- What Are Leaf Prints?
- Supplies You Need to Make Leaf Prints
- How to Make Leaf Prints: 8 Steps
- Creative Leaf Print Ideas
- Leaf Printing Tips for Better Results
- Common Leaf Printing Mistakes and How to Fix Them
- Why Leaf Printing Is Great for Kids
- Leaf Rubbing vs. Leaf Printing
- Extra Experience: What I Learned From Making Leaf Prints
- Conclusion
Leaf printing is one of those rare crafts that feels fancy, costs almost nothing, and gives you permission to wander outside like a very artistic squirrel. With a few leaves, a little paint, and some paper, you can create beautiful botanical art that shows every tiny vein, edge, curve, and natural imperfection. The best part? You do not need to be a professional artist. Honestly, the leaf does most of the work. You just have to help it make a dramatic entrance.
Whether you are making fall leaf prints with kids, decorating handmade cards, creating classroom nature art, or designing rustic wall decor, this step-by-step guide will walk you through the process clearly. You will learn how to choose the best leaves, prepare your workspace, apply paint properly, press the leaf without smearing it into leafy chaos, and turn your prints into frame-worthy projects.
This guide focuses on the classic painted leaf printing method, but you will also find ideas for crayon leaf rubbings, fabric prints, layered designs, and creative ways to use your finished artwork. Ready to turn your backyard into an art supply store? Let’s begin.
What Are Leaf Prints?
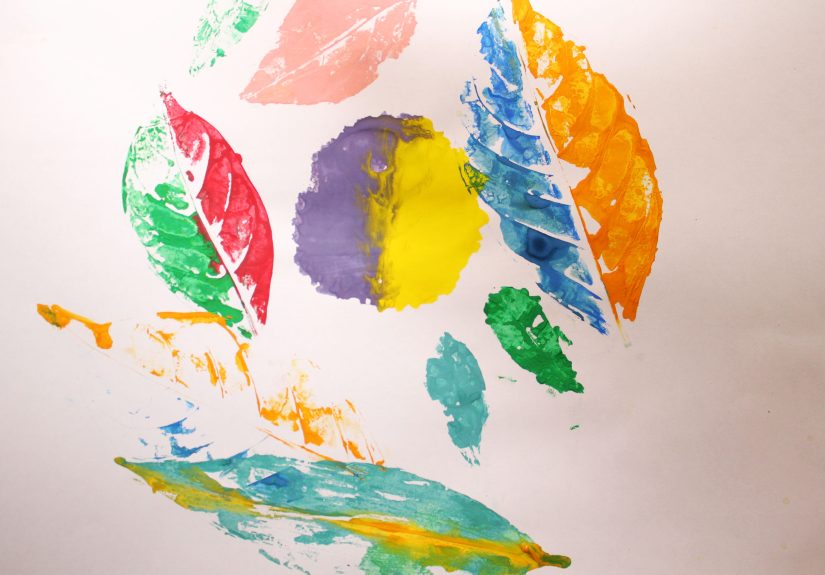
Leaf prints are impressions made by coating a real leaf with paint, ink, or another coloring medium, then pressing it onto paper, fabric, cardstock, or another surface. The result is a natural print that captures the leaf’s shape, veins, stem, and texture. Unlike drawing a leaf by hand, printing uses the leaf itself as the stamp, which gives the design a wonderfully organic look.
Leaf printing is popular in classrooms, homeschool nature studies, family craft days, seasonal decorating, and botanical art projects. It combines art and science in a very simple way. Children can observe leaf anatomy, compare shapes from different trees, and notice how texture affects the final print. Adults can use the same technique to make elegant stationery, handmade wrapping paper, fabric napkins, scrapbook pages, or minimalist wall art.
Supplies You Need to Make Leaf Prints
You do not need a studio, a shopping cart full of supplies, or a mysterious craft tool that only exists in online tutorials. Most leaf print projects use basic materials you may already have at home.
Basic Materials
- Fresh leaves in different shapes and sizes
- Acrylic paint, tempera paint, washable craft paint, or printing ink
- Paintbrush, foam brush, sponge, or small roller
- White paper, cardstock, watercolor paper, kraft paper, or fabric
- Newspaper, cardboard, or a washable table covering
- Paper towels or a clean cloth
- A flat tray, paper plate, or palette for paint
- A book, rolling pin, brayer, or your hands for pressing
- Apron or old shirt, especially if kids are helping
Optional Extras
- Metallic paint for holiday cards or elegant decor
- Fabric paint for tote bags, napkins, or T-shirts
- Painter’s tape to hold paper in place
- Colored cardstock for a bold background
- Fine-tip markers for adding names, dates, or botanical labels
- Crayons for leaf rubbing variations
- Mod Podge or clear sealant for preserving finished art
How to Make Leaf Prints: 8 Steps
Step 1: Choose the Right Leaves
The best leaf prints begin with the best leaves. Look for leaves that are fresh, flexible, and not too dry. Brittle leaves may crumble when you press them, which is dramatic but not especially helpful. Leaves with clear veins and interesting edges usually create the most detailed prints.
Maple, oak, fern, ginkgo, elm, magnolia, and ivy leaves are great choices. Large leaves make bold statement prints, while small leaves are perfect for borders, cards, bookmarks, and layered patterns. Try collecting a variety of shapes so your artwork does not look like one leaf showed up and invited only its cousins.
For the clearest texture, use the underside of the leaf. That is usually where the veins are more raised. Raised veins hold paint better and create sharper details when pressed onto paper.
Step 2: Clean and Dry the Leaves
Before printing, gently wipe dirt, moisture, or tiny outdoor hitchhikers from the leaves. A slightly damp paper towel works well, but do not soak the leaves. Too much water can thin the paint and make the print blurry.
After wiping them, pat the leaves dry with a clean cloth or paper towel. If your leaves are curled, place them between two sheets of paper and press them under a book for 10 to 20 minutes. You do not need to flatten them for days. This is leaf printing, not leaf taxidermy. A short press is usually enough to make them easier to handle.
Step 3: Prepare Your Workspace
Leaf printing is simple, but paint has a personality. It likes to travel. Cover your table with newspaper, cardboard, butcher paper, or a washable mat. Set out your leaves, paint, brushes, paper, and paper towels before you begin.
If you are crafting with children, pour small amounts of paint onto a paper plate or tray. This keeps the activity manageable and reduces the chance of someone creating a surprise abstract mural on the table. Tape the printing paper down if it slides around. A stable surface makes cleaner prints.
Good lighting helps too. When you can see the veins of the leaf clearly, you can apply paint more evenly and place the print more carefully.
Step 4: Apply a Thin Layer of Paint
Place the leaf vein-side up on your work surface. Using a brush, foam brush, sponge, or small roller, apply a thin, even layer of paint to the textured side. This is the step where less really is more. Too much paint fills in the delicate vein patterns and creates a smudgy blob. A light coat lets the details shine.
If you are using acrylic paint, work fairly quickly because it can dry fast. Tempera paint is great for kids because it is washable and easy to use. Watercolor can create soft, dreamy prints, but it may not show as much detail unless the color is concentrated. Fabric paint is best when printing on cloth because it is designed to stay put after drying and heat setting.
For extra visual interest, try blending two or three colors on the same leaf. For example, use yellow near the stem, orange in the middle, and red around the edges for a fall-inspired print. Just avoid overbrushing, or the colors may mix into the official shade of “muddy pumpkin.”
Step 5: Place the Leaf on Your Paper
Once the leaf is painted, carefully flip it over so the painted side faces down. Place it onto your paper exactly where you want the print to appear. Try not to slide it around after it touches the surface. Sliding causes smears, and while smears can be artistic, they are usually not invited to this party.
If you are making a pattern, think about layout before you press. You can arrange leaves in a wreath shape, scatter them randomly, line them along the edge of the page, or create a repeating design. For greeting cards, one strong leaf print in the center can look clean and professional. For wrapping paper, repeated prints in different directions create a lively handmade look.
Step 6: Press the Leaf Evenly
Place a clean sheet of scrap paper over the back of the leaf. Then press gently but firmly with your fingers, palm, a brayer, rolling pin, or the flat side of a book. Pay special attention to the edges, stem, and center vein. The goal is to transfer the paint without shifting the leaf.
Do not press so hard that the leaf tears or paint squishes out from the sides. A steady, even pressure works best. If you are working with young children, show them how to hold the leaf still while pressing. This helps improve the final print and gives them a little fine motor practice along the way.
Step 7: Lift the Leaf Carefully
Now comes the big reveal. Starting from the stem or one edge, slowly peel the leaf away from the paper. Lift straight up rather than dragging it sideways. You should see a beautiful leaf impression with visible veins and natural edges.
If the print looks too light, add slightly more paint next time. If it looks too thick or blurry, use less paint. Leaf printing often improves after a few test prints, so do not judge the whole project by the first one. The first print is basically the leaf clearing its throat.
You can reuse the same leaf several times. Sometimes the second or third print is even better because excess paint has already been removed. These lighter prints are called ghost prints, and they can add depth and softness to your artwork.
Step 8: Let the Print Dry and Add Finishing Touches
Place the finished print somewhere flat to dry. Drying time depends on the paint and surface. Thin tempera or acrylic prints on paper may dry within 30 minutes, while fabric prints or heavier paint layers may need several hours.
Once dry, you can leave the print as it is or add details. Outline the leaf with a fine marker, write the tree name underneath, add watercolor washes around it, or layer more prints on top. If you are making wall art, frame the piece with a mat for a polished look. If you are making cards, fold cardstock before printing so the design lands exactly where you want it.
Creative Leaf Print Ideas
Make Seasonal Wall Art
Choose leaves from the same season and print them in a limited color palette. Fall prints look lovely in gold, rust, burgundy, and brown. Spring prints feel fresh in green, yellow, and soft blue. Arrange three or four prints in matching frames for inexpensive botanical decor.
Create Handmade Greeting Cards
Leaf prints make beautiful cards for Thanksgiving, birthdays, teacher gifts, housewarming notes, and nature-themed invitations. Use one leaf as the focal point, then add a short message below it. Handmade cards feel personal without requiring you to glitter-bomb your dining room.
Design Custom Wrapping Paper
Print leaves onto kraft paper or plain white wrapping paper. Repeat the same leaf in rows for a modern pattern, or mix several leaf shapes for a woodland look. Tie the package with twine, and suddenly your gift looks like it came from a charming little shop that smells like cinnamon.
Try Leaf Printing on Fabric
Use fabric paint to print leaves on tote bags, napkins, pillow covers, or T-shirts. Wash and dry the fabric first to remove sizing. Place cardboard inside a bag or shirt so paint does not bleed through. After the print dries, follow the paint manufacturer’s instructions for heat setting.
Make a Nature Journal Page
Leaf prints are perfect for nature journals. Print the leaf, then write the date, location, tree name, weather, and observations. This turns a simple craft into a hands-on science activity. It is especially useful for children learning to identify trees by leaf shape, edge, size, and vein pattern.
Leaf Printing Tips for Better Results
Use fresh leaves whenever possible. Dry leaves can work for rubbings, but they often crack during painted printing. If you only have dry leaves, press very lightly or use them as inspiration for drawing instead.
Apply paint to the underside of the leaf. The raised veins create stronger texture and clearer lines. A foam brush often works better than a stiff brush because it spreads paint without tearing delicate leaves.
Test your first print on scrap paper. This helps you adjust paint thickness and pressure before printing on your final paper or fabric. Keep a paper towel nearby to blot excess paint from the leaf or your fingers.
Experiment with paper types. Regular printer paper works for practice, but cardstock, watercolor paper, and mixed media paper give a sturdier, more finished result. For a rustic look, try kraft paper or handmade paper.
Let each layer dry before adding more prints if you want crisp overlapping designs. Wet paint on wet paint may blend, which can be beautiful, but it can also turn your art into a mysterious swamp cloud.
Common Leaf Printing Mistakes and How to Fix Them
The Print Looks Blurry
You probably used too much paint or moved the leaf while pressing. Use a thinner coat and press straight down. Try placing scrap paper over the leaf before pressing to keep your hands clean and distribute pressure evenly.
The Print Is Too Light
Add a little more paint or press more evenly around the edges and veins. Some leaves have smoother surfaces and do not hold much paint, so try switching to a leaf with stronger texture.
The Leaf Tears
The leaf may be too dry, too thin, or overloaded with paint. Choose a fresher leaf and use a softer brush. Ferns and delicate leaves can make gorgeous prints, but they need gentle handling.
The Paper Wrinkles
Too much wet paint can cause thin paper to buckle. Use less paint or switch to cardstock, watercolor paper, or mixed media paper. If you are using watercolor, tape the paper down before printing.
Why Leaf Printing Is Great for Kids
Leaf printing is more than a cute craft. It helps children explore nature, color, texture, shape, and pattern. They can compare leaves from different trees, notice how veins branch out, and learn that every leaf has its own structure. The activity also builds hand-eye coordination because children must paint, place, press, and lift carefully.
For younger children, keep the process simple with washable paint and large leaves. For older children, add science vocabulary such as stem, blade, margin, midrib, and veins. You can even turn the project into a mini tree identification lesson by matching prints to the trees they came from.
Most importantly, leaf printing gives kids a satisfying result quickly. They do not have to wait long to see their artwork appear. That instant reveal makes the activity exciting, especially for children who like crafts but do not want a project with 47 steps and a glue-drying cliffhanger.
Leaf Rubbing vs. Leaf Printing
Leaf rubbing and leaf printing are related, but they are not exactly the same. Leaf rubbing uses a crayon, colored pencil, or oil pastel to reveal the shape and texture of a leaf placed under paper. Leaf printing uses paint or ink applied directly to the leaf, then transferred onto a surface.
Leaf rubbing is less messy and excellent for younger kids, classrooms, and quick nature activities. Leaf printing creates bolder, more decorative results and works well for finished art projects, cards, fabric crafts, and home decor. If you have time, try both methods. The same leaf can produce two very different kinds of art.
Extra Experience: What I Learned From Making Leaf Prints
The first thing you learn when making leaf prints is that nature has absolutely no interest in being perfectly symmetrical for your craft project. That is actually the magic. A leaf with a tiny tear, a curled tip, or a bug-nibbled edge often makes a more interesting print than a flawless one. The imperfections give the artwork personality. In a world full of digital designs and smooth templates, a real leaf print feels refreshingly alive.
One of the most useful lessons is to test everything first. The leaf that looks perfect in your hand may not print well, while the slightly plain leaf you almost ignored may reveal stunning veins once painted. Thick leaves such as magnolia can create bold shapes, but they may need firmer pressure. Thin leaves show delicate detail, but they can wrinkle or tear. Ferns look beautiful, yet they require patience because each tiny section needs contact with the paper.
Paint amount matters more than most beginners expect. The temptation is to load the leaf with paint because more paint seems like it should mean more color. In reality, too much paint hides the details. The best prints usually come from a thin, even layer. When the brush almost feels like it needs more paint, that is often the sweet spot. If the leaf looks glossy and wet, it may be overloaded. If it looks lightly coated but you can still see the veins, you are probably ready to print.
Another experience worth mentioning is that the second print can be better than the first. The first press sometimes releases extra paint, while the second creates a softer, cleaner version. These ghost prints are wonderful for backgrounds, layered compositions, and subtle designs. Try printing a dark leaf first, then pressing it again nearby without adding paint. The faded impression can make the page feel more natural and less stiff.
Leaf placement also changes the mood of the project. A single centered maple leaf can look calm and elegant. A scattered mix of oak, fern, and ivy prints feels playful and woodland-inspired. A row of small leaves along the bottom of a card creates a simple border. A circle of leaves becomes a wreath. Before printing on your final paper, arrange the unpainted leaves on the surface and take a quick photo. That little planning step can save you from accidentally creating a design where all the leaves appear to be fleeing the page.
When working with children, the best experience comes from letting the project be exploratory rather than perfect. Kids may use unexpected colors, press with unusual tools, or decide that one leaf needs six layers of purple paint because it “looks happier that way.” That is part of the fun. Set up the workspace to handle mess, give simple guidance, and let them experiment. The finished prints may not look like boutique stationery, but they will be full of discovery.
For adults, leaf printing can be surprisingly relaxing. There is a slow rhythm to brushing paint, placing the leaf, pressing it down, and lifting it away. It is simple enough to do without stress but creative enough to feel rewarding. It also encourages you to look closely at everyday nature. After a few prints, you may find yourself noticing leaf shapes during walks, in parking lots, and beside sidewalks. Congratulations, you have become the person admiring tree veins in public. It is a peaceful club.
My best advice is to make more prints than you think you need. Some will be too light, some will be too dark, and some will look like the leaf sneezed during the process. But several will surprise you. Those are the ones to frame, turn into cards, scan for digital designs, or use as handmade gift wrap. Leaf printing rewards curiosity, not perfection.
Conclusion
Learning how to make leaf prints is simple, affordable, and wonderfully satisfying. With just leaves, paint, paper, and a little patience, you can create artwork that captures the beauty of nature in fine detail. The process works for kids, adults, classrooms, family craft days, seasonal decorating, and handmade gifts.
The key is to choose fresh, textured leaves, apply a thin coat of paint, press evenly, and lift carefully. Once you understand those basics, you can experiment with colors, papers, fabrics, patterns, and layered designs. Leaf printing is proof that beautiful art does not always require expensive supplies. Sometimes it is waiting right outside your door, quietly attached to a tree.
Note: This article is written in original standard American English and is based on widely used craft, art education, and nature-study practices for making painted leaf prints, rubbings, and botanical art projects.


