Table of Contents >> Show >> Hide
- Why Use a Raspberry Pi as a Web Server?
- What You Need Before You Start
- Step 1: Prepare Raspberry Pi OS
- Step 2: Choose Apache or Nginx
- Step 3: Install Your Web Server
- Step 4: Publish Your First Page
- Step 5: Make the Server More Organized
- Step 6: Local Access vs. Public Access
- Step 7: Add HTTPS
- Step 8: Secure the Server
- Common Raspberry Pi Web Server Problems
- What You Can Host on a Raspberry Pi Web Server
- When a Raspberry Pi Is Not the Right Web Server
- Real-World Experiences: What Building a Raspberry Pi Web Server Actually Feels Like
- Conclusion
- SEO Tags
A Raspberry Pi web server is one of those projects that sounds suspiciously ambitious right up until the moment it works. Then suddenly you are the proud operator of a tiny, blinking box that serves web pages from your desk, your shelf, or that one corner of the house where all tech projects go to become “temporary permanent.” The good news is that building a Raspberry Pi server is absolutely doable for beginners, useful for developers, and weirdly satisfying for anyone who enjoys making small computers do big-kid jobs.
This guide walks through how to make a Raspberry Pi web server from start to finish. You will learn what hardware you need, how to install a web server, when to pick Apache versus Nginx, how to test your site locally, how to make it public, and how to add HTTPS so your visitors are not greeted by a browser warning that looks like a cybercrime jump scare. Whether you want to host a portfolio, a documentation site, a personal dashboard, or a lightweight blog, this setup gives you a practical foundation.
Why Use a Raspberry Pi as a Web Server?
A Raspberry Pi is a great fit for a small web hosting project because it is inexpensive, energy-efficient, and flexible. It can serve static HTML pages, lightweight PHP sites, small databases, internal tools, home automation dashboards, and development environments without sounding like a jet engine or turning your power bill into modern art.
That said, let’s keep the expectations healthy. A Raspberry Pi web server is ideal for learning, testing, personal projects, and modest traffic. It is not the best choice for a giant ecommerce platform, a media-heavy site with thousands of simultaneous visitors, or anything mission-critical where downtime costs actual money and not just wounded pride. For small and medium hobby projects, though, it is excellent.
What You Need Before You Start
Before you build your Raspberry Pi web server, gather the basics:
- A Raspberry Pi 3, 4, or 5. Older models can still work for simple sites.
- A reliable microSD card, or better yet, an SSD for improved durability and speed.
- Raspberry Pi OS installed and updated.
- A stable network connection, preferably Ethernet if this server will stay online often.
- SSH access or a keyboard and monitor for setup.
- A domain name if you plan to make the site public.
If your goal is a local-only server for your home or office network, you can stop at the networking basics. If your goal is a public website, you will also need DNS, a way to route external traffic to the Pi, and a plan for HTTPS.
Step 1: Prepare Raspberry Pi OS
Start with a clean, updated Raspberry Pi OS installation. Fresh systems are less mysterious, and mysterious systems usually become “I spent three hours debugging a typo and now I need snacks.” Open Terminal and run:
Once the Pi reboots, confirm that it is on your network and note its local IP address:
You will use that IP address to test the site from another device on the same network. For a more stable setup, assign the Pi a DHCP reservation in your router so its local IP does not change every time it feels emotionally unavailable.
Step 2: Choose Apache or Nginx
One of the first decisions in a Raspberry Pi web server project is choosing the web server software. The two most common options are Apache and Nginx.
Choose Apache if you want easy familiarity
Apache is beginner-friendly, widely documented, and especially convenient if you plan to run PHP in a traditional way. If your project is a simple website, a local intranet page, or a classic LAMP-style stack, Apache is a comfortable choice.
Choose Nginx if you want a lighter footprint
Nginx is famous for being lean, fast, and efficient, especially for static content and reverse proxy setups. On a Raspberry Pi, that efficiency can be attractive. If you want a lightweight static site server, a reverse proxy, or a clean modern config style, Nginx is a strong option.
There is no wrong answer here. Apache is like a roomy toolbox. Nginx is like a compact multitool. Both can build the thing. Pick the one that matches your comfort level and project type.
Step 3: Install Your Web Server
Option A: Install Apache
Now open a browser on another device on the same network and visit:
If you see the Apache default page, congratulations: your Raspberry Pi just became a web server. It is official. It may now develop opinions about uptime.
If you plan to run PHP as well, install PHP support:
Option B: Install Nginx
Then browse to:
If you see the Nginx welcome page, your Pi is serving content successfully. At this point, the tiny computer is doing real server work, which is always a little delightful.
Step 4: Publish Your First Page
The default document root is typically /var/www/html. Replace the default page with your own:
Paste something simple like this:
Save the file, refresh the browser, and your custom page should appear. That simple test proves the full loop is working: browser request, server response, HTML delivered.
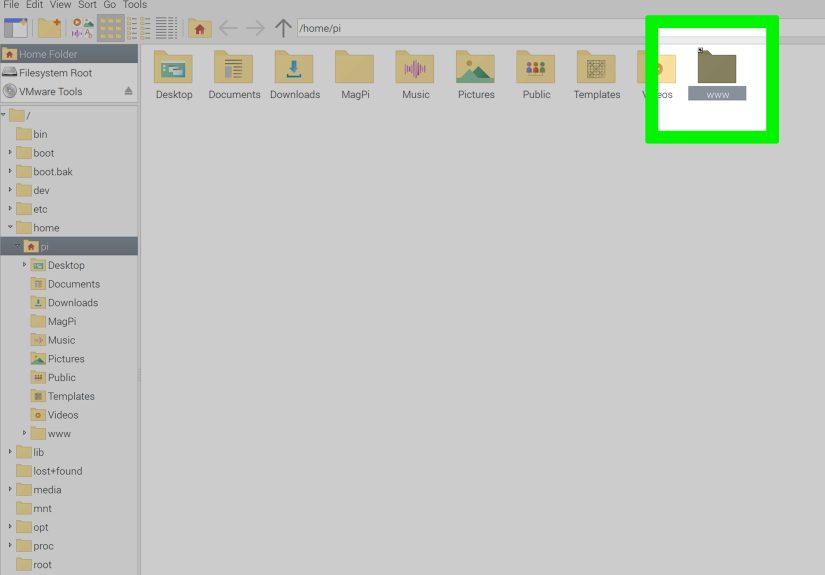
Step 5: Make the Server More Organized
If you are only hosting one tiny site, the default document root is fine. If you want a cleaner setup, create a dedicated site directory. For Apache, you can create a virtual host. For Nginx, you can create a server block. This matters when you want to host more than one project, use a real domain, or keep your config from looking like a junk drawer.
Apache example workflow
Then create an Apache site config in /etc/apache2/sites-available/, enable it, test the config, and reload Apache.
Nginx example workflow
Create a site config in /etc/nginx/sites-available/, link it into /etc/nginx/sites-enabled/, test with sudo nginx -t, and reload with:
This is the point where your Raspberry Pi stops being “that thing running a default page” and starts becoming an actual managed server.
Step 6: Local Access vs. Public Access
You now have a working Raspberry Pi server on your local network. That means devices connected to the same router can reach it using the Pi’s local IP address. For many people, that is enough. Internal dashboards, lab tools, smart home pages, and testing environments work perfectly well this way.
If you want anyone on the internet to access the server, you need a public path to the device.
Option 1: Port forwarding and a domain name
This is the classic route. You configure your router to forward external traffic on port 80 and 443 to the Raspberry Pi’s local IP. Then you point a domain name to your home’s public IP address using DNS records.
This method works, but it comes with responsibility. You are exposing your home-hosted server directly to the internet, so security, updates, and HTTPS are no longer optional decorations. They are the grown-up part of the project.
Option 2: Use a tunnel instead
If you do not want to open ports on your router, a tunnel is often the cleaner option. Cloudflare Tunnel can connect your Pi to Cloudflare’s network using cloudflared, and Tailscale Funnel can expose a local service through an encrypted tunnel. Both approaches can be friendlier than battling router settings, ISP limitations, or carrier-grade NAT.
For a lot of hobbyists, tunnel-based publishing feels like cheating in the best possible way: less network pain, fewer sharp edges, and much less “why does my port forwarding rule look correct but still hate me?”
Step 7: Add HTTPS
If your Raspberry Pi web server is public, use HTTPS. Modern browsers expect it, visitors trust it, and plain HTTP is no longer charmingly retro. It is just risky.
If your site is reachable on a real domain and your server is already responding over HTTP, Certbot is a common way to request and install TLS certificates from Let’s Encrypt.
For Apache
For Nginx
Follow the prompts, allow redirection to HTTPS when offered, and test your site afterward. If you are using a tunnel product, HTTPS may be handled partly by that service, so the exact workflow can differ.
One important detail: certificates are not magical stickers. They depend on domain validation and renewal. Good news, though: Certbot is designed to help automate renewals, so once it is configured correctly, your server can mostly handle that housekeeping on its own.
Step 8: Secure the Server
A Raspberry Pi web server should be small, not reckless. Basic security steps go a long way:
- Change any default credentials and use a strong password.
- Use SSH keys instead of password-only remote login when possible.
- Keep the OS and packages updated.
- Open only the ports you need.
- Back up your site files and configs.
- Do not run random scripts from the internet like they are inspirational quotes.
A simple firewall setup with UFW can help:
If the server is for local use only, you can be even stricter and avoid exposing public traffic entirely.
Common Raspberry Pi Web Server Problems
The page does not load
Check whether the service is running. Use systemctl status apache2 or systemctl status nginx. Then confirm the Pi’s IP address has not changed.
You see a 403 or 404 error
This usually means the document root, permissions, or site path is wrong. Check your config carefully. Servers are wonderfully literal and totally uninterested in your intentions.
The site works locally but not publicly
Look at router forwarding, DNS records, your public IP, and whether your ISP blocks inbound traffic. If this becomes a networking soap opera, a tunnel may be easier.
HTTPS will not issue
Make sure the domain points to the right destination, the server is reachable, and the HTTP site works first. Certificate tools validate control of the domain before issuing certificates.
What You Can Host on a Raspberry Pi Web Server
Once your Raspberry Pi web server is running, you can do much more than serve a single HTML page. Good candidates include:
- A personal website or portfolio
- A small blog or static documentation site
- A home dashboard for sensors or smart devices
- A private wiki or knowledge base
- A development test environment
- A reverse proxy for other services on your network
That range is what makes this project so useful. You are not just learning one trick. You are building a foundation for self-hosting, Linux administration, web deployment, and networking.
When a Raspberry Pi Is Not the Right Web Server
It is smart to know the limits. Move beyond a Pi when you need heavy database workloads, large media processing, very high uptime guarantees, or traffic levels that make the little board sweat metaphorically. The Pi is impressive, but it is still a low-power device, not a secret data center hidden behind your houseplant.
For early-stage projects, internal tools, and educational hosting, though, it is fantastic. And honestly, there is real value in understanding the full stack on a small machine before scaling to bigger infrastructure later.
Real-World Experiences: What Building a Raspberry Pi Web Server Actually Feels Like
The first real experience most people have with a Raspberry Pi web server is surprise. Not because the setup is impossible, but because it is easier than expected to get a site working on the local network. Install Apache or Nginx, edit a single index.html, refresh the browser, and suddenly the Pi is serving pages like it has been doing this its whole life. That first win matters. It turns a vague idea into something tangible, and it builds confidence fast.
The second experience is usually humility. A local site is easy. A polished, reliable, secure public site is where the grown-up lessons begin. People discover that web hosting is not just “install server, done.” It is DNS records, router behavior, service restarts, permissions, firewall rules, HTTPS certificates, and the occasional moment where everything looks correct but still refuses to work because one config file is pointing to the wrong folder. That is not failure. That is the normal curriculum.
Many Raspberry Pi owners also notice how educational the project becomes once real traffic is involved. You start caring about page size, image optimization, caching, startup services, log files, and reboot behavior. You learn that a tiny server can feel very professional when it is organized well. You also learn that bad habits become visible quickly. If a page takes forever to load on a Pi, the Pi is often doing you a favor by exposing inefficiency early.
Another common experience is choosing between pride and convenience when it comes to networking. Some people love port forwarding and direct DNS because it feels like “real” hosting. Others try it once, lose an evening to router settings, and happily move to Cloudflare Tunnel or Tailscale Funnel. Both paths are valid. The best setup is the one you can maintain without turning every update into a relationship test between you and your network.
Then there is the long-term experience, which is probably the best one of all: the Pi keeps quietly doing its job. It serves a personal site, hosts a dashboard, runs a family wiki, or powers a lab project with almost no noise and very little electricity. That reliability is what makes the Raspberry Pi web server such a beloved project. It teaches useful skills, solves real problems, and gives you a small but meaningful sense of ownership over your corner of the web. And that feeling is hard to beat.
Conclusion
Learning how to make a Raspberry Pi web server is one of the best hands-on projects for understanding modern web hosting at a practical level. You install a server, publish content, test requests, manage networking, lock down security, and optionally put a real domain and HTTPS in front of it. That is a lot of value from one very small computer.
Start simple. Get the local site working first. Then decide whether Apache or Nginx fits your style, whether you want local-only or public access, and whether direct exposure or a tunnel makes more sense. Build the cleanest version that meets your needs, keep it updated, and let the Pi do what it does best: quietly punch above its weight.


