Table of Contents >> Show >> Hide
- What Is a Bra Strap Bracelet, Exactly?
- Why This DIY Gift Actually Works
- Materials You’ll Need
- How to Choose the Right Strap
- How to Measure for the Right Fit
- Step-by-Step: How to Make a Bra Strap Bracelet
- How to Make It Look More Like Jewelry and Less Like a Random Strap
- Common Mistakes to Avoid
- Gift Presentation Ideas
- Care and Maintenance
- Experience-Based Tips: What Making One Actually Feels Like
- Conclusion
Publish-ready HTML body only. English content. SEO JSON block included at the end.
Some handmade gifts cost a fortune. Others require a laser cutter, three YouTube certifications, and the patience of a saint. A bra strap bracelet is not one of those gifts. It is simple, surprisingly wearable, and packed with the kind of personal meaning that store-bought accessories usually can’t fake. If you’ve seen the trend online and thought, “That’s oddly sweet and weirdly clever,” you are in exactly the right place.
This guide walks you through how to make a bra strap bracelet for your significant other in a way that looks intentional, feels comfortable, and doesn’t scream “I made this in thirty-seven chaotic seconds before dinner.” We’ll cover tools, sizing, design ideas, common mistakes, and ways to make the finished bracelet look polished instead of accidental. We’ll also keep things practical: clean materials, comfortable construction, and gift-worthy presentation matter more than dramatic symbolism.
One important note before we start: if you’re making a bracelet from an actual bra strap, use a clean strap from an old, damaged, or unused bra. If that feels too personal, too awkward, or simply not your style, you can buy replacement bra straps or similar elastic straps from sewing and craft suppliers and get the same look. Same vibe, less chaos.
What Is a Bra Strap Bracelet, Exactly?
A bra strap bracelet is a DIY bracelet made from the adjustable strap portion of a bra or from a similar elastic replacement strap. The reason the idea caught on is pretty obvious: the strap is already soft, flexible, lightweight, adjustable, and fitted with useful hardware. In other words, it is halfway to becoming a bracelet before you even touch the scissors.
For some people, the appeal is sentimental. For others, it’s just a funny, low-cost, low-pressure craft that turns an everyday material into a wearable keepsake. It can be minimal and subtle, or personalized with beads, charms, thread wrapping, embroidery, initials, or a small engraved tag. Think of it as upcycled jewelry with a little personality and a story attached.
Why This DIY Gift Actually Works
A good handmade gift checks three boxes: it feels personal, it’s usable, and it doesn’t look like a random school project. A bra strap bracelet can hit all three if you make it well. The elastic gives it comfort. The slider hardware gives it adjustability. And the fact that it’s handmade gives it emotional value that a generic bracelet from a checkout aisle simply cannot compete with.
It also works because it’s customizable. You can keep it ultra-simple for someone who likes low-key accessories, or dress it up with metal findings and charms for a more decorative finish. This makes it a flexible craft for different styles, whether your significant other is into clean basics, streetwear, casual looks, or a sentimental “I’ll keep this forever” type of gift.
Materials You’ll Need
Basic Supplies
- One clean bra strap or replacement bra strap
- Sharp scissors
- Measuring tape or a strip of paper and ruler
- Needle and thread, or fabric glue, or both
- Jewelry clasp, if needed
- Jump rings or split rings
- Two pairs of pliers for jewelry hardware
Optional Extras
- Charms or letter beads
- Embroidery floss or ribbon for wrapping
- Small metal end caps
- Fray-preventing glue or clear-drying fabric sealant
- A small gift box or pouch
If your strap already has a slider and loop hardware in good shape, that’s a bonus. Those little pieces do a lot of the structural work for you. If the original ends are too bulky or damaged, you can trim them away and attach a new clasp system instead.
How to Choose the Right Strap
Not every strap makes a good bracelet. The best ones are soft, not overly padded, and not too flimsy. A medium-width strap usually works best because it feels substantial without looking clunky. Super-thin straps can look delicate, which is great for a subtle design, but they may twist more easily. Very wide straps can feel sporty, but they sometimes look more like a wristband than a bracelet.
Look for these features:
- Elastic that still has stretch and recovery
- Smooth fabric without heavy pilling
- Hardware that is not rusty or bent
- A neutral or attractive color that fits the recipient’s style
- Enough length to wrap around the wrist with room for adjustment
Black, white, beige, gray, and muted colors are easiest to style. If you want the bracelet to feel more like jewelry and less like a novelty, darker or more neutral shades usually work better than neon lace explosions. Unless neon lace explosions are the relationship brand. In that case, carry on.
How to Measure for the Right Fit
Before you cut anything, measure the wrist. This step matters more than people think. A bracelet that is too tight feels annoying. A bracelet that is too loose turns into a tiny elastic hula hoop. Neither is ideal.
Wrap a flexible measuring tape around the wrist where the bracelet will sit. If you don’t have one, use a strip of paper or string, mark it, and measure it against a ruler. Then add a little extra room for comfort. If you’re using a clasp, remember that the clasp itself adds length. If you’re using the strap’s built-in slider, keep enough room for adjustment so the bracelet can be tightened or loosened after it’s finished.
A smart move is to cut slightly longer than you think you need, test the fit, and then trim again if necessary. The number one beginner mistake is cutting first and regretting it immediately after.
Step-by-Step: How to Make a Bra Strap Bracelet
Step 1: Clean and Inspect the Strap
Wash the strap gently and let it dry fully before working on it. Check for fraying, weak stitching, stretched-out elastic, or damaged hardware. If the strap looks tired enough to need emotional support, pick another one.
Step 2: Decide on Your Closure Style
You have three practical options:
- Use the original slider and hook setup: easiest if the hardware is already neat and functional.
- Add a jewelry clasp: better for a cleaner, more bracelet-like finish.
- Create a sewn loop closure: simple and soft, especially for a casual design.
If the existing hardware looks sleek, keep it. If it looks too much like underwear hardware and not enough like jewelry, upgrade it with a lobster clasp, magnetic clasp, toggle clasp, or button closure.
Step 3: Cut the Strap to Length
Measure the wrist, add your comfort allowance, and account for the clasp. Then cut the strap neatly. Use sharp scissors so the edge stays clean. If the cut end looks like it wants to unravel at the first sign of trouble, seal it with a tiny amount of fabric glue or anti-fray product.
Step 4: Finish the Ends
A raw cut edge is where many DIY gifts go from “sweet handmade bracelet” to “craft emergency.” Fold the cut end inward by a small amount and stitch it down, or use fabric glue if the material allows. A combination of light stitching and adhesive often creates the most secure finish. Keep the fold compact so it doesn’t create a thick lump against the wrist.
Step 5: Attach Hardware
If you’re using a clasp, attach one end of the bracelet to a jump ring and the other end to the clasp side. Use two pairs of pliers to open jump rings by twisting them sideways rather than pulling them apart. That helps the ring keep its shape and close more securely. Close the ring firmly so there’s no gap.
If you don’t want exposed metal on the fabric, you can sew a small fabric loop at one end and attach the clasp or button through that loop instead.
Step 6: Add Personal Details
This is the fun part. Keep it tasteful and wearable. A small initial charm, a tiny heart, a favorite color thread wrap, or a short word bead section can make the bracelet feel custom without turning it into a jingling keychain for the wrist. Good design is about restraint. Just because you own fifteen charms does not mean all fifteen need to attend.
Step 7: Test the Fit
Put the bracelet on a wrist before you call it finished. Check that it lies flat, doesn’t twist too much, and feels secure without pinching. Pull on the clasp lightly. Slide the adjuster if it has one. This is your quality-control moment. Handmade doesn’t mean you skip the final exam.
How to Make It Look More Like Jewelry and Less Like a Random Strap
The difference is all in the finishing. Here’s how to upgrade the final look:
- Use matching metal tones for charms, rings, and clasps
- Trim all loose threads and seal the ends cleanly
- Wrap part of the strap with embroidery floss for contrast
- Add one focal detail instead of five distracting ones
- Choose a strap color that works with everyday outfits
You can also turn the bracelet into a layered gift by pairing it with a short note explaining why you made it. That note doesn’t need to be dramatic. In fact, less is often better. A simple “Made this for you because I wanted something personal, wearable, and a little ridiculous in the best way” is charming and memorable.
Common Mistakes to Avoid
Cutting It Too Short
This is the classic error. Always test the length before finishing both ends. Elastic, folds, and clasp components can change the final size more than expected.
Ignoring Fraying
If the end is unraveling, don’t pretend it will somehow become elegant later. Seal it early and neatly.
Using Weak Hardware
A bracelet gets tugged on more than people realize. Weak jump rings or loose clasps can fail fast. Use solid findings and close them properly.
Overdecorating the Design
A bracelet should still be comfortable enough to wear regularly. If every inch has beads, charms, knots, and wire, the bracelet may become more symbolic than wearable.
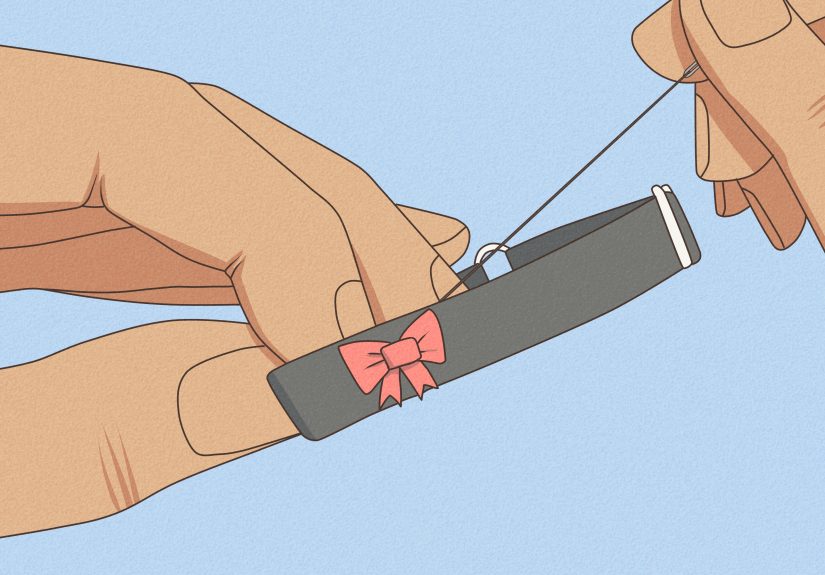
Gift Presentation Ideas
Presentation matters. A good bracelet feels even more thoughtful when it arrives like a real gift instead of an item rescued from a desk drawer. Try one of these:
- Place it in a small kraft jewelry box with tissue paper
- Wrap it around a handmade card with a short message
- Put it in a soft pouch with a tiny tag explaining the design
- Pair it with candy, a playlist, or another small handmade item
The bracelet itself is simple, so the presentation can elevate the whole experience without much extra effort.
Care and Maintenance
Because this is a fabric-and-elastic bracelet, it won’t behave like stainless steel jewelry or a solid bangle. That’s fine. It just means you should treat it like a soft accessory. Avoid soaking it in water, yanking it hard, or leaving it in hot places for long periods. If it gets dirty, spot clean gently and let it air dry flat.
If you added metal charms or decorative thread, check the bracelet now and then for loosening. A thirty-second repair early is much better than a full bracelet rescue mission later.
Experience-Based Tips: What Making One Actually Feels Like
The experience of making a bra strap bracelet is usually a mix of “This is easier than I expected” and “Why is this tiny jump ring suddenly the most difficult object on Earth?” That combination is part of the fun. On paper, the project looks incredibly simple. In real life, it teaches a few useful lessons about handmade gifts very quickly.
First, most people underestimate how much cleaner the bracelet looks when they slow down during the measuring stage. A rushed maker tends to eyeball the wrist size, snip the strap, and assume the slider will save everything. Sometimes it does. Sometimes it absolutely does not. The better experience comes from testing the length two or three times and making small adjustments before finishing the ends. That extra minute usually separates a bracelet that gets worn from one that gets tucked into a drawer.
Second, the emotional part of the gift usually gets stronger when the design is subtle. A lot of first-time makers think they need to stack on letters, beads, glitter, ribbon, and every charm they can find in the house. Then they put it together and realize it looks less like a meaningful keepsake and more like a craft store exploded on a wrist. In practice, the bracelets people remember most often have one or two thoughtful details: a small initial, a favorite color, a tiny symbol, or a simple wrap detail that means something to both people.
Another common experience is discovering that the original hardware can be either a hero or a villain. Sometimes the existing slider makes the bracelet incredibly easy to fit and gives it a neat adjustable finish. Other times, the hardware looks awkward or bulky, which pushes the whole design closer to novelty than style. That’s why many makers end up happiest when they treat the strap like a raw material rather than a finished shortcut. Trimming, refolding, and adding a cleaner clasp can make the final bracelet feel far more intentional.
People also tend to remember the reaction more than the build. Handmade gifts like this work best when the recipient understands the thought behind them. It’s not about the cost of the material. It’s about the fact that someone took time to design something wearable, personal, and a little unusual. Even when the bracelet is simple, that effort comes through. In many cases, the gift lands better when it is presented with humor instead of pressure. A light, warm delivery makes the bracelet feel sweet. A dramatic speech worthy of an awards show? Probably unnecessary.
Finally, making this kind of bracelet often changes how people think about DIY gifts in general. It proves that meaningful doesn’t have to mean expensive, and personal doesn’t have to mean complicated. Sometimes the best projects are built from humble materials, good finishing, and a clear idea. That’s really the charm of a bra strap bracelet for a significant other: it’s small, wearable, easy to customize, and memorable for reasons bigger than its size.
Conclusion
If you want a handmade gift that is personal, affordable, customizable, and surprisingly stylish, a bra strap bracelet is a smart DIY project. The key is not just the material. It’s the execution. Measure carefully, finish the ends neatly, choose secure hardware, and keep the design wearable. That is how you turn a quirky idea into a bracelet someone might actually reach for again and again.
Whether you use an old strap, a clean spare, or a replacement elastic band, the result can be thoughtful and fun without being overly complicated. Make it simple, make it comfortable, and make it feel like the person receiving it. That’s the real secret.