Table of Contents >> Show >> Hide
- Why Rigidity Sits at the Center of Precision
- What Rigidity Really Means in the Shop
- The Usual Suspects That Destroy Rigidity
- Chatter: The Shop’s Most Annoying Jazz Drummer
- How Machinists Build Rigidity Into the Cut
- Real-World Examples of Rigidity in Action
- Rigidity Is Also a Mindset
- Experience From the Floor: What Rigidity Teaches You
- Conclusion
Every machine shop has its own folklore. Some of it sounds scientific. Some of it sounds like it was handed down by a wizard in steel-toe boots. But one truth survives every trend, every shiny catalog, and every argument over feeds and speeds: if the setup is flimsy, the part is in trouble. In machining, precision does not begin with a digital readout or a premium insert. It begins with rigidity.
That may not sound glamorous. Rigidity does not sparkle like a new five-axis machine, roar like a high-horsepower spindle, or make your CAM software feel like a spaceship. But rigidity is the quiet hero of accurate machining. It is the reason one shop gets mirror-like finishes and repeatable tolerances while another gets chatter marks, mystery taper, broken tools, and the sort of language that makes the coolant blush.
At its simplest, rigidity is resistance to unwanted movement. The machine, toolholder, cutter, fixture, and workpiece all need to resist bending, twisting, vibrating, and walking off script under cutting forces. The stiffer the system, the more faithfully the tool follows the programmed path. The less rigid the system, the more that path turns into a suggestion. And suggestions are wonderful in dinner plans, not in aerospace bores or mold cavities.
Why Rigidity Sits at the Center of Precision
Machining is a force-filled event, not a peaceful negotiation. Every chip removed pushes back on the tool, the spindle, the part, and the setup. If any part of that chain deflects too much, the tool cuts somewhere other than where you intended. That is how a perfect CAD model becomes an undersized shoulder, a tapered wall, an out-of-round bore, or a finish that looks like it was machined during a mild earthquake.
This is why seasoned machinists talk about rigidity with almost spiritual reverence. A rigid setup improves dimensional accuracy, surface finish, tool life, and process stability all at once. It also lets you cut more confidently. In practical terms, rigidity gives you permission to increase material removal without immediately summoning chatter, tool wear, or scrap.
And here is the part that makes rigidity especially important: precision is not only about static stiffness. It is also about dynamic behavior. A setup can seem solid while sitting still and still behave like a nervous cymbal when the spindle starts cutting. That is why machine mass, structure, damping, tool overhang, holder quality, workholding, and even part geometry all matter. Precision lives where stiffness and stability shake hands.
What Rigidity Really Means in the Shop
The Machine Structure
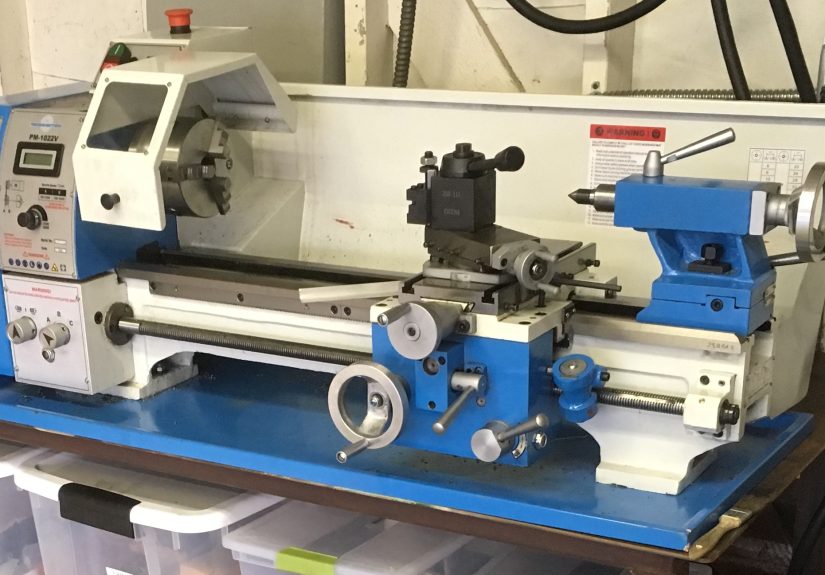
A machine tool with a stiff frame and well-supported moving axes creates the foundation for good work. Cast iron, ribbed bases, box ways, robust columns, and thoughtfully engineered structures are not there for decoration. They exist because machine tools must resist cutting forces without distorting. A machine that flexes under load may still move quickly and look impressive on a brochure, but accuracy under pressure is where truth shows up.
The Spindle and Toolholder Interface
Think of the spindle-to-holder connection as the handshake between power and precision. If it is loose, worn, or poorly matched, the system loses stiffness and runout increases. That creates uneven cutting forces, poor finish, and early tool failure. Strong interfaces and solid holders help the cutter stay aligned, reduce vibration, and keep the cutting edge doing actual work instead of interpretive dance.
The Cutting Tool
Tool diameter, flute length, core strength, and overall reach all influence rigidity. A short, stout end mill is far stiffer than a long, skinny one. That is not shop superstition. It is basic mechanics. The farther a tool hangs out, the easier it bends. The more it bends, the more likely it chatters. And chatter is machining’s favorite way to turn confidence into rework.
The Workholding and Fixture
Even the best machine and cutter cannot save a weak setup. If the vise, fixture, chuck, or custom workholding allows the part to move, the process is compromised. Thin parts, tall parts, interrupted cuts, and long stick-out conditions make workholding even more critical. A rigid fixture supports the part close to the cut, distributes clamping force wisely, and keeps the work from acting like a tuning fork.
The Usual Suspects That Destroy Rigidity
Most rigidity problems do not arrive wearing a cape. They sneak in through ordinary decisions.
Too much overhang is the classic offender. Whether it is a boring bar, reamer, end mill, or parting blade, extra extension makes the tool easier to deflect. Shops love reach right up until reach starts fighting back.
Underbuilt tooling is another culprit. A small-diameter cutter might fit the feature, but if a larger, stiffer option can do the same job, the smaller tool may be the wrong hero for the movie.
Weak workholding causes parts to vibrate, shift, or spring. This gets especially ugly with thin walls, long slender shafts, and parts that are already begging for mercy.
Worn holders, runout, or poor assembly rob stiffness and consistency. Precision machining does not tolerate lazy interfaces.
Machine selection mismatches matter too. Some jobs demand brute stiffness more than kinematic flexibility. High-speed contouring on complex parts is wonderful, but added axes and reach can create tradeoffs in rigidity if the setup is not carefully planned.
Chatter: The Shop’s Most Annoying Jazz Drummer
No discussion of rigidity is complete without chatter, the shrieking, finish-destroying, tool-chewing villain of metal cutting. Chatter is self-excited vibration. Once it starts, it can feed on itself. The tool leaves a waviness on the surface, the next pass rides into that waviness, the system vibrates more, and suddenly your cutter sounds like it is filing a complaint with management.
Chatter does more than make noise. It reduces surface quality, speeds up wear, chips edges, damages spindle health, and limits productivity. Shops often try to cure chatter only with spindle speed tweaks, and yes, that can help. But spindle adjustment alone is often a bandage on a structural problem. If the setup lacks rigidity, the process may remain fragile no matter how cleverly you juggle the RPM.
That is why the smartest anti-chatter move is often mechanical, not magical: shorten the tool, increase support, improve the holder, reduce reach, change the cutter geometry, or fixture the part more effectively. In other words, make the system stiffer before you ask it to behave better.
How Machinists Build Rigidity Into the Cut
1. Minimize Tool Overhang
This is the first commandment. Use the shortest tool that safely reaches the feature. Chuck it as deeply as practical. If you do nothing else, doing this one thing will solve an alarming number of shop-floor headaches.
2. Increase Tool Diameter When Possible
A larger-diameter tool usually offers more core strength and less deflection. That matters in side milling, slotting, and finishing passes where tool bend can quietly wreck tolerances. Bigger is not always better, but in terms of rigidity, skinny tools do not win many arguments.
3. Use Stronger Holders and Interfaces
Collet systems have their place, but high-rigidity holders, hydraulic chucks, shrink-fit systems, and well-maintained spindle interfaces often provide better stability for demanding cuts. The goal is simple: reduce movement between the spindle and the cutting edge.
4. Support the Workpiece Close to the Cut
If the part is thin or tall, give it backup. Use parallels wisely, add soft jaws, support with tailstocks or steadies when appropriate, and design fixtures that carry force instead of merely hoping for the best. The closer the support is to the action, the less the part behaves like a diving board.
5. Match Cutting Parameters to Reality
Rigid setups let you push. Less rigid setups need diplomacy. Depth of cut, width of cut, feed, step-over, and spindle speed all interact with stiffness. Sometimes increasing feed stabilizes the process. Sometimes changing axial engagement helps. Sometimes a strategic speed change moves the cut out of a chatter zone. But those decisions work best when they are grounded in the setup’s actual stiffness, not in wishful thinking.
6. Use Damped or Specialized Tooling for Long Reach
Some features simply require reach. Deep bores, narrow cavities, and awkward geometry do not always permit stub tooling. In those cases, damped boring bars, vibration-control systems, and specialized long-reach cutters can restore enough stability to make the job practical. These tools cost more, but so does scrapping a high-value part while pretending physics is optional.
Real-World Examples of Rigidity in Action
Deep-hole boring: A long boring bar begins to sing, the bore goes out of round, and the finish looks dreadful. The fix is rarely “believe harder.” It is usually shorter overhang, a stiffer bar material or damped bar, better holder support, or adjusted cutting parameters.
Thin-wall aluminum parts: Roughing too aggressively on a flexible wall invites deflection and spring-back. Skilled machinists leave support stock, use strategic sequencing, reduce radial engagement, and finish only after the part has enough support to behave.
Five-axis contour work: Five-axis machining delivers access and efficiency, but long gauge lengths, angled approaches, and complex reach can reduce rigidity. Great results come from pairing toolpath strategy with holder choice, tool selection, and machine behavior.
Parting and grooving: The farther the blade sticks out, the more the process becomes a negotiation with vibration. Overhang limits, blade selection, feed strategy, and machine geometry all determine whether the cut is smooth or dramatic.
Rigidity Is Also a Mindset
The best machinists do not worship rigidity because they love heavy iron for its own sake. They value it because it forces discipline. Rigidity is the physical expression of good judgment. It rewards careful setup, realistic tool choice, clean interfaces, smart fixturing, and honest process planning.
That is why excellent shops often look calm. They are not relying on heroics at the spindle. They are stacking the odds in their favor before the cycle starts. They know the machine cannot compensate for every bad decision downstream. It can only reveal them at high speed.
In that sense, rigidity is more than a machine property. It is a way of thinking. It asks a machinist to stop chasing symptoms and start fixing causes. Bad finish? Check stiffness. Broken tools? Check stiffness. Wandering size? Check stiffness. Strange harmonic squeal that sounds like a robot learning opera? Definitely check stiffness.
Experience From the Floor: What Rigidity Teaches You
The longer you spend around machine tools, the more you realize that rigidity has a personality. It is not flashy, but it is brutally honest. Early in a machinist’s life, there is often a phase where every problem looks like a feeds-and-speeds problem. Surface finish is ugly? Tweak the RPM. Tool chipped? Back off the feed. Bore tapered? Maybe blame the insert. Sometimes those adjustments help. Sometimes they are just moving deck chairs around on a ship made of deflection.
Then comes the job that teaches the real lesson. It might be a long bore in tough steel, a thin-wall housing that keeps springing away from the cutter, or a cavity so deep the end mill looks like it needs emotional support. You try the usual tricks. You change speeds. You swap inserts. You mutter ancient shop prayers. Nothing works. Then someone with thirty years of scar tissue walks over, looks at the setup for three seconds, and says, “Too much stick-out.” Just like that, the mystery becomes mechanics.
That lesson sticks. You shorten the tool. You move the clamp closer. You switch to a sturdier holder. You reduce the unsupported length of the part. Suddenly the sound changes. The cut feels calmer. The finish improves. The spindle stops sounding personally offended. And the really humbling part is this: the machine was capable all along. The problem was not hidden in some magical parameter. The system simply needed to stop bending.
Over time, experienced machinists begin to spot rigidity issues before the first chip flies. They look at a setup and can almost hear whether it will chatter. They notice the long jaws, the weak clamping, the excessive reach, the tiny tool trying to do a heavyweight job, or the tall part waiting to ring like a bell. That instinct is not superstition. It is pattern recognition built from hundreds of cuts and a respectable number of mistakes.
There is also a quiet satisfaction in solving a job through stiffness rather than brute force. Anybody can slow a process to a crawl and eventually get a part. The art is making the setup strong enough that the part can be made accurately, efficiently, and repeatably. That is where craftsmanship shows. A rigid process is not just safer and faster; it is more elegant. It respects the machine, the material, the tool, and the operator’s time.
And maybe that is why machinists keep returning to this mantra. Precision, in the end, is not only about measurement. It is about control. Control of movement. Control of force. Control of vibration. When the system is rigid, the cut becomes predictable, and predictability is the bedrock of quality. Every veteran eventually learns the same truth: when a setup is solid, everything gets easier. When it is not, everything gets weird.
Conclusion
The machinists’ mantra endures because it is true: precision loves rigidity. A rigid machine, rigid holder, rigid tool, rigid fixture, and well-supported part create the stable platform that accurate machining demands. When stiffness is high, chatter drops, finish improves, tolerances hold, and productivity rises. When stiffness is low, the process becomes noisy, fragile, and expensive.
So the next time a cut starts squealing, a wall starts wandering, or a finish turns ugly, do not start with panic. Start with the structure of the process. Look at the overhang. Look at the holder. Look at the fixture. Look at the part support. Because in machining, precision is not a miracle. It is a mechanical consequence. And more often than not, its true name is rigidity.
Note: Prepared for web publication; source-reference artifacts removed.


