Table of Contents >> Show >> Hide
- What You’ll Learn
- Before You Buy Anything: Pick the Right Hardwood and Install Method
- Tools and Materials Checklist
- Jobsite Prep: The Unsexy Stuff That Makes the Floor Look Expensive
- Step-by-Step: Nail-Down Hardwood Installation
- Step 1: Install the underlayment (if required)
- Step 2: Snap a straight starting line
- Step 3: Lay the first row (face-nail where the flooring nailer can’t reach)
- Step 4: Start blind-nailing through the tongue
- Step 5: Keep your pattern clean
- Step 6: Handle obstacles and doorways
- Step 7: Finish the last rows
- Step-by-Step: Glue-Down Hardwood Installation
- Step 1: Confirm the slab and surface prep
- Step 2: Plan your working area (glue waits for no one)
- Step 3: Spread adhesive in small sections
- Step 4: Set boards, keep expansion gaps, and watch for “creep”
- Step 5: Roll the floor (if the adhesive system calls for it)
- Step 6: Clean adhesive immediately
- Step 7: Cure time and post-install protection
- Step-by-Step: Floating / Click-Lock Engineered Hardwood
- Special Situations (Because Homes Love Plot Twists)
- Common Mistakes That Turn a Dream Floor Into a Group Project
- Real-World Experiences: What Usually Happens Somewhere Around Row 7 (Extra )
- Wrap-Up
Installing hardwood flooring is equal parts carpentry, geometry, and emotional resilience. Done right, it looks like a magazine spread.
Done wrong, it looks like your floor is trying to escape the room. This guide walks you through the full processprep, layout, and
installationplus the three main methods (nail-down, glue-down, and floating/click-lock) so you can choose the approach that matches
your flooring, subfloor, and sanity level.
One promise: we’ll spend more time on the boring stuff (moisture, flatness, expansion gaps) than most DIY videos do. Because that’s the
boring stuff that keeps your boards from cupping, creaking, or doing the wave after your first humid summer.
Before You Buy Anything: Pick the Right Hardwood and Install Method
Solid vs. engineered hardwood (why it matters)
Solid hardwood is one piece of wood, typically thicker, and can be refinished multiple times. It’s classicand it moves more
with seasonal humidity swings. Engineered hardwood has a real wood top layer (wear layer) over stable core layers, making it
more dimensionally steady and often better suited for concrete slabs, condos, and rooms that aren’t humidity-perfect all year.
The three main installation methods
Your install method is largely decided by two things: what you bought (solid vs engineered; tongue-and-groove vs click-lock) and
what you’re installing over (plywood/OSB vs concrete).
- Nail-down (or staple-down): Common for solid hardwood over wood subfloors. Fast, sturdy, very “traditional hardwood floor energy.”
- Glue-down: Popular for engineered hardwood, especially over concrete. Also used for some solid hardwood with the right adhesive system.
-
Floating/click-lock: Engineered boards click together and “float” over an underlaymentno fasteners into the subfloor. DIY-friendly,
but still picky about flatness and expansion gaps.
Quick decision cheat sheet
- Solid hardwood + plywood subfloor: Nail-down is usually the go-to.
- Engineered hardwood + concrete slab: Glue-down or floating (depending on the product).
- Click-lock engineered: Floating is the pointjust follow the manufacturer’s underlayment and vapor barrier requirements.
- Concrete + you want nail-down anyway: You’d need an approved plywood subfloor system first, which adds cost and height.
Tools and Materials Checklist
Must-haves
- Moisture meter (for wood subfloors and wood flooring)
- Tape measure, chalk line, pencil
- Speed square, straightedge (6 ft) or long level for checking flatness
- Miter saw or circular saw (with the right blade), jigsaw for notches
- Rubber mallet + tapping block
- Pry bar / pull bar for tight last rows
- Spacers for expansion gap
- Safety gear: eye protection, hearing protection, knee pads, dust mask
Method-specific gear
- Nail-down: Flooring nailer/stapler, compressor (if pneumatic), fasteners, nail set, drill for pilot holes near walls
- Glue-down: Manufacturer-approved adhesive, notched trowel (correct notch size), painter’s tape, mineral spirits/cleaner (as recommended), floor roller (often 75–100 lb), lots of rags
- Floating: Underlayment (and vapor barrier if required), seam tape, transitions appropriate for floating floors
Pro tip: buy more blades than you think you need. Hardwood is basically a blade-eating contest with a decorative outcome.
Jobsite Prep: The Unsexy Stuff That Makes the Floor Look Expensive
1) Get the room conditions stable (then keep them stable)
Hardwood is a natural material. It expands and contracts with changes in temperature and humidity. The goal is to install it when the home’s
normal living conditions are already in placeHVAC running, windows and doors installed, and major wet trades (drywall mud, paint, tile
thinset) finished and dry.
Don’t treat “acclimation” like a timer you set and forget. Think of it as: “Is the flooring’s moisture content reasonably matched to the jobsite
environment?” A moisture meter is how you answer that with facts instead of hope.
2) Moisture test like your warranty depends on it (because it does)
Moisture is the #1 reason hardwood floors fail. The fix isn’t “more nails” or “more glue.” The fix is verifying the subfloor and the wood are within
acceptable moisture ranges before you install.
-
Wood subfloors: Use a calibrated wood moisture meter on the subfloor and on multiple flooring boards from different boxes.
You’re looking for the flooring to be close to the subfloor’s moisture contentnot wildly different. -
Concrete slabs: Concrete can look dry and still be emitting moisture vapor. Follow the flooring/adhesive manufacturer’s required
concrete moisture tests (commonly calcium chloride or in-situ RH tests) and document the results.
3) Check subfloor flatness (flat, not necessarily level)
“Level” is great for pool tables. Hardwood mostly cares about flat. Humps cause rocking boards, hollow sounds, and gaps. Valleys
can cause bounce and poor fastener hold.
Use a long straightedge and mark high/low spots. If you’re outside flatness tolerances, fix it nowsand/grind down highs, and fill lows with
an approved leveling compound (and follow adhesive compatibility rules if you’re gluing down).
4) Remove baseboards and undercut door jambs
Remove baseboards so the floor can expand under the wall trim. Undercut door jambs and casing so boards slide under them for a clean look.
(Yes, it feels wrong to cut your trim on purpose. It feels more wrong to stare at a jagged notch around every doorway forever.)
5) Plan your layout (so you don’t end with a 1-inch “sad strip”)
- Direction: Many installers run boards parallel to the longest wall or perpendicular to joists for a traditional look.
- Dry layout: Measure room width and calculate how wide the last row will be. Adjust your starting line to avoid a tiny last row.
- Racking: Open multiple cartons and mix boards for natural color variation. Stagger end joints so they don’t line up in a “brick wall of regret.”
- Expansion gap: Leave the manufacturer-required gap around the entire perimeter and at fixed vertical objects (columns, hearths, etc.). Don’t fill this with wood. Trim covers it.
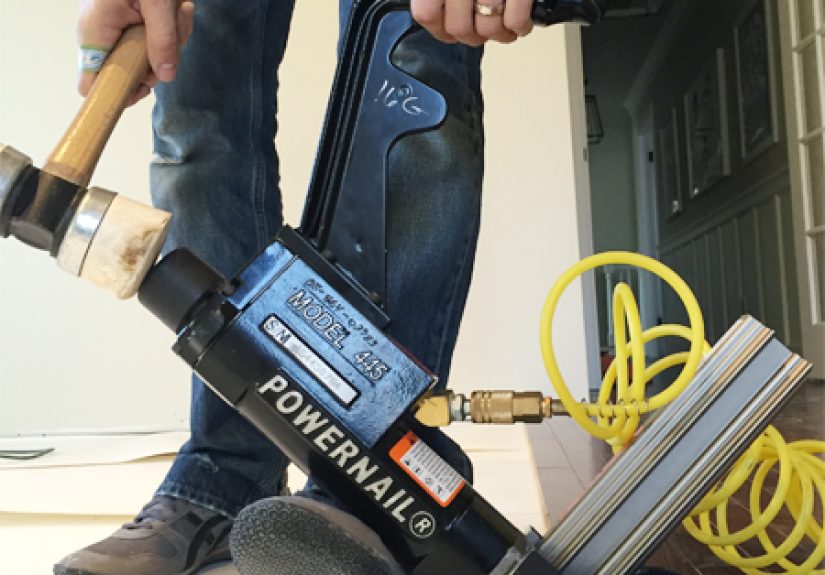
Step-by-Step: Nail-Down Hardwood Installation
Nail-down is the classic method for solid hardwood over a wood subfloor. It’s strong, fast, and satisfyinglike clicking tongs at a barbecue, but
with more sawdust.
Step 1: Install the underlayment (if required)
Many nail-down installs use a felt/rosin paper underlayment to reduce squeaks and help with minor friction. Follow your flooring manufacturer’s
instructions on what’s approved (and what voids warranties).
Step 2: Snap a straight starting line
Pick your starting wall (often the longest, straightest). Measure out the board width plus the expansion gap and snap a chalk line. This line is
your truth. Treat it like GPS. Ignore it and you’ll end up driving through a lake.
Step 3: Lay the first row (face-nail where the flooring nailer can’t reach)
Use your straightest boards for row one. Place spacers at the wall for the expansion gap. Because the flooring nailer won’t fit close to the wall,
you’ll typically face-nail or hand-nail the first row (and often the second/third) after predrilling to prevent splits.
Step 4: Start blind-nailing through the tongue
Once you have clearance, use the flooring nailer to fasten through the tongue at the correct angle. Work row by row, keeping joints staggered and
pulling boards tight as you go. Use a tapping block (never your mallet directly on the tongue unless you like broken tongues).
Step 5: Keep your pattern clean
- Stagger end joints (many guides recommend offsets of at least several inches).
- Avoid “H-joints” where end joints line up across adjacent rows.
- Mix boards from multiple boxes so the floor looks intentionally beautiful, not accidentally patchy.
Step 6: Handle obstacles and doorways
Undercut trim, trace your cuts carefully, and sneak up on tight notches. Leave expansion space at fixed objects and cover it with trim or
appropriate transitions.
Step 7: Finish the last rows
Near the far wall, the flooring nailer won’t fit again. Pre-drill and face-nail the final rows as needed, then fill visible nail holes with
color-matched wood filler/putty. Reinstall baseboards and shoe molding to the wall, not the floor, so the floor can move underneath.
Step-by-Step: Glue-Down Hardwood Installation
Glue-down is common for engineered hardwood and is often chosen for concrete slabs. The key is using the exact adhesive system
specified by the flooring manufacturerand applying it with the correct trowel notch and technique.
Step 1: Confirm the slab and surface prep
Concrete must be clean, flat, and free of bond breakers (paint overspray, drywall mud, oil/grease, sealing compounds that aren’t approved).
Test moisture using the manufacturer-required method and record results. If you need a moisture mitigation system or primer, do it now and let it
cure per the product instructions.
Step 2: Plan your working area (glue waits for no one)
Dry-lay a few rows to confirm your line and your joint stagger. Once adhesive is down, you’ll want a clear path to work without stepping in glue
like a cartoon villain.
Step 3: Spread adhesive in small sections
Pour out only what you can cover in a short window and trowel it with the recommended notch size. Many guides advise spreading enough for just
a couple rows at a time so the adhesive doesn’t skin over before boards go in.
Step 4: Set boards, keep expansion gaps, and watch for “creep”
Place the first row along your guideline with spacers at the walls. Fit the next row, tap boards tight with a mallet and block, and keep joints
staggered. Use painter’s tape across seams if boards want to drift while the adhesive grabs (especially with longer planks).
Step 5: Roll the floor (if the adhesive system calls for it)
Some glue-down systems require rolling the floor with a heavy roller to ensure proper transfer and a tight bond. Follow the adhesive manufacturer’s
instructions on timing and roller weight.
Step 6: Clean adhesive immediately
Dried urethane adhesive is basically fossilized regret. Clean squeeze-out right away with the approved cleaner and rags. Keep a “clean rag” pile and
a “this rag is now part of the adhesive” pile.
Step 7: Cure time and post-install protection
Respect cure times before heavy furniture, rugs, or wet mopping. Add felt pads to furniture and protect high-traffic paths while you finish trim work.
Step-by-Step: Floating / Click-Lock Engineered Hardwood
Floating floors are DIY-popular because they install fast and don’t require a nailer or wet adhesive across the whole floor. But they’re picky about
flatness and expansion space. Think of them like a well-trained dog: easy, but only if you follow the rules consistently.
Step 1: Install underlayment (and vapor barrier if required)
Use the underlayment specified for your product. Some setups require a separate vapor barrier on concrete; others combine it. Tape seams per
instructions so moisture doesn’t sneak through the cracks like it pays rent.
Step 2: Establish a straight first row
Use spacers for the expansion gap. Start with the straightest boards. If your first row wanders, every other row will follow it into the woods.
Step 3: Click, lock, and tap gently
Engage the locking mechanism per the manufacturer’s angle/tap method. Use a tapping block so you don’t damage edges. Keep seams tight and
avoid forcing a board that clearly wants a cleaner cut.
Step 4: Stagger joints and keep the floor floating
Stagger end joints so seams aren’t lining up across rows. Also, do not trap the floating floor with heavy fixed cabinetry or trim nailed through the
floor (unless your manufacturer explicitly allows it). Floating floors need freedom to expand and contract.
Step 5: Finish with transitions and trimattached to walls, not the floor
Use appropriate transitions at doorways and where flooring meets other surfaces. Remove spacers, then install baseboards/shoe molding to the wall
so the floor can move underneath.
Special Situations (Because Homes Love Plot Twists)
Installing over concrete (especially slabs on grade)
Concrete can hold and release moisture for a long time. Always follow required moisture testing and use manufacturer-approved vapor retarder or
moisture mitigation when needed. If moisture is high, don’t “send it anyway.” Moisture problems don’t age like fine winethey age like bananas in
a hot car.
Wide planks and seasonal movement
Wider boards tend to show movement more. That means prep, moisture testing, and flatness matter even more. Your spacing, adhesive/fastener
schedule, and manufacturer guidelines are not “suggestions” here.
Transitions, thresholds, and height changes
Plan transitions early so you’re not inventing woodworking solutions at 11:47 p.m. Use reducers, T-moldings, or threshold pieces that match your
floor system and allow expansion where required.
Stairs
Hardwood on stairs is doable, but it’s detail-heavy: nosings, returns, squeak control, and safety. If you’re new to this, consider hiring out stairs
even if you DIY the main floor. That’s not quitting. That’s being strategic.
Common Mistakes That Turn a Dream Floor Into a Group Project
- Skipping moisture testing: “It feels dry” is not a measurement.
- Installing over an un-flat subfloor: Humps and dips telegraph into the finished floor and create noise.
- Forgetting expansion gaps: Wood moves. If it can’t move, it will move anywayjust in the worst possible direction.
- Not mixing boards from multiple cartons: You risk obvious color blocks instead of natural variation.
- Rushing cuts around trim: Crooked notches draw the eye like a typo in a billboard.
- Letting adhesive skin over: Glue-down success depends on proper open time and transfer.
- Nailing trim into the floor: Trim should typically attach to the wall so the floor can expand underneath.
Real-World Experiences: What Usually Happens Somewhere Around Row 7 (Extra )
If you’ve never installed hardwood before, here’s the part no one tells you: the job has a personality, and it changes halfway through. The first
few rows feel slow because you’re measuring everything twice, learning the rhythm, and trying not to scratch your brand-new boards with the very
tools you bought to protect them. Then you hit a grooveliterallyand the floor starts flying.
And then: doorway trim. Doorways are where confidence goes to be humbled. Even with jambs undercut, you’ll meet at least one opening where the
wall isn’t perfectly square, the casing is slightly bowed, and the plank you cut “exactly to the line” is somehow still too long. The fix is usually
simple (shave a hair off the cut, clean the notch, try again), but the emotional journey is dramatic. This is normal. Hardwood work is a slow dance
with millimeters.
Another common experience is discovering that your subfloor is “mostly flat” in the way a toddler is “mostly quiet.” One ridge you didn’t notice
becomes a repeating hollow sound as you walk across it. DIYers often learn the hard way that flatness checks can’t be a quick glance; they have to
be systematic. The good news: most issues are fixable mid-project if you catch them earlypull up a few rows, address the hump or dip, then
reinstall. The bad news: it’s annoying. The best news: it’s still less annoying than living with a squeaky trampoline strip for the next decade.
Glue-down installers tend to have their own “row 7 moment”: adhesive cleanup. You start with pristine rags and careful trowel lines, and then you
blink and there’s a smudge on the face of a plank that looks small until it dries and becomes a permanent glossy souvenir. Experienced installers
develop a habit of checking the surface every few boards, keeping the right cleaner within reach, and treating fresh squeeze-out like a kitchen
spillwipe now, celebrate later.
Floating floors bring a different plot twist: the click mechanism that refuses to click in one particular spot, for absolutely personal reasons.
Usually it’s a tiny bit of debris in the groove, a board edge that needs a minor trim, or a subfloor dip that’s forcing the joint out of alignment.
The lesson is to avoid brute force. If you’re hitting something hard enough to make you angry, pause and diagnose. Most “this board is defective”
moments are actually “this board is asking for a cleaner setup.”
Finally, there’s the surprisingly satisfying ending: reinstalling baseboards and transitions makes the whole room snap into place visually. That
1/2-inch gap you left on purpose stops looking like a mistake and starts looking like craftsmanship. You’ll do the first doorway transition, step back,
and think, “Okay… this is real now.” That’s the moment hardwood flooring becomes less of a project and more of a brag.