Table of Contents >> Show >> Hide
- Why Greasing and Flouring a Pan Matters
- How to Grease and Flour a Pan: 9 Steps
- Step 1: Choose the right pan for the recipe
- Step 2: Decide on your grease
- Step 3: Gather your tools before you start
- Step 4: Apply a thin, even layer of grease
- Step 5: Add flour a little at a time
- Step 6: Tilt, tap, and rotate the pan
- Step 7: Knock out the excess flour
- Step 8: Add parchment paper when extra insurance helps
- Step 9: Fill the pan and bake without delay
- Best Pan-Prep Methods for Different Bakes
- Common Mistakes to Avoid
- How to Tell You Did It Right
- Extra Baking Experiences and Lessons From the Real World
- Conclusion
If you have ever baked a cake that refused to leave the pan like a stubborn houseguest, welcome. You are among friends. Greasing and flouring a pan sounds like one of those tiny kitchen tasks that should be impossible to mess up. And yet, one missed corner, one puddle of butter, or one enthusiastic snowstorm of flour later, your beautiful cake comes out looking like it lost a bar fight.
The good news is that learning how to grease and flour a pan properly is easy, fast, and wildly worth it. This simple prep step helps cakes, quick breads, loaf cakes, brownies, and some Bundt cakes release cleanly after baking. It can also preserve those lovely crisp edges and decorative details that make your dessert look like it came from a bakery instead of a panic spiral.
In this guide, you will learn exactly how to grease and flour a pan in 9 easy steps, plus when to use parchment paper, when to use cocoa powder instead of flour, and when you should skip greasing altogether. Yes, there are exceptions. Baking loves rules, and then it loves surprise exceptions even more.
Why Greasing and Flouring a Pan Matters
Before we get into the steps, let’s answer the obvious question: why not just hope for the best? Because cake batter contains sugar, flour, fat, and moisture, all of which can cling to the pan once heat enters the chat. A thin layer of grease creates a barrier between the batter and the metal, and a dusting of flour helps the batter grip the sides while still releasing more easily after baking.
That combination is especially useful for layer cakes, loaf cakes, pound cakes, and detailed Bundt pans. It can be the difference between a cake that slides out gracefully and a cake that exits the pan in emotional pieces.
How to Grease and Flour a Pan: 9 Steps
Step 1: Choose the right pan for the recipe
Start with the pan your recipe calls for, or as close to it as possible. Pan size and shape affect both baking time and how easily a cake releases. A flat round or square cake pan is easy to prep. A fluted tube pan or Bundt pan is where things get serious. Those beautiful curves are lovely until batter welds itself into every groove.
If you are using an older pan with scratches, worn coating, or mystery scars from kitchens past, be extra thorough. A tired pan needs a little more love.
Step 2: Decide on your grease
For most baking projects, solid vegetable shortening is the most reliable choice. It spreads evenly, clings well to the pan, and gives flour something to hold onto. Butter can work, especially in basic cake pans, but it contains milk solids that can sometimes brown or contribute to sticking. Liquid oil is usually the least ideal option here because it tends to slide around and can pool in the pan.
If convenience is your thing, a baking spray that contains flour is also a solid option. It is especially handy for intricate pans where getting into every little nook by hand feels like detailing a tiny edible sculpture.
Step 3: Gather your tools before you start
You do not need a professional pastry kit. A folded paper towel, your clean fingers, or a soft pastry brush will all do the job. If you are working with a Bundt pan, a pastry brush is your best friend because it can reach into every ridge and corner without leaving thick globs behind.
Set your flour nearby too, along with a sink or trash can for tapping out the extra. This is one of those tasks that gets messy fast if you improvise halfway through.
Step 4: Apply a thin, even layer of grease
Rub the shortening, butter, or baking spray over the entire inside surface of the pan. Focus on the bottom, sides, corners, and any detailed edges. The key word here is even. You want coverage, not blobs. Thick streaks of grease can create gummy patches or leave pale marks on the outside of the baked cake.
Take your time with this step. If a spot looks shiny and bare, hit it again. If it looks like you frosted the pan, scale it back. You are aiming for a neat, whisper-thin coat, not a butter spa treatment.
Step 5: Add flour a little at a time
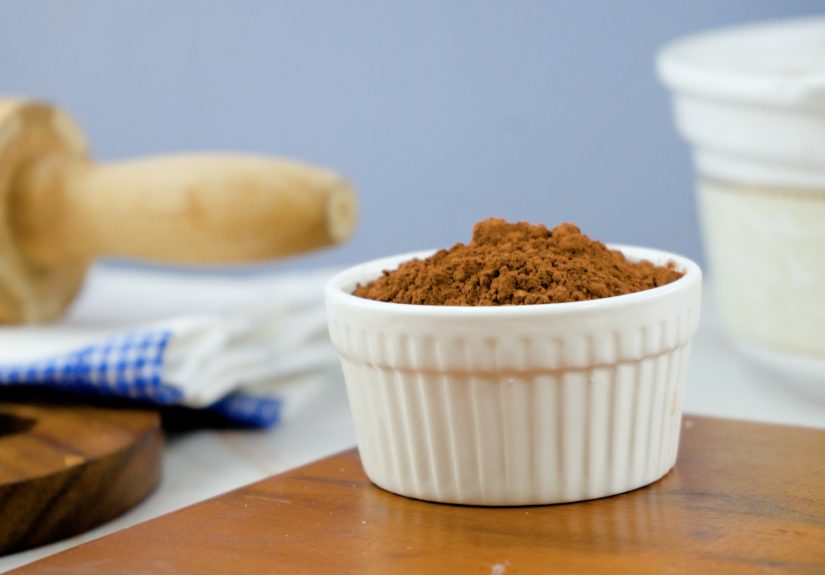
Sprinkle in a tablespoon or two of all-purpose flour. You do not need half the bag. Start small. You can always add another spoonful if the pan is large. If you are baking a chocolate cake, use cocoa powder instead of flour to avoid leaving white streaks on the finished cake. That little trick is simple, smart, and much kinder to the final look.
Some bakers also use fine sugar instead of flour for certain cakes, especially Bundt cakes, when they want a delicate crust. But for classic pan prep, flour is the go-to.
Step 6: Tilt, tap, and rotate the pan
Now hold the pan over the sink or trash and gently tap, tilt, and rotate it so the flour coats every greased surface. The flour should skate across the grease and cling lightly to the inside. Keep turning until the bottom and sides are covered.
This step is oddly satisfying. It is also where you find out whether you missed a greasy spot. If the flour refuses to stick in one area, add a touch more grease and try again.
Step 7: Knock out the excess flour
Once the pan is coated, invert it and tap out the extra flour. Do not leave loose flour sitting in the bottom or hiding in the corners. Excess flour can bake into a pasty, dusty layer on the cake. You want a thin coating, not a flour beach.
If you see thick patches, gently shake the pan again or wipe the heaviest spots with a clean finger. Neatness counts here more than people realize.
Step 8: Add parchment paper when extra insurance helps
For flat-bottom cake pans, adding a circle or strip of parchment paper can make removal even easier. Many bakers grease the pan first, place the parchment on the bottom, and then lightly grease the parchment too, depending on the recipe. This is especially helpful for sticky batters, delicate cakes, or anyone who has trust issues because of one traumatic cake release in 2019.
Do note that parchment is great for round, square, and loaf pans. It is not practical for detailed Bundt pans, where careful greasing and flouring are usually the better strategy.
Step 9: Fill the pan and bake without delay
Once your pan is prepped, add the batter and get it into the oven. For some pans, especially Bundt pans, it helps to grease just before filling so the coating does not slide downward while it sits. After baking, let the cake cool according to the recipe before turning it out. Too soon, and it may break. Too late, and it may stick more firmly than a toddler holding a cookie.
In other words, pan prep matters, but so does timing after the bake. A well-prepped pan is a head start, not a license to ignore the cooling instructions.
Best Pan-Prep Methods for Different Bakes
Layer cakes
Grease and flour the pan, then line the bottom with parchment if you want nearly foolproof release. This is ideal for birthday cakes, celebration cakes, and any cake you plan to frost nicely.
Loaf cakes and quick breads
Greasing and flouring works well, but a parchment sling can make lifting easier, especially for banana bread, pound cake, or coffee cake.
Bundt and tube pans
Be thorough. Extra thorough. Then maybe check once more. These pans need complete coverage in every detail. A baking spray with flour or a careful shortening-and-flour method works especially well.
Chocolate cakes
Use cocoa powder instead of flour if you want the pan coated without leaving white residue on the outside of the cake. It is a small move that makes the finished dessert look much cleaner.
Angel food cake
Do not grease the pan unless the recipe specifically says to. Angel food cake relies on the batter gripping the sides of the pan so it can rise properly. This is the rebel exception that proves the rule.
Common Mistakes to Avoid
- Using too much grease: Heavy streaks can create oily patches and uneven release.
- Leaving bare spots: One missed corner is often where the cake tears.
- Using regular cooking spray in some decorative pans: It can leave sticky residue over time.
- Dumping in too much flour: Extra flour can leave a chalky coating on the cake.
- Skipping parchment in flat pans when the recipe suggests it: Sometimes the recipe is trying to save you from heartbreak.
- Greasing a pan that should stay ungreased: Angel food cake would like a word.
How to Tell You Did It Right
A properly prepped pan should have a smooth, lightly coated interior with no dry spots, no greasy puddles, and no clumps of flour. When the cake is done and cooled as directed, it should release with minimal resistance. You should not need dramatic knife surgery around the edges or a pep talk delivered directly to the pan.
If your cake does stick a little, do not panic. Let it rest for a few minutes, run a thin spatula around the edges if appropriate, and try again. Even experienced bakers have occasional clingy cakes. Baking keeps us humble.
Extra Baking Experiences and Lessons From the Real World
The funny thing about learning how to grease and flour a pan is that it seems too basic to matter until the day it absolutely does. Most bakers have at least one memory of turning a pan upside down with confidence, waiting for that glorious little thump, and then getting silence. Just silence. You tap once. Nothing. You tap again. Still nothing. At that point, you are no longer baking; you are negotiating.
One of the most common beginner mistakes is assuming nonstick means no prep needed. That works right up until it does not. A nonstick coating can help, but cakes, especially sugary or buttery ones, still have a talent for finding one vulnerable spot and clinging to it like it pays rent. That is why experienced bakers often still grease and flour a nonstick pan, especially if the cake matters. Weeknight snack cake? Maybe you gamble. Birthday cake for twelve people? You prep like your reputation depends on it.
Bundt pans are where baking optimism goes to be tested. They are gorgeous, dramatic, and full of tiny curves that love to trap batter. The first time many people use one, they treat it like a regular round pan and regret it immediately. The smarter approach is slow, patient prep with a brush, a thin layer of grease, and just enough flour or baking spray to cover every detail. It feels fussy, but it is much less fussy than patching a broken cake with glaze and pretending the crater was intentional.
There is also a quiet confidence that comes from figuring out your own preferred method. Some bakers love classic shortening and flour. Others swear by baking spray with flour already in it. Some line every possible pan with parchment because they enjoy peace and emotional stability. None of these choices are wrong if they suit the recipe and give you a clean release.
Over time, pan prep becomes one of those kitchen habits you stop thinking about. Your hands know what to do. You grease evenly, dust lightly, tap out the extra, and move on. That is when baking gets more fun, because you stop treating pan prep as an annoying extra step and start seeing it as cheap insurance. Two minutes of effort can save an entire cake.
And honestly, that is the best lesson here. Greasing and flouring a pan is not glamorous. No one posts a dramatic social media reel of themselves tapping flour into the sink like it is a life-changing cinematic event. But it is one of those little behind-the-scenes skills that makes home baking smoother, cleaner, and much more successful. The cake may get the applause, but the properly prepped pan is the quiet hero in the background, wearing an apron and asking for absolutely no credit.
Conclusion
Knowing how to grease and flour a pan is one of those foundational baking skills that pays off forever. It is simple, practical, and surprisingly powerful. When done right, it helps cakes bake up beautifully, release cleanly, and keep their shape instead of disintegrating into what we politely call a “rustic presentation.”
Remember the core formula: use a thin, even layer of grease, add a light dusting of flour, coat every surface, and tap out the excess. Add parchment when needed, use cocoa powder for chocolate cakes, and always pay attention to recipe-specific exceptions. Once you get the rhythm down, this small prep step becomes second nature, and your future cakes will thank you by actually leaving the pan.


