Table of Contents >> Show >> Hide
- What You’ll Learn
- Step 1: Diagnose What’s Really Wrong
- Option A: Quick Fence Post Repair (Reinforce Instead of Replace)
- Option B: Replace the Fence Post (Best Long-Term Fix)
- How to Set the New Post So It Stays Put (and Stays Healthy)
- Concrete vs. Gravel: Which Is Better for Fence Posts?
- Make Your Life Easier Later (Future-You Will Send a Thank-You Card)
- FAQ: Fence Post Repair Questions People Actually Ask
- Conclusion: Fix It Once, Enjoy It for Years
- Experiences & Lessons DIYers Learn the Hard Way (So You Don’t Have To)
A broken fence post is the DIY equivalent of a check-engine light: you can ignore it for a while, but eventually it turns into a bigger, louder, more expensive
problemusually right before guests arrive. The good news? Most fence post repair jobs are totally doable with basic tools, a little patience, and the willingness
to get dirt in places dirt was never meant to go.
In this guide, you’ll learn how to fix a broken fence post the right waywhether it’s leaning, cracked, or rotted at the baseand how to
set up your fence so future-you isn’t out there redoing the same post every other spring. We’ll cover when to reinforce vs. replace, how deep to dig, how to
avoid rot, what to do about frost heave, and the small “forever tips” that make your life easier later.
Step 1: Diagnose What’s Really Wrong
“Broken fence post” is a broad category. Before you start digging like you’re auditioning for an archaeology show, figure out what failure mode you’re dealing
with. The fix depends on it.
Common fence post problems
- Leaning post: Usually caused by loose soil, poor compaction, shallow depth, wind load, or gate stress.
- Rotted at ground level: The classic. Water + oxygen + time. Often worse when mulch or soil sits against the post.
- Cracked/split post: Could be age, fasteners too close to the edge, or a heavy impact (looking at you, lawn mower).
- Wobbly post: The post might still be fine, but the backfill has settled or washed out.
- Post snapped: Usually impact damage or severe rot you couldn’t see until the post gave up on life.
Quick test: reinforce or replace?
Grab the post about chest height and push/pull. If the post moves but feels solid (no squishy wood, no crumbling at the base), you can often straighten
and re-stabilize it. If the wood at ground level is soft, punky, hollow, or missing chunks, it’s usually time to replace the fence post.
Option A: Quick Fence Post Repair (Reinforce Instead of Replace)
Sometimes you don’t need a full replacement. Maybe the post is mostly solid, the fence is still aligned, and you just want it upright again before it turns into
a domino chain. Here are the fastest legit repairs that don’t scream “I gave up.”
1) Brace-and-stake method (simple, cheap, surprisingly effective)
For a leaning post that’s still structurally sound, you can brace it straight and add support. One common approach is to drive a stake into the ground a couple
feet away, use a level to plumb the post, then fasten the stake and post together temporarily while you re-pack the base.
- Remove any loose boards/pickets near the post so you can access the base.
- Brace the fence panel so it doesn’t sag while you work (scrap 2x4s are perfect).
- Dig out loose soil around the post (think: a bowl shape, not a crater).
- Plumb the post with a level and hold it in place with stakes/bracing.
- Backfill in layers (2–4 inches at a time), tamping each layer hard.
If you’re tempted to skip tamping: don’t. Tamping is the difference between “fixed” and “fixed for two rainstorms.”
2) Metal repair brackets/spikes (when the post is weak at the bottom)
If the post is deteriorated near ground level but still decent above it, a steel repair bracket can buy you a lot of time. These are designed to reinforce
a rotted fence post without removing the existing concrete or digging out the whole thing.
A common bracket-style approach: brace the fence straight, slide the bracket tight to the post, drive it into the ground, then fasten it with structural
connector screwsideally filling every fastener hole so the bracket and post act like one unit.
This is especially useful when the fence is long, replacement is complicated, or you’re dealing with “mystery concrete” that looks like it was poured during
the Eisenhower administration.
3) Re-pack with gravel + compact (great for wobbly posts)
If the post isn’t rotten and the issue is movement at the base, you can sometimes restore stability by removing soil around the post and re-packing with
gravel/stone in compacted lifts. This is also a smart method when you want drainage and serviceability later.
Option B: Replace the Fence Post (Best Long-Term Fix)
When a post is rotted, snapped, or too far gone, replacement is the grown-up answer. It’s more work todaybut much less work later.
Tools & materials (so you don’t do 9 trips to the hardware store)
- Work gloves, safety glasses
- Post hole digger (or rent an auger for multiple posts)
- Shovel + digging bar (for rocks and stubborn soil)
- Level (2–6 ft), string line, tape measure
- Temporary bracing lumber (2x4s) + screws
- New post: ground-contact pressure-treated lumber (or a steel post if appropriate)
- Gravel/crushed stone or graded base (gravel + stone dust), and/or concrete mix
- Exterior-rated fasteners (galvanized or coated)
1) Support the fence section first (save your panels from chaos)
Before removing anything, support the fence so it doesn’t sag, twist, or pull nails out like a horror movie. Slide temporary 2×4 supports under rails or use
braces on both sides of the section. If the post is part of a gate, support the gate toogate posts carry constant stress.
2) Disconnect the fence from the damaged post
Remove screws/nails attaching rails or panels to the post. If it’s a decorative system with rails seated into routed holes, pull the fence section away carefully
and keep it braced.
3) Remove the old post (and any “bonus” wood fragments)
Pull out the rotted post and dig out leftover chunks. If there’s old concrete, you may be able to pry and work the footing out with a digging bar, or break it
up and remove it in pieces. The goal is a clean hole you can properly rebuild.
4) Enlarge or refresh the hole
Old holes are often too small, too shallow, or shaped like a weird funnel. Clean up the sides with a post hole digger. A good rule of thumb is a hole diameter
around three times the post width for many residential fences, and a depth that keeps the post stable through wind and seasonal movement.
How to Set the New Post So It Stays Put (and Stays Healthy)
Setting the post correctly is where you “pay once” instead of “subscribe to fence repairs forever.” The two big goals are stability and
water management.
How deep should a fence post be?
A widely used guideline is to bury about one-third of the post length underground, plus extra room for a gravel base. For many residential
fence posts (often 6–8 feet tall), that commonly lands around a 2-foot hole depthmore for tall fences, high winds, weak soils, or freeze-thaw areas.
In cold climates, frost heave is real: as soil freezes and expands, it can lift shallow posts. When in doubt, align your depth with local frost conditions and
whatever your local building requirements expect. (Yes, this is the boring part. It’s also the part that prevents your fence from doing the Leaning Tower of
Backyard.)
1) Prep the base for drainage
Add a layer of crushed stone or gravel (commonly around 6 inches) to the bottom of the hole and compact it. This helps drainage and gives the post a stable,
tamped seat instead of a muddy puddle.
2) Use the right post (this matters more than people admit)
For wood posts touching soil, choose pressure-treated lumber rated for ground contact. In preservative “use category” language, that’s commonly
UC4-rated material for ground contact exposure. Using “above ground” lumber for an in-ground post is like wearing flip-flops to shovel snow: bold choice, poor
outcome.
Also consider upgrading the post size. If your 4×4 gate post failed, a 6×6 replacement can be a serious quality-of-life improvement.
3) Plumb and brace like you mean it
Set the post in the hole, use a level on at least two sides, and brace it so it cannot move while you backfill. If you’re replacing a post in an existing
fence line, a string line between neighboring posts helps you match height and alignment.
4) Backfill in compacted lifts
Whether you use soil, gravel, graded base, or concrete, the secret is layering and compaction. Add a few inches, tamp hard, repeat. Compacting every lift
reduces settlingmeaning your post stays straight instead of slowly tilting like it’s tired of holding up the fence.
Concrete vs. Gravel: Which Is Better for Fence Posts?
This debate has launched a thousand comment threads. Here’s the practical truth: both can work, and both can fail. The difference is how they manage
water, soil movement, and future repairs.
When concrete makes sense
- Gate posts (constant stress from opening/closing)
- End/corner posts (they carry tension and wind load)
- Rocky soils where you can’t dig deep enough for reliable soil compaction
- High-wind areas or tall privacy fences
If you use concrete, shape the top so it slopes away from the post to shed water. A flat “donut” around the post can hold moisture where rot
loves to party.
When gravel/graded base is the smarter move
- You want excellent drainage around the post
- You want easier replacement later (no wrestling an old concrete plug)
- Your soil compacts well and you can dig to a proper depth
- You’re repairing a post in an existing fence and want minimal disruption
Some classic long-lasting repairs use gravel at the base and a compacted aggregate backfill (like a graded base of gravel and stone dust), tamped in layers.
Done well, it locks in tight and drains well.
The moisture trap problem (and how to avoid it)
Concrete can create an “interface” where water collects between wood and concrete, especially if the top isn’t crowned or if the wood shrinks over time.
Direct burial or well-draining backfill can reduce trapped moisture by letting water move away from the post.
If you choose concrete, you can still prioritize drainage: use a gravel base, avoid creating a bowl around the post, and don’t bury the post in organic topsoil.
Think: firm, mineral-based support + water shedding.
Make Your Life Easier Later (Future-You Will Send a Thank-You Card)
Fixing the post is step one. Making sure you don’t redo it in two years is step two. Here are the upgrades and habits that keep fence post repair from becoming
your annual “surprise hobby.”
1) Keep wood out of constant dampness
- Don’t pile mulch against posts. Leave a little breathing room.
- Maintain grade so water doesn’t pond around the base.
- Trim plants so posts can dry after rain (yes, airflow matters).
2) Cap the end grain and seal what you can
The top of a wood post is thirsty end grain. A post cap or a simple beveled cut helps shed water. For visible portions, a water-repellent sealant or stain
can reduce weathering and checking over time.
3) Upgrade hardware so it doesn’t become the weak link
Use exterior-rated fasteners and connectorsgalvanized or coatedespecially near treated lumber. Cheap interior screws in a fence are basically a timed prank.
4) Build in serviceability
If you’re rebuilding sections, consider designs that allow rails/panels to be removed without destroying everything. Your next repair becomes a clean swap,
not a demolition derby.
5) Treat gate posts like the VIPs they are
Gate posts do more work than line posts. Set them deeper, consider concrete, and consider a bigger post size. A sagging gate is often a gate-post problem in
disguise.
6) Inspect once a season (two minutes, tops)
Walk the fence line and look for early signs: hairline cracks, slight lean, soil gaps at the base, rusting hardware, or rot starting at ground level. Fixing
“slightly loose” is so much easier than fixing “now the fence is napping.”
FAQ: Fence Post Repair Questions People Actually Ask
Can I fix a broken fence post without digging it out?
If the post is leaning but not rotten, yesoften by straightening, bracing, and re-packing the base with compacted material. If the post is rotten at the
bottom, a metal repair bracket may reinforce it. If the post is structurally gone, replacement is the honest answer.
Should I use fast-setting concrete?
Fast-setting concrete can be great for speed and convenience, especially for single-post fixes and tight timelines. Just be ready: it sets quickly, so plumb
and brace first. Also, shape the top to shed water.
What’s the most common reason fence posts fail?
Moisture at the ground line + insufficient drainage + time. Add shallow installation or poor compaction and you’ve got the perfect recipe for leaning and rot.
How do I keep a replacement post from rotting again?
Use ground-contact rated treated wood, manage water around the base, avoid mulch contact, consider drainage-friendly backfill, and cap/seal exposed surfaces.
If your area is especially wet or decay-prone, consider protective sleeves or switching to metal posts where appropriate.
Conclusion: Fix It Once, Enjoy It for Years
A fence post repair can be a quick brace-and-pack job or a full replacement with a properly built base. The best approach depends on what failed: if the wood is
still solid, stabilization is often enough; if the post is rotten or snapped, replacement is the long-term win.
The “make your life easier later” formula is simple: dig deep enough, choose ground-contact materials, brace and plumb
carefully, compact in layers, and manage water so rot doesn’t get a permanent invitation. Do that, and your fence can
spend the next decade doing its job quietlylike a well-trained dog that doesn’t steal your socks.
Experiences & Lessons DIYers Learn the Hard Way (So You Don’t Have To)
Fence post projects have a funny way of teaching the same lessons over and overusually right after someone says, “This should be quick.” Below are common,
real-world experiences homeowners and DIYers run into when tackling a broken fence post repair, along with the practical takeaways that make
the next repair easier (or unnecessary).
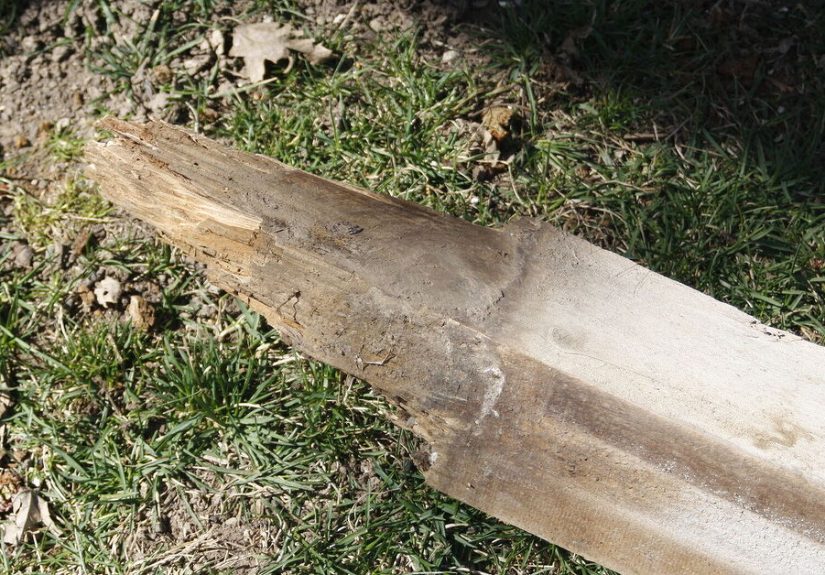
Experience #1: The post looked fine… until it wasn’t. A lot of posts rot from the inside out at the ground line. From a few feet away, the
fence looks okay. Up close, the wood at soil level crumbles like a stale cookie. The takeaway: always probe the base with a screwdriver before deciding on a
“quick fix.” If the tool sinks in easily or pulls out wet wood, you’re not dealing with a leanyou’re dealing with rot, and reinforcement or replacement should
be on the table.
Experience #2: “I’ll just dump material in the hole.” Many first-time repairs fail because the backfill was never compacted. Soil and gravel
settle. Rain helps them settle faster. That’s how a newly straightened post starts leaning again within weeks. The takeaway: tamp in lifts. It feels slow, but
it’s the difference between “fixed” and “temporary.”
Experience #3: Concrete made it strong… and then helped it rot. Concrete can lock a post in place, but if the top isn’t shaped to shed water,
moisture can linger right where the post is most vulnerable. Over time, that area becomes a rot hotspot. The takeaway: if you use concrete, crown it so water
runs away from the post, and consider a drainage-minded base. If you prefer a drainage-first approach, compacted aggregate backfill can offer stability without
creating a moisture trap.
Experience #4: Gate posts are a different species. DIYers often replace a failed gate post with “the same thing” and wonder why the gate sags
again. Gates apply repeated leverageevery opening and closing is a little stress test. The takeaway: treat gate posts like structural supports. Go deeper, use a
more robust post size if possible, and consider concrete or upgraded reinforcement.
Experience #5: The fence line became a surprise geometry exam. People often set a new post perfectly plumb… but slightly out of line with the
rest of the fence, so rails don’t meet cleanly. The takeaway: use a string line to match height and alignment, and dry-fit connections before you commit. A few
extra minutes here prevents hours of “why won’t this rail reach?” later.
Experience #6: The “fast set” concrete wasn’t the problemrushing was. Fast-setting mixes are convenient, but they punish hesitation. Some DIYers
pour first and then try to plumb later (spoiler: the post wins). The takeaway: brace and plumb before adding anything that hardens. Have screws, level, water,
and bracing ready so the process is calm, not frantic.
Experience #7: The best repair is the one that’s easy to redo. People who’ve fought old concrete footings tend to become fans of serviceable
designs: drainage-friendly backfill, accessible fasteners, and modular fence sections. The takeaway: even if you choose concrete for certain posts, think about
how the next repair would happen. Build with future access in mind. Your back will remember.


