Table of Contents >> Show >> Hide
- What “Ombré” Really Means (and Why Dip Dyeing Works)
- Step 1: Choose the Right Dye for Your Fabric (This Is Half the Battle)
- Step 2: Gather Supplies (A.K.A. Your “Don’t Ruin the Spoon” List)
- Step 3: Prep Fabric for an Even, Smooth Fade
- Three Ways to Create Ombré (Pick the One That Fits Your Patience Level)
- Step-by-Step: Ombré Dip Dyeing on Cotton/Linen/Rayon (Fiber-Reactive Dye)
- Step-by-Step: Ombré Dip Dyeing with All-Purpose Dye (Easy, Accessible Option)
- Silk or Wool Ombré: Use Acid Dye (Elegant Results, Needs Heat)
- Polyester Ombré: What to Expect (and How Not to Hate Your Life)
- Color Planning: How to Get the Gradient You Actually Want
- Troubleshooting: Fix the Usual Ombré Problems
- Project Ideas That Look “Wow” Without Being High Drama
- Safety and Cleanup (Because Dye Has No Respect for Your Favorite Countertop)
- Real-World Ombré Dyeing Experiences (What People Actually Learn)
Ombré dyeing is the “graduated latte” of the fabric world: dark at the bottom, light at the top, and somehow it makes
even a basic tea towel look like it belongs in a fancy catalog where people definitely don’t spill marinara.
The good news: you don’t need a studio, a chemistry degree, or a dramatic scarf-flinging montage. You just need the
right dye for your fabric, a little patience, and a willingness to accept that your kitchen may briefly resemble a
friendly science lab.
This guide walks you through dip dyeing (aka immersion dyeing) to create a smooth ombré gradient on fabricstep-by-step,
with fabric-specific instructions, troubleshooting, and real-world tips so you get a fade that looks intentional, not accidental.
What “Ombré” Really Means (and Why Dip Dyeing Works)
Ombré is a gradual transition from one shade to anotherusually from deep color into a lighter tint (or all the way to white).
Dip dyeing creates this gradient by controlling how long each section of fabric sits in the dye bath (time = depth of color),
and sometimes by changing dye concentration (more dye = deeper color).
Think of dye like sunlight on a tan line: the longer it hangs out, the more noticeable it gets. Your job is to choreograph
the hangout so the bottom gets a long, meaningful relationship with the dye, while the top just has a quick handshake.
Step 1: Choose the Right Dye for Your Fabric (This Is Half the Battle)
The smoothest ombré results come from matching dye chemistry to fiber type. If you skip this step, you’ll still get “a look,”
but it might be more “mystery blotch” than “gradient glow.”
Best dye options by fabric
- Cotton, linen, rayon/viscose, hemp: Fiber-reactive dye (bright, washfast, great control).
- Silk, wool, cashmere, alpaca, nylon: Acid dye (needs heat + vinegar/citric acid; gorgeous on silk).
- Polyester and high-poly blends: Dye made for synthetics (usually disperse-style; needs near-boiling heat).
- “Mystery blends”: Expect heathered or two-tone effectsdifferent fibers in the same fabric can take dye differently.
If you’re dyeing something big (curtains, tablecloths, duvet covers), pick a method that’s realistic for your setup.
Sometimes the “best” dye is the one you can actually use without balancing a boiling pot the size of a kiddie pool.
Step 2: Gather Supplies (A.K.A. Your “Don’t Ruin the Spoon” List)
Keep dye tools separate from cooking tools. Yes, even if it’s “just one quick stir.” Future-you deserves better.
Basic gear
- Rubber gloves (unless you want “lavender fingertips” for a week)
- Plastic bins or buckets (or a stainless steel sink/pot for hot methods)
- Tongs or a clamp (helpful for lifting and controlling the fabric)
- Measuring cups/spoons (dedicated to dyeing)
- Plastic drop cloth / trash bags / old towels to protect surfaces
- Mild detergent for washing (and optional textile detergent)
- Paper towels for quick color testing
Helpful add-ons (not mandatory, but you’ll feel like a pro)
- String + binder clips (to suspend fabric and keep the “dip line” steady)
- Ruler or tape measure (for marking gradient heights)
- Salt, soda ash, or vinegar/citric acid (depends on dye type)
- Optional dye fixative (useful for some dyes and projects)
Step 3: Prep Fabric for an Even, Smooth Fade
Most “why is it blotchy?” problems start before the dye bath. Fabric comes with finishes, sizing, oils, or detergent residue
that can block dye absorption. Prep is boringlike flossingbut it pays off.
Prep checklist
- Wash first: Launder with detergent (avoid fabric softener). If it’s new, wash twice.
- Keep it damp: Dye penetrates more evenly when fabric is wet or at least uniformly damp.
- Test a swatch: If possible, dye a scrap or an inside seam area to preview color.
- Plan the gradient: Decide how high the color should climb. Mark the inside seam or use binder clips as guides.
Three Ways to Create Ombré (Pick the One That Fits Your Patience Level)
Method A: Time-Lift Gradient (One Dye Bath, Multiple Lifts)
This is the classic ombré: you dip the fabric deep, then gradually lift it out over time. The bottom stays in longest (dark),
the top stays out (light).
Method B: Strength Gradient (Multiple Baths: Light → Medium → Dark)
Great when you want extra control or you’re dyeing multiple items. You prepare 2–3 dye baths at different strengths, then dip
deeper sections into darker baths.
Method C: Add-Dye-as-You-Go (One Bath That Gets Stronger Over Time)
You start with a weak dye bath for the light area, then add more dye to deepen the bath as you lower/soak the darker section.
This can be very smoothjust keep notes so you can repeat it.
Step-by-Step: Ombré Dip Dyeing on Cotton/Linen/Rayon (Fiber-Reactive Dye)
If you want bold color and strong washfastness on plant fibers, this is the gold standard. Fiber-reactive dye bonds well to
cellulose fibers when the pH is raised (commonly with soda ash).
1) Mix a soda ash presoak (optional but powerful)
Presoaking helps the dye bond more effectively and can improve brightness. Soak fabric, then squeeze until dampnot dripping.
(Dripping fabric dilutes your dye bath near the surface, which can cause uneven fades.)
2) Prepare the dye bath
- Fill a bin with enough warm water for fabric to move freely (crowding causes streaks).
- Add the recommended amount of salt (often used to encourage dye uptake on cotton/rayon).
- Premix dye in warm water to avoid speckles, then pour into the bath and stir thoroughly.
- Optional: add urea for smoother, more even color (especially helpful in warmer climates or longer dye times).
3) Set up your “dip station”
The easiest way to get a controlled gradient is to suspend the fabric from a dowel, hanger, or sturdy stick laid across the bin.
Clip the top edge with binder clips so you can lift in small increments without wrestling wet fabric like a slippery octopus.
4) Dye the darkest section first
- Lower the fabric to the deepest point (this will be your darkest area).
- Agitate gentlyespecially near the dye lineto prevent a harsh band.
- Hold for a set time (example: 5–10 minutes for a noticeable dark base, longer for deeper saturation).
5) Create the gradient by lifting in stages
Every few minutes, lift the fabric 1–2 inches and hold again. The part that stays submerged keeps getting darker; the part you lift
gets less time and becomes lighter. For a smoother fade, do more smaller lifts rather than a few big jumps.
Pro tip for soft transitions: At each lift, “bounce” the fabric up and down about 1 inch for 10–20 seconds.
This gently feathers the boundary so you don’t get a hard line.
6) Add soda ash to the dye bath (if not presoaking)
Some fiber-reactive methods add soda ash to the dye bath gradually (instead of presoaking). If you do this, dissolve it fully in warm water first,
then add slowly while stirringdon’t pour concentrated solution directly onto fabric (it can cause dark splotches).
7) Rinse and wash properly
- Rinse in cool-to-warm water until most loose dye is gone.
- Then wash in warm/hot water with detergent to remove unattached dye.
- Dry away from direct sunlight for the first dry if you want to baby the color.
Step-by-Step: Ombré Dip Dyeing with All-Purpose Dye (Easy, Accessible Option)
All-purpose dyes are popular for quick projects and are widely available. They can work well, especially on natural fibers,
but they may not be as washfast as fiber-reactive dyesso good rinsing and optional fixative can matter.
1) Heat your dye bath (important)
All-purpose dye typically performs best in hot water. Use a stainless steel pot if you need consistent heat. Add dish detergent (a small amount)
to promote level dyeing.
2) Add your helper ingredient
- For cotton/linen/rayon: Add salt to enhance color.
- For nylon/silk/wool: Add vinegar to help dye uptake.
3) Create the gradient (same time-lift idea)
- Wet fabric and squeeze out excess.
- Submerge to the darkest depth first and stir gently.
- Lift the fabric in small increments over time, feathering the dye line with gentle up-and-down motion.
- Test the bath with a paper towel if you’re unsure about intensity.
4) Rinse from warm to cool
Start rinsing in warm water and gradually cool it as water runs clearer. Then wash with mild detergent. If you’re worried about bleeding,
consider using a dye fixative after dyeing (especially for garments that will be washed frequently).
Silk or Wool Ombré: Use Acid Dye (Elegant Results, Needs Heat)
Acid dyes are designed for protein fibers (silk, wool) and nylon. Despite the dramatic name, the “acid” is usually vinegar or citric acid.
The key is gentle heat and gentle handlingespecially for wool, which can felt if shocked by sudden temperature changes.
Basic acid dye ombré approach
- Fill a non-food stainless/enamel pot with enough water for fabric to move freely.
- Dissolve dye thoroughly; add fabric while wet.
- Add vinegar/citric acid (not directly on the fabric), then gradually raise heat (just below boiling for many projects).
- Create ombré by lifting fabric in stages while maintaining heat and stirring gently.
- Cool gradually, rinse, then wash gently.
Polyester Ombré: What to Expect (and How Not to Hate Your Life)
Polyester is the “nonstick pan” of fabrics: it’s engineered to resist absorption. Dyeing it at home typically requires
dye formulated for synthetics and near-boiling heat maintained for the duration of dyeing. It can workjust commit to the process.
- Use a stovetop method for consistent high heat.
- Keep the fabric moving to avoid streaks.
- Expect that poly blends may dye unevenly (which can look cool, honestly).
Color Planning: How to Get the Gradient You Actually Want
Most ombré disappointment is really “color math disappointment.” Here’s how to plan without guessing wildly.
Use these simple rules
- Wet looks darker: Fabric often looks deeper when wet. Plan for a slight lighten-up after drying.
- Longer time = deeper shade: If you want dramatic contrast, give the bottom more soak time.
- Small lifts = smoother fade: More steps, less banding.
- Test constantly: Paper towel dips are quick and save regret.
Example timing plan (adjust to your dye and fabric)
For a medium-length tea towel or scarf, you might do a 20–30 minute total dye session: the bottom stays in for the full time,
while you lift 1–2 inches every 2–3 minutes. If you want a super-smooth fade, lift every 60–90 seconds in smaller increments.
Troubleshooting: Fix the Usual Ombré Problems
Problem: A harsh line (a.k.a. “the tide mark”)
- Cause: Fabric sat still at one dye level too long; not enough feathering/agitation at the boundary.
- Fix: Re-wet and re-dip just the transition area; gently bounce it up/down to blur the line.
Problem: Blotchy or streaky dye
- Cause: Fabric wasn’t fully wetted, was crowded, or dye wasn’t dissolved/premixed well.
- Fix: Prewash again, keep fabric relaxed, premix dye, and stir more consistently.
Problem: Backstaining (light area picks up dye)
- Cause: Dyed section touched the light area during rinsing; dye floated upward in the bath.
- Fix: Rinse carefully from top to bottom, keep the light area out of the bath, and consider a fixative when appropriate.
Problem: Color is too light
- Cause: Dye bath too weak, time too short, water too cool (for heat-reliant dyes), or wrong dye for fiber.
- Fix: Increase dye concentration or time; raise temperature if required; confirm fiber content.
Project Ideas That Look “Wow” Without Being High Drama
- Kitchen towels: Classic ombré makes basics feel boutique.
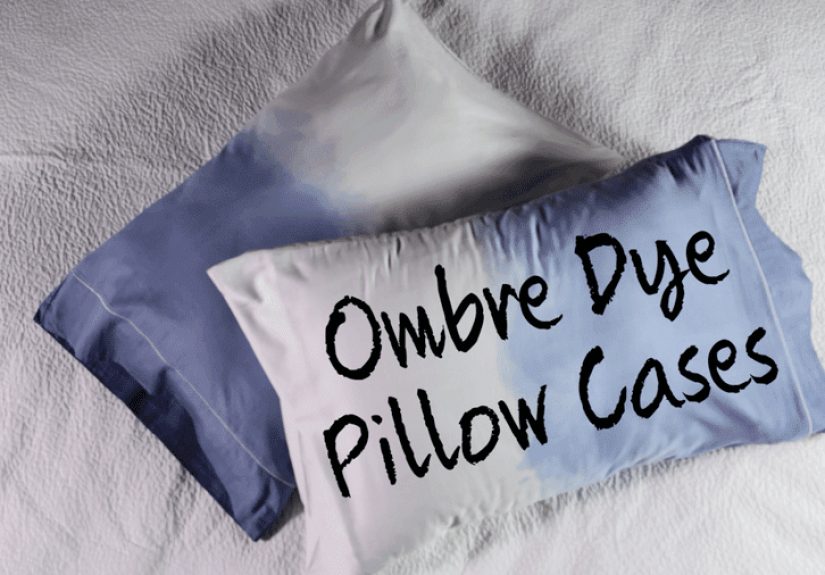
- Pillow covers: A gradient edge looks custom and hides life’s tiny stains.
- Napkins: Dip-dyed sets make dinner feel like an event (even if it’s just tacos).
- Cotton canvas totes: Practical plus artsylike your errands have an aesthetic plan.
- Curtain panels: Big impact, just requires a bigger dye bath and extra patience.
Safety and Cleanup (Because Dye Has No Respect for Your Favorite Countertop)
- Wear gloves and protect surfaces with plastic.
- Ventilate if working with hot dye baths or strong products.
- Use dedicated tools (no kitchen crossovers).
- Dispose of dye water responsibly and rinse bins thoroughly.
Real-World Ombré Dyeing Experiences (What People Actually Learn)
The internet is full of “dip for 3 minutes, become a textile wizard” energybut real projects teach more nuanced lessons.
Here are the kinds of experiences crafters commonly report when they start ombré dyeing, especially with the dip-dye method.
Consider this the “wisdom section” that saves you from repeating the same three mistakes everyone makes on their first gradient.
1) Your first fade is usually too abrupt. Most people lift the fabric in big jumps because it feels efficient:
dip, wait, lift halfway, wait, done. The result? A two-tone block with a neon “border” in the middle. The fix is almost always
smaller increments. Instead of moving the fabric up 4 inches at a time, try 1 inch (or even half an inch) steps, and do more of them.
Yes, it takes longer. No, your fabric won’t file a complaint. The extra steps create that soft, watercolor transition you’re aiming for.
2) Movement at the dye line matters more than people expect. One of the biggest “aha” moments is realizing that the
boundary between dyed and undyed fabric behaves like a tiny shoreline. If the fabric sits still, dye concentrates along that edge and forms
a hard line. People often get better results simply by gently swishing or “bouncing” the fabric at the dye line for 10–20 seconds at each stage.
It’s not aggressive stirringmore like coaxing the gradient to behave.
3) Damp fabric is a cheat code. Beginners sometimes dip dry fabric because it seems like it would soak up dye faster.
In practice, dry fabric can grab dye unevenly (especially at folds and creases), leading to streaks that look like the fabric had opinions.
Keeping fabric uniformly damp helps dye spread more smoothly through the fibers, which is exactly what you want for ombré.
4) Big pieces teach you logistics. Dyeing a scarf is relaxing. Dyeing curtain panels is a planning exercise worthy of a clipboard.
People often discover they need a container deep enough to submerge fabric without bunching, plus a method for lifting evenlystring, clips,
a dowel, even a sturdy broom handle laid across the bin. The “experience lesson” here is simple: your setup determines your outcome.
If the fabric is cramped, the gradient will show it.
5) Rinsing is where many gradients get accidentally ruined. After dyeing, it’s common to rinse everything like a normal garment.
But ombré has a light section you’re trying to keep light. A frequent real-world mistake is letting the darkest part drape over the palest part
during rinsing, which can cause backstaining. People who get the cleanest fades usually rinse carefullyoften starting with the light end,
keeping it separated, and gradually working toward the darker section so loose dye doesn’t travel uphill.
6) The best projects come from testing, not guessing. One of the most repeated pieces of “I wish I knew this earlier” advice is
to test color intensity before committing. A paper towel dip, a scrap swatch, or a tiny hidden seam test can prevent the classic “this was supposed
to be blush but it’s… coral lava.” The crafters who end up with repeatable results treat each dye bath like a recipe: a quick test, a small adjustment,
then the real project.
If you take nothing else from these shared experiences, take this: ombré is less about perfection and more about controlled consistency.
The moment you slow down, keep fabric moving, and lift in smaller steps, your gradients start looking intentionally dreamylike you meant to do it
all along (even if your first attempt was basically “tie-dye’s calmer cousin”).


