Table of Contents >> Show >> Hide
- Why Carve a Design Into a Table Top?
- Choose the Right Look Before You Cut Anything
- Tools and Materials You May Need
- Step-by-Step: How to Carve a Design Into a Table Top DIY Project
- 1. Start with a flat, stable surface
- 2. Make your design full-size
- 3. Transfer the pattern to the wood
- 4. Test on scrap wood first
- 5. Set a shallow depth and make multiple passes
- 6. Follow the right routing direction
- 7. Clean up corners and fine details by hand
- 8. Sand without erasing your hard work
- 9. Add contrast if you want the carving to pop
- 10. Seal it for real life
- Best Design Approaches for Different Styles
- Common Mistakes to Avoid
- How to Keep the Finished Table Looking Good
- Conclusion
- Real-World DIY Experience: What It’s Actually Like to Carve a Table Top
- SEO Metadata
If your table top is looking a little too plain, a carved design can change the whole mood of the piece. One minute it is “nice table.” The next minute it is “wait, you made that?” That is the magic of tabletop carving. It adds texture, personality, and just enough drama to make your furniture feel custom without requiring a medieval apprenticeship.
The good news is that carving a design into a table top DIY-style is completely doable for a careful beginner. You do not need a giant workshop, a beard full of sawdust, or a dramatic soundtrack. What you do need is a good plan, the right tool for the style you want, and enough patience to avoid turning your beautiful table into an accidental topographic map.
In this guide, you will learn how to carve a design into a table top DIY project step by step, including how to choose a design, prep the surface, cut clean lines, avoid tear-out, and finish the piece so it still survives actual life. Because yes, people will still put mugs on it like animals.
Why Carve a Design Into a Table Top?
A carved table top can be subtle or bold. You can add a border around the edge, a monogram in the center, a geometric pattern, a floral motif, a family name, or a shallow relief design that looks far more expensive than it really is. Carving also lets you rescue a basic table. If you have a flat wood top with good bones but zero personality, decorative carving is one of the best upgrades you can make.
It also gives you flexibility. A plunge router works beautifully for crisp grooves, lettering, and repeatable patterns. A rotary tool can help with fine detail and freehand work. Hand tools like chisels and gouges add that slightly imperfect, handmade look that says, “Yes, a real human touched this,” which is usually more charming than machine-perfect sterility.
Choose the Right Look Before You Cut Anything
Before you touch a router, decide what kind of carved design you actually want. This matters because the tool, depth, and finishing approach all change depending on the style.
Good beginner-friendly tabletop carving ideas
- Simple border grooves around the perimeter
- A center medallion or monogram
- Geometric linework using a template
- Shallow leaf or vine patterns
- Repeating corner flourishes
- Lettering for a farmhouse or rustic look
If this is your first attempt, keep the design shallow and reasonably open. Tiny, fussy details may look great on paper, but they are much less lovable once you are squinting over a spinning bit wondering why you chose chaos as a hobby.
Tools and Materials You May Need
- Wood table top or solid wood panel
- Plunge router or trim router
- Router bits such as straight bits, V-groove bits, or pattern bits
- Template material such as MDF, hardboard, or acrylic templates
- Guide bushing if using router templates
- Rotary tool for fine detail work
- Sharp chisels or carving gouges
- Clamps
- Pencil, carbon paper, or painter’s tape for layout
- Sandpaper in a range of grits
- Shop vacuum or tack cloth
- Wood stain, paint, or glaze if desired
- Clear protective finish
- Safety glasses, hearing protection, and a dust mask or respirator
If your design starts in the middle of the panel instead of on an edge, a plunge router is especially helpful. It lets you lower the bit into the wood with more control. If you are tracing a pattern, templates and guide bushings can save your sanity and improve your accuracy in one move.
Step-by-Step: How to Carve a Design Into a Table Top DIY Project
1. Start with a flat, stable surface
Your table top should be clean, dry, flat, and secure. If the wood is cupped, loose, or already failing, carving will not magically fix it. It will simply make the flaws more decorative. Sand off grime or old finish if needed, and make sure the panel is clamped firmly to your work surface. Movement is the enemy here.
2. Make your design full-size
Draw the design on paper first. Full-size is best. This is where you spot awkward spacing, crooked lettering, or the unfortunate moment when your “elegant vine” looks suspiciously like spaghetti. Tape the paper pattern to the table top, stand back, and look at it from different angles. Adjust before cutting, not after regretting.
For repeatable or symmetrical designs, make a template from MDF, plywood, or hardboard. A carefully made template gives cleaner, more consistent results and makes routing much easier. If you plan to carve lettering or a medallion, a template is your best friend and most judgmental coworker.
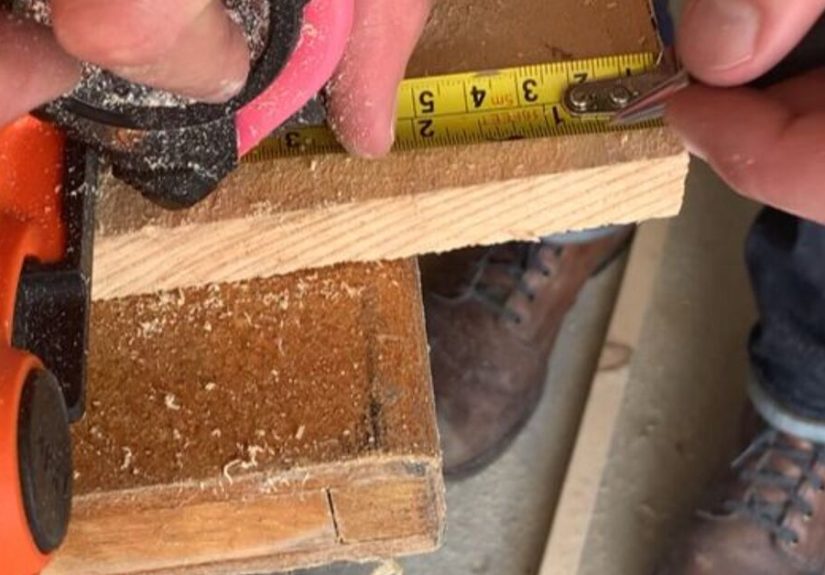
3. Transfer the pattern to the wood
You can transfer a design using carbon paper, a printed stencil, painter’s tape and pencil, or by tracing around a rigid template. Keep your lines clear but light. Heavy layout lines can smear into open grain and turn into an unexpected permanent feature.
For lettering or geometric shapes, mark centerlines and reference points first. Symmetry matters a lot on a table top because the eye catches crooked placement immediately. A slightly wobbly vine can look handmade. A crooked monogram looks like the furniture equivalent of a typo.
4. Test on scrap wood first
This step is not optional unless you enjoy experimental sadness. Use a scrap piece of the same species if possible and test your bit, depth, feed speed, and finish schedule. Wood species behave differently, and even a simple V-groove can look dramatically different in oak, maple, walnut, or pine.
Testing helps you answer the important questions: Is the bit too aggressive? Is the depth too shallow to show up after finishing? Is the groove clean, or is it fuzzing at the edges? Fix all of that now while nobody is watching.
5. Set a shallow depth and make multiple passes
One of the smartest things you can do when carving a design into a table top is to work in shallow passes. Do not try to hog out the full depth in one go. That increases the chance of splintering, rough edges, burning, and loss of control. Start shallow, especially with decorative carving.
For many designs, even a subtle depth can be enough to catch light beautifully. A crisp, shallow groove often looks better than a deep trench that seems ready to collect crumbs for the next hundred years.
6. Follow the right routing direction
Move steadily and deliberately. Let the tool cut at its own pace. For edge work and many pattern-routing tasks, tool direction matters for control and cleaner results. On tricky areas or end grain, light cleanup passes can reduce tear-out. When in doubt, slow down, reduce depth, and test again on scrap. This is woodworking, not speed dating.
If you are using a pattern bit or guide bushing, keep the router base flat and the template secure. If the template shifts, your design shifts, and then you will begin learning creative new vocabulary.
7. Clean up corners and fine details by hand
Router bits are round. Corners are not. If your design includes sharp inside corners, squared letters, or crisp transitions, use a sharp chisel or carving gouge to refine them. Work carefully and remove a little at a time. This is where the piece starts to look thoughtful instead of merely machined.
A rotary tool can also help with tight curves, small leaves, and delicate texture. Just remember that detail work is where overconfidence usually sneaks in. Use a light touch. Tiny corrections are elegant; panicked trenching is not.
8. Sand without erasing your hard work
Once the carving is complete, sand the surface enough to remove fuzz and tool marks, but not so aggressively that you soften the profile. Use folded sandpaper, flexible sanding pads, or small detail sanding tools in the carved areas. On the flat areas, sand with the grain for a cleaner finish.
Vacuum the dust thoroughly and wipe the top clean. Dust loves carved grooves because dust is nosy and refuses to leave unless asked repeatedly.
9. Add contrast if you want the carving to pop
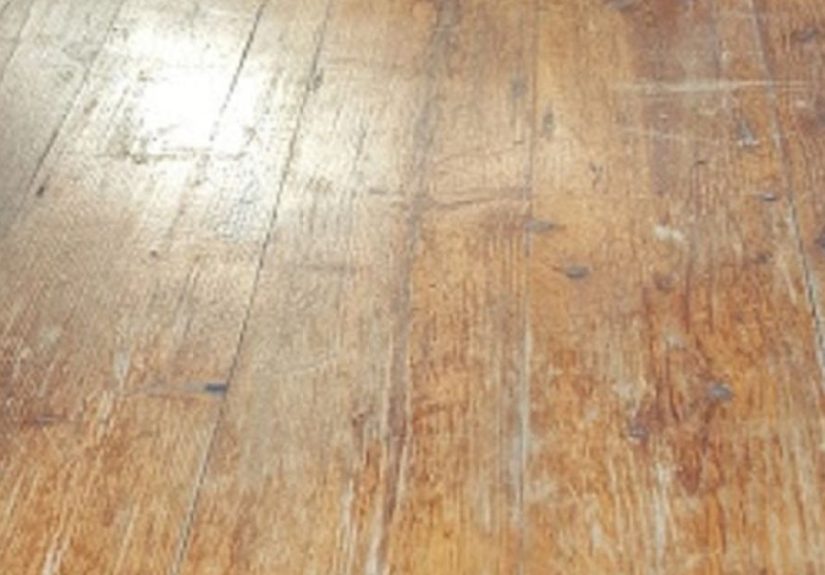
You have a few finishing options. You can leave the table top natural and let the carved pattern show through shadow and texture alone. You can stain the full top for a classic look. Or you can highlight the carving with a darker glaze, diluted paint, wax, or stain applied into the grooves and wiped back from the surface.
This contrast trick works especially well with lettering, borders, and floral designs. The carving becomes more visible without needing absurd depth. If you are using a soft wood that tends to blotch, prep and test carefully before staining so the finish enhances the design instead of giving it a weird patchy personality.
10. Seal it for real life
A carved table still has to function as a table. That means you need a protective finish, especially if the piece will live in a dining room, kitchen, or family space. Apply your clear coat according to the product directions, allow proper dry time, and sand lightly between coats when appropriate. Remove all dust before recoating.
A durable clear finish helps protect both the flat field and the carved recesses. It also makes the surface easier to clean, which matters more than most people realize once the first spaghetti dinner enters the chat.
Best Design Approaches for Different Styles
Farmhouse or rustic table
Try a monogram, family name, simple branch pattern, or border groove. Slight hand-tool texture can look great here. Perfection is not the goal; warmth is.
Modern table
Go for geometric channels, parallel lines, or a subtle center pattern. Keep the carving shallow and symmetrical. Clean lines do most of the work.
Traditional table
Floral motifs, medallions, and corner flourishes work beautifully. A V-groove bit can create crisp decorative lines, while chisels can soften and refine the look.
Personalized gift table
Initials, a date, a short phrase, or a carved border can turn a basic side table or coffee table into a keepsake. This works especially well for wedding gifts, anniversary pieces, or entryway tables.
Common Mistakes to Avoid
- Skipping the scrap test and discovering your mistakes directly on the project
- Cutting too deep in one pass and causing tear-out or rough grooves
- Using a dull bit or dull chisel
- Failing to clamp the top securely
- Making the design too small and detailed for your skill level
- Over-sanding the carving until everything looks tired and blurry
- Applying finish without removing dust from the grooves
- Choosing a pattern that fights the style of the table instead of complementing it
The best DIY tabletop carving projects are usually the ones with a strong, simple design executed cleanly. You do not need to turn your dining table into a Renaissance ceiling panel. Unless you want to. In that case, hydrate first.
How to Keep the Finished Table Looking Good
Once your carved table top is finished, maintenance is simple. Dust the carving regularly with a soft brush or microfiber cloth. Avoid letting water pool in recessed areas. Use coasters, placemats, or the universal classic: telling your family not to put hot pizza boxes directly on the furniture like tiny home-improvement villains.
If the piece gets heavy use, refresh the protective topcoat as needed over time. A well-sealed carved table can hold up beautifully, and the design often looks even better as the wood ages and the finish settles in.
Conclusion
Learning how to carve a design into a table top DIY-style is one of those projects that looks intimidating right up until the moment it starts making sense. The key is not magic. It is method. Choose a realistic design, transfer it carefully, cut in shallow passes, clean up the details, and finish the surface like you expect people to actually use it.
Whether you want a simple routed border, carved lettering, or a more decorative statement piece, the process rewards patience more than bravado. Start with a straightforward pattern, practice on scrap, and let the design build one clean pass at a time. Soon enough, you will have a table that feels custom, creative, and very satisfying to point at whenever guests come over. Casually, of course.
Real-World DIY Experience: What It’s Actually Like to Carve a Table Top
The experience of carving a design into a table top is equal parts exciting, nerve-racking, dusty, and weirdly addictive. Before the first cut, the project feels almost too precious to touch. You spend an absurd amount of time moving a paper template half an inch left, then half an inch right, then back again, because suddenly alignment feels like a moral issue. Once the design is finally centered and taped down, you realize woodworking has a lot in common with cooking for guests: most of the stress happens before anything useful has actually happened.
The first routed pass is the big emotional event. The sound of the tool kicks up, the bit touches the wood, and in about three seconds you either think, “Oh, this is going beautifully,” or “Well, that groove is definitely more expressive than planned.” That is why practice cuts matter so much. A small test piece takes the panic out of the real cut and gives you a feel for how the wood responds. Some woods cut clean and crisp. Others act like they were personally offended by your design.
There is also a surprising rhythm to the process. After the first few minutes, you stop overthinking every inch and start paying attention to pressure, pace, and sound. You learn that forcing the router is a terrible idea, that dust gets everywhere, and that shallow passes are not a suggestion from overly cautious people on the internet. They are the reason your pattern looks intentional instead of chewed.
The cleanup stage is where the project starts feeling personal. Squaring a corner with a chisel, refining a curve, or sanding a fuzzy edge makes the carving feel less like a construction task and more like actual craft. You notice the little decisions that give the table character. Maybe one line gets slightly softened. Maybe the border becomes cleaner than you expected. Maybe the monogram that looked too bold on paper suddenly looks perfect in wood. Those moments are incredibly satisfying.
Then comes finishing, which can feel like a reveal on a home makeover show, except there is no dramatic host and you are covered in sawdust. As stain or clear finish goes on, the carved lines darken, the grain wakes up, and the whole top begins to look deliberate and complete. It is one of the best parts of the project. All the cautious measuring, the test cuts, the tiny corrections, and the vacuuming of dust from every microscopic recess finally pay off.
Perhaps the most rewarding part is living with the finished piece afterward. A carved table top changes how a room feels. People notice it. They run a hand over the design. They ask where you bought it, and you get to enjoy the deeply satisfying phrase, “I made it.” Better yet, you know every part of that table: where you hesitated, where you adjusted, where the grain surprised you, and where the design came together better than expected. It is not just furniture anymore. It is proof that careful DIY work can produce something useful, beautiful, and personal. Also, it gives you an excellent excuse to start looking suspiciously hard at every plain table in your house.