Table of Contents >> Show >> Hide
- Introduction: The Small Shelf That Solves a Big Wall Problem
- What Is a DIY Picture Ledge?
- Why Build Your Own Picture Ledge?
- Best Places to Use a Picture Ledge
- Materials You Will Need
- Tools You Will Need
- How to Build an Easy DIY Picture Ledge
- How to Install a Picture Ledge Safely
- Picture Ledge Styling Ideas
- Common Mistakes to Avoid
- Budget-Friendly Variations
- of Real-Life Experience: What Building a Picture Ledge Teaches You
- Conclusion
- SEO Tags
Note: This guide is written for beginner and intermediate DIYers who want a stylish wall display without turning the living room into a drywall crime scene.
Introduction: The Small Shelf That Solves a Big Wall Problem
A blank wall can be strangely intimidating. It just stands there, judging your décor choices, waiting for you to either hang one lonely frame too high or commit to a gallery wall that requires math, courage, and possibly emotional support. That is exactly why an easy DIY picture ledge is such a smart home project. It gives you the polished look of a curated gallery wall, but with far less measuring, fewer nail holes, and no need to permanently marry one layout forever.
A picture ledge is a shallow shelf with a small front lip that keeps framed photos, art prints, books, postcards, and small decorative objects from sliding off. Unlike traditional floating shelves, picture ledges are usually narrow, lightweight, and designed mainly for display. They work beautifully in living rooms, bedrooms, hallways, nurseries, kitchens, home offices, and even awkward little wall spaces that previously had no purpose except collecting side-eye.
The best part? You can build one with common lumber, basic tools, wood glue, screws, sandpaper, and paint or stain. A simple DIY photo ledge can look custom, expensive, and magazine-ready, while costing far less than many store-bought versions. Whether your style is modern farmhouse, minimalist, Scandinavian, traditional, or “I bought this frame five years ago and finally want to use it,” this project is flexible enough to fit your home.
What Is a DIY Picture Ledge?
A DIY picture ledge is a handmade wall-mounted display shelf, typically made from three narrow boards: a back board, a base board, and a front lip. The back board attaches to the wall, the base supports your frames, and the front lip keeps everything in place. Think of it as a tiny stage for your favorite memories, art, and decorative treasures.
Picture ledges are popular because they make decorating easier. Instead of hanging every frame separately, you simply lean frames against the wall. Want to swap a family photo for seasonal art? Done. Want to move a print two inches to the left because your inner designer woke up dramatic today? Easy. No hammer required.
Why Build Your Own Picture Ledge?
Store-bought ledges are convenient, but building your own gives you full control over length, color, wood type, depth, and finish. You can make a short shelf for a bathroom, a long picture ledge above a sofa, or a set of stacked ledges for a hallway gallery. Custom sizing is especially helpful if your wall is an unusual width or you want the ledge to align with furniture below it.
Another major benefit is cost. With a few boards from a home improvement store, you can often create a sturdy, attractive ledge for much less than a designer version. Plus, there is something deeply satisfying about pointing at your wall and saying, “I made that.” Bonus points if you say it while holding a coffee mug and looking humble but proud.
Best Places to Use a Picture Ledge
Above the Sofa
A long picture ledge above the sofa creates a natural focal point. For a balanced look, choose a ledge that is roughly two-thirds the width of the couch or slightly longer if the room has large walls and high ceilings. Layer larger frames in the back and smaller pieces in front to create depth.
In a Hallway
Hallways are perfect for picture ledges because they often have long, narrow walls. Instead of lining up frames one by one, install one or two ledges and create a family photo display that can grow over time. It is also easier to dust one shelf than twenty separate frames. Your future self will appreciate this.
In a Bedroom
A picture ledge above a bed can replace a traditional headboard or add personality above an existing one. Keep safety in mind: mount it securely into studs whenever possible, avoid heavy objects above pillows, and place it high enough so nobody bumps their head while sitting up.
In a Kids’ Room or Nursery
Picture ledges can double as forward-facing book shelves. Displaying children’s books with the covers visible makes them more inviting and easier for kids to choose. Just mount the shelves securely and avoid placing breakable décor within reach of tiny hands with surprisingly ambitious climbing goals.
In the Kitchen or Dining Room
A narrow ledge can hold small framed recipes, mini art, vintage plates, or cookbooks. It adds warmth without taking up the space of bulky cabinets. In a dining room, a picture ledge can create a rotating display for seasonal prints, botanical art, or family photos.
Materials You Will Need
For a basic DIY picture ledge shelf, you can use the following materials:
- One 1×4 board for the back
- One 1×3 or 1×4 board for the bottom shelf
- One 1×2 board for the front lip
- Wood glue
- Wood screws, usually 1 1/2-inch to 2-inch depending on board thickness
- Brad nails or finishing nails
- Wood filler
- Sandpaper, such as 120-grit and 220-grit
- Paint, stain, or clear protective finish
- Wall screws and anchors if studs are not available
Select pine is a popular choice because it is smooth, affordable, and easy to paint or stain. Common boards are cheaper, but they may require more sanding and careful selection. When shopping, look down the length of each board to check for bowing, twisting, cracks, or rough edges. A board that looks like it is trying to become a banana should stay at the store.
Tools You Will Need
This project does not require a professional workshop. A simple setup is enough:
- Tape measure
- Pencil
- Miter saw, circular saw, or handsaw
- Drill and drill bits
- Clamps
- Level
- Stud finder
- Brad nailer or hammer
- Sanding block or orbital sander
- Paintbrush, foam roller, or staining cloth
- Safety glasses
If you do not own a saw, many home improvement stores can cut boards to length for you. This is a beginner-friendly shortcut and absolutely not cheating. It is called efficiency, and it deserves applause.
How to Build an Easy DIY Picture Ledge
Step 1: Measure Your Wall
Start by deciding where the picture ledge will go. Measure the wall area and consider nearby furniture. Above a sofa, bed, console table, or desk, the ledge should feel visually connected to the furniture below it. Avoid making the shelf so short that it looks lost, or so long that it overwhelms the room.
Mark the desired length on your boards. Common lengths include 24 inches, 36 inches, 48 inches, and 60 inches, but you can customize the size to fit your space. If you plan to install multiple ledges, measure the spacing between them before cutting.
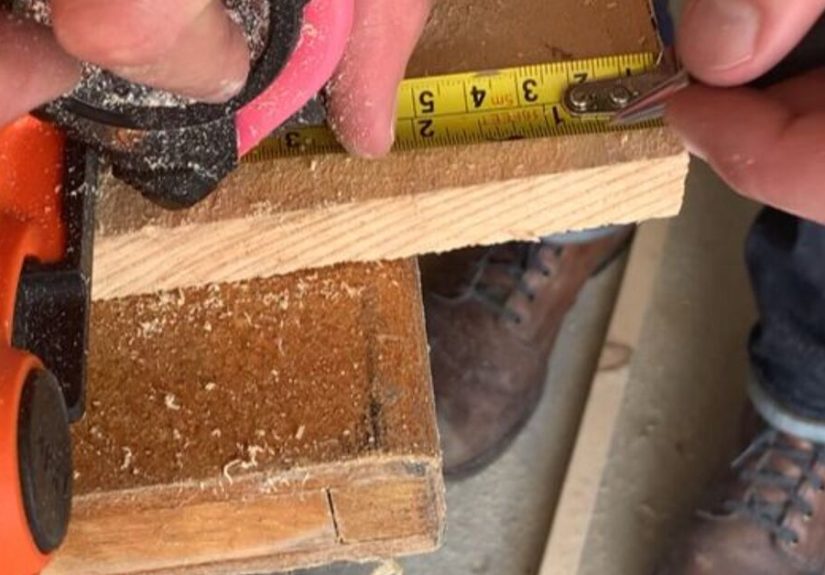
Step 2: Cut the Boards
Cut all three boards to the same length. For example, a 48-inch picture ledge would require one 48-inch back board, one 48-inch bottom board, and one 48-inch front lip. Use a square or guide to help make clean, straight cuts.
After cutting, lightly sand the edges to remove splinters. Sanding before assembly makes the final finish much smoother and prevents those tiny wood slivers from attacking your fingers like miniature ninjas.
Step 3: Assemble the Back and Bottom Boards
Place the back board upright behind the bottom board to form an L shape. Apply wood glue along the joint where the boards meet. Clamp the pieces together so they stay aligned while you fasten them.
Pre-drill pilot holes to reduce the risk of splitting the wood. Then drive screws through the back or bottom, depending on your design. Space screws evenly along the length of the ledge, usually every 8 to 12 inches. Wipe away excess glue with a damp cloth before it dries.
Step 4: Attach the Front Lip
The front lip is what separates a picture ledge from a regular shelf. It keeps frames from sliding forward and gives the ledge its signature look. Apply wood glue to the front edge of the bottom board, position the 1×2 lip, and clamp it in place.
Use a brad nailer or finishing nails to attach the lip. If you prefer screws, pre-drill first and place them carefully so they do not split the narrow board. Nails are usually easier to hide, especially if you plan to paint the ledge.
Step 5: Fill Holes and Sand Smooth
Once the glue has dried, fill nail holes, screw holes, and small gaps with wood filler. Let it dry according to the product directions, then sand the entire shelf. Start with medium-grit sandpaper if needed and finish with fine-grit paper for a smooth surface.
Pay special attention to corners and edges. Slightly rounding the edges gives the ledge a softer, more finished look. It also makes the shelf more pleasant to handle during installation.
Step 6: Paint, Stain, or Seal
Now comes the fun part: giving your DIY picture ledge personality. Paint is ideal if you want a clean, modern finish or want the ledge to match your wall color. White, black, soft beige, deep green, and warm taupe are all versatile choices.
Stain is a great option if you want the natural wood grain to show. Light oak, walnut, weathered gray, and natural pine finishes all work well with different decorating styles. Always test stain on a scrap piece first because wood can absorb color unpredictably. Pine, in particular, has a flair for drama.
If you want extra durability, add a clear protective coat after staining or painting. This is especially useful in kitchens, bathrooms, kids’ rooms, or high-traffic hallways.
How to Install a Picture Ledge Safely
Find the Studs
For the strongest installation, attach the picture ledge to wall studs. Use a stud finder and mark the stud locations lightly with a pencil. Studs are often spaced 16 inches apart, but older homes and remodeled walls can have surprises. Trust the stud finder more than wishful thinking.
Mark a Level Line
Hold the ledge against the wall and use a level to mark the placement. This step matters. A slightly crooked shelf may not bother you at first, but once frames are leaning on it, the whole display can look like it is slowly sliding into another dimension.
Drive Screws Through the Back Board
Pre-drill holes through the back board where it meets the studs. Then secure the ledge to the wall with screws long enough to pass through the wood, drywall, and into the stud. For most lightweight picture ledges, two or three stud connections are ideal, depending on the shelf length.
Use Anchors When Needed
If you cannot hit studs in every location, use wall anchors rated for the expected weight. Choose anchors carefully based on the wall type and what you plan to display. Lightweight frames may be fine with standard drywall anchors, but heavier objects require stronger hardware. When in doubt, keep the ledge décor light or consult a professional.
Picture Ledge Styling Ideas
Layer Frames for Depth
The secret to a good picture ledge display is layering. Place larger frames in the back and overlap smaller frames in front. This creates depth and makes the arrangement feel relaxed rather than overly perfect.
Mix Sizes and Shapes
Use a mix of vertical frames, horizontal frames, square prints, and small objects. The variety keeps the display interesting. To avoid visual chaos, repeat one or two elements, such as black frames, natural wood tones, or a consistent color palette.
Add Small Decorative Objects
Picture ledges are not only for pictures. Add a tiny vase, candle, small plant, ceramic figure, framed quote, vintage postcard, or sculptural object. Just keep the scale shallow so the shelf does not look crowded.
Decorate Seasonally
One reason people love picture ledges is that they are easy to update. Add autumn prints in October, winter greenery in December, bright florals in spring, or beachy artwork in summer. A ledge lets your home change moods without requiring a full makeover or a suspiciously large online shopping cart.
Common Mistakes to Avoid
Making the Ledge Too Deep
A picture ledge should usually be shallow. If it sticks out too far, it can look bulky and become easier to bump into. A depth of about 3 to 4 inches works well for most framed art and photos.
Skipping the Front Lip
The front lip is essential. Without it, frames can slide forward, especially if the ledge is bumped. Even a small 1×2 lip adds security and gives the shelf a finished profile.
Using Weak Installation Hardware
Do not rely on tiny nails or adhesive strips for a wood picture ledge. Even if the shelf itself is light, the combined weight of frames and décor adds up. Use screws into studs whenever possible and appropriate anchors when needed.
Overcrowding the Shelf
A picture ledge should feel curated, not stuffed. Leave a little breathing room between objects. If every inch is packed, the display can look more like a yard sale lineup than intentional décor.
Budget-Friendly Variations
If you want to save money, build your picture ledge from leftover lumber, fence boards, or reclaimed wood. Just make sure the wood is clean, dry, straight, and safe for indoor use. Sand rough surfaces thoroughly and seal reclaimed wood if needed.
For a sleek built-in look, paint the ledge the same color as the wall. For contrast, choose black, charcoal, walnut, or warm natural wood. In a modern room, a black ledge with black-and-white photography looks crisp and sophisticated. In a cozy farmhouse space, stained pine or oak brings warmth.
of Real-Life Experience: What Building a Picture Ledge Teaches You
Building an easy DIY picture ledge is one of those projects that looks almost too simple on paper. Three boards, some glue, a few screws, a little paint, and suddenly you are a person who “does woodworking.” But the real experience is full of small lessons that make you better at future DIY projects.
The first lesson is that measuring matters, but visual balance matters too. A shelf can be technically centered and still feel wrong if the furniture below it is off-center, the ceiling is high, or the wall is wider than expected. Before cutting wood, it helps to tape the ledge outline on the wall with painter’s tape. Step back, look from the doorway, sit on the sofa, and check how it feels. This simple preview can prevent the classic DIY moment where you install something perfectly and then whisper, “Why does this look weird?”
The second lesson is that wood has opinions. Even boards labeled the same size can vary slightly. Some have tiny bows, rough corners, knots, or dents. Taking five extra minutes at the store to choose straight boards makes the project easier from start to finish. At home, dry-fitting the pieces before adding glue helps you spot gaps and alignment issues. Wood glue is wonderful, but it is not a magic wand. It works best when the boards actually want to be friends.
The third lesson is patience. Sanding feels boring until you skip it. Then every rough edge, glue bump, and filler ridge becomes obvious once paint or stain goes on. A smooth ledge looks custom; a rushed one looks like it fought a raccoon and lost. Sanding between coats of paint can also make a big difference. It does not need to be perfect, but it should feel good to the touch.
Installation teaches the biggest lesson: walls are mysterious. Stud finders help, but walls can hide pipes, wires, odd framing, old repairs, and surprises from previous homeowners who apparently made decisions during a thunderstorm. Marking studs carefully, using a level, and pre-drilling holes can make the difference between a secure shelf and a dramatic crash at 2 a.m. Nobody wants to be awakened by falling family photos. That is not nostalgia; that is an indoor jump scare.
Styling the ledge is the reward. Start with the largest frame, then add medium pieces, then smaller accents. Odd-numbered groupings usually feel natural, but do not become trapped by rules. The best displays look collected, personal, and slightly relaxed. A family photo, a travel print, a small plant, and a favorite quote can say more about a home than a perfectly matched set of generic art.
The best experience, though, is flexibility. A picture ledge grows with your life. You can change photos after a vacation, add holiday art, display children’s drawings, rotate prints, or simplify the arrangement when you want a calmer room. Unlike a traditional gallery wall, you are not locked into one layout. That makes the DIY picture ledge one of the most forgiving, useful, and confidence-building projects you can make. It is small enough for beginners, stylish enough for design lovers, and practical enough to earn its spot in almost any room.
Conclusion
An easy DIY picture ledge is a simple project with a big design payoff. With a few boards, basic tools, and careful installation, you can create a custom wall display that looks polished, personal, and flexible. It is easier than building a full gallery wall, more customizable than many store-bought shelves, and perfect for anyone who likes to refresh their décor without patching holes every season.
Whether you install one ledge above a sofa, stack several in a hallway, use them as book shelves in a nursery, or create a rotating art display in your office, picture ledges are practical and stylish. They prove that good design does not always require a huge budget, complicated tools, or a renovation show camera crew. Sometimes, it just takes three boards, a level, and the confidence to start.