Table of Contents >> Show >> Hide
- What You Need Before You Start
- Best Wood for Burning Letters
- How to Burn Letters Into Wood: 15 Steps
- Step 1: Choose a Safe Piece of Wood
- Step 2: Set Up a Ventilated Workspace
- Step 3: Sand the Wood Smooth
- Step 4: Plan Your Lettering Design
- Step 5: Pick a Beginner-Friendly Font
- Step 6: Print or Draw the Letters
- Step 7: Transfer the Design to the Wood
- Step 8: Choose the Right Burning Tip
- Step 9: Heat the Tool Properly
- Step 10: Test on Scrap Wood
- Step 11: Burn the Outlines First
- Step 12: Fill in Thick Letter Strokes
- Step 13: Add Shadows, Accents, or Decorative Details
- Step 14: Clean the Surface After Burning
- Step 15: Seal and Protect the Finished Piece
- Common Mistakes to Avoid
- Tips for Cleaner Wood-Burned Letters
- Project Ideas for Wood-Burned Lettering
- Safety Reminders for Wood Burning
- Extra Experience: What Wood Burning Letters Teaches You Over Time
- Conclusion
Note: This guide is for safe, beginner-friendly pyrography using a wood-burning pen. Always work in a well-ventilated area, use only dry untreated wood, keep a fire-safe workspace, and have adult supervision for younger crafters.
Burning letters into wood is one of those crafts that looks fancy enough to impress guests but is still beginner-friendly enough that you do not need a secret membership card to the Woodworker Wizard Society. With a simple wood-burning tool, a smooth board, and a little patience, you can create personalized signs, cutting-board-style décor, ornaments, gift tags, name plaques, wedding decorations, and rustic home accents that feel handmade in the best possible way.
The technique is called pyrography, which literally means “writing with fire.” Thankfully, modern pyrography does not require waving a flaming torch around like a medieval sign painter. Instead, you use a heated pen-like tool to darken the surface of the wood. When you learn how to control temperature, pressure, speed, and grain direction, letters become cleaner, smoother, and much less likely to resemble a nervous squirrel’s handwriting.
This step-by-step guide explains how to burn letters into wood safely and beautifully, from choosing the right wood to sealing your finished piece. Whether you are making a farmhouse kitchen sign, a personalized jewelry box, or a handmade gift that says “I tried harder than buying a mug,” these 15 steps will help you get professional-looking results.
What You Need Before You Start
Before heating your wood-burning pen, gather everything you need. Wood burning goes more smoothly when you are not searching for sandpaper while holding a tool hot enough to make toast nervous.
Basic Supplies
- Wood-burning pen or pyrography tool with a stand
- Dry, unfinished, untreated wood
- Fine-grit sandpaper, usually 220 grit or higher
- Pencil and eraser
- Printed lettering template or stencil
- Graphite paper or transfer paper
- Heat-resistant surface or craft mat
- Ruler or measuring tape
- Painter’s tape
- Scrap wood for testing
- Soft cloth or tack cloth
- Optional finish such as clear water-based polyurethane, mineral oil, or wax, depending on the project
Best Wood for Burning Letters
The best wood for wood burning is smooth, light-colored, dry, and unfinished. Basswood is a favorite because it has a soft, even grain that accepts burn marks cleanly. Birch, maple, poplar, beech, and aspen can also work well. Pine is affordable and easy to find, but its uneven grain and resin pockets can make lettering slightly more unpredictable. In other words, pine sometimes has opinions.
Avoid painted, stained, pressure-treated, varnished, reclaimed, moldy, or unknown wood. Also avoid MDF, particleboard, and other manufactured boards for pyrography projects, because adhesives and chemicals may release unsafe fumes when heated. A good rule is simple: if you do not know what is in the wood, do not burn it.
How to Burn Letters Into Wood: 15 Steps
Step 1: Choose a Safe Piece of Wood
Start with a piece of dry, raw, untreated wood. Light-colored woods make burned letters stand out more clearly, while smooth-grained woods help the pen glide without skipping. If you are a beginner, choose basswood or birch before experimenting with harder or more textured woods. Make sure the wood is thick enough that it will not warp easily and large enough for your lettering layout.
Step 2: Set Up a Ventilated Workspace
Wood burning creates smoke, odor, and fine particles, so ventilation matters. Work near an open window, use a fan to move fumes away from your face, or work in a garage or craft area with good airflow. Keep your workspace clear of paper scraps, fabric, sawdust piles, and anything else that could catch heat. Place the hot tool on its stand whenever it is not touching wood. Do not set it on the table “just for a second,” because that second has a talent for becoming a permanent scorch mark.
Step 3: Sand the Wood Smooth
Sanding is one of the most important steps for clean lettering. Use fine-grit sandpaper and sand with the grain until the surface feels smooth to the touch. Rough wood causes the burner tip to drag, jump, or leave uneven lines. After sanding, wipe the board with a clean cloth or tack cloth to remove dust. A clean surface gives you better control and more consistent burn marks.
Step 4: Plan Your Lettering Design
Decide what you want the wood to say. Short phrases are easier for beginners than long quotes. A name, date, kitchen label, family motto, or one-word sign is a great place to start. Measure your wood and sketch a simple layout. Think about spacing, margins, and alignment before transferring the letters. Your future self will be grateful when the word “Welcome” does not accidentally become “Welcom e.”
Step 5: Pick a Beginner-Friendly Font
For your first project, choose a bold, simple font with clean lines. Block letters, serif fonts, and basic script fonts are easier to burn than extremely thin calligraphy or decorative lettering. Avoid fonts with tiny loops, hairline strokes, and complicated flourishes until you are comfortable controlling the pen. Thick letters give you room to outline, correct, and fill without every tiny wobble becoming headline news.
Step 6: Print or Draw the Letters
You can draw the letters by hand or print a template from a computer. Printing is helpful because it lets you adjust the size, spacing, and style before touching the wood. Cut the paper template to fit your board, then position it exactly where you want the letters. Use a ruler to center the design and painter’s tape to hold it in place.
Step 7: Transfer the Design to the Wood
Place graphite paper or transfer paper between the template and the wood, dark side facing down. Trace the letters firmly with a pencil or stylus. Lift one corner of the template to check the transfer before removing everything. If the lines are too faint, trace again with slightly more pressure. If you draw directly on the wood, use light pencil marks so they are easier to erase later.
Step 8: Choose the Right Burning Tip
Most wood-burning kits include several tips. For lettering, a universal point, rounded tip, flow point, or calligraphy tip usually works well. A fine point is useful for outlines and small details, while a broader tip can fill thicker strokes. Practice with each tip on scrap wood before working on the final piece. Different tips feel surprisingly different, like switching from a ballpoint pen to a paintbrush.
Step 9: Heat the Tool Properly
Plug in the wood-burning pen and let it heat fully according to the manufacturer’s directions. If your tool has temperature control, start with a medium setting. Too cool, and you will press too hard. Too hot, and the letters may scorch too quickly or look blotchy. The goal is controlled browning, not a dramatic smoke signal to the neighbors.
Step 10: Test on Scrap Wood
Before burning your final design, test the tool on a scrap piece of the same wood. Practice straight lines, curves, dots, thick strokes, and thin strokes. Notice how speed changes the darkness: moving slowly creates darker burns, while moving quickly creates lighter lines. Also test how the tip behaves with and against the grain. This five-minute practice session can save your final project from becoming “rustic” in the emergency sense of the word.
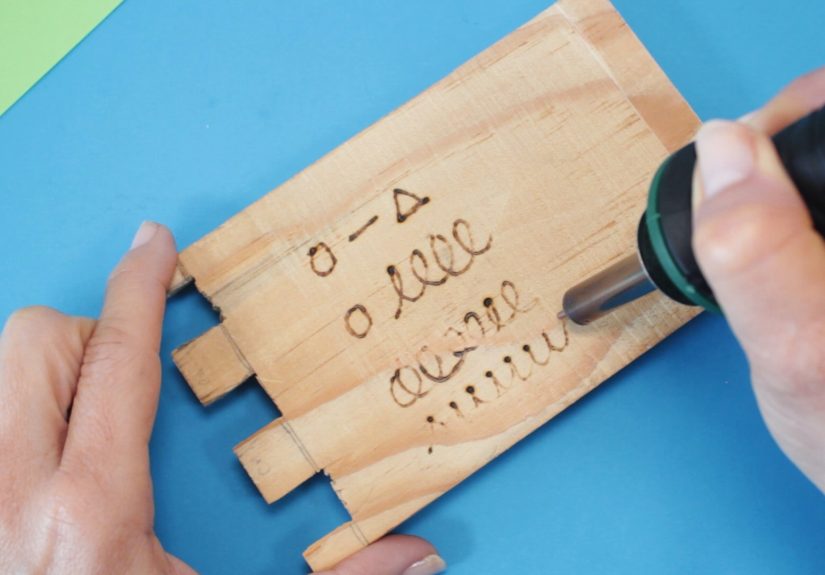
Step 11: Burn the Outlines First
Start by lightly burning the outlines of each letter. Use gentle pressure and let the heat do the work. Pull the pen toward you when possible instead of pushing it, because pulling often gives smoother control. For curves, rotate the wood rather than twisting your wrist awkwardly. Work slowly, but do not stop too long in one spot or you may create dark blobs. If a line needs to be darker, you can always go over it again.
Step 12: Fill in Thick Letter Strokes
After outlining, fill in wider parts of the letters with small, controlled strokes. Keep the motion consistent so the burn color looks even. Some crafters use parallel lines, while others use tiny circular movements. Both can work. For bold block letters, use a shading tip or the side of a broader tip. Try not to rush this step. Filled letters look best when the darkness builds gradually.
Step 13: Add Shadows, Accents, or Decorative Details
Once the main letters are burned, you can add style. A slight shadow on one side of each letter creates depth. Small dots, vines, stars, borders, leaves, or simple line art can make the design feel finished. Keep accents balanced and avoid overcrowding. The letters should remain the star of the project, not trapped in a jungle of decorative doodles.
Step 14: Clean the Surface After Burning
Let the wood cool completely. Then use an eraser to remove any visible pencil or transfer marks. Be gentle around burned areas so you do not lighten the design too much. If there are tiny raised fibers, you can very lightly sand around the design with fine sandpaper, but avoid sanding directly over the lettering unless you want a faded look. Wipe away dust with a clean cloth.
Step 15: Seal and Protect the Finished Piece
Sealing is optional, but it helps protect your wood-burned lettering from dust, fingerprints, moisture, and fading. For decorative signs, a clear water-based polyurethane or acrylic sealer can work well. For items that may contact food, use a food-safe finish appropriate for the object and follow the product label carefully. Always let the burned wood cool fully before applying any finish. Apply thin coats and let each coat dry completely.
Common Mistakes to Avoid
Pressing Too Hard
A wood-burning pen is not a carving tool. If you press hard, the tip can dig into the wood, catch on grain, or create uneven marks. Use light pressure and allow heat to darken the surface. Better control comes from temperature, speed, and patience.
Skipping the Sanding Step
Rough wood makes rough letters. Even if the board looks smooth, sand it anyway. Sanding gives the burner tip a better path and helps your lines look cleaner.
Burning on Finished or Treated Wood
Never burn letters into painted, stained, pressure-treated, varnished, or mystery wood. Heat can release fumes from finishes, adhesives, and chemicals. Use raw, untreated wood only.
Using Complicated Fonts Too Soon
Beautiful script fonts are tempting, but they can be tricky. Start with simple lettering and build skill gradually. Once your hand control improves, curls and flourishes become much less intimidating.
Forgetting About the Grain
Wood grain affects how the pen moves. Burning with the grain usually feels smoother. Burning across the grain can create resistance or uneven lines. Rotate the piece as needed and work in short sections.
Tips for Cleaner Wood-Burned Letters
Clean lettering comes from preparation more than magic. Use a smooth board, transfer a clear design, test your temperature, and burn slowly. Keep the tool tip clean according to the manufacturer’s instructions, because residue can make lines uneven. If your pen has adjustable heat, use lower heat for fine outlines and slightly higher heat for bold fills. Keep your wrist relaxed and your breathing normal. Holding your breath may feel serious and artistic, but it usually just makes your hand shakier.
When burning script letters, treat each stroke like handwriting. Work from top to bottom and left to right when possible. For block letters, outline first and fill second. For serif letters, burn the main vertical strokes before adding small caps and feet. If you make a small mistake, do not panic. Many tiny slips can be blended into shadows, thickened strokes, or decorative accents. Wood burning is forgiving if you stay calm and creative.
Project Ideas for Wood-Burned Lettering
Once you learn the basics, there are dozens of ways to use wood-burned letters. Make a family name sign for an entryway, label herb garden markers, personalize wooden spoons, decorate holiday ornaments, create table numbers for a wedding, or burn a favorite short quote onto a wall plaque. Small projects are best for practice because they are quick, affordable, and less emotionally devastating if the letter “S” decides to go rogue.
For gifts, add names, dates, initials, or meaningful phrases. A plain wooden box becomes a keepsake with a burned monogram. A simple round wood slice becomes a Christmas ornament with a name and year. A small board with “Coffee” burned across it can make a kitchen corner feel cozy. The charm of pyrography is that even simple designs feel warm, personal, and handcrafted.
Safety Reminders for Wood Burning
A wood-burning pen gets extremely hot, so treat it with respect. Keep the cord away from the hot tip, place the pen in its stand when not in use, and unplug it when finished. Do not leave a hot tool unattended. Keep water or a fire extinguisher nearby in a safe workspace, and make sure smoke alarms in the home are working. Wear eye protection when sanding and avoid breathing wood dust. If smoke or odor becomes strong, stop and improve ventilation.
For younger crafters, adult supervision is important. The project may look like drawing, but the tool is still a heated instrument. Safe habits make the craft more enjoyable and help prevent burns, scorched tables, and the awkward family sentence, “Why does the dining room smell like a campfire?”
Extra Experience: What Wood Burning Letters Teaches You Over Time
The first thing many beginners learn about burning letters into wood is that confidence and speed are not the same thing. You may feel ready to glide across the board like a professional sign maker after watching a few tutorials, but the wood has other plans. The grain changes, the tip catches, and suddenly your perfect line has a tiny wiggle. The good news is that almost every wood-burning artist has been there. The better news is that those little imperfections often give handmade pieces their character.
One useful experience is learning to test everything. Test the wood. Test the tip. Test the temperature. Test the font size. A design that looks wonderful on paper may be too detailed once transferred onto a small board. Thin cursive strokes may disappear into strong grain, while bold letters may need more filling time than expected. Scrap wood is not a waste; it is your rehearsal stage. The final piece is the concert.
Another lesson is that preparation makes the burning process feel easier. A well-sanded board can make even a basic burner feel smoother. A poorly sanded board can make an expensive tool feel like it is dragging itself through gravel. Many beginners want to rush into the exciting part, but sanding, measuring, centering, and transferring are what make the final letters look intentional. In pyrography, patience is not just a virtue; it is practically a tool in the kit.
Letter spacing also becomes more important with experience. When letters are too close together, the burned edges can visually merge, especially on small signs. Leaving slightly more space between letters improves readability. This is especially true for names, labels, and quotes meant to be read from across a room. A beautiful sign is less helpful if guests have to squint and ask whether it says “Gather” or “Gopher.”
Wood choice teaches its own lessons. Basswood is kind to beginners because it burns evenly and does not fight back much. Pine can be charming but inconsistent. Maple looks beautiful but may require more heat and patience. Darker woods can hide subtle burn marks, while pale woods create strong contrast. Once you understand how each wood behaves, choosing material becomes part of the design instead of a random trip down the lumber aisle.
Over time, you also learn that mistakes are not always disasters. A shaky outline can become a thicker stroke. A dark dot can become part of a shadow. A slightly uneven fill can become a rustic texture. The trick is to pause before “fixing” too aggressively. Sometimes the best correction is a small design adjustment, not a full rescue mission.
Finally, burning letters into wood teaches you to slow down. It is not a craft that rewards rushing. The tool needs time, the wood responds gradually, and your hand gets steadier with practice. That slower pace is part of the appeal. In a world full of instant printing and one-click personalization, pyrography gives you something more satisfying: a handmade piece with warmth, texture, and a little bit of smoke-scented pride.
Conclusion
Learning how to burn letters into wood is a rewarding way to turn simple wooden pieces into personalized art. The process is straightforward: choose safe untreated wood, sand it smooth, transfer your design, test your tool, burn the outlines, fill the letters, and protect the finished project. With practice, your lines become cleaner, your spacing improves, and your confidence grows.
The secret is not fancy equipment or impossible artistic talent. It is preparation, patience, and respect for safety. Start with simple fonts, practice on scrap wood, and give yourself permission to improve one project at a time. Soon, you will be making signs, gifts, ornaments, and keepsakes that look thoughtful, rustic, and charmingly handmadewithout needing to explain that the first practice board has been quietly retired to the “learning experience” drawer.


