Table of Contents >> Show >> Hide
- What Counts as a “Vintage Inspired Stand”?
- Vintage Style Cheat Codes: Shapes, Details, and Finishes
- Tools & Materials You’ll Use Again and Again
- Project 1: Mid-Century Plant Stand (Wood Round + Tapered Legs)
- Project 2: Thrifted Pedestal (Plate + Candlestick = Vintage Cake Stand)
- Project 3: Farmhouse Wood Pedestal Stand (Riser for Decor or Serving)
- Project 4: Vintage Industrial Stand (Pipe Base + Wood Top)
- Project 5: Multi-Level “Collected” Plant Stand (Crates, Ladders, or Simple Tiers)
- Finishing Like a Time Traveler: How to Make New Look Vintage
- Safety & Stability (Because Gravity Has No Chill)
- How to Style DIY Vintage Inspired Stands So They Look “Right”
- Real-Life Experiences: What I Learned Building DIY Vintage Inspired Stands (and a Few Funny Mistakes)
- Conclusion
DIY vintage inspired stands are the unsung heroes of home decor: they lift things up (literally), make everyday objects look intentional (emotionally), and somehow turn “I bought this at a thrift store for $4” into “Yes, it’s a curated vignette.” Whether you want a mid-century plant perch, a farmhouse pedestal for cookies, or a moody little riser for candles, a stand is the quickest way to add height, character, and that “collected over time” vibewithout actually needing time.
This guide walks you through the most popular styles, materials that read “vintage” on sight, and several beginner-friendly builds you can finish in a weekend. We’ll also cover stability, finishes (because nothing says “not vintage” like shiny plastic gloss), and smart ways to style your finished pieces so they look like they belong in your homenot like they’re waiting to be judged at a craft fair.
What Counts as a “Vintage Inspired Stand”?
A stand is any raised surface designed to hold or display somethingplants, desserts, toiletries, candles, books, you name it. “Vintage inspired” simply means the form, finish, or materials nod to older design eras (or to the delightful wear-and-tear those eras left behind).
Common stand types (and where they shine)
- Plant stands: single pot, multi-tier, corner, or ladder styles that add height and help plants catch better light.
- Pedestal/cake stands: perfect for entertaining, centerpieces, coffee stations, or bathroom organization.
- Display risers: small platforms for soap dispensers, spices, perfumes, candles, or seasonal decor.
- Tiered stands: stacked levels for snacks, fruit, crafts, or “I swear I’m organized” energy.
Vintage Style Cheat Codes: Shapes, Details, and Finishes
If you want your DIY stand to look vintage without trying too hard, borrow from these design cues. Think of them as “time-travel ingredients,” minus the paradoxes.
Mid-century modern (1950s–1960s)
- Tapered legs (especially angled)
- Warm wood tones (walnut-ish stains, teak vibes)
- Simple silhouettes, minimal ornament
Farmhouse & cottage (rustic, collected, cozy)
- Chunkier bases, turned legs, bead details
- Painted finishes (white, cream, sage), light distressing
- Natural wood tops and “slightly imperfect” charm
Vintage industrial (old workshop, but make it decor)
- Black metal pipe, flanges, bolts, brackets
- Wood tops with visible grain
- Matte finishes and utilitarian lines
Antique glam (brass, glass, and drama)
- Gold/brass tones, glass plates, ornate edges
- Patina looks (rubbed edges, antiqued wax)
- Delicate silhouettes that still feel sturdy
Tools & Materials You’ll Use Again and Again
You don’t need a full workshop. Most DIY vintage inspired stands can be built with basic tools and a willingness to measure twice (or measure once and learn a valuable lesson, your choice).
Core tools
- Measuring tape + pencil
- Drill/driver + bits
- Sander or sanding block (80/120/220 grit is a solid starter set)
- Clamps (helpful, not always mandatory)
- Paintbrushes or foam rollers
Common materials
- Wood rounds, boards, scrap lumber, or pre-cut panels
- Furniture legs (tapered, turned, hairpin, or reclaimed)
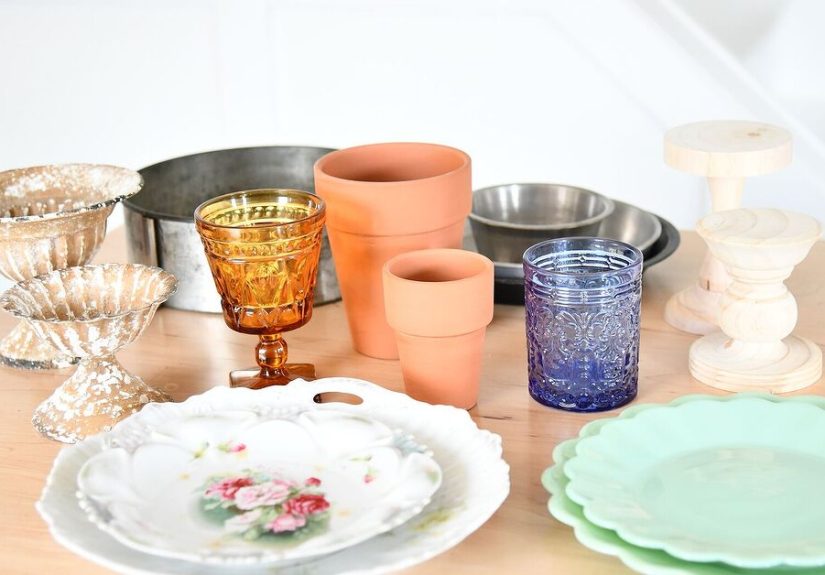
- Candlesticks, plates, platters, and bowls (thrifted gold)
- Wood glue, screws, brackets, or metal pipe fittings
- Paint, stain, wax, and/or clear topcoat
Project 1: Mid-Century Plant Stand (Wood Round + Tapered Legs)
This is the “I can’t believe I made that” stand. The shape is classic: a simple wood top with three or four tapered legs. It looks mid-century, works in small spaces, and doesn’t require complicated joinery.
What you’ll need
- Wood round (or cut a circle from a wood panel)
- 3 or 4 tapered furniture legs
- Mounting plates (often sold with legs)
- Screws, drill, sandpaper
- Stain + clear coat (or paint)
Steps
- Size the top: Aim for 4–5 inches wider than the pot base so it feels balanced.
- Sand: Smooth the top and edges. Slightly round the edge for a softer, older feel.
- Mark leg placement: Space legs evenly. For a vintage look, angle them slightly outward.
- Attach mounting plates: Predrill to avoid splitting and keep screws straight.
- Finish: Stain for warm wood tones, then seal. For extra “old piece” charm, choose a satin (not glossy) topcoat.
Pro tip: If your plant is tall or top-heavy, use four legs and a thicker top. Your fern shouldn’t be practicing for a tightrope career.
Project 2: Thrifted Pedestal (Plate + Candlestick = Vintage Cake Stand)
This is the classic upcycle: a pretty plate becomes a pedestal stand with a candlestick base. It’s perfect for cookies, cupcakes, perfume bottles, or a holiday centerpiece. Bonus: it’s one of the fastest vintage pedestal stand DIYs you can make.
What you’ll need
- One plate/platter (glass, ceramic, or sturdy melamine)
- One candlestick (glass, metal, or wood)
- Strong adhesive (epoxy or a glue designed for glass/ceramic)
- Rubbing alcohol for cleaning
- Painter’s tape (optional)
Steps
- Test the look: Flip the plate upside down and center the candlestick on it. Check proportions.
- Clean both surfaces: Remove dust and oils with rubbing alcohol; let dry completely.
- Glue: Apply adhesive to the candlestick top, press firmly, and keep it centered.
- Stabilize while curing: Use painter’s tape if needed so nothing shifts.
- Wait: Let it fully cure before usingespecially if it’ll hold anything heavier than a single macaron.
Vintage upgrade ideas: Spray paint the candlestick a muted brass or satin black; add a thin beaded trim under the plate; or use a wood base and lightly distress it for farmhouse style.
Project 3: Farmhouse Wood Pedestal Stand (Riser for Decor or Serving)
Wood pedestal risers scream “vintage kitchen counter” in the best way. Use them to elevate a coffee station, soaps by the sink, or a candle cluster. The shape can be super simple and still look intentional.
What you’ll need
- 1 wood board for the top (rectangle or round)
- 1 wood base (block, turned piece, or even a chunky furniture leg segment)
- Wood glue + screws (optional reinforcement)
- Paint or stain + topcoat
Steps
- Cut your top: 8–14 inches wide is a great everyday size.
- Choose a base: A turned base reads vintage instantly. Thrifted table legs can be cut down for this.
- Attach: Glue and clamp. If it’s going to hold heavier items, add screws from underneath.
- Finish: Paint the base, stain the top, or do a full monochrome look. Light distressing on edges sells the “aged” vibe.
Style tip: Odd numbers look more natural (3 candles, 5 mini pots). Your eyes like a little chaosas a treat.
Project 4: Vintage Industrial Stand (Pipe Base + Wood Top)
If you want a stand that looks like it came from an old factory office (but in a cool way), pipe fittings do the job. This style is especially good for plant stands, small side stands, or sturdy risers.
What you’ll need
- Black iron pipe pieces + fittings (flanges, elbows, tees)
- Wood top (round or square)
- Screws to attach flange to wood
- Optional: stain + matte clear coat for the wood
Steps
- Plan height: For plants, 18–28 inches is common. For a riser, 4–8 inches.
- Dry fit first: Assemble the pipe without tightening fully to check wobble and symmetry.
- Tighten: Make it snug and aligned.
- Attach top: Screw flange into the wood top after predrilling.
- Finish wood: A warm stain makes the black pipe feel vintage instead of “unfinished basement chic.”
Project 5: Multi-Level “Collected” Plant Stand (Crates, Ladders, or Simple Tiers)
Vintage homes often look layered because they actually are layeredobjects stacked, grouped, and varied in height. A multi-tier plant stand mimics that feel while giving each plant its own spotlight.
Easy build options
- Leaning ladder stand: Great for corners and small rooms. Add shelves or baskets to each rung.
- Tiered shelf stand: Make a stepped structure so plants don’t block each other’s light.
- Crate stack: Screw wood crates together for a modular vintage market vibe.
Vintage trick: Don’t make every shelf perfect. Slight variations in board width, edge rounding, or finish tone can make a new build feel older and more believable.
Finishing Like a Time Traveler: How to Make New Look Vintage
The finish is where “DIY stand” becomes “vintage inspired stand.” The goal isn’t to destroy your project (relax). It’s to add softness, depth, and a little history.
Option A: Distressed painted finish
- Use a base color, then a top color, then lightly sand edges where real wear would happen (corners, rims, handles).
- Keep distressing subtle. If it looks like it survived a pirate battle, dial it back.
Option B: Warm wood stain + satin topcoat
- Choose a warm tone and avoid ultra-gloss. Satin feels more furniture-like and less “plastic cafeteria table.”
- Wipe away excess stain for a natural look rather than a thick, muddy coat.
Option C: Shellac for vintage warmth (advanced-but-doable)
Shellac has been used for ages and gives wood that classic amber glow. It dries fast and can be rubbed smooth for a refined vintage finish. It’s especially nice on display risers or stands that won’t face heavy water exposure.
Safety & Stability (Because Gravity Has No Chill)
Vintage style should not mean vintage safety standards. If your stand holds anything breakable, heavy, or living, build for stability.
- Wider base = happier life: A narrow base plus a tall plant is basically a physics prank.
- Use the right adhesive: For glass/ceramic pedestals, choose a strong adhesive and let it fully cure before use.
- Be cautious with old paint: If you’re sanding or stripping older painted pieces, assume dust could be hazardous and use proper precautions. When in doubt, skip aggressive sanding and paint over after cleaning and scuffing glossy surfaces.
- Add grip: Felt pads can prevent sliding, and a thin cork sheet on top can keep trays and pots from scooting around.
How to Style DIY Vintage Inspired Stands So They Look “Right”
A stand is a stage. Styling is the performance. Here are simple ways to make your stands look intentional (even if you built them in sweatpants with a frozen pizza timer going off).
Use height in threes
Group items into three heights: one tall, one medium, one small. For example: a candle + small vase + match holder on a riser.
Mix textures, not chaos
Pair glass with wood, metal with linen, glossy with matte. The contrast feels curated and vintage.
Repeat a material
If your stand has brass tones, echo that brass once more nearby (a frame, a knob, a small tray). Repetition makes it look like a design choice instead of an accident.
Real-Life Experiences: What I Learned Building DIY Vintage Inspired Stands (and a Few Funny Mistakes)
I used to think a stand was just a standlike a plain metal folding chair for your stuff. Then I built my first pedestal riser and realized stands are basically confidence boosters for objects. A regular candle on a table? Fine. The same candle on a slightly distressed wooden pedestal with a warm satin finish? Suddenly it has a résumé and a mysterious backstory.
My first “vintage” attempt was a thrifted plate-and-candlestick cake stand. I eyeballed the center point (brave) and glued it down. It looked perfectuntil the next morning when I realized it had cured a few millimeters off-center. No one else noticed… until I pointed it out, because apparently I enjoy sabotaging my own peace. Lesson: measure and mark the center. Your future self will thank you, quietly, while sipping coffee and not redoing the whole thing.
Then there was the mid-century plant stand era. I made one with three angled legs and felt extremely handy. I placed a tall plant on it and admired my work like a proud sitcom dad. Two hours later, I bumped the stand while vacuuming and the plant wobbled like it was auditioning for a drama series. Nothing fell, but my soul left my body briefly. I rebuilt the next one with four legs and a slightly thicker top, and it was instantly more stable. Lesson: if it’s tall, top-heavy, or you own pets/kids/your own clumsy feet, build sturdier than you think you need.
Finishes taught me the most. I once used a super glossy clear coat because it was what I had. It dried beautifully… and made my “vintage inspired” riser look like a cafeteria display stand from the year 2009. I sanded it back and redid it in satin. That single change made the piece look older and more furniture-like. Lesson: sheen matters. When you’re chasing vintage vibes, satin and matte are your best friends.
I also learned that distressing is an art, not a tantrum. My first distress job looked like a raccoon had tried to open the piece with tiny chaotic hands. Now I focus distressing on natural wear pointsedges, corners, and spots where fingers would actually touch. It looks more believable and less like a “before” photo.
Finally, styling is half the magic. A stand can look “meh” until you put the right things on it. My favorite trick is to add one unexpected item: a tiny framed photo on a plant stand shelf, a vintage salt cellar on a pedestal tray, or a stack of old books under a candle. Those little details make the setup feel collected over time. And that’s the point: DIY vintage inspired stands aren’t just projects. They’re tiny stages where your home gets to tell a storypreferably one that doesn’t involve anything tipping over.
Conclusion
DIY vintage inspired stands are one of the easiest ways to add character, height, and “collected charm” to your space. Start simplelike a wood round plant stand or a thrifted pedestalthen experiment with finishes that soften the look and make it feel lived-in. Build for stability, let adhesives fully cure, and style with intention. Before you know it, your plants, snacks, and candles will all be living their best elevated lives.


