Table of Contents >> Show >> Hide
- Why Cut Down a Cabinet Instead of Buying a New One?
- Plan First: Measure the Space and the Stuff
- Tools and Materials You’ll Actually Use
- Safety: Make the Project Boring (In a Good Way)
- Decide What You’re Cutting: Height, Width, or Depth
- Get Clean Cuts (Even If You’re Using a Circular Saw)
- Reinforce the Cabinet for Tool Weight
- Design the Inside Like a Tool Person (Not a Linen Closet)
- Mounting the Cabinet: Wall, Floor, or Rolling?
- Finishing Touches That Make It Feel Pro
- FAQ: Quick Answers Before You Start Cutting
- Conclusion: A Cabinet That Fits Beats a Cabinet That’s “Nice”
- Bonus: About of Real-World Experience (So You Don’t Repeat My Mistakes)
Your garage doesn’t have a “tool problem.” It has a “where did I put that 10mm socket” problem.
If you’ve got a cabinet that’s almost perfecttoo tall for under a workbench, too deep for a narrow aisle,
or too wide for that one stubborn wallcutting it down can turn “almost” into “absolutely.”
This guide walks you through planning, safe cutting, rebuilding strength, and adding smart storage features so your cabinet
can handle real tool weight (not just a few lonely paintbrushes and your hopes and dreams).
Why Cut Down a Cabinet Instead of Buying a New One?
New tool cabinets are greatuntil you price them out and realize your wallet just developed a stress fracture.
Cutting down an existing cabinet (especially a solid old kitchen cabinet) can be cheaper, sturdier, and more customizable.
- Better fit: Slide it under a workbench, below a window, or into a tight bay.
- Better use of space: A too-tall cabinet becomes a base cabinet; a too-deep cabinet stops eating your walkway.
- Better durability (with reinforcement): Add bracing, a thicker back, and stronger shelves for heavier tools.
- Less waste: Repurposing saves materials and keeps a perfectly usable box out of the landfill.
The key is doing it like a cabinetmaker, not like a raccoon with a circular saw.
Plan First: Measure the Space and the Stuff
Before you cut anything, decide what the cabinet is supposed to do. Tool storage works best when you plan around
your most-used items (the ones you grab weekly) and your awkward items (the ones shaped like they were designed by a prankster).
Step 1: Inventory by “Tool Behavior”
- Daily grab: drill/driver, tape, square, bits, pencils, gloves.
- Project-specific: sanders, routers, jigs, specialty clamps.
- Heavy and/or dangerous: nailers, grinders, big batteries, chemicals, blades.
Step 2: Measure the Install Zone
- Height: from floor to underside of the workbench/top clearance.
- Width: between obstacles (walls, trim, outlets, garage door tracks).
- Depth: enough to store tools without turning the aisle into a sideways crab-walk.
- Door swing: doors need room to open without hitting a bench vise, mower, or your knees.
Pro tip: mark the cabinet outline on the wall with painter’s tape. It’s the cheapest “3D modeling” you’ll ever do.
Tools and Materials You’ll Actually Use
You don’t need a museum of power tools. You need clean, straight cuts and a cabinet that stays square afterward.
Cutting and Shaping
- Circular saw (or track saw if you’re feeling fancy)
- Straightedge guide (shop-made or store-bought)
- Jigsaw or oscillating multi-tool (for corners and tight spots)
- Router with flush-trim/pattern bit (optional, but great for “factory” edges)
Layout and Assembly
- Tape measure, square, pencil (the holy trinity)
- Clamps (more than you think; fewer than you want)
- Drill/driver, bits, countersink
- Wood glue, cabinet screws, brad nails (optional)
Reinforcement and Storage Upgrades
- 3/4″ plywood or hardwood cleats for stretchers and shelf supports
- New back panel material (1/2″ plywood is excellent for strength)
- Shelf pins and a drilling jig (for adjustable shelves)
- Edge banding or solid wood edging for clean, durable edges
- Drawer slides and 1/2″ plywood (if you’re adding drawers)
Safety: Make the Project Boring (In a Good Way)
“Boring” is the goal when spinning sharp teeth at several thousand RPM. Set yourself up so the cut is controlled,
your work is supported, and nothing pinches the blade.
Quick safety checklist
- PPE: eye protection, hearing protection, and a dust mask/respirator when cutting engineered wood.
- Blade depth: set it shallowjust enough to clear the material.
- Support: support both sides of the cut so the waste piece can drop away without binding.
- Clamps: clamp the workpiece and clamp the guidehands are not clamps.
- Guards: never defeat safety guards; make sure they move freely.
- Hidden metal: check for screws, nails, and staples before cutting.
Cabinets often contain particleboard, plywood, staples, and surprise fasteners. Your saw blade deserves the courtesy of not meeting those at full speed.
Decide What You’re Cutting: Height, Width, or Depth
“Cutting down a cabinet” can mean three different things. Choose the approach that keeps the cabinet strong and the doors looking intentional.
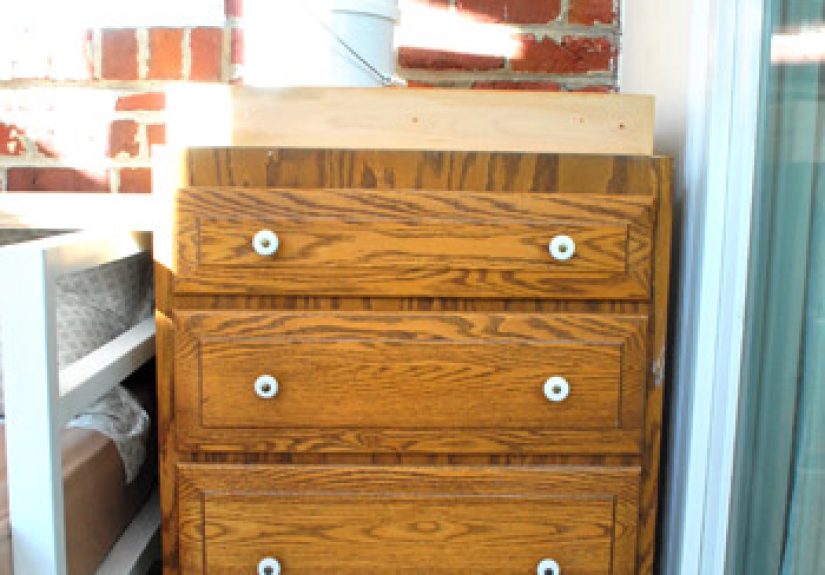
Option A: Shorten the Height (Most Common)
Example: You’ve got a 34-1/2″ base cabinet, but your workbench clearance is 30″. You need to lose ~4-1/2″
without turning the cabinet into a wobbly box.
- Strip it down. Remove doors, drawers, shelves, and hardware. Label hinges and parts so reassembly isn’t a scavenger hunt.
-
Choose where to remove material.
- From the bottom: best if you’re hiding changes with a new toe-kick or the cabinet sits on a platform.
- From the top: best if you want to preserve the toe-kick and base structure.
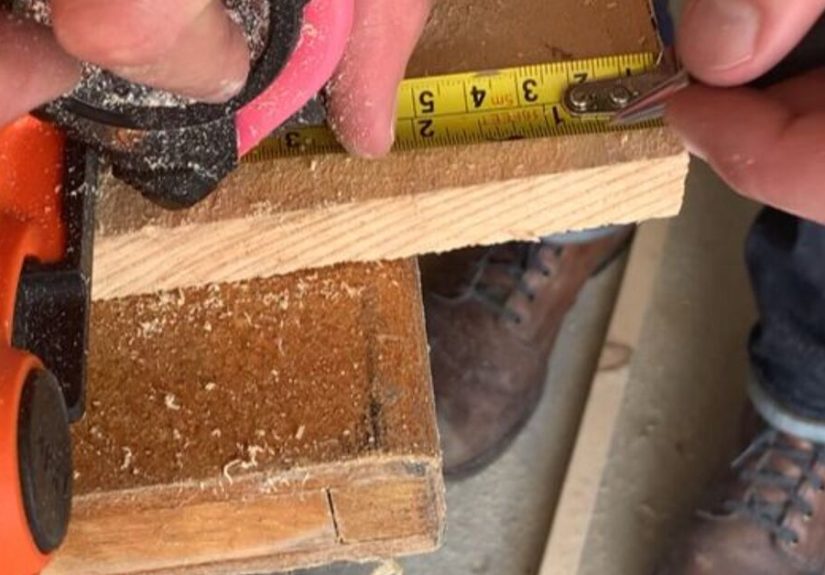
- Mark a clear cut line. Use a square and measure from a reference edge. Check corner-to-corner measurements so you don’t “build in” a twist.
- Score the cut line. Lightly score with a utility knife to reduce tear-out, especially on veneered plywood.
-
Cut the sides first. Use a circular saw with a straightedge guide for long cuts.
Finish corners with a jigsaw or multi-tool if the saw can’t reach. - Cut the bottom/top panel. If the cabinet has a captured bottom (in a groove), you may need to remove it and reinstall it higher or lower.
-
Rebuild the structure. Add internal stretchers (front and back) where you removed material.
This is what keeps the cabinet square and prevents the top from sagging under tool weight. - Adjust doors/drawers. If you shortened the opening, you may need to trim doors or convert to a different layout (e.g., one door + drawers).
Option B: Make the Cabinet Narrower (When the Space Is Tight)
Narrowing is more involved because you’re interrupting the cabinet’s “box” geometry.
The cleanest approach is often to remove one side, shorten the top/bottom/back, then reattach the side with new joinery and reinforcement.
- Decide which side to lose. Prefer the side that won’t ruin hinge placement or face-frame symmetry.
- Remove the face frame (if applicable) carefully. You may re-use it or rebuild a new one.
- Shorten panels. Cut top and bottom panels to the new width with a guide for straightness.
- Reattach and reinforce. Use glue + screws + internal cleats; consider dowels or pocket screws where appropriate.
- Square it. Measure diagonals; clamp until both diagonals match.
If “narrowing” starts to sound like surgery, that’s because it is. The reward is a cabinet that looks original to the space instead of “close enough.”
Option C: Reduce the Depth (Stop Losing Your Walkway)
Shallow cabinets are underrated in tool storage. Most hand tools don’t need 24″ of depth; they need visibility and easy access.
Depth reduction usually means removing and reinstalling the back panel and shortening side panels.
- Remove the back. Many cabinets use thin hardboard backs stapled on; pry carefully to avoid blowouts.
- Rip the sides to the new depth. Use a straight guide; keep cuts consistent so the cabinet stays square.
- Shorten the top/bottom. Match the new depth and reassemble with cleats or dados.
- Reinstall a stronger back. A thicker back panel dramatically improves racking resistance (important for wall mounting).
Don’t go so shallow that hinges and doors become awkward. You want “efficient,” not “clown car.”
Get Clean Cuts (Even If You’re Using a Circular Saw)
The difference between “DIY” and “did you buy that?” is often a straightedge guide and patience.
A good guide keeps the saw base tight to a reference edge, giving you repeatable, straight cuts.
- Use the right blade: a fine-tooth blade for plywood/veneers reduces chipping.
- Mind the kerf: the blade removes material; cut on the waste side of your line.
- Support the panel: if the offcut sags, it can pinch the blade and rough up the edge.
- Go steady: forcing the saw invites wandering and burn marks.
For extra-clean veneer cuts, painter’s tape over the cut line can help reduce tear-out. It’s not magic, but it’s a nice assist.
Reinforce the Cabinet for Tool Weight
Kitchen cabinets were built for plates and cereal. Tools are a different lifestyle choice.
A cabinet that holds drills, routers, and a collection of “why do I own this?” clamps needs reinforcement.
Where cabinets fail under tool loads
- Sagging shelves (especially particleboard or thin stock shelves)
- Racking (the cabinet becomes a parallelogram when pushed from the side)
- Weak hanging rails (wall mounting pulls away under weight)
Simple reinforcement upgrades
- Add internal stretchers: front and back rails at the top and bottom keep the box rigid.
- Upgrade the back panel: a 1/2″ plywood back (properly fastened) adds major anti-rack strength.
- Use cleats: glue and screw hardwood/plywood cleats where panels meet.
- Strengthen shelves: use 3/4″ plywood shelves; add a hardwood nosing to reduce sag.
Design the Inside Like a Tool Person (Not a Linen Closet)
Tool storage isn’t about stuffing everything behind a door and hoping for the best.
It’s about fast access, visibility, and not getting bonked by falling hex keys.
Adjustable shelves that don’t wobble
Adjustable shelves let your cabinet evolve as your tool collection “mysteriously” grows.
Drill shelf pin holes in consistent spacing (many jigs use a 32mm system layout), and you can move shelves without drama.
Add drawers where they matter
- Shallow top drawers: bits, blades, measuring tools, layout gear.
- Medium drawers: fasteners, nailer accessories, sanding supplies.
- Deep drawer or bottom bay: chargers, big batteries, bulky tools.
Line drawers with non-slip liner to stop tools from skating around like they’re auditioning for a hockey league.
Use the doors
Cabinet doors are prime real estate. Consider pegboard panels, magnetic strips, or shallow racks for spray cans and tapes.
Just keep door-mounted weight reasonable so hinges don’t suffer a slow, squeaky retirement.
Mounting the Cabinet: Wall, Floor, or Rolling?
How you mount the cabinet determines how safe (and how annoying) it will be long-term.
Garages have moisture, vibration, and the occasional “oops, I bumped it with the mower” moment.
Wall-mounted (clean floor, easy sweeping)
- Locate studs and anchor into solid framing.
- Consider a ledger board during install to hold the cabinet level while you fasten it.
- Add a French cleat system if you want removability and strong load distribution.
Floor-mounted (maximum capacity)
- Shim to level on garage floors (they’re rarely perfectly flat).
- Add a platform/toe-kick to keep the cabinet base away from minor water intrusion.
- Fasten to the wall anyway if it’s tall or top-heavy.
Rolling (the “bring the tools to the mess” approach)
- Use heavy-duty locking casters rated for the cabinet + tools + “future tools.”
- Add a stiff base frame so the cabinet doesn’t twist when rolling.
- Great for shared garages where space changes day to day.
Finishing Touches That Make It Feel Pro
- Label zones: “Drilling,” “Measuring,” “Fasteners,” “Sand & Finish.”
- Add lighting: a small LED strip inside makes tools easier to find.
- Top it like a workbench: a plywood or butcher-block top turns a base cabinet into a mini station.
- Lock it: if kids/pets are around, consider locking doors for chemicals and blades.
A cabinet that looks good is easier to keep organized. Your brain treats it like a “system,” not a dumping ground.
Yes, your brain is that shallow. Mine too.
FAQ: Quick Answers Before You Start Cutting
Should I cut from the top or the bottom?
Cut from the bottom if you’re rebuilding a toe-kick or the cabinet will sit on a platform. Cut from the top if you need to preserve the base structure.
Either way, rebuild internal support where you removed material.
Can I cut down particleboard cabinets?
Yes, but treat edges carefully. Particleboard chips easily and hates moisture. Seal raw edges, reinforce joints, and don’t overload thin shelves.
If the cabinet is flimsy, upgrading the back and adding cleats makes a big difference.
What’s the easiest way to keep the cut straight?
Use a straightedge guide (clamped) and a sharp blade. Make test cuts on scrap first to confirm your saw’s offset from the guide.
How do I keep the cabinet square after cutting?
Measure diagonals during reassembly. If both diagonal measurements match, your box is square.
A strong back panel and internal stretchers help it stay that way.
Conclusion: A Cabinet That Fits Beats a Cabinet That’s “Nice”
Cutting down a cabinet for tool storage is one of those projects that feels small until you realize you’ve upgraded your entire workflow.
When the cabinet fits your space, your tools get returned more often, your bench stays clearer, and your garage stops looking like a
“before” photo from a home improvement show.
Plan the cut, make it safely, reinforce like you mean it, and design the inside around how you actually work.
Future-you will thank youand might even stop buying duplicate tools just because the original got lost.
(Might.)
Bonus: About of Real-World Experience (So You Don’t Repeat My Mistakes)
The first cabinet I ever “cut down” for tool storage was a retired kitchen base cabinet that had survived three owners, two questionable paint jobs,
and one drawer that sounded like a haunted maraca. I measured the space under my workbench, did the math, felt extremely confident…
and then cut it exactly to the line like the line was the law.
That’s when I learned Lesson #1: the blade eats wood. That missing little stripkerfmeant my “perfect” cabinet was now slightly short, which wouldn’t
have mattered if I wasn’t trying to align it with adjacent cabinets like I was building the Louvre in a one-car garage. I fixed it with a new top panel
and told everyone it was “intentional ventilation.” Nobody believed me, but the cabinet worked.
Lesson #2: support is not optional. On my first long cut, I supported the cabinet on a couple of sawhorses and figured gravity would “handle the rest.”
Gravity handled it… by letting the offcut sag and pinch the blade near the end. The saw complained, the cut wandered, and I invented new words.
After that, I started supporting both sides of the cut with scrap blocks or a sacrificial foam sheet so the waste piece could fall away cleanly.
Lesson #3: cabinets hate losing their backs. The moment you remove (or weaken) a back panel, the cabinet suddenly develops the flexibility of a yoga instructor.
I once reinstalled a cabinet back with a few casual staples, loaded the shelves with power tools, and watched the box rack out of square over time.
The “fix” was simple: a stronger plywood back, glued and screwed into place, plus internal stretchers.
The emotional damage, however, lasted longer.
Lesson #4: engineered wood edges are drama queens. Particleboard and thin plywood will chip if you look at them wrong.
Scoring the cut line, using a fine-tooth blade, and finishing raw edges with banding or wood strips made everything look cleaner and last longer.
I also learned to seal raw particleboard edgesbecause garages get humid, and particleboard reacts to moisture the way a cat reacts to bath time.
Finally, Lesson #5: design the inside for your habits, not your fantasies. I used to think I’d keep everything “neatly stacked.”
What I actually do is drop tools into the nearest open space when I’m tired. Adding shallow top drawers for small stuff,
a dedicated charging shelf for batteries, and door storage for tapes and sprays made the system feel obviousso I actually used it.
And when a storage system is easy to use, it survives real life.
If you take anything from my cabinet-cutting adventures, let it be this: precision is great, but planning and reinforcement are what make the cabinet
feel solid every time you open it. Do that, and you’ll end up with tool storage that looks intentionaleven if your garage still has one mystery bucket
labeled “random.”