Table of Contents >> Show >> Hide
- What Does “Chair Revival” Mean?
- Step One: Inspect the Chair Before You Start
- Step Two: Decide on the Type of Chair Revival
- Essential Tools and Materials for Chair Revival
- How to Revive a Wooden Chair Step by Step
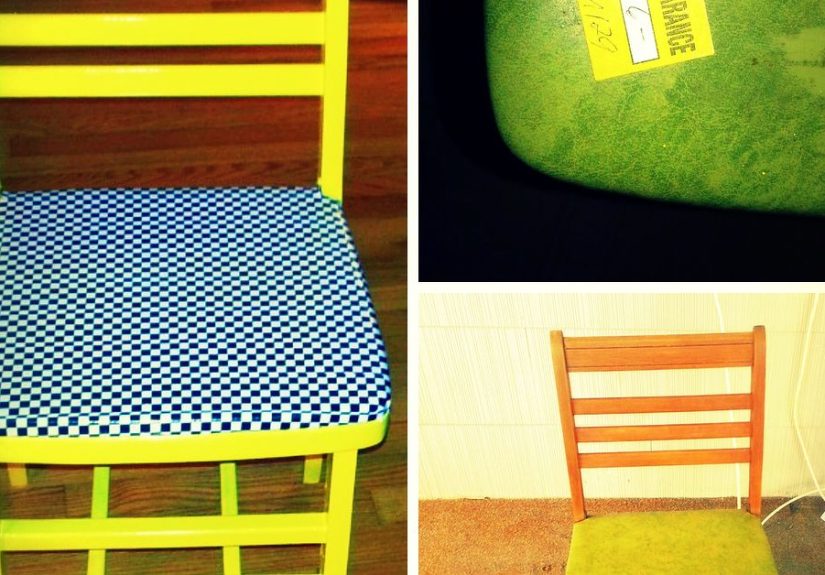
- How to Reupholster a Chair Seat
- Chair Revival Design Ideas
- Common Chair Revival Mistakes to Avoid
- When Should You Restore, Replace, or Repurpose a Chair?
- Budget-Friendly Chair Revival Tips
- of Real-Life Chair Revival Experience
- Conclusion: Give That Chair Another Chance
Chair revival is the oddly satisfying art of turning a tired, wobbly, scratched, “please hide me in the garage” chair into a seat with dignity again. It is part furniture restoration, part DIY therapy, and part detective work. You look at a chair and ask important questions: Is the wood solid? Are the joints loose? Is the fabric older than your favorite sitcom reruns? And most importantly, can this chair be saved without spending more than a new one costs?
The answer is often yes. Many chairs are built with strong bones: hardwood frames, repairable joints, removable seats, and surfaces that can be cleaned, refinished, painted, stained, or reupholstered. A chair revival project can be as simple as tightening screws and replacing seat fabric, or as involved as stripping old finish, repairing cracks, sanding, staining, sealing, and adding new foam. Either way, the goal is the same: give an old chair a second life without making your living room look like a furniture crime scene.
This guide walks through the practical, creative, and surprisingly fun process of reviving chairs. Whether you are restoring a dining chair, refreshing a thrift-store find, repairing a family heirloom, or rescuing a curbside treasure before the neighbors judge you, here is how to bring it back beautifully.
What Does “Chair Revival” Mean?
Chair revival means restoring, refreshing, repairing, or redesigning a chair so it becomes useful and attractive again. It is broader than refinishing and less intimidating than full antique restoration. A revival may include cleaning, gluing loose joints, replacing missing hardware, sanding rough surfaces, painting, staining, sealing, reupholstering, or updating the style with new fabric and color.
Think of it as a makeover with a toolbox. Some chairs need a spa day. Others need structural counseling. A chair with good bones but ugly fabric may only need a staple gun and a brave fabric choice. A wooden chair with scratches and dull finish may need cleaning, light sanding, and a new protective coat. A chair that wobbles like it has stage fright may need joint repair before anything cosmetic happens.
Why Chair Revival Is Worth It
Reviving chairs is popular because it blends savings, sustainability, and personal style. Instead of sending usable furniture to the landfill, you can repair and reuse it. Instead of buying generic seating, you can create something that fits your home. And instead of paying high prices for custom furniture, you can put in some effort and earn bragging rights every time someone says, “Where did you get that chair?”
Another benefit is quality. Older wooden chairs are often made from solid wood, while many inexpensive modern pieces rely on particleboard, veneers, or lightweight construction. Not every old chair is a treasure, of course, but many are stronger than they look. If the frame is sturdy, the seat can be replaced, and the style has potential, revival may be the smarter choice.
Step One: Inspect the Chair Before You Start
Before grabbing paint, fabric, or sandpaper, inspect the chair carefully. This is the part where you pretend to be a furniture doctor, minus the white coat and expensive invoice.
Check the Frame
Start by testing the chair’s structure. Sit on it carefully and feel for wobbling, creaking, shifting, or weakness. Look at the legs, stretchers, arms, backrest, and seat supports. If joints are loose, they may need to be cleaned and reglued. If wood is cracked, you may need wood glue, clamps, filler, or epoxy depending on the damage.
Do not skip this step. Cosmetic updates are wonderful, but fresh paint on a weak chair is like putting lipstick on a folding lawn chair during a thunderstorm. It may look better, but it is still not ready for guests.
Look for Surface Damage
Scratches, water rings, chipped finish, peeling paint, dents, and stains all tell you what kind of revival the chair needs. Light surface scratches may be improved with cleaning, touch-up markers, wax, or a new clear coat. Deep damage may require sanding, stripping, staining, or painting.
Examine Upholstery and Cushioning
If the chair has a padded seat, check the fabric, foam, batting, and underside. Fabric that is faded, stained, torn, or outdated can usually be replaced. Foam that is flat, crumbly, or permanently compressed should also be replaced. A chair seat should feel supportive, not like a pancake wearing fabric.
Step Two: Decide on the Type of Chair Revival
Not every chair needs the same treatment. Choosing the right approach saves time, money, and frustration. There are four common chair revival paths: clean and refresh, repair and stabilize, refinish or repaint, and reupholster.
Option 1: Clean and Refresh
If the chair is structurally sound and only looks dull or dirty, start with cleaning. Use a mild soap and water solution for many painted or sealed surfaces, but avoid soaking the wood. Dry the chair quickly with a clean cloth. For detailed areas, use a soft brush to remove dust from carvings, corners, and joints.
Sometimes a deep clean reveals that the chair does not need a full makeover. It just needed someone to remove ten years of fingerprints, dust, and mysterious kitchen life.
Option 2: Repair and Stabilize
Loose joints, missing screws, cracked stretchers, or separated seat supports should be repaired before cosmetic work begins. Tighten hardware where appropriate. For wooden joints, you may need to separate the joint, clean out old glue, apply fresh wood glue, and clamp it until fully cured. Follow the glue manufacturer’s drying time, because impatience is how chairs become modern art.
Option 3: Refinish or Paint
If the chair has beautiful wood grain, refinishing may be the best route. This can involve removing old finish, sanding, staining, and sealing. If the wood is damaged, mismatched, or not especially attractive, painting may be a better choice. A painted chair can look classic, farmhouse, modern, coastal, vintage, or bold depending on the color and finish.
Option 4: Reupholster
Reupholstering a chair seat is one of the most beginner-friendly chair revival projects. Many dining chairs have seats attached with screws from underneath. Once removed, the old fabric can be taken off, the foam can be replaced if needed, and new fabric can be stapled around the seat base.
Essential Tools and Materials for Chair Revival
Your exact supply list depends on the chair, but most projects use a familiar set of tools. You do not need a professional workshop to revive a chair, although a stable work surface and good lighting will make the process much easier.
Basic Tools
- Screwdriver or drill
- Sandpaper in several grits
- Wood glue
- Clamps
- Putty knife
- Staple remover or tack puller
- Staple gun
- Scissors or fabric shears
- Clean rags and tack cloth
- Paintbrushes or foam brushes
Common Materials
- Wood filler or epoxy for repairs
- Primer, paint, stain, or clear finish
- Furniture wax or protective topcoat
- Upholstery fabric
- Foam cushion
- Batting
- Spray adhesive
- Drop cloth or plastic sheeting
- Gloves, eye protection, and a suitable respirator when needed
Safety matters, especially with older painted furniture. If a chair may have lead-based paint, avoid sanding or scraping until you understand the risk. Older finishes can also produce dust and fumes, so work in a well-ventilated area and use proper protection.
How to Revive a Wooden Chair Step by Step
A wooden chair revival usually follows a practical order: clean, repair, sand, finish, and protect. Jumping straight to paint or stain may feel exciting, but preparation determines whether the final result looks polished or like a rushed weekend apology.
1. Clean the Chair Thoroughly
Remove dust, grease, wax, and grime before sanding or finishing. A chair from a kitchen or dining room may have invisible oils on the surface, which can interfere with paint or stain. Use a gentle cleaner appropriate for the finish and dry the chair completely.
2. Repair Loose Joints and Cracks
Repair comes before beauty. If a leg wiggles, the chair needs structural work. Apply wood glue to loose joints, clamp them firmly, and allow the glue to cure. For small cracks or dents, use wood filler. For larger damaged areas, epoxy may be more suitable. Sand repaired areas smooth once dry.
3. Sand the Surface
Sanding smooths the surface and helps new finish adhere. Start with a medium grit if the surface is rough, then move to finer grit for a smooth finish. Always sand with the grain on visible wood surfaces. Wipe away dust with a tack cloth before applying stain, primer, paint, or sealer.
4. Choose Paint, Stain, or Clear Finish
Stain highlights wood grain and gives the chair a natural look. Paint hides flaws and allows dramatic style changes. A clear finish protects the surface while preserving the wood’s color. Popular choices include polyurethane, water-based topcoats, oils, waxes, and shellac. Each finish has its own look, durability, drying time, and maintenance needs.
5. Seal and Protect
Chairs take daily abuse from people, pets, backpacks, coffee mugs, and that one relative who leans back on two legs despite repeated warnings. A protective topcoat helps the revived finish last longer. Apply thin, even coats and let each coat dry properly before adding another.
How to Reupholster a Chair Seat
Reupholstering is where chair revival gets especially fun. Fabric can change the entire personality of a chair. A plain dining chair can become elegant with linen, cheerful with floral cotton, bold with geometric fabric, or practical with performance upholstery.
1. Remove the Seat
Turn the chair upside down and locate the screws holding the seat to the frame. Remove them and set the screws aside in a cup or bag. Do not trust yourself to “remember where they are.” Screws have a talent for entering another dimension.
2. Remove Old Fabric and Staples
Use a staple remover, tack puller, or flat screwdriver to remove old staples. Wear gloves if the staples are rusty or sharp. Once the fabric is removed, inspect the foam and batting.
3. Replace Foam if Needed
If the cushion is still supportive, you may reuse it. If it is flattened, crumbling, stained, or smells suspicious, replace it. Cut new foam to match the seat shape, then add batting to soften the edges and create a smoother upholstered look.
4. Cut and Position Fabric
Lay the fabric face down, place the seat on top, and make sure the pattern is straight. Leave enough extra fabric on all sides to wrap around the seat and staple underneath. For patterned fabric, check alignment twice. Crooked stripes are surprisingly loud once the chair is finished.
5. Staple the Fabric
Start by stapling one side, then pull the opposite side snug and staple it. Repeat with the remaining sides, working from the center toward the corners. Keep the fabric tight but not distorted. Fold corners neatly, trim excess fabric, and reattach the seat to the chair frame.
Chair Revival Design Ideas
The best chair revival projects balance function and style. You want the chair to look great, but it also needs to fit the room and survive real life. Here are a few design directions that work well.
Classic Wood Restoration
For a timeless look, preserve the natural wood. Clean, sand, stain, and seal the chair to highlight the grain. This works beautifully for traditional dining chairs, vintage office chairs, and heirloom pieces.
Modern Painted Chair
A coat of matte black, warm white, deep green, navy, or soft gray can instantly modernize an old chair. Painted chairs are especially useful when the wood is not attractive enough to stain or when you want a cohesive dining set from mismatched pieces.
Two-Tone Chair Revival
Try a stained wood seat with a painted frame, or a painted chair with a natural cane or woven seat. Two-tone designs add depth without making the chair feel too busy.
Statement Upholstery
If the chair frame is simple, fabric can become the star. Try velvet, boucle, faux leather, linen blends, performance fabric, or bold prints. For dining chairs, choose durable, stain-resistant materials that can handle spills. Tomato sauce waits for no one.
Common Chair Revival Mistakes to Avoid
Chair revival is beginner-friendly, but a few mistakes can make the project harder than necessary.
Skipping Prep Work
Paint and stain need a clean, smooth surface. If you skip cleaning or sanding, the finish may peel, bubble, or look uneven. Prep work is not glamorous, but neither is redoing the project next weekend.
Ignoring Structural Problems
A chair should be safe before it is stylish. Fix loose joints, cracked legs, or weak supports before painting or upholstering.
Using the Wrong Fabric
Thin craft fabric may look cute but wear out quickly on a chair seat. Use upholstery-weight fabric or durable home decor fabric, especially for chairs used every day.
Applying Thick Coats
Thick paint or finish can drip, dry unevenly, and obscure details. Thin coats are easier to control and usually look better.
Forgetting Dry Time
Let glue, paint, stain, and topcoat dry fully. Sitting on a chair too soon can damage the finish or shift repairs. Patience is part of the project, even if your inner decorator is pacing dramatically.
When Should You Restore, Replace, or Repurpose a Chair?
Some chairs are worth saving. Others are better used as plant stands, decorative pieces, or farewell lessons. Restore a chair if the frame is solid, the repairs are manageable, and you like the shape. Replace it if the structure is unsafe, repairs cost more than the chair is worth, or the materials are too damaged.
Repurposing is a fun third option. A chair with a broken seat can become a garden planter. A single dining chair can become a bedside table. A chair back can be turned into a wall rack. Revival does not always mean returning a chair to its original job. Sometimes promotion to “quirky decor” is the right career move.
Budget-Friendly Chair Revival Tips
Chair revival does not have to be expensive. Shop thrift stores, yard sales, estate sales, online marketplaces, and curb alerts for candidates. Look for sturdy frames, removable seats, and classic shapes. Avoid chairs with major structural damage unless you have the skills and tools to repair them.
Save money by using leftover paint, fabric remnants, or discounted upholstery fabric. A small chair seat often needs less fabric than people expect. You can also mix chairs around a table for an intentional collected look. Matching is nice, but personality has better stories.
of Real-Life Chair Revival Experience
Chair revival teaches you that furniture has a personality. Some chairs cooperate. Some chairs fight like tiny wooden lawyers. The first lesson is that every chair looks easier before you flip it upside down. From the top, it may seem like a quick fabric swap. Underneath, you may discover fifty staples, three mystery nails, one stripped screw, and a previous owner who apparently believed glue should be applied with the emotional intensity of frosting a cake.
One of the most useful experiences is learning to slow down during disassembly. Take photos before removing the seat, hardware, or old upholstery. Label screws if there are different sizes. Keep fabric pieces as templates. The old fabric may be ugly, but it knows the chair’s measurements better than you do. When you use it as a guide, your new fabric is more likely to fit neatly.
Another important experience is understanding that sanding is not a punishment; it is preparation. At first, sanding feels boring. Then you apply paint or stain and realize the smoothest areas look professional while the rushed spots look like they were finished during a power outage. Sanding with the grain, wiping away dust, and using thin coats can dramatically improve the result.
Reupholstery also teaches practical patience. Pulling fabric too loosely causes wrinkles. Pulling too tightly can warp the pattern or compress the cushion strangely. The best method is to staple gradually, checking the top often. Corners are the hardest part, especially on rounded seats. The trick is to fold small, even pleats instead of creating one bulky lump. If the underside looks a little chaotic, that is fine. The underside of a chair is where staples go to live privately.
Color choice is another experience-based lesson. A bold paint color may look amazing in your imagination but overwhelming in a dining room with six chairs. Testing color on a hidden area or sample board helps. Fabric samples are equally useful because lighting changes everything. A fabric that looks beige in the store may look yellow at home. A “subtle pattern” may become the loudest object in the room once stretched over a seat.
Finally, chair revival builds confidence. The first chair may not be perfect, but it teaches you how wood behaves, how fabric stretches, how finishes dry, and how small repairs change the whole piece. By the second chair, you work smarter. By the third, you start looking at abandoned furniture with dangerous optimism. Suddenly every scratched chair has “potential,” and your garage becomes a waiting room for future masterpieces. That is the charm of chair revival: it turns old furniture into something useful again, and it turns ordinary DIY effort into a story you can sit on.
Conclusion: Give That Chair Another Chance
Chair revival is one of the most rewarding DIY furniture projects because it offers visible results without requiring a mansion-sized workshop or a professional design degree. With careful inspection, basic repairs, thoughtful sanding, the right finish, and fresh upholstery when needed, an old chair can become sturdy, stylish, and personal again.
The secret is to respect the process. Fix structure before style. Prep before paint. Choose durable materials. Let finishes dry. And do not underestimate the power of new fabric. A chair that once looked forgotten can become the piece that makes a room feel warmer, smarter, and more original.
Note: This article was created as an original, publication-ready SEO blog post based on practical chair restoration, refinishing, reupholstery, furniture repair, and DIY safety guidance from reputable home improvement, restoration, upholstery, and public safety resources.