Table of Contents >> Show >> Hide
- Table of Contents
- Safety First (Seriously)
- How a Water Rocket Works
- Method 1: The Cork-Pop Water Rocket (Fastest Build)
- Method 2: The High-Flying 2-Liter Bottle Rocket (Best Performance)
- Method 3: The Payload + Parachute Water Rocket (Most Fun to Tinker)
- Tuning Tips: Higher, Straighter, Safer
- FAQ
- Extra: Real-Life Water Rocket Experiences (500+ Words)
- Conclusion
A water rocket is basically a science experiment that looks like a backyard miracle: you add water, trap a bunch of air,
and thenwhooshyour “recycled” soda bottle briefly auditions for a space program. The best part? You can build one with
simple materials, learn real rocket physics, and create the kind of outdoor chaos that makes everyone put down their phone
and look up (literally).
Below are three build styles that work for different goals: a quick-and-fun “cork pop” build, a high-flying 2-liter design
you can tune like an engineer, and a mission-ready version with a payload bay and parachute-style recovery. Along the way,
you’ll get safety rules, performance tweaks, and practical tips so your rocket launches skywardnot sideways into your
neighbor’s emotional support hydrangeas.
Table of Contents
- Safety First (Seriously)
- How a Water Rocket Works
- Method 1: The Cork-Pop Water Rocket (Fastest Build)
- Method 2: The High-Flying 2-Liter Bottle Rocket (Best Performance)
- Method 3: The Payload + Parachute Water Rocket (Most Fun to Tinker)
- Tuning Tips: Higher, Straighter, Safer
- FAQ
- Extra: Real-Life Water Rocket Experiences (500+ Words)
- SEO Tags (JSON)
Safety First (Seriously)
A water rocket is powered by stored pressure. That means it can be thrilling and educationaland also unforgiving if you
treat it like a party favor. Follow these rules every time:
- Wear eye protection. Safety glasses aren’t optionalpressure systems can fail.
- Use only plastic soda bottles made for carbonated drinks; they’re built for higher internal pressure than many other bottles.
- Retire bottles early. If a bottle is scuffed, sun-brittle, dented, or has been launched many times, replace it.
- Don’t exceed safe pressure. Many educators recommend staying at or below 100 psi for 2-liter class-style launches, and often much less for beginners.
- Remote launch only. Never hand-hold a pressurized rocket. Keep people back and launch from a stable device.
- Give it space. Pick a wide, open outdoor area away from cars, windows, power lines, and roads.
- Mind the wind. If you can’t launch close to vertical without aiming toward people or property, wait for calmer weather.
- No metal parts. Fins, cones, and decorations should be lightweight and non-metallic.
- Use only air + water. Never use propane, CO₂ cartridges, or other gases.
Bonus rule: when someone says, “I bet we could pump it a little more,” that person is now in charge of cleanup.
How a Water Rocket Works
Water rockets run on the same big idea as real rockets: Newton’s Third Law. When mass shoots out one way,
the rocket gets pushed the other way. In a bottle rocket, the “engine” is pressurized air forcing water out of the nozzle.
Water is dense, so it carries a lot of momentum out the backmeaning you get a strong push up front.
Think of it like this: pressurized air is the spring, water is the heavyweight being shoved out the door, and your bottle
is the very surprised doorman launching into the sky.
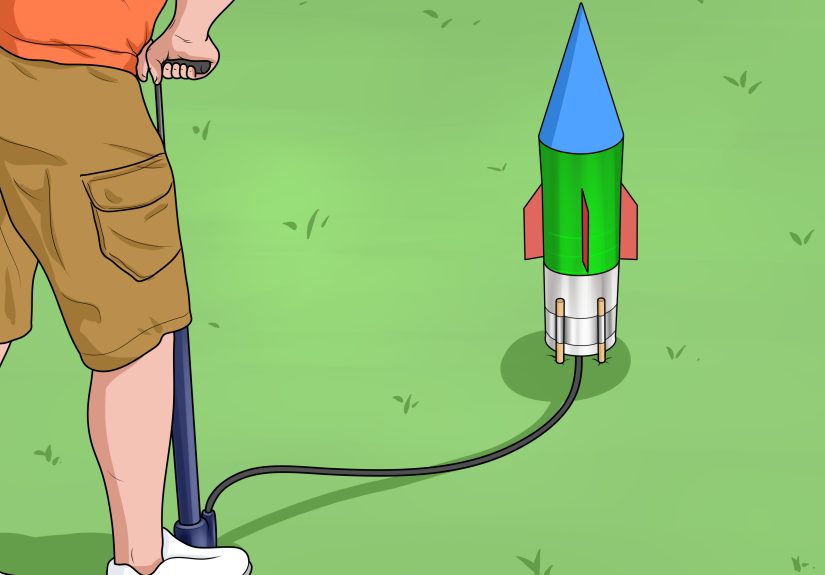
Method 1: The Cork-Pop Water Rocket (Fastest Build)
This is the quick-and-fun build: minimal tools, fast setup, and lots of giggles. It’s ideal for a first launch, a STEM
demo, or a weekend project that won’t take over your garage.
What You’ll Build
A small bottle rocket (often 16–20 oz) sealed with a cork or rubber stopper. You pump air in through a ball needle until
the cork can’t hold it anymoreand it pops, launching the rocket.
Materials
- 1 empty plastic bottle (16–20 oz works well)
- Cork or rubber stopper that fits snugly
- Bicycle pump + ball needle adapter
- Duct tape
- Cardboard or poster board (fins + cone)
- Scissors
- Power drill (adult help) + bit sized for the needle
- A sturdy “launch stand” (an upside-down milk crate works nicely)
- Water (yes, we’re actually using the “water” part)
Build Steps
- Test the cork fit. Push the cork into the bottle opening. It should be snug. If it’s loose, wrap the cork with duct tape until it seals tightly.
- Drill the cork. With adult help, drill a straight hole through the cork.
- Insert the needle. Push the pump needle through the hole so it fits securely. Tape around the needle/cork joint to reduce air leakage.
- Add fins. Cut 3–4 identical fins and tape them evenly around the bottle. Keep them lightweight and straight.
- Add a nose cone. Make a simple cone from cardstock and tape it to the bottom of the bottle (this becomes the “top” when launched).
Launch Steps
- Go outside. Use a wide-open area. Everyone wears eye protection.
- Add water. Start with a small amountaround 10–20% of the bottle volume for this simple cork setup.
- Seat the cork firmly. Invert the bottle (cork down) and place it on the launch stand.
- Back up. Don’t hover over it. Give it space and keep faces away from the rocket.
- Pump steadily. The cork will eventually pop. That’s your liftoff.
Why This Method Rocks
- Fast build, minimal parts
- Great for learning seals, stability, and basic rocket anatomy
- Easy to iterate: change fins, water amount, or cork tightness
Pro tip: If your rocket “sneezes” water and flops over, your seal is leaking or your fins are crooked. Or your rocket
is just having a dramatic day. Fix the seal first.
Method 2: The High-Flying 2-Liter Bottle Rocket (Best Performance)
If Method 1 is “weekend fun,” this is “backyard engineering.” A 2-liter soda bottle holds more air and water, making it
capable of higher, straighter flightsespecially when paired with a real launcher and a pressure gauge.
What You’ll Build
A 2-liter water bottle rocket with a tuned water-to-air ratio, stable fins, and an aerodynamic nose. This style is perfect
for testing variables like water volume, pressure, fin shape, and added mass.
Materials
- 1 clean 2-liter carbonated beverage bottle (your pressure vessel)
- Fins: sturdy cardstock, plastic folder material, or thin corrugated plastic
- Duct tape or strong packing tape
- Marker + ruler (for alignment)
- Nose cone material: cardstock or the top portion of a second bottle (optional)
- Small amount of modeling clay (optional, for nose weight)
- Launcher with an O-ring seal and pressure gauge (commercial launchers are common and consistent)
- Bicycle pump (manual pumping is slower and easier to control)
- Water + funnel
Build Steps (The “Straight Flyer” Setup)
- Mark your water line. A classic starting point is about one-third water and two-thirds air. Mark that line on your bottle so you can repeat tests consistently.
- Make 3 identical fins. Three fins are simple and stable. Cut them carefully so they match in size and shape.
- Place fins near the nozzle end. When launched, the bottle’s mouth is the bottom (the “engine”). Put fins toward that end so they act like stabilizers.
- Align fins evenly. Measure the bottle circumference where fins will go and divide by three. Mark placement points before taping.
- Add a nose cone. A smooth cone reduces drag. If using a second bottle top as a nose/payload shell, fit it snugly and tape as needed (or keep it removable if you’ll add recovery later).
- Optional: add nose weight. A small amount of clay at the nose can improve stability by shifting the center of mass forward. Start small; too much weight reduces altitude.
Launch Steps (Repeatable, Testable, Gloriously Nerdy)
- Choose a big field. You want room for drift and a soft landing.
- Fill to your marked line. Use a funnel so you don’t baptize your shoes.
- Mount on the launcher. Ensure the O-ring seal is clean. A tiny dab of petroleum jelly can help maintain a good seal.
- Clear the area. Operator distance and spectator distance matter. Don’t crowd the pad.
- Pump to a safe pressure. Start lower (for example, beginner ranges like 30–60 psi) and increase only when your build is consistent and your safety setup is solid.
- Launch remotely. Count down. Launch. Enjoy the extremely satisfying “whoomph.”
Quick Performance Notes
- Water amount: Too little water = not much thrust. Too much water = heavy rocket, less acceleration. One-third is a strong baseline.
- Fins: Crooked fins create spin, wobble, and unexpected “interpretive dance” flight paths.
- Pressure: Higher pressure can increase performance, but only within safe limits and with a reliable launcher.
Method 3: The Payload + Parachute Water Rocket (Most Fun to Tinker)
This is the build for people who read “payload bay” and immediately think, “Yes, my rocket needs cargo.” It’s also the
best for classroom challenges: egg drops, landing protection, hang-time contests, or “bring back the astronaut safely”
missions.
What You’ll Build
A 2-liter rocket with a detachable nose/payload compartment plus a simple parachute or streamer system. You’re trading a
little altitude for a lot more controland dramatically fewer cracked “payloads.”
Materials
- 2 clean 2-liter carbonated beverage bottles
- Fin material + tape (as in Method 2)
- Plastic bag (lightweight) for a parachute canopy
- String (3–6 equal lengths)
- Tape (to anchor strings inside the nose compartment)
- Optional payload: sand (in a sealed container), a foam “astronaut,” or an egg (brave choice)
- Launcher + pump + pressure gauge
Build Steps
- Build the base rocket. Follow Method 2 for the main bottle body and fin placement.
- Create the nose/payload bay. Cut the top portion off the second bottle to form a shell that fits over the “nose” end of your main bottle (the bottom of the bottle when upright).
- Make the parachute. Cut a lightweight plastic bag into a canopy shape (circle or octagon works). Tape or tie 3–6 strings evenly around the canopy edge.
- Anchor the strings. Attach the string ends inside the rocket body or payload bay with tape so the parachute stays connected during descent.
- Pack it gently. Fold the parachute neatly and tuck it into the payload bay. The nose shell should fit snugly but be able to pop off during the fall.
- Add payload protection (optional). If you’re doing an egg challenge, create a “hard inner cocoon” surrounded by a crushable layer (foam, bubble wrap, paper) to absorb impact.
Launch and Recovery Tips
- Keep launches close to vertical. Parachute rockets can drift.
- Test without payload first. Make sure the nose pops off and the parachute deploys reliably.
- Use a hang-time scoreboard. Time from launch to touchdown is a fun metric that rewards good recovery design.
If your parachute doesn’t open: don’t panicyour rocket just invented “ballistic re-entry.” Pack looser, reduce tape
friction, and make sure the nose shell can separate cleanly.
Tuning Tips: Higher, Straighter, Safer
The secret to a great DIY bottle rocket isn’t a single magic trickit’s consistent testing. Change one variable at a time,
keep notes, and you’ll quickly learn what your rocket “likes.”
1) Dial in the Water-to-Air Ratio
One-third water is a reliable starting point for many 2-liter launches because it balances thrust (water mass out the nozzle)
with available compressed air (the part that expands and does the pushing). Try small changeslike 25%, 33%, and 40%and
compare altitude and stability.
2) Improve Stability with Center of Mass vs. Drag
A stable rocket generally has its center of mass forward (toward the nose) while its stabilizing surfaces (fins)
are toward the rear (near the nozzle). If your rocket wobbles, try:
- Straighter fins (re-tape them using a guide line)
- Slightly larger fins (not hugedrag is real)
- A small amount of nose weight (modeling clay)
- A smoother nose cone (less turbulence)
3) Make Your Build Repeatable
- Mark fill lines on the bottle for consistent water volume.
- Use a pressure gauge so each trial starts with the same “fuel.”
- Retire damaged bottles and avoid sun-brittle plastic.
4) Pick the Right Launch Day
Calm weather makes results clearer. Strong wind can tilt rockets, reduce altitude, increase drift, and turn your data
collection into “we found it… eventually.”
FAQ
How high can a water bottle rocket go?
It depends on pressure, design, and conditions. Even educational safety materials warn that water bottle rockets can be
very fastfast enough that you should treat them like serious projectiles and keep spectators far back. With a good launcher
and a stable build, launches can be impressiveoften far higher than you’d guess from “just a soda bottle.”
Do I really need a launcher?
For small cork-pop builds, a simple stand can work. For 2-liter performance rockets, a proper launcher with a secure seal
and remote release is strongly recommended for safety and repeatability.
What’s the best “easy win” upgrade?
Add three straight fins (evenly spaced) and a smooth nose cone. That upgrade alone often turns wild wobble into a clean,
satisfying flight path.
Can kids do this?
Yeswith active adult supervision, eye protection, conservative pressure limits, and a strict “everyone stands back” rule.
The rocket should never be hand-held during pressurization or launch.
Extra: Real-Life Water Rocket Experiences (500+ Words)
If you’re wondering what it’s actually like to build and launch water rockets (beyond the tidy steps), here are the
real-world moments people tend to run intooften in the same afternoon.
First, there’s the “seal saga.” Your very first launch attempt might not launch at all. You pump, you pump, everyone chants
“three, two, one,” and… nothing. The rocket just sits there like it’s waiting for a written invitation. That’s usually a
leaky seal. You’ll learn quickly that tiny air leaks matter, and a snug stopper or a well-maintained O-ring can be the
difference between a majestic liftoff and a sad, bubbly fountain. When the seal finally holds, the launch is so sudden
that people often flinch even when they’re standing at a safe distance. That’s normal. Your brain is simply updating its
internal “plastic bottle threat assessment” database.
Next comes the “fin humility phase.” Many first rockets fly like a confused duck: up-ish, sideways-ish, then cartwheeling
back to Earth. The cause is almost never “bad luck.” It’s usually fins that aren’t aligned, aren’t identical, or aren’t
firmly attached. The fixmeasuring, spacing evenly, and taping cleanlyfeels strangely satisfying, like you just gave your
rocket a tiny posture correction. On the next launch, the flight suddenly looks intentional. That’s a great moment, because
it teaches a powerful engineering lesson: small, careful improvements beat random cleverness.
Then there’s the “water ratio debate.” Someone will insist that more water means more power, because water is heavy and
rockets need fuel. Someone else will argue that less water means less weight and therefore higher altitude. Both are partly
right, and your launches become the evidence. This is where water rockets shine as a STEM project: you can run real tests,
keep notes, and watch physics play out in the sky. After a few trials, teams often settle into a practical routine: pick a
baseline (like one-third water), adjust by small increments, and compare results. Suddenly, you’re not guessingyou’re
experimenting.
Another classic experience is the “recovery hike.” Even a well-launched rocket can drift with wind, and parachute builds
drift even more. People commonly underestimate how far a rocket can travel, then spend a few minutes walking the field
while scanning the grass like they lost a set of keys. This is why open spaces matter. The upside: recovery walks become
part of the fun, especially with kids, because it feels like a mini “mission” to retrieve the vehicle. Some groups even
assign roles: launcher operator, countdown caller, safety checker, and recovery team.
Finally, there’s the moment when someone suggests a payload challengeusually an egg. Once that happens, the project turns
into a full engineering drama: cushioning, “crumple zones,” parachute packing, and whether the nose cone will actually pop
off at the right time. Expect failures. Expect laughter. Expect at least one triumphant landing where the egg survives and
everyone acts like they just completed a lunar return. And honestly? That’s exactly what makes water rockets memorable:
they’re not just a craft, they’re a repeatable experiment where each launch teaches you something you can use on the next one.
Conclusion
Building a water rocket is one of the best “low-cost, high-wow” science projects out there: you start with a bottle and end
with real lessons about pressure, thrust, aerodynamics, and design iteration. Whether you choose the quick cork-pop rocket,
the high-flying 2-liter build, or the payload-and-parachute version, the formula is the same: build carefully, launch safely,
test smart, and keep improving.
And when your rocket finally streaks upward in a clean, straight climbown that moment. You didn’t just make a water rocket.
You made physics visible.


