Table of Contents >> Show >> Hide
- Why Melted Plastic and Wax Need Different Kinds of Cleanup
- Method 1: Freeze It, Crack It, Lift It
- Method 2: Warm It, Absorb It, Wipe It Away
- Method 3: Gently Scrape, Then Clean the Residue
- How to Pick the Right Method Fast
- Common Mistakes That Make the Mess Worse
- Final Thoughts
- Extra Experience: What Cleanup Mishaps Usually Teach You
- SEO Tags
Note: This article is written for common household surfaces and everyday messes. Always test a cleaner in a hidden spot first, and if plastic melted onto a hot appliance surface, follow the manufacturer’s care instructions before improvising like a cowboy with a sponge.
Few household messes cause instant regret quite like melted plastic and wax. One second you are enjoying a candlelit dinner, warming leftovers, or setting down a hot pan without thinking twice. The next second, something has dripped, fused, hardened, stained, or turned your kitchen into a tiny crime scene sponsored by poor judgment.
The good news is that most of these messes are fixable. The better news is that you do not need a chemistry degree, a hazmat suit, or a mystical grandmother with secret cleaning powers. In most cases, cleaning up melted plastic and wax comes down to three practical approaches: freeze it, warm it, or gently scrape and treat what is left behind.
This guide walks through all three methods in plain English, with surface-specific tips, common mistakes to avoid, and enough real-life detail to help you clean up the mess without making it worse. Because when wax lands on carpet or plastic melts onto a cooktop, the goal is not just “remove stuff.” The goal is “remove stuff without ruining the thing under it.” Big difference.
Why Melted Plastic and Wax Need Different Kinds of Cleanup
At first glance, wax and plastic seem like they should behave the same way. They melt, they cool, they harden, and they cling to surfaces like they have signed a lease. But they are not identical messes.
Wax usually responds well to temperature changes. It can be hardened with ice and chipped away, or softened with gentle heat and absorbed into paper towels or cloth. Plastic, on the other hand, can bond more aggressively to some surfaces, especially hot glass cooktops, heating elements, and certain finishes. That means timing matters. On some appliance surfaces, melted plastic should be removed carefully while the area is still warm enough to release it. On other surfaces, it is better to let everything cool first so you do not spread the mess.
The safest strategy is to match the method to the material underneath. Carpet is not a stovetop. Hardwood is not a candle jar. And your favorite sweater is definitely not a ceramic cooktop, even if laundry day has occasionally made you question reality.
Method 1: Freeze It, Crack It, Lift It
Best for carpet, rugs, clothing, table linens, candle jars, and small wax drips
This is the most satisfying method because it turns a gooey mess into a brittle one. Once wax becomes hard and fragile, it is much easier to lift off fibers and surfaces without pushing it deeper in.
If the spill is fresh, resist the urge to wipe it immediately. That usually smears the material and drives it deeper into fabric or texture. Instead, let it cool or speed up the process with a sealed bag of ice cubes, an ice pack, or even a bag of frozen vegetables. Yes, peas can briefly become a cleaning tool. They probably never saw that career pivot coming.
How to do it
- Place ice in a sealed plastic bag so moisture does not soak the area.
- Set it on top of the wax until the spill becomes firm and brittle.
- Use a dull knife, spoon, old credit card, or plastic scraper to gently lift and chip away the hardened material.
- Vacuum up loose bits if you are working on carpet or upholstery.
- If color or oily residue remains, move on to Method 2 or Method 3 depending on the surface.
Where this works especially well
Carpet and rugs: Freezing is often the safest first move because it keeps wax from sinking deeper into the pile. Once hardened, you can break it apart and vacuum up the crumbs before treating the stain.
Clothing and linens: Hard wax is easier to scrape off fabric than soft wax. Lay the item flat and work slowly so you do not snag the fibers.
Candle jars: Putting an old candle jar in the freezer can help the leftover wax shrink slightly and pop loose more easily.
Tablecloths and fabric napkins: Again, freezing first prevents you from rubbing wax into the weave like an accidental craft project.
What to avoid
Do not gouge the area with a sharp blade. Do not attack delicate fabric like you are auditioning for a survival show. And do not use so much moisture that you swap a wax problem for a mildew problem.
Method 2: Warm It, Absorb It, Wipe It Away
Best for fabric, carpet, upholstery, hardwood, tabletops, walls, and glass containers
If freezing handles the chunky part of the mess, gentle heat often handles what is left behind. This method works because wax softens and transfers to an absorbent material, while some hard-surface drips loosen enough to be wiped away cleanly.
The key phrase here is gentle heat. Not inferno. Not blast furnace. Not “I held the hair dryer there so long I created a second problem.” Low to medium heat is your friend.
How to do it on fabric and carpet
- Remove as much hardened wax as possible first.
- Place a clean white cloth, paper towel, or plain paper on top of the stain. For fabric, place another absorbent layer underneath too.
- Use an iron on a low, no-steam setting, or press gently with a warm tool through the cloth.
- As the wax softens, it transfers into the cloth or paper.
- Move to a clean section and repeat until no more wax transfers.
- Finish by treating the remaining stain if there is dye or oily residue.
This is one of those old-school tricks that still works because it is simple and logical. You are not “cleaning” the wax so much as convincing it to leave one surface for another. Frankly, if all difficult things in life worked that way, half our problems would be solved with a warm towel.
How to do it on hard surfaces
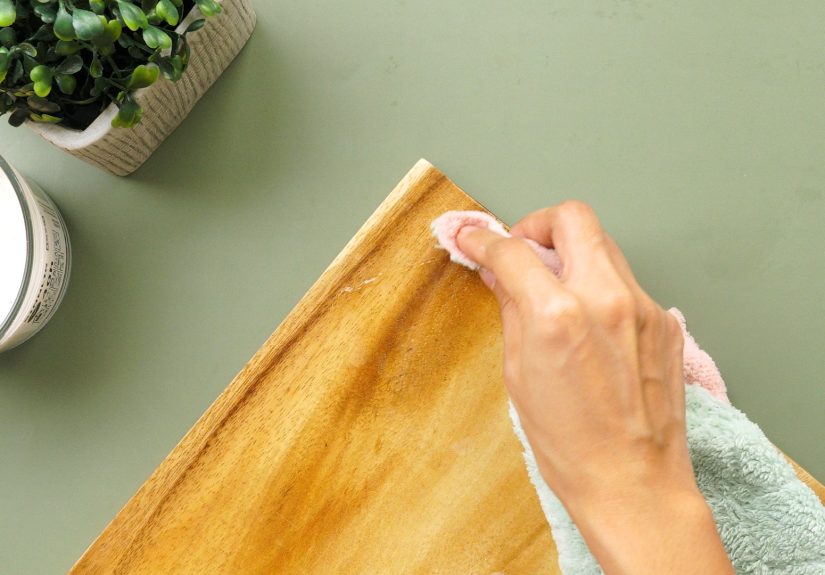
For wood, painted walls, sealed tabletops, and similar surfaces, a hair dryer is usually safer than direct contact heat. Hold it several inches away, warm the wax until it softens, and then wipe or lift it with a soft cloth, paper towel, or plastic scraper. Buff away what remains.
This method is especially useful on:
- Hardwood floors with candle drips
- Wood furniture with wax trails
- Painted walls with splatters
- Spent candle jars you want to reuse
When heat is the better choice
Use this method when the material is clinging to a smooth surface or when a frozen, brittle approach would be awkward. A wall drip, for example, is rarely improved by balancing a bag of ice against vertical paint while muttering at gravity.
Important caution
Always be careful with finished wood, delicate paint, synthetic upholstery, and anything heat-sensitive. Keep the temperature moderate, keep the tool moving, and stop if the surface looks glossy, warped, sticky, or annoyed.
Method 3: Gently Scrape, Then Clean the Residue
Best for melted plastic, dyed candle wax stains, greasy residue, and appliance surfaces
Sometimes the visible blob is only half the problem. After the main chunk comes off, you are left with a film, a greasy shadow, a wax dye mark, or a stubborn patch of melted plastic that seems emotionally committed to the surface. That is where this method earns its keep.
First, scrape carefully. Use a plastic scraper, wooden spoon, silicone spatula, or another nonmetal tool unless the surface specifically allows a specialized scraper. The goal is to lift residue without scratching the finish underneath.
For melted plastic on appliances and cooktops
If plastic melts on a glass cooktop or similar hot appliance surface, speed matters. Some manufacturer guidance warns that melted plastic can permanently damage the surface if allowed to cool completely and bond. On certain cooktops, the safest move is to wear oven mitts, use the appropriate scraper while the area is still warm, and push the softened material away carefully. After cooling, clean the remaining residue with a surface-safe cream or nonabrasive cleaner.
If plastic melts on a dishwasher heating element, microwave interior, or other appliance component, unplug or power off the unit, let it cool fully unless the manual says otherwise, remove loose debris with a nonmetal tool, and clean remaining residue according to the manufacturer’s instructions. If there is a persistent burning smell, smoke, or concern about electrical parts, stop and use the manual or professional service. Heroic sponge energy is not a substitute for appliance safety.
For wax or plastic residue on washable fabrics
Once the bulk is gone, pretreat the remaining area with laundry detergent, stain remover, or a fabric-safe cleaner. Wash according to the care label, then let the item air dry first. Do not toss it into a hot dryer until you know the stain is gone. Heat can set residue and turn “almost fixed” into “permanently commemorated.”
For residue on carpet or upholstery
After freezing or warming away the wax, blot the area with a carpet-safe cleaner. Some people use a tiny amount of rubbing alcohol on a cloth for color residue, but do not soak the fibers and always test first. Blot, do not scrub. Scrubbing is how innocent carpet fibers become a frizzy cautionary tale.
For hard surfaces
Use a soft cloth with warm soapy water, diluted vinegar where appropriate, or a surface-safe cleaner recommended for the material. Nonabrasive pads can help on durable surfaces, but skip steel wool and aggressive scrubbers unless you enjoy replacing finishes.
How to Pick the Right Method Fast
When you are standing in front of a mess, you do not need a philosophical framework. You need a quick decision.
- Use freezing first for carpet, clothing, rugs, and loose wax blobs.
- Use gentle heat first for smooth hard surfaces, hardwood, walls, tabletops, and candle jars.
- Use careful scraping plus residue treatment for melted plastic, appliance surfaces, and any leftover film or stain.
And when in doubt, start with the least aggressive option. It is much easier to repeat a mild method than to reverse a scratch, scorch mark, or stripped finish.
Common Mistakes That Make the Mess Worse
1. Wiping too soon
Hot wax and softened plastic smear. Give the material a moment and choose the right method before diving in.
2. Using sharp metal tools on delicate finishes
A clean surface is great. A clean surface with a brand-new scratch is less impressive.
3. Applying too much heat
Low and steady beats hot and reckless every time.
4. Skipping the patch test
Even mild cleaners can discolor fabric, dull wood, or affect painted finishes.
5. Drying fabric before the stain is gone
Heat sets residue. Air-dry first, inspect second, celebrate third.
Final Thoughts
Melted plastic and wax look dramatic, but they usually respond well to calm, surface-appropriate cleanup. The trick is not brute force. It is choosing the right temperature, the right tool, and the right amount of patience.
Freeze when you need brittleness. Warm when you need release. Scrape gently and treat the leftovers when the mess leaves behind a clingy little reminder of your bad luck. Most of all, remember that cleanup goes better when you stop trying to win in one move. This is chess, not checkers. Messy, slightly sticky chess.
Extra Experience: What Cleanup Mishaps Usually Teach You
Ask enough homeowners, renters, parents, candle lovers, and midnight snack engineers about melted wax or plastic, and you start hearing the same stories. The details change, but the emotional arc is always familiar. First comes confidence. Then comes the smell. Then comes that long, silent stare at the mess, where the brain tries to calculate whether pretending not to see it is somehow a valid cleaning strategy.
One common experience happens with candle wax on carpet. People assume they need to act immediately, so they grab paper towels and press down while the wax is still soft. For a moment, it feels proactive. Then the wax sinks deeper, spreads wider, and becomes part of the rug’s personality. The lesson people usually learn is simple: speed matters, but panic does not help. Waiting two minutes to harden the wax often saves thirty minutes of unnecessary scrubbing later.
Another classic scene involves wax on wood furniture. Someone tries to scrape it off with a fingernail, gets impatient, upgrades to a butter knife, and then discovers that the furniture now has both wax and a scratch. That is when the humble hair dryer suddenly looks like a genius invention. Gentle heat softens the drip, the cloth picks it up, and the furniture survives. Not because the mess was tiny, but because the method matched the surface.
Melted plastic tends to create a different kind of panic because it smells terrible and looks permanent. People often assume the item underneath is ruined forever. Sometimes that is true, especially when plastic bonds to certain hot glass surfaces. But many times, the cleanup goes better than expected when the person slows down, checks the appliance guidance, and uses a nonmetal tool instead of attacking the mess with whatever is closest. A wooden spoon has saved more dignity than it gets credit for.
Laundry stories are their own special genre. A birthday candle tips onto a shirt. A craft project goes rogue. A wax melt lands on a tablecloth five minutes before guests arrive. The first instinct is usually to wash the item right away, but experienced cleaners learn that water alone is not the hero here. Remove the bulk first, treat the residue second, and only then wash. People who have ruined a garment in the dryer rarely make that mistake twice.
What these experiences all have in common is not just the mess. It is the realization that cleanup is easier when you stop trying to improvise under stress. The best results usually come from a boring little sequence: assess the surface, control the temperature, lift the material, treat the residue, and be patient. Not glamorous. Not dramatic. Extremely effective.
So yes, melted plastic and wax can turn an ordinary day into a mild household soap opera. But they also tend to reward calm thinking. And that may be the most useful cleaning lesson of all: the mess is annoying, but it is usually not the end of the story.