Table of Contents >> Show >> Hide
- Why Tissue Paper Works So Well for Gift Wrapping
- Method 1: The Classic Gift Bag Tissue Paper Wrap
- Method 2: The Candy-Twist Tissue Paper Wrap
- Method 3: The Layered Tissue Paper Box Wrap
- Common Mistakes to Avoid When Wrapping with Tissue Paper
- How to Choose the Best Tissue Paper for the Job
- of Real-Life Experience with Tissue Paper Wrapping
- Final Thoughts
Tissue paper is the quiet overachiever of the gift-wrapping world. It is light, inexpensive, easy to store, and somehow capable of making even a last-minute gift look like you planned your life beautifully. One minute it is cushioning a candle in a gift bag, and the next it is turning a basic package into something that looks boutique-worthy. Not bad for a materiaaker. You just need a few simple techniques that work for real gifts, real homes, and real people who may be wrapping five minutes before a party.
In this guide, you will learn three simple ways to wrap with tissue paper: the classic gift bag method, the candy-twist wrap for odd shapes, and the layered tissue wrap that gives boxes and delicate gifts a softer, more polished finish. Along the way, you will also get practical tips, common mistakes to avoid, and creative examples that make tissue paper wrapping look intentional instead of accidental.
Why Tissue Paper Works So Well for Gift Wrapping
Before getting into the three methods, it helps to know why tissue paper is such a useful wrapping material. First, it adds presentation without much bulk. Second, it can protect lightweight or delicate items from scratches and shifting. Third, it layers beautifully, which means you can create volume, color, and texture with very little effort.
Tissue paper is especially handy for wrapping gifts like clothing, books, candles, cosmetics, handmade items, mugs, accessories, ornaments, and small home decor pieces. It also works well when you want a softer look than traditional wrapping paper. Regular wrap can feel crisp and formal. Tissue paper feels airy, playful, and just a little extra in the best way.
The secret is not to fight the material. Tissue paper is supposed to look soft and flexible. You are not aiming for military corners and ruler-straight folds. You are aiming for clean, gentle shaping that looks effortless and elegant.
Method 1: The Classic Gift Bag Tissue Paper Wrap
Best for: gift bags, small boxed gifts, candles, bath products, and boutique-style presents
This is the easiest and most versatile tissue paper method. It is perfect when you want the gift to look polished fast. A gift bag with tissue paper is also one of the best ways to present awkward little items that do not deserve the drama of full wrapping paper.
What You Need
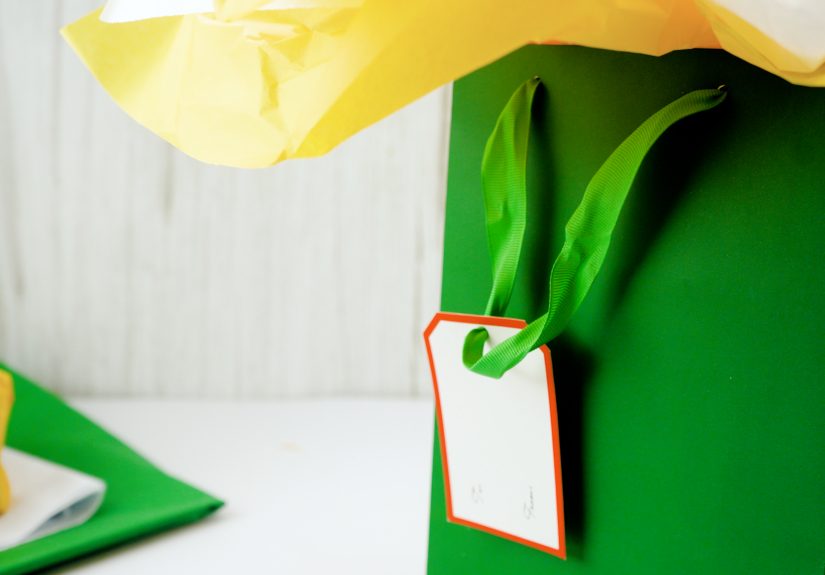
Tissue paper, a gift bag, your gift, and optional extras like ribbon, a gift tag, or a sticker.
How to Do It
Start by lining the inside of the bag with one or two sheets of tissue paper. Let the paper cover the bottom and sides so the gift has a soft base. This step matters more than people think. Without the lining, the gift bag can look hollow, and the item can slide around like it is looking for an exit.
Next, place the gift gently into the center of the bag. If the item is fragile, add another sheet or two around it for cushioning. Then take one sheet of tissue paper, lay it flat, and lightly pinch the center. Twist the pinched area just enough to create a point at the bottom while leaving the top loose and fluffy. Place that pointed end into the bag so the fuller part sticks out above the opening.
Repeat with one or two more sheets if you want a fuller look. Rotate the sheets slightly so the colors and edges spread out evenly. The goal is to create volume, not a paper explosion. Think “pretty cloud,” not “craft tornado.”
Tips for Making It Look Better
Use two or three colors for more depth. Pairing white with gold, blush with ivory, or navy with silver instantly looks more thoughtful. For birthdays, bright combinations like yellow and pink or teal and coral feel cheerful. For weddings or showers, soft neutrals look elegant.
If the tissue looks too flat, lift it out and fluff it again rather than jamming more paper into the bag. More paper does not always mean more style. Sometimes it just means your gift looks like it is hiding in a nest.
Example
Say you are gifting a candle and a small jar of matches. Place both items inside a medium gift bag, line the bottom with white tissue, then top it with two sheets of pale gray and one sheet of metallic gold tissue. Add a black satin ribbon to the handle. Suddenly your practical little gift looks like it came from an upscale boutique instead of your kitchen counter.
Method 2: The Candy-Twist Tissue Paper Wrap
Best for: clothing, scarves, plush toys, socks, baby gifts, cylindrical items, and odd-shaped presents
Some gifts refuse to behave. A scarf slumps. A plush toy sprawls. A candle rolls. A water bottle acts like it has personal goals. This is where the candy-twist method saves the day. It is simple, charming, and ideal for gifts that are soft or hard to box neatly.
What You Need
Several sheets of tissue paper, ribbon or twine, tape if needed, and the gift.
How to Do It
Lay out several sheets of tissue paper so they overlap slightly, creating a larger wrapping surface. For extra coverage or strength, use double layers. Place the gift in the center. If the item is long, position it horizontally.
Bring one side of the tissue over the gift, then roll or fold the gift until it is fully enclosed. Gather the tissue at each end, then twist those ends gently, like a giant wrapped candy. Secure each side with ribbon, twine, or curling ribbon.
If the item is especially soft, such as pajamas or a baby onesie set, you can fold it first into a tidy rectangle before wrapping. If it is cylindrical, like a bottle or tumbler, keep tension light but steady as you roll to avoid tearing.
Why This Method Works
The candy-twist wrap takes advantage of tissue paper’s flexibility. Instead of trying to force sharp corners onto a gift that has none, you let the paper mold gently around the object. It is one of the easiest ways to wrap oddly shaped gifts without making everything look lumpy.
Ways to Upgrade It
Add a gift tag in the middle instead of at the end for a cleaner look. Use patterned tissue over solid tissue for more texture. For baby gifts, pastel tissue with satin ribbon looks sweet. For holiday gifts, deep red or forest green tissue with gold ribbon makes the package feel festive without requiring much effort.
Example
If you are giving a cozy scarf and fuzzy socks, fold them into a soft bundle and wrap them in cream tissue paper layered over plaid tissue. Tie both ends with velvet ribbon. The finished gift looks warm, playful, and a lot more exciting than handing someone a folded scarf that resembles laundry.
Method 3: The Layered Tissue Paper Box Wrap
Best for: gift boxes, books, framed prints, stationery, delicate items, and elegant presentation
This method is ideal when you want tissue paper to do more than peek out of a bag. It creates a soft, refined wrap for boxes and flat gifts, and it works especially well when presentation matters. Think birthdays, bridal showers, party favors, hostess gifts, or handmade products.
What You Need
Tissue paper, a box or flat gift, double-sided tape or regular tape, ribbon, and optional embellishments like a sticker or paper flower.
How to Do It
Start by stacking two to four sheets of tissue paper, depending on how opaque you want the wrap to look. Put the gift or gift box in the center, face down if you want the neatest side facing up at the end.
Bring one side of the tissue over the gift and smooth it lightly. Then fold the opposite side over it. Secure with a tiny piece of tape underneath or along a seam where it will be less noticeable. Fold the ends inward the same way you would with regular wrapping paper, but keep the folds soft rather than sharply creased.
Because tissue paper is delicate, use a gentle touch. Too much pulling can tear it, especially around corners. Once wrapped, tie the package with ribbon or twine to hold everything in place and add structure.
This method is especially effective when combining multiple sheets in coordinating colors. White under blush, kraft-toned tissue under olive, or ivory under patterned tissue creates subtle depth. It looks simple, but it has a “this person absolutely has their life together” energy.
Add a Tissue Paper Topper
To make the package feel more finished, add a quick tissue paper flower or pom-style topper. Fold several small sheets accordion-style, tie at the center with floral wire or thin ribbon, round or point the ends, and carefully fluff the layers apart. Attach it to the top of the gift with ribbon or adhesive.
This is a smart way to turn plain packaging into something memorable without buying a premade bow. It is also useful if your wrapping job is not perfect. A good topper can distract from many things, including minor folds, slightly uneven edges, and the emotional consequences of wrapping under pressure.
Example
Imagine wrapping a hardcover journal for a friend. Place it inside a slim box, wrap the box in three layers of white and sage tissue paper, then tie it with natural twine and add a small cream tissue flower. The result feels thoughtful, clean, and handmade without looking overly crafty.
Common Mistakes to Avoid When Wrapping with Tissue Paper
Using too little paper
If the gift shows through too much, the wrap can look flimsy. Layering a few sheets usually solves the problem.
Overstuffing gift bags
Too much tissue paper makes the bag look chaotic. Aim for balanced fullness, not maximum volume.
Pulling too tightly
Tissue paper tears easily. Gentle shaping works better than trying to force crisp tension.
Ignoring color coordination
A random stack of leftover tissue can work, but intentional color choices usually make the gift feel more polished.
Skipping support for fragile gifts
Tissue paper can cushion light items, but very delicate gifts may still need a box or additional protective material underneath.
How to Choose the Best Tissue Paper for the Job
For everyday gifts, standard tissue paper works well. For delicate items or layered wraps, choose thicker sheets when possible. Solid colors are versatile, while printed tissue adds personality. Acid-free tissue is especially useful for delicate fabrics, keepsakes, or items you want to protect from transfer and wear over time.
If you are wrapping for a specific occasion, match the mood. Bright colors feel celebratory. White, cream, silver, and soft pastels feel elegant. Black tissue can look striking and modern when paired with gold or white. Kraft-toned paper gives a natural, understated style that works beautifully with twine, greenery, or simple tags.
of Real-Life Experience with Tissue Paper Wrapping
The more I use tissue paper, the more I appreciate that it solves problems regular wrapping paper creates. Traditional gift wrap is great when the gift is a perfect box and the tape is cooperating. Real life, however, is often less cinematic. The candle is round, the sweater is fluffy, the bag is too deep, and the scissors have disappeared again. Tissue paper steps into that chaos like a calm friend who somehow knows what to do.
One of the most helpful things I have learned from experience is that tissue paper makes gifts feel more personal even when the method is very simple. A plain mug in a plain bag can look forgettable. That same mug nestled into layered tissue paper with colors that fit the occasion suddenly feels intentional. It tells the recipient that you took an extra minute to make the gift look cared for. That minute matters.
I have also learned that tissue paper is one of the best rescue tools for odd-shaped gifts. I used to think oddly shaped presents were just destined to look messy. Then I tried the candy-twist method on a rolled scarf, and everything changed. It looked charming, tidy, and a little whimsical. Since then, I have used the same idea for slippers, baby clothes, handmade cookies in protective sleeves, and even a reusable water bottle. The method works because it does not fight the object. It works with it.
Another surprisingly useful lesson is that color layering changes everything. Even inexpensive tissue paper can look upscale when two or three tones are paired thoughtfully. White and gold feel celebratory. Blush and cream feel soft and elegant. Green and kraft feel natural and modern. I used to grab whatever sheets were left in the drawer, but once I started paying attention to color combinations, the finished results looked much more polished.
There is also something satisfying about how forgiving tissue paper can be. Yes, it tears easily. But it also hides imperfections well. A box wrapped in tissue paper and tied with ribbon does not need razor-sharp corners to look beautiful. A gift bag with fluffed tissue paper does not need perfect symmetry to feel festive. In that way, tissue paper is ideal for people who want nice presentation without perfectionism eating the entire afternoon.
Perhaps my favorite part is that tissue paper helps create a better unwrapping experience. It adds softness, anticipation, and that little rustling sound that makes a gift feel special. The package feels layered. The reveal takes an extra second. That tiny pause gives the moment more charm. And honestly, that is part of what good gift wrapping is supposed to do. It is not just about hiding the item. It is about making the act of giving feel memorable.
So if your wrapping style has historically been “bag, panic, tissue, done,” you are closer to success than you think. With a few simple techniques, tissue paper can make your gifts look polished, creative, and thoughtfully put together without turning your dining table into a full-scale crafting emergency.
Final Thoughts
If you want an easy way to make gifts look prettier, tissue paper is one of the smartest materials you can keep on hand. It is affordable, flexible, beginner-friendly, and surprisingly versatile. Whether you are filling a gift bag, wrapping a soft or awkwardly shaped item, or layering a box for a more elegant finish, these three simple ways to wrap with tissue paper can make your gifts feel more polished without adding stress.
The best part is that each method is easy to adapt. You can keep it minimalist with one color and twine, or go full festive with layered shades, ribbon, and tissue flowers. Either way, your present will look more thoughtful, more stylish, and far less like it was wrapped in a rush while standing in the kitchen five minutes before leaving the house. That alone is a gift.