Table of Contents >> Show >> Hide
If you’ve been tackling DIY plywood projects for a while, you probably have a
growing mountain of oddly shaped offcuts hiding behind the garage door or
under the workbench. You know, those “too small to build anything, too good
to throw away” pieces. Good news: those plywood scraps are actually DIY
gold. With a little creativity, you can turn leftover plywood into practical
organizers, stylish decor, and even small furniture all while saving
money and keeping waste out of the landfill.
Inspired by the thrifty spirit of Remodelaholic-style builds and other
scrap-friendly woodworking ideas, this guide rounds up 25+ plywood scraps
projects you can customize for every room in your home. Whether you have a
handful of 3-inch strips or half a sheet left from your last cabinet build,
there’s a project here to put those pieces to work.
Why plywood scraps are DIY gold
Before we dive into specific plywood scrap projects, it helps to understand
why plywood is so perfect for this kind of upcycling:
-
Budget friendly: You already paid for the sheet when you
did your main project. Using scraps means you’re stretching your lumber
budget and getting “bonus builds” for free. -
Strong and stable: Because plywood is made from layered
veneer, it’s less likely to warp or twist than solid boards of the same
thickness. That makes it ideal for small organizers, shelves, and jigs
that need to stay square. -
Easy to cut and shape: Straight cuts on a table saw or
circular saw turn even tiny offcuts into useful strips, blocks, and
panels. With a jigsaw or bandsaw, you can create curves, circles, and
decorative shapes. -
Finish any way you like: Paint it for a modern look,
stain the face veneer for warmth, wrap edges with iron-on banding, or
lean into the layered edge for a cool, contemporary profile. -
Sustainable and low-waste: Every little scrap you use is
one less piece headed to the trash. If you care about eco-friendly home
projects, scrap plywood ideas are an easy win.
Smart tips before you start cutting into scraps
A pile of random plywood offcuts can feel overwhelming at first glance.
Take a few minutes to prep, and you’ll have a much easier building
experience:
-
Sort by thickness: Group 1/4-inch, 1/2-inch, and 3/4-inch
pieces. Many plywood projects depend on matching thicknesses especially
when parts interlock, stack, or need consistent strength. -
Check for defects: Avoid pieces with deep voids, major
delamination, or crushed corners for load-bearing parts. Those scraps can
still work great for decorative details or small trim pieces. -
Square one edge: Use your table saw or track saw to
establish one straight, square reference edge on each scrap. From there,
you can rip accurate strips and panels. -
Plan projects around the scraps you actually have: It’s
easier to design a small caddy around a 6-inch-wide strip than to force a
scrap to become something it doesn’t want to be. -
Protect the edges: Plywood edges can chip, so use sharp
blades, support both sides of the cut, and sand lightly before finishing.
25+ plywood scraps projects to try
Here’s the fun part: a big list of scrap plywood projects you can tackle
with basic tools and beginner-friendly skills. Treat these as a starting
point Remodelaholic-style creativity means you’re always free to tweak
dimensions, colors, and details to fit your own home.
1. Organizers and storage from leftover plywood
1. Desk organizer caddy: Cut narrow strips of 1/2- or
3/4-inch plywood and assemble them into a simple open-top box with interior
dividers for pens, sticky notes, and phone chargers. Add a small slot at
the front to hold your favorite notepad. A quick coat of paint or
clear-coat makes it look intentionally designed, not “scrap-y.”
2. Drawer dividers: Thin plywood offcuts are perfect for
creating custom dividers in kitchen, office, or dresser drawers. Cut
strips, notch them so they interlock in a grid, and dry fit everything
before securing with a drop of glue. No more utensils sliding into chaos.
3. Wall-mounted mail sorter: Combine a few rectangular
scraps into tiered pockets mounted on a plywood backer board. Label each
pocket (bills, kids’ papers, coupons, etc.) so the entryway clutter finally
has a home.
4. Vegetable or toy storage bin: With slightly larger
scraps, you can build a divided bin for a pantry, mudroom, or playroom.
Think of it as a mini crate: two side panels, a bottom, and a front/back,
plus one or two dividers to keep contents organized.
5. Floating shelves: A wide strip of 3/4-inch plywood
becomes a sleek floating shelf when paired with hidden brackets or a
French cleat. You can edge-band the front for a clean furniture-grade
look, or leave the layered edge exposed for modern style.
2. Decor and wall art from plywood offcuts
6. Geometric wall art: Cut triangles, diamonds, or
hexagons from 1/4-inch plywood scraps and arrange them like a puzzle on a
thin backer panel. Stain or paint some shapes and leave others natural to
create custom artwork that fits your space and color palette.
7. House number plaque: Use a rectangular scrap as a base
for your front porch house numbers. Paint the board, add adhesive metal
numbers, and mount with exterior screws. For extra charm, frame the edges
with thin plywood strips for a faux “picture frame” look.
8. Layered wall clock: Stack two or three plywood circles
of different diameters, glue them together, and drill a center hole for a
clock movement. The exposed plywood edges add subtle texture, and you can
use scrap veneer or paint to create contrasting rings.
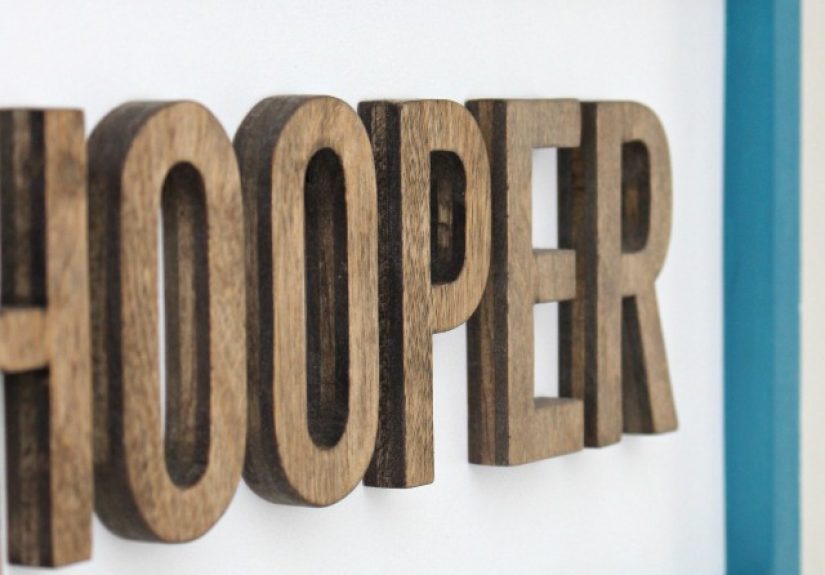
9. Kids’ name sign or room sign: Cut a simple rectangle or
cloud shape, paint the background, and attach wooden letters or vinyl
lettering. It’s a playful way to personalize a nursery door or playroom
wall using scraps that might otherwise be tossed.
10. Picture ledge: Combine one wide scrap for the back,
one for the base, and a narrow lip at the front to hold frames in place.
These slim ledges are ideal for rotating art, family photos, or kids’
masterpieces without constantly patching nail holes.
3. Small furniture and utility pieces from scrap plywood
11. Step stool: A stout little step stool is one of the
most useful plywood scrap projects you can build. Use thicker scraps for
the sides and top, cut gentle arches or angles for style, and add a
cut-out handle in the center for easy carrying. It’s perfect for reaching
high cabinets or helping kids reach the sink.
12. Narrow side table: If you have a few long, thin
scraps, glue them edge-to-edge to form a small tabletop, then add simple
plywood legs or hairpin legs. Ideal for a reading nook or next to a
compact sofa, this table proves that “leftovers” can look designer-made.
13. Shoe rack or entry bench: Stack a couple of plywood
shelves between side panels to create a low shoe rack. For a sturdier
build, add a plywood top so it doubles as a bench for putting on shoes.
14. Plant stands: Simple cross-leg plant stands use very
little material but add tons of style. Cut two matching panels, notch them
halfway so they intersect, and attach a round or square top. Finish with a
clear coat or paint and enjoy your upgraded plant corner.
15. Modern plywood bench from scraps: With larger pieces,
you can build a minimalist bench using interlocking slotted legs and a
solid top. The layered edge and clean lines give it a polished, modern
look proof that scrap plywood can absolutely live in the living room,
not just the workshop.
4. Workshop helpers and DIY jigs
16. Corner clamp jig: Small L-shaped pieces of plywood can
be glued together to create corner clamps that help you assemble boxes and
frames at a perfect 90 degrees. Add a slot for a clamp or screw and
you’ve got a workshop helper that cost you nothing but time.
17. Drill press or sanding station trays: Use shallow
plywood boxes to corral drill bits, sanding discs, and other small
accessories right where you use them. Label each tray so you can grab
what you need with one glance.
18. Tool wall and French cleats: Long narrow scraps are
perfect for building a French cleat tool wall. Cut matching angled strips,
mount one set to the wall, and attach the others to tool holders and bins
made from smaller offcuts. Rearranging your tools becomes as easy as
lifting and rehanging.
19. Push sticks and featherboards: Safety first. Cut push
sticks from 3/4-inch plywood to keep your hands away from saw blades, and
use thinner scraps to make featherboards that hold stock tight against
fences during cuts.
20. Simple assembly table top: If you have several
medium-sized scraps, edge-glue them into a panel to lay on top of sawhorses
for a temporary assembly table. It doesn’t have to be pretty just flat
and sturdy enough to support your next project.
5. Gifts, trays, and seasonal plywood scrap projects
21. Serving tray with handles: A rectangular plywood panel
becomes a chic serving tray with the addition of two cutout handles or
simple hardware pulls. Add edge trim or a painted border, and you’ve got
a practical piece for coffee, snacks, or breakfast in bed.
22. Coasters and trivets: Thin plywood can be cut into
squares, circles, or hexagons for coasters. Slightly larger pieces make
great trivets. Seal them well to protect against moisture and heat.
23. Tea light holders: Stack and glue several square
offcuts, then drill shallow holes for tea lights. Keep a safe distance
from the flame and never leave candles unattended, but enjoy the warm,
layered wood look.
24. Holiday ornaments: Cut out stars, trees, or simple
geometric shapes from thin plywood scraps and drill small holes for ribbon.
Paint, stain, or let kids decorate them with markers. They store flat and
become a yearly reminder of your DIY spirit.
25. Wine rack or bottle holder: With a bit of careful
layout, you can drill angled holes in a small plywood panel to cradle
bottles. Mount it on the wall or build a tabletop stand using two side
supports and one front panel.
26. Pet feeding station riser (bonus idea): Combine two or
three scraps to create a raised platform with cutouts sized to fit your
pet’s bowls. It’s easier on their neck and looks much better than bowls
pushed into the corner on the floor.
How to choose and work with plywood scraps safely
Even small plywood projects benefit from good technique and safe habits:
-
Use sharp blades and bits: Dull tools can tear veneer
and cause dangerous kickback. A sharp blade cuts cleaner, especially on
small pieces. -
Avoid tiny offcuts near big blades: If a piece feels
too small to control safely on the table saw, find another way to cut
it like using a handsaw, jigsaw, or clamping it to a larger board. -
Wear proper protection: Safety glasses, hearing
protection, and a dust mask or respirator are smart anytime you’re
cutting plywood, which often contains adhesives and fine dust. -
Seal raw edges and surfaces: A simple water-based
polyurethane, clear lacquer, or paint protects your projects and makes
them easier to wipe clean, especially for kitchen and bathroom use. -
Consider where it will live: For outdoor or damp
locations, exterior-grade plywood and outdoor finishes will last longer
and look better over time.
Real-world experiences with plywood scrap projects
Plywood scrap projects sound great on paper, but what does this look like
in a real home or workshop? Here are some practical experiences and lessons
that often show up once people start turning leftovers into useful builds.
One common story starts with a cluttered garage and a chaotic pile of
offcuts leaning against the wall. The first “aha” moment usually happens
when that pile becomes a set of simple storage bins. Suddenly, sports
gear, gardening tools, or kids’ outdoor toys have a home. The builder
realizes that the scraps weren’t junk they were raw material for solving
everyday problems. That mindset shift fuels the rest of the projects.
Another typical experience: learning to design around what you have rather
than what you wish you had. Maybe you only have 4-inch-wide strips of
3/4-inch plywood. Instead of forcing those into a big cabinet, you adapt
and build slim wall shelves, a narrow shoe rack, and a couple of plant
stands. The limitation becomes a creative challenge. Over time, you get
better at “seeing” projects in your scrap pile the way experienced
Remodelaholic-style DIYers do.
Many DIYers also notice how scrap projects are ideal skill builders.
Because the material is essentially free, there’s less pressure to be
perfect. You might experiment with new joinery, like simple dowels or
pocket screws, on a plywood scrap box before using that technique on a
big piece of furniture. If the first attempt goes sideways, you’ve lost a
little glue and some time, not an expensive hardwood board.
Families often turn scrap plywood ideas into shared activities. Kids can
help sand edges, paint panels, or arrange shapes for wall art. Small
projects like coasters, picture ledges, and ornaments are approachable for
beginners, which makes them great for teaching basic tool safety and
craftsmanship. The finished projects become memories a plant stand built
with your teenager, a pet feeding station made with your partner, a set of
ornaments decorated by the kids.
Another real-world benefit: your home gradually becomes more customized.
Instead of living with generic store-bought organizers that almost fit, you
build drawer dividers that match your utensils, a mail sorter sized to
your paperwork, and a bench perfectly sized for your entryway. Every
plywood scrap project nudges your space closer to how you actually live.
Finally, there’s the satisfaction factor. Seeing a once-awkward offcut
turned into a sleek shelf, a handy jig, or a beautiful piece of wall art
is deeply rewarding. You’re not just saving money you’re practicing
resourcefulness, building skills, and creating a home that tells a story.
That’s the heart of the “use what you have” Remodelaholic philosophy:
transform leftovers into something that looks intentional, feels
personal, and makes daily life a little smoother.
Conclusion: turn leftover plywood into lasting value
Your plywood scrap pile is more than sawdust waiting to happen it’s a
toolbox full of future projects. From organizers and decor to small
furniture, jigs, and thoughtful gifts, there are endless ways to turn
leftover plywood into pieces you’ll actually use and love.
Start small with a desktop organizer or set of coasters, then work your
way up to benches, shelves, and custom storage. As you experiment, you’ll
gain confidence, reduce waste, and give your home a more personalized,
handcrafted feel. That’s the magic of scrap plywood projects: they prove
that good design doesn’t require a full sheet of material just a good
idea, a few tools, and the willingness to see potential in every offcut.
SEO JSON


