Table of Contents >> Show >> Hide
- Prep Secrets (Where the Good Paint Jobs Are Secretly Made)
- 1) Start with a 10-minute “surface audit” before you open a paint can
- 2) Clean like paint is a picky eater (because it is)
- 3) Fix the wall firstpaint is not spackle with confidence
- 4) Sand for dullness, not for punishment
- 5) Remove dust like your finish depends on it (because it does)
- 6) Prime with intention, not tradition
- 7) Caulk gaps for a crisp lookbut don’t caulk everything
- 8) Protect your space like you’re painting with a wild animal
- Product Secrets (What Pros Buy That DIYers Often Don’t)
- 9) Match paint sheen to the abuse level of the room
- 10) Buy the best roller cover and brush you can justify
- 11) Use the right roller nap for the surface texture
- 12) “Box” your paint when using multiple cans of the same color
- 13) Consider a paint conditioner in hot/dry conditions (but don’t freestyle chemistry)
- Technique Secrets (Where the Magic Actually Happens)
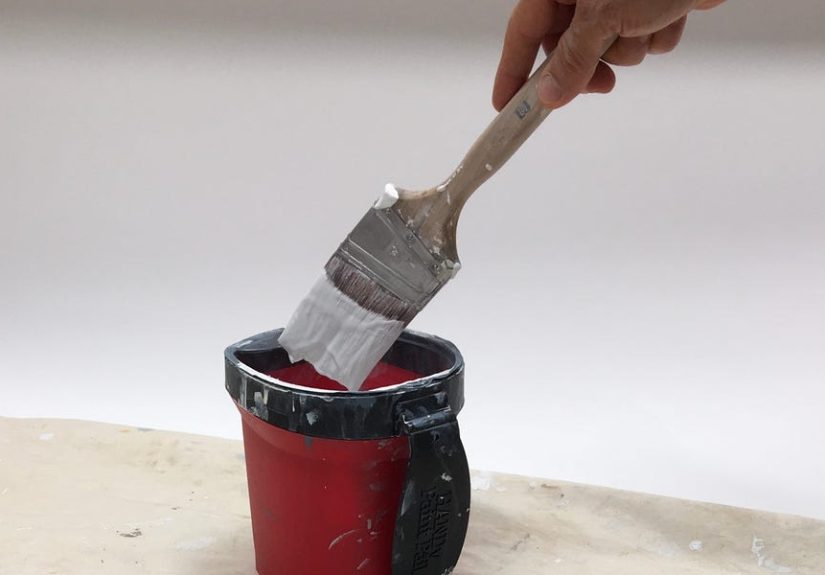
- 14) Load your brush correctly: dip, tap, don’t wipe
- 15) Cut in strategically to avoid “picture framing”
- 16) Roll in a pattern, then “lay off” for a uniform finish
- 17) Keep a wet edgepaint in manageable sections, not heroic ones
- 18) Don’t press the roller like you’re tenderizing steak
- 19) Use an extension pole (your shoulders are not a renewable resource)
- 20) Treat trim and doors like a different project (because they are)
- Drying, Curing, and Cleanup Secrets (The Part Everyone Rushes and Then Regrets)
- Quick Recap: The “Pro Finish” Checklist
- of Real-Life Painting Experiences (A.K.A. Lessons Learned the Loud Way)
- Conclusion
House painting looks easy until you’re standing in your living room at 9:47 p.m. with a roller that’s shedding fuzz like a golden retriever
and a “quick weekend project” that has officially become a lifestyle. The good news? Pros aren’t born with magical wrists.
They just know a handful of small, unsexy secrets that stack up into a smooth finish, crisp edges, and paint that doesn’t peel the first time
you sneeze near it.
This guide covers the real stuff: how to prep without overdoing it, when primer actually matters, how to avoid lap marks and “picture framing,”
what tool choices make the biggest difference, and the drying/curing details that separate “freshly painted” from “why is my wall sticky?”
Use these 20 house painting secrets to paint like a prowithout hiring one (unless you want to, in which case: respect).
Prep Secrets (Where the Good Paint Jobs Are Secretly Made)
1) Start with a 10-minute “surface audit” before you open a paint can
Walk the room (or exterior wall) with bright side lightinglike a flashlight held at an angle. You’ll instantly see nail pops, dents, peeling edges,
glossy patches, and rough repairs that daylight politely hides. Mark trouble spots with painter’s tape or a pencil. This prevents the classic mistake:
discovering a crater in the wall after you’ve painted over it, when it’s now a proud crater with a glossy finish.
2) Clean like paint is a picky eater (because it is)
Paint sticks best to clean, dull surfaces. Kitchen walls collect grease; bathrooms collect residue; exterior siding collects… the entire outdoors.
Wash dirty areas with a mild degreasing cleaner and rinse if needed. For interiors, a damp microfiber wipe can be enough on lightly soiled walls.
The secret is consistency: if one section is squeaky-clean and another is grimy, your paint may dry with uneven sheen or adhesion issues.
3) Fix the wall firstpaint is not spackle with confidence
Fill dents, dings, and nail holes. Let repairs dry completely, then sand them smooth. Feather the edges so you can’t feel a “ridge” when you run
your fingers across it. If you skip feathering, the patched area can “telegraph” through the paint as a halo or texture changeespecially in
eggshell or semi-gloss finishes.
4) Sand for dullness, not for punishment
You’re not trying to erase the wallyou’re trying to knock down gloss and roughness. Lightly sand glossy trim and doors so paint can grip.
If you’re painting over peeling paint, scrape loose areas and sand the edges smooth. A quick scuff-sand often beats over-priming, over-painting,
and over-regretting.
5) Remove dust like your finish depends on it (because it does)
Dust is sneaky: it sits in corners, clings to trim, and floats right into fresh paint like it owns the place. Vacuum sanding dust, wipe surfaces with
a slightly damp cloth, and let them dry. On trim or cabinets, a tack cloth (used lightly) or a clean microfiber wipe can help. The smoother the surface,
the more dust matters.
6) Prime with intention, not tradition
Primer isn’t a required ritualit’s a problem-solver. Use it for:
- Stains or odors (water marks, smoke, tannins): use a stain-blocking primer.
- New or repaired drywall: a drywall primer prevents flashing and sheen differences.
- Raw wood or porous masonry/stucco: primer improves adhesion and coverage.
- Glossy surfaces: a bonding primer helps paint stick where it otherwise might slide.
Secret tip: spot-prime patched areas even if you don’t prime the whole wall. It’s a small move that prevents big “why is that patch shiny?” energy.
7) Caulk gaps for a crisp lookbut don’t caulk everything
Caulk makes trim look sharper and helps block drafts and moisture at seams. Use paintable caulk on small gaps where trim meets wall or where exterior
trim meets siding. Smooth it with a damp finger or a caulk tool and let it cure before painting. The secret is restraint: don’t caulk areas meant for
drainage or movement, and don’t try to fill huge gaps with caulkuse backer rod or repair materials instead.
8) Protect your space like you’re painting with a wild animal
A good paint job is 80% protection and 20% pretending not to step in paint. Remove outlet covers, switch plates, curtain hardware, and doorknobs if
possible. Use drop cloths (canvas grips better than plastic). Tape where it truly helpslike baseboards near carpetthen don’t rely on tape as your
only plan for clean lines. Your future self will thank you loudly.
Product Secrets (What Pros Buy That DIYers Often Don’t)
9) Match paint sheen to the abuse level of the room
Flat hides wall flaws but scuffs easier. Eggshell/satin are great for most living spaces because they’re easier to wipe. Semi-gloss is popular for
trim and doors because it’s durable (and will also reveal every sanding mistake, so be nice to yourself and prep well). In humid bathrooms,
choose a paint formulated for moisture and mildew resistance.
10) Buy the best roller cover and brush you can justify
Paint quality matters, but tool quality shows up as texture, edge control, and how many times you mutter “why is it doing that?” A good angled brush
helps you cut in cleanly. A high-quality roller cover sheds less, holds paint evenly, and reduces stipple chaos. If your roller cover is shedding,
you’re not “adding texture.” You’re installing lint as a design choice.
11) Use the right roller nap for the surface texture
Smooth walls like a shorter nap. Light texture needs medium nap. Heavy texture requires more nap to reach into bumps. Too short and you’ll skip texture;
too long and you’ll leave a fuzzier finish. Secret move: test on a small area and look at it under side lighting before committing to the whole wall.
12) “Box” your paint when using multiple cans of the same color
Even the same color can vary slightly between cans. Boxing means mixing multiple cans together in a clean bucket so the color stays consistent across
the entire job. It’s especially important for big rooms, open floor plans, and exteriors where sunlight makes tiny differences obvious. Stir well,
then stir again like you’re trying to wake the paint up for work.
13) Consider a paint conditioner in hot/dry conditions (but don’t freestyle chemistry)
In warm, breezy conditions, paint can dry too fast, making it harder to maintain a wet edge and increasing brush marks. A paint conditioner/extender
can slow drying slightly for smoother levelingespecially on trim and doors. Follow label directions precisely. Secret rule: more is not better; more is
a science experiment you didn’t sign up for.
Technique Secrets (Where the Magic Actually Happens)
14) Load your brush correctly: dip, tap, don’t wipe
For cleaner cutting-in, dip only about 1–2 inches of the bristles. Tap the brush lightly to remove excessdon’t wipe hard on the rim, which starves
the brush and causes dragging. A properly loaded brush glides and releases paint evenly, which is how you get smooth lines without panic.
15) Cut in strategically to avoid “picture framing”
Picture framing happens when the brushed edges look darker or glossier than the rolled center. The secret is blending: either cut in and roll that area
while the edge is still workable, or work in small sections where you can keep transitions soft. Use the roller close to the cut line and “feather” the
overlap lightly so you don’t build a paint ridge at the perimeter.
16) Roll in a pattern, then “lay off” for a uniform finish
Pros often roll in a W or M pattern to distribute paint, then fill in without lifting the roller too much. Finish each section with long, gentle strokes
in one direction (often top to bottom). This “laying off” step evens out texture and helps prevent lap marks, especially with higher-sheen paints.
17) Keep a wet edgepaint in manageable sections, not heroic ones
A wet edge means you’re always rolling into paint that hasn’t fully dried yet, so sections blend. The secret is right-sizing your ambition:
paint a wall in vertical sections rather than rolling the whole thing randomly. If you stop mid-wall and come back later, you may see a lap mark where
the two zones meet (your wall will remember).
18) Don’t press the roller like you’re tenderizing steak
Pressing too hard squeezes paint out unevenly and can leave roller lines or dry patches. Let the roller do the work; reload when it starts sounding
dry or looking speckled. Secret sign you need more paint: the roller starts making a “sticky zipper” noise. That’s not motivation. That’s a warning.
19) Use an extension pole (your shoulders are not a renewable resource)
An extension pole improves reach, reduces fatigue, and helps you maintain consistent pressure and stroke length. The secret benefit is control:
you’ll get straighter passes and fewer “oops” touches against trim. It’s also the only tool that makes ceilings feel 10% less like a workout class.
20) Treat trim and doors like a different project (because they are)
Walls are forgiving. Trim is not. For trim and doors, sand smooth, remove dust carefully, and use a paint designed for trim/doors (often a harder,
leveling enamel). Apply thinner coats, and consider light sanding between coats for the best feel. Secret pro move: finish doors lying flat when possible
to reduce drips and improve leveling.
Drying, Curing, and Cleanup Secrets (The Part Everyone Rushes and Then Regrets)
21) Know “dry,” “recoat,” and “cure” are three different timelines
Paint may feel dry to the touch fairly quickly, but that doesn’t mean it’s ready for another coator ready to be scrubbed. Recoat time is when the next
coat won’t trap moisture or cause dragging. Cure time is when the paint reaches full hardness and durability. Secret reality check: treat freshly painted
walls gently for a while, especially in high-traffic areas.
22) Exterior paint is basically a weather negotiationchoose your window wisely
For exterior house painting, temperature and humidity matter a lot. Avoid painting when it’s too hot, too cold, too humid, or when dew/rain is likely.
Direct midday sun can make paint dry too fast, causing lap marks and poor leveling. A calmer, mild day often produces a better finish and longer-lasting
adhesion. Secret scheduling tip: plan for multiple days of stable weather so each coat gets proper drying time.
23) Remove painter’s tape the right way (and at the right pace)
Tape removal is where crisp lines go to dieunless you do it right. Pull tape back on itself at a low angle (often around 45 degrees), slowly and evenly.
If paint starts lifting, score gently along the edge with a utility knife to break the film before continuing. Secret: tape is helpful, but it’s not a
substitute for good technique and proper surface prep.
24) Clean tools immediatelyfuture you is not a volunteer
Good brushes and rollers can last a long time if cleaned well. Water-based paint cleans with soap and warm water; oil-based needs the appropriate solvent.
Rinse until water runs clear, reshape brush bristles, and let tools dry thoroughly. Secret: the fastest way to ruin a brush is to let paint harden near
the base of the bristles, where it forces the brush to splay and lose its edge.
Quick Recap: The “Pro Finish” Checklist
- Clean, repair, sand, and de-dust before painting.
- Prime only where it solves a real problem (stains, patches, bare surfaces, glossy areas).
- Use decent tools, correct roller nap, and consistent technique.
- Work in sections, keep transitions soft, and respect dry/recoat/cure times.
- Choose exterior painting days like you’re booking an outdoor wedding: no drama weather.
of Real-Life Painting Experiences (A.K.A. Lessons Learned the Loud Way)
The first time I painted a room, I believed in the myth of “one-coat coverage” the way people believe in spotting a unicorn in a Target parking lot.
I picked a bold color, bought the cheapest roller I could find, and started rolling like I was trying to win a speed contest. The wall looked fine…
until daylight hit it and revealed lap marks that spelled out my roller path like a treasure map. That was my first lesson: paint is patient, but it
also keeps receipts.
My second lesson came from skipping the boring partcleaning. I painted a kitchen wall that looked “not that dirty,” which is exactly what a wall wants
you to think right before it betrays you. A few weeks later, a section behind the stove started looking weirdly patchy. The paint hadn’t failed
dramatically; it just didn’t bond evenly. I learned that grease is basically paint repellent, and “good enough” cleaning is a gamble you usually lose.
Then there was the trim disaster. I figured trim paint was just wall paint’s shinier cousin. Wrong. I painted baseboards without sanding, and the finish
looked like it had tiny ridgeslike the trim had a subtle corduroy phase. Later, when I bumped a chair into it, the paint nicked easily. That’s when I
discovered the magic combination: scuff-sand + dust removal + the right paint for trim/doors + thinner coats. It wasn’t glamorous, but it was the first
time my trim looked like it belonged in the same zip code as “professional.”
One of my favorite “secret wins” happened when I finally used an extension pole. I’d avoided it because I thought it was optionallike fancy garnish.
The moment I rolled a wall with consistent pressure from top to bottom, I realized I’d been painting with a tired shoulder and uneven strokes for years.
The wall looked smoother, and I finished faster because I wasn’t constantly climbing up and down or readjusting my grip. It felt like discovering
power steering after driving a go-kart.
I also learned to respect the difference between dry and cured the hard way. I once washed a freshly painted hallway wall because it had a scuff.
The paint was “dry,” so I assumed it was ready. It wasn’t. I ended up with a shiny spot that caught the light forevermy own tiny monument to impatience.
Now I treat newly painted surfaces gently for a while and save the scrubbing for later, when the paint has had time to harden properly.
The biggest experience-based truth? The secret isn’t one magic trickit’s stacking small smart moves. When I take the time to patch and sand properly,
wipe away dust, box paint for consistent color, cut in with a well-loaded brush, roll in sections, and let coats dry as long as they need, the room
comes out looking calm and polished. And when it looks good, it feels goodlike the house just got a fresh haircut and decided to turn its life around.
Conclusion
If you remember only one thing from these 20 house painting secrets, make it this: the finish you want is mostly built before the paint goes on.
Prep thoroughly, choose the right products for the surface, work in manageable sections, and let the paint do what it’s designed to dolevel, bond, and cure.
With a little planning and a few pro techniques, you can get smooth walls, sharp trim, and a paint job that looks intentional (not accidental).


