Table of Contents >> Show >> Hide
- Why Baseboards Get So Gross (So Fast)
- The Pro-Approved “No All-Day Scrubbing” Method
- Step 1: Dry-Clean First (This Is Where the Time Savings Happens)
- Step 2: Clean While Standing (Yes, Really)
- Step 3: Use a Gentle Cleaner That Matches the Mess
- Step 4: Remove Scuffs Without Sanding the Paint Off
- Step 5: Detail the Corners and Crevices in 60 Seconds
- Step 6: Finish With a Dust-Repelling “Shield”
- The Fastest “Lazy Genius” Baseboard Routine (That Pros Actually Use)
- Baseboard Cleaning by Material
- Common Mistakes That Turn “Quick Clean” Into “All-Day Scrub”
- A Pro “Baseboard Toolkit” You Can Copy at Home
- When You Really Do Need “Extra Effort” (And How Pros Still Keep It Fast)
- Extra: of Real-World Experience (What Actually Works, Room by Room)
- Conclusion
Baseboards are the home’s sneakiest little liars. From across the room, they look innocentcrisp, white, and totally
“I have my life together.” Up close? They’re basically a scrapbook of your household: dust, pet hair, scuff marks,
mystery splatters, and that one gray smear that makes you wonder if your walls are slowly melting.
The good news: cleaning pros don’t spend their days crawling around like they dropped a contact lens in every room.
Their secret isn’t stronger elbow greaseit’s less scrubbing, smarter tools, and a routine that keeps grime from
throwing a party in the first place. Here’s the pro-style game plan for getting baseboards clean fast, without turning
it into an all-day, knee-shattering festival.
Why Baseboards Get So Gross (So Fast)
Baseboards sit right where dust settles and life happens. Air movement pushes dust down the wall, feet kick debris
toward the edges, and pets treat the baseboard line like a fur-deposit zone. Kitchens add grease film, bathrooms add
hair-spray residue, and hallways add scuffs from shoes, vacuums, and that one chair you keep “meaning to move.”
Pros also point out something most of us forget: if you wipe a dusty baseboard with a wet rag first, you’re basically
making “dirt paste.” That’s when scrubbing starts… and that’s exactly what we’re avoiding.
The Pro-Approved “No All-Day Scrubbing” Method
Think of this like a car wash for your baseboards: rinse (dry), wash (light), detail (targeted), and protect (so dust
doesn’t sprint back). The order matters more than the products.
Step 1: Dry-Clean First (This Is Where the Time Savings Happens)
Pros almost always start with a dry method to pull off loose dust and pet hair. Your best options:
- Vacuum with a brush attachment for the face of the baseboard.
- Crevice tool for the seam where the baseboard meets the floor (prime crumb real estate).
- Microfiber duster or cloth for quick runs in low-dust rooms.
- A clean, soft paintbrush for grooves, ornate trim, and cornersespecially if you pair it with a vacuum nearby.
The goal is to remove the “fluffy layer” first, so you’re not smearing dust around later. If you’re in a hurry, even
a quick vacuum pass makes the wet step dramatically easier.
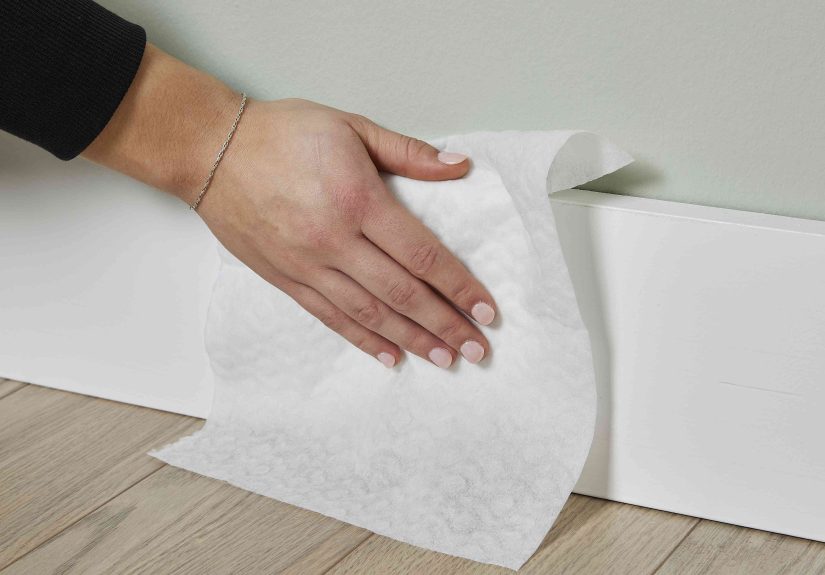
Step 2: Clean While Standing (Yes, Really)
Cleaning pros love any method that keeps you upright, because it’s faster and you’ll actually do it more than once a
year. Try one of these:
- Microfiber mop head on a flat mop or Swiffer-style tool for most baseboards.
- Spin mop + lightly damp microfiber to glide along long stretches without bending.
- A microfiber cloth “wrapped” around a broom or mop handle (secured with a rubber band or hair tie) for a budget-friendly hack.
Pro tip: If your baseboards have decorative curves, use the flat mop for the main surface, then switch to a handheld
microfiber cloth for the edges. That’s still way less time than scrubbing everything by hand.
Step 3: Use a Gentle Cleaner That Matches the Mess
For most homes, pros keep it simple: warm water + a few drops of dish soap. It cuts everyday grime without damaging
paint when used lightly.
For regular dust + light grime:
- Warm water in a small bucket
- A few drops of gentle dish soap
- Microfiber cloth or mop head (wring it out well)
For kitchen baseboards (grease film):
- Dish soap solution first
- If still tacky: a diluted degreaser on a cloth (not sprayed directly), then a clean water wipe
For “why is this sticky?” spots:
- A slightly stronger soapy mix
- Or a diluted vinegar + water wipe (test first, especially on delicate finishes)
The main rule pros repeat: don’t soak the baseboard. Wring your cloth until it’s just damp. Then dry
the section with a clean cloth, especially if you have wood floors or older trim.
Step 4: Remove Scuffs Without Sanding the Paint Off
Scuff marks are the reason people “end up scrubbing all day.” Pros don’t scrub the whole baseboardonly the scuffs.
- Melamine sponge (Magic Eraser-style) for many scuffsuse a light hand. It’s mildly abrasive, so gentle is the vibe.
- Baking soda paste (baking soda + a little water) for stubborn marks on durable finishesagain, test first.
- A tiny bit of oil on a microfiber cloth can help lift certain scuffs on painted trimwipe clean afterward so it’s not slick.
Important: Always test your scuff-removal method in a hidden spot. Some finishes dull easily, and the “fix” shouldn’t
look like you tried to erase the baseboard with sandpaper.
Step 5: Detail the Corners and Crevices in 60 Seconds
Pros don’t fight trim details with a full-size rag. They “downshift” tools:
- Cotton swabs for grooves, corners, and tiny ledges.
- Soft toothbrush for textured trim (light pressure, gentle cleaner).
- Paintbrush + vacuum for dry, stubborn dust packed into creases.
Step 6: Finish With a Dust-Repelling “Shield”
This is the pro move that makes future cleanings faster. After the baseboards are clean and dry, wipe them lightly
with something that reduces static and helps dust slide off:
- Dryer sheet (quick swipe along the baseboard)
- Reusable microfiber cloth for a lower-waste option
If you have pets (or people sensitive to fragrance), consider skipping heavily scented dryer sheets. The goal is
“less dust,” not “mystery perfume fog.”
The Fastest “Lazy Genius” Baseboard Routine (That Pros Actually Use)
Want clean baseboards without scheduling a whole baseboard-themed weekend? Pros recommend a simple rhythm:
- Every 2–4 weeks: quick dry pass (vacuum brush, microfiber duster, or flat mop with a dry pad)
- Every 1–3 months: light damp wipe for grime and fingerprints
- 1–2 times per year: deeper detail work (corners, scuffs, kitchen grease)
Households with pets, kids, or high traffic may want to bump that first step up to twice a month. The “no scrubbing”
magic comes from not letting grime harden into a permanent personality trait.
Baseboard Cleaning by Material
The safest approach is “least moisture, least abrasion.” Here’s how pros typically adjust:
Painted Wood Baseboards
- Dry dust/vacuum first
- Lightly damp microfiber with dish soap solution
- Spot-treat scuffs carefully (melamine sponge with gentle pressure)
- Dry immediately
Stained or Natural Wood Trim
- Avoid excess water
- Use a wood-safe cleaner or very mild soap solution on a wrung-out cloth
- Dry right away to prevent swelling or streaking
MDF or Older Trim
- Use minimal moisture (MDF can swell)
- Wipe in small sections
- Dry immediately
PVC or Composite Baseboards
- More forgiving with moisture
- Great candidates for the standing mop method
- Still: don’t drenchwater can run onto floors or seep into seams
Common Mistakes That Turn “Quick Clean” Into “All-Day Scrub”
- Skipping the dry step and immediately wiping with a wet cloth (hello, dirt paste).
- Using too much water and letting it drip onto wood floors or into seams.
- Going aggressive on scuffs with abrasives that dull paint or leave shiny patches.
- Spraying cleaner directly on the trim instead of onto the cloth (overspray happens, especially near floors).
- Cleaning baseboards first and then vacuuming/sweeping later (dust falls right back down).
A Pro “Baseboard Toolkit” You Can Copy at Home
Pros don’t need fancy gadgets; they need the right few tools within arm’s reach. Here’s the go-to kit:
- Vacuum with brush + crevice attachments
- Microfiber cloths (a fewclean ones matter)
- Flat mop or Swiffer-style tool
- Small bucket + gentle dish soap
- Soft paintbrush for crevices
- Cotton swabs (tiny detail heroes)
- Melamine sponge for scuffs (used gently)
- Dryer sheet or microfiber for dust-repelling finish
When You Really Do Need “Extra Effort” (And How Pros Still Keep It Fast)
Sometimes baseboards are genuinely grimylike behind the trash can, under the high chair zone, or near a stove that
has seen things. Pros still avoid full scrubs by working in layers:
- Dry vacuum/dust
- Soapy wipe in small sections
- Targeted degreaser only where needed
- Scuff removal only where visible
- Dry + dust-repelling finish
That’s not laziness. That’s efficiency. And it’s how you get “fresh baseboards” without adopting a new full-time job.
Extra: of Real-World Experience (What Actually Works, Room by Room)
Here’s what “no all-day scrubbing” looks like in real homesbecause baseboards don’t get dirty in a vacuum (even if a
vacuum is step one).
The “I Have Two Dogs” House
In pet homes, the baseboard line becomes a fur magnetespecially near doorways and the spots where pets like to rub
against walls like they’re applying for a scratch-and-sniff sponsorship. The fastest win here isn’t a cleaner; it’s
the vacuum crevice tool followed by a dry microfiber mop pass. That combo pulls the hair off without
smearing it. If you go straight to wet wiping, the fur clumps into little tumbleweeds that cling to your cloth like
it’s their emotional support blanket. After dry removal, a lightly damp cloth finishes the job in minutes.
The Kitchen “Grease Halo” Problem
Kitchen baseboards can get an invisible film that makes dust stick like it’s been glued on. The mistake most people
make is scrubbing harder. The better approach: dish soap first (it’s designed to cut grease), then reassess.
If it still feels tacky, use a diluted degreaser on a clothnot sprayed directlyjust on the problem zones near the
stove, trash can, and eating areas. The moment the grease film breaks, the grime wipes away quickly, and suddenly
it’s not a “scrub all day” situationit’s a “why didn’t I do this first?” situation.
The Hallway Scuff-Mark Speedway
Hallways collect scuffs from shoes, bags, vacuums, and anything with wheels (including that rolling laundry basket
you swear you steer carefully). The trick is to stop treating scuffs like they’re a full-wall emergency. Pros spot
treat. A melamine sponge used gently can knock out many scuffs in seconds. The key word is gentlythink
“polishing a strawberry,” not “sanding a deck.” For more stubborn marks, a tiny bit of baking soda paste can help,
but always test first so you don’t end up with an obvious dull patch that looks worse than the scuff.
The Bathroom Hair-Spray Fallout Zone
Bathrooms add their own special seasoning: hair products, toothpaste mist, and random drips that dry into little
glossy spots. Here, the “standing method” shines because you can do a quick damp wipe while you’re already cleaning
the sink and toilet. A flat mop with a microfiber pad lets you swipe the length of the baseboards without crouching,
and a cotton swab handles corners where residue hides. The difference-maker is dryingbathrooms stay humid, so a quick
dry cloth pass keeps the trim from looking streaky.
The “Move-Out Clean” Baseboards That Look Beyond Hope
If you’ve ever cleaned baseboards before a move, you know the feeling: “Did the previous tenant cook spaghetti by
launching sauce at the walls?” For heavy buildup, pros keep momentum by working in sectionstwo to three feet at a time.
Dry dust first, then soapy wipe, then spot-treat. The biggest sanity saver is avoiding the temptation to scrub the
entire baseboard evenly. You don’t need uniform pressure; you need uniform results. Hit the obvious grime, handle the
scuffs, clean the grooves, and move on. When you finish with a dust-repelling wipe, the baseboards look freshly painted,
and you get your afternoon back.
Conclusion
If baseboards are your least favorite chore, you’re not aloneand you’re not doomed to scrub forever. Pros keep it
fast by doing the dry step first, cleaning while standing whenever possible, spot-treating scuffs instead of scrubbing
everything, and finishing with a dust-repelling wipe so the next clean is even easier. Do it a little more often, and
you’ll do it a lot less painfully.


