Table of Contents >> Show >> Hide
- Meet ArduinoCade (a.k.a. Arduinocade): A Console Hiding in Plain Sight
- Why This Looks Impossible on Paper
- The Secret Sauce: Composite Video Generated in Software
- 8-Bit Console Tricks: Why the Games Feel Real Instead of “Tech Demo-ish”
- What Retro Games Work Best on ArduinoCade?
- How the Impossible Becomes Possible: Design Rules ArduinoCade Forces You to Respect
- Build Notes: What Makers Learn the Moment They Try This
- FAQ: Quick Answers Before You Reach for the Soldering Iron
- Workbench Stories: of “How This Feels” in Real Life
- Conclusion: The Best Kind of Impossible
- SEO Tags
There are two kinds of “retro gaming” projects in the world: the ones that use a Raspberry Pi and call it a day, and the ones that make you
stare at a parts list and mutter, “No. That can’t possibly be enough silicon.”
ArduinoCade (often written as Arduinocade) belongs proudly in the second category. It’s a tiny Arduino-based game system that
spits out color composite video, plays convincing 8-bit-era games, and even makes soundwhile running on a microcontroller that normally
spends its days blinking LEDs and reading temperature sensors like a responsible adult.
And yet… it works. Which is exactly why it feels like it shouldn’t.
Meet ArduinoCade (a.k.a. Arduinocade): A Console Hiding in Plain Sight
At a high level, ArduinoCade is a retro game system that generates its own video and audio signals directly from an Arduino-class AVR chip.
No dedicated graphics chip. No fancy video encoder. No “helpful” FPGA quietly doing the heavy lifting off-camera.
The “Wait, That’s It?” Parts List
The magic trick is how little hardware it needs. The canonical setup is basically:
- An AVR-based Arduino (famously in the Arduino Uno / Pro Mini family)
- A swapped crystal (because timing is everything)
- A few resistors (yes, resistors… doing video work)
- Optional: an IR receiver for controllers
- Your TV or monitor that still accepts composite input (or an adapter that does)
That’s the hook: it’s not trying to “run an emulator.” It’s building a tiny console by brute-forcing the electrical expectations of NTSC
composite video and old-school game design at the same time.
Why This Looks Impossible on Paper
Microcontroller Reality Check
A classic Arduino Uno-class AVR chip is not a powerhouse. You’re dealing with a microcontroller that, in its comfort zone, handles simple logic,
small buffers, and tight loops. It’s not meant to be a GPU, an audio engine, and a video encoder all at once.
If you’ve ever tried to push graphics to a display from an Arduino and thought, “Why is this so slow?”, congratulationsyou’ve already met the
villain: bandwidth and timing. Even drawing pixels to a small TFT over SPI can feel sluggish if you’re repainting too much too often.
Now imagine generating an entire TV signal from scratch.
Video Is a Hungry Beast
Composite video isn’t just “send image data.” It’s a tight choreography of voltages and timing: sync pulses, scanlines, and color encoding that expects
very specific frequencies. NTSC, for example, relies on a precise color subcarrier frequency that’s famously unforgiving. Miss timing, and your picture
rolls, tears, loses color, or becomes modern art (the kind your TV didn’t ask for).
So the idea that an 8-bit AVR can:
- Generate stable composite video timing
- Produce multiple color levels (not just black-and-white)
- Render game graphics (sprites, tiles, scrolling)
- And synthesize audio
…sounds like a prank. A very funny prank. But still a prank.
The Secret Sauce: Composite Video Generated in Software
Timing Like a Drummer Who Never Misses a Beat
ArduinoCade leans into a truth that embedded programmers learn the hard way: if you can control timing precisely enough, you can “fake” hardware.
The AVR toggles output pins at exact moments to form sync signals and pixel data as the TV scans each line.
This isn’t a new conceptthere have long been composite output approaches for Arduino-class chips (especially monochrome), where interrupts and careful
cycle counting create the illusion of a video adapter. ArduinoCade takes that general idea and turns the difficulty dial up to “why do you hate yourself?”
Resistors as a DIY Digital-to-Analog Converter
Composite video expects different voltage levels: sync, black, white, and intermediate levels for luminance and color tricks. ArduinoCade uses a small
resistor network to combine digital pin outputs into several voltage stepseffectively a tiny, cheap DAC made from parts you probably already have in a drawer.
That’s the first mind-bender: a few resistors turn binary outputs into analog-ish levels your TV accepts as legitimate video.
Color Without a Color Chip
Here’s the part that makes people squint at the screen: ArduinoCade is known for achieving dozens of on-screen colors by carefully
aligning output patterns with NTSC color timing. It’s also famous for running the AVR at a nonstandard clock (an overclocked frequency chosen to match
video timing demands) and then shaping the signal so the TV “sees” color where there is no dedicated encoder.
In other words: it convinces your television to cooperate through sheer confidence and impeccable punctuality.
8-Bit Console Tricks: Why the Games Feel Real Instead of “Tech Demo-ish”
Tiles, Sprites, and Scrolling: The Retro Optimization Trinity
If you want games to run on tiny hardware, you don’t paint the whole screen every frame. You reuse patterns and move small objects around. That’s why
classic consoles loved:
- Tiles (small reusable background blocks)
- Sprites (movable objects drawn over the background)
- Scrolling (shifting a tile map instead of redrawing everything)
ArduinoCade embraces that era’s design language because it isn’t nostalgiait’s survival. Tile maps let you store a “level” as compact indices instead of
full pixel data. Sprites let you update only what changes. Scrolling becomes a clever offset instead of a rewrite.
The result is that the games don’t feel like one-off experiments. They feel like they belong to a coherent, 8-bit-ish platform with its own aesthetic rules.
Sound: Tiny Chip, Surprisingly Legit Audio
ArduinoCade is also known for multi-voice sound synthesisthink classic bleeps, crunchy bass lines, and little melody hooks that get stuck in your head.
It does this with software-driven synthesis techniques (including wavetable-style approaches) while still juggling video timing.
If that sounds like too much, remember: retro audio wasn’t “high fidelity.” It was high personality. A few channels, clever envelopes, and
rhythmic discipline can sound shockingly rich when the goal is charm, not realism.
Input: IR Controllers and “Whatever You’ve Got” Energy
Many ArduinoCade builds support input via IR, which opens up a practical world of cheap remotes and simple receivers. It’s very on-brand: instead of
requiring proprietary controllers, it politely accepts whatever you’ve got lying aroundlike a true retro hacker project.
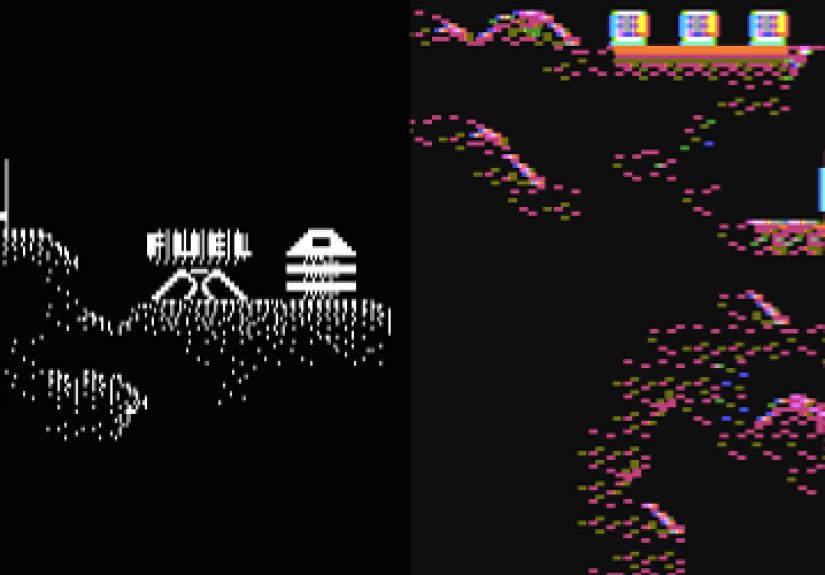
What Retro Games Work Best on ArduinoCade?
The best matches are arcade-style games that fit the strengths of tile-and-sprite rendering and don’t require huge assets or complex physics.
Think:
- Breakout / Arkanoid-style games: simple geometry, fast response, satisfying audio cues
- Space shooter games: repeated enemy patterns, sprite bullets, score-driven pacing
- Maze / chase games: tile maps, simple AI, iconic sound loops
- Platformer micro-levels: short stages, tight collision rules, small sprite sets
- Puzzle games: compact state, low asset needs, highly replayable
What it’s not trying to do is full-console emulation of complex systems. If you came here hoping for “Arduino runs the entire SNES library,”
that’s a different party, and it’s being hosted by hardware with way more RAM.
ArduinoCade’s brilliance is that it doesn’t pretend to be a general-purpose emulator box. It’s a purpose-built retro platform with its own constraintsand
the games are designed (or adapted) to thrive inside them.
How the Impossible Becomes Possible: Design Rules ArduinoCade Forces You to Respect
1) You Budget CPU Cycles Like They’re Rent Money
On a microcontroller generating video, you don’t get to casually “add a particle system.” Every feature competes with the strict timing needed to keep the
TV signal stable. The real discipline is learning what can run:
- Every scanline
- Every frame
- Only during vertical blanking (when the TV isn’t actively drawing the picture)
- Or only when the player pauses to admire your pixel art
2) You Store Graphics Like a Minimalist Who Owns Exactly One Chair
Memory is tight on AVR-class chips, so you store art efficiently:
- Use tiles and indices instead of raw bitmaps
- Compress repeated patterns
- Keep sprite sheets small and reusable
- Prefer simple animations that “read” well in motion
This is why retro graphics had such a distinct style: they weren’t just cutethey were optimized.
3) You Let the TV Do the Heavy Lifting (Because It Already Is)
A composite TV signal is an analog compromise with a long history of “good enough.” ArduinoCade exploits that. It doesn’t need perfect pixels; it needs a
stable signal and a consistent visual grammar. The moment you accept that, you start designing games that look great on a slightly fuzzy displaylike they
were meant to live there.
Build Notes: What Makers Learn the Moment They Try This
Overclocking Isn’t Just Bragging Rights
ArduinoCade’s approach is tied to video timing, and that often means running the chip at a special frequency that plays nicely with NTSC math. That’s why
builds talk about swapped crystals and unusual clock rates. It’s not “because faster.” It’s because stable.
Signal Integrity: The Most Boring Part That Will Ruin Your Day
Composite video is sensitive. Long jumper wires, messy grounds, and sloppy connections can introduce noise, ghosting, or rolling. If your picture looks like a
haunted VHS tape, it’s often not your codeit’s your wiring auditioning for a horror movie.
Troubleshooting That Actually Helps
- Keep wiring short and tidy, especially around video output
- Use a solid ground reference and avoid breadboards when possible
- Test on more than one display (some TVs are pickier than others)
- If input feels laggy, simplify the controller path and check timing conflicts
- Start with a known working demo before adding “just one more feature”
FAQ: Quick Answers Before You Reach for the Soldering Iron
Is ArduinoCade the same as a Raspberry Pi emulator box?
Not at all. A Pi runs emulators by brute force. ArduinoCade behaves more like a tiny original console: it generates video and audio directly and runs games
designed for its constraints.
Do you need a CRT TV?
A CRT is the most “authentic,” but many modern TVs still accept composite (or you can use adapters). Results vary by displaysome are forgiving, some are dramatic.
Can it run “real” classic ROMs?
The spirit here is faithful recreations and purpose-built games rather than full-system emulation. ArduinoCade shines when the game is made for the hardware.
Workbench Stories: of “How This Feels” in Real Life
There’s a specific emotional arc that tends to happen when people first try an ArduinoCade-style build, and it starts with unreasonable optimism.
You look at the schematicthree resistors and a crystal swapand you think, “Cool, this is going to be a relaxing afternoon project.” That’s adorable.
Step one is usually the first signal. Not the first picture. The first signal. A vague flicker. A rolling band of gray.
Something that makes your TV react in a way that says, “I don’t like this, but I acknowledge your existence.” This is where you learn that video output
is half code and half cable hygiene. You start shortening wires like you’re pruning a bonsai. You move one ground connection and suddenly the screen is
less haunted. You move it back and the ghosts return.
Step two is the first stable image, which feels like winning a small Nobel Prize. The picture locks. The rolling stops. You get a test
pattern or a chunky title screen. And then you realize the microcontroller is now living on a schedule stricter than a New York subway. Every time you add
a new gameplay featurecollision checks, extra enemies, fancier soundthere’s a tiny voice in the back of your head whispering, “Are you sure you can afford
those CPU cycles?” It’s budgeting, but make it dramatic.
Step three is graphics reality. You learn to love tiles. You stop thinking in “pixels” and start thinking in “reusable little squares.”
You reuse the same 8×8 brick pattern everywhere like it’s the hottest interior design trend of 1984. Sprites become your VIPs: they get special treatment,
because they move, and movement is what makes a game feel alive. Someone inevitably creates (or borrows) a sprite editor workflow, because hand-writing bitmap
arrays feels like carving a statue using only a spoon.
Step four is sound, where the project graduates from “cool picture” to “wait, this has vibes.” A simple melody line or a crunchy laser effect
suddenly makes the whole thing feel like a real console. The funny part is how quickly your standards shift. In normal life, you’d call it a beep. In retro life,
it’s an expressive lead instrument with emotional range and a promising future.
Finally, there’s the moment you hand someone a controller (or an IR remote you found in a drawer), and they play it without asking how it works. That’s the
true win: when the magic becomes invisible. Your Arduino stops being “a board” and starts being “a console.” And for a split second, you understand why retro
hardware engineers were equal parts genius, stubborn, and probably fueled by caffeine.
Conclusion: The Best Kind of Impossible
ArduinoCade isn’t impressive because it’s practical. It’s impressive because it’s disciplined. It takes the hard limits of a tiny microcontroller,
the finicky nature of composite video timing, and the ruthless economics of retro game designand turns them into a working entertainment machine.
The end result is a reminder that “powerful” isn’t always about GHz and gigabytes. Sometimes “powerful” is a perfectly timed pulse train, three resistors,
a brave clock frequency, and game design smart enough to make every cycle count.