Table of Contents >> Show >> Hide
- Why Paint an Upholstered Armchair Instead of Reupholstering?
- Is Your Armchair a Good Candidate for Upholstery Paint?
- Choose Your Method: Three Popular Ways to Paint Upholstery
- Tools & Materials Checklist
- Step-by-Step: How to Paint Upholstered Armchairs (The Reliable Workflow)
- Step 1: Clean like you mean it
- Step 2: Protect what you’re not painting
- Step 3: Test your method
- Step 4: Apply thin coats (the golden rule)
- Step 5: Keep fabric slightly damp (if using diluted paint techniques)
- Step 6: Let it dry fully
- Step 7: Smooth between coats (only if needed)
- Step 8: Build color gradually
- Step 9: Seal (when your method requires it)
- Design Ideas That Make a Painted Armchair Look Custom
- Durability, Comfort, and Cleaning: The Honest Reality
- Common Mistakes (and How to Avoid the “Crunchy Chair” Outcome)
- When You Should NOT Paint Upholstered Armchairs
- FAQ: Quick Answers About Painted Upholstered Armchairs
- Real-World Experiences: What DIYers Notice After Painting Upholstery (Extra Notes)
If you’ve ever looked at an upholstered armchair and thought, “I love you… but you’re giving sad hotel lobby,” you’re not alone. Painted upholstered armchairs are the DIY glow-up that lives somewhere between “I’m being responsible with money” and “I refuse to let this chair win.” With the right fabric, the right paint approach, and a little patience (plus the emotional support of a spray bottle), you can turn a dated, stained, or just-plain-not-your-style armchair into a custom statement piece.
This guide walks you through what actually works, what looks good on Instagram but feels like a tortilla chip in real life, and how to get that “designer chair” vibe without paying designer-chair money. We’ll talk about methods (chalk-style paint washes, true fabric paints, upholstery sprays), the best candidates for painting, durability realities, and the common mistakes that make people swear off DIY forever.
Why Paint an Upholstered Armchair Instead of Reupholstering?
Reupholstery is amazingwhen you have the time, the budget, and the emotional resilience to choose fabric under pressure. Painting upholstery can be a smart alternative when:
- The chair is sturdy but the fabric is stained, faded, or stuck in another decade.
- You want a quick style shift (hello, modern monochrome or cozy cottage neutrals).
- You’re working with an accent chairsomething used occasionally, not your daily “I live here now” seat.
- You need an affordable refresh while you save for a full reupholstery later.
Think of painting upholstery like giving your chair a new outfit using pigment instead of fabric. It’s not identical to reupholstering, and it shouldn’t pretend to be. But it can look shockingly high-end when done thoughtfully.
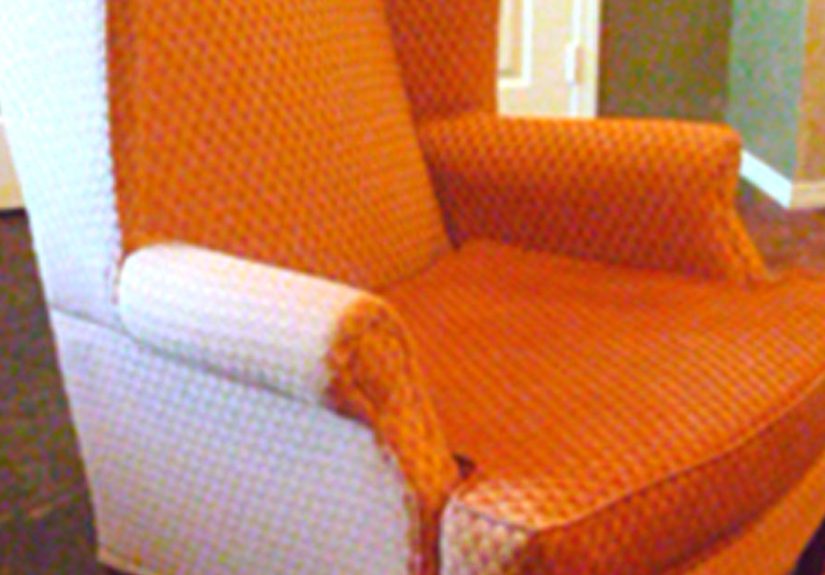
Is Your Armchair a Good Candidate for Upholstery Paint?
Your results depend heavily on what you’re painting. The best painted upholstered armchairs start with a good match between fabric and method.
Best candidates
- Tightly woven, smoother fabrics (less texture = easier coverage, softer final feel).
- Firm upholstery that doesn’t shift or wrinkle dramatically when you sit.
- Pieces that are clean and odor-free (paint is not a miracle therapist for smoke smells).
- Lighter-to-darker color changes (dark-to-light is possible, but it’s a “bring snacks” situation).
Proceed with caution
- Velvet, velour, heavy texture, or deep nap: these can end up rough or crusty if the wrong product sits on top.
- High-movement cushions: if the fabric constantly flexes and crinkles, paint is more likely to crack over time.
- Your favorite everyday chair: painting can change the hand-feel, even when it turns out “good.”
Always do a small test in an inconspicuous spot (back skirt, under a cushion, behind a flap). This is the DIY version of a seatbelt: slightly annoying until it saves your life.
Choose Your Method: Three Popular Ways to Paint Upholstery
“Painted upholstered armchairs” can mean a few different techniques. Pick based on comfort goals, durability needs, and how much time you want to spend bonding with your chair.
1) Fabric paint (brush-on) for a flexible finish
True fabric paint is designed to flex with fibers. It’s a strong choice when you want a softer, more “still feels like fabric” result. You’ll often apply thin coats and let each layer dry fully. Many fabric paints also come in markers for detail work (piping, stripes, small patterns).
Best for: accent chairs, dining seat cushions, detailed designs, moderate-use pieces.
Tradeoff: multiple coats may be needed for deep color or full coverage.
2) Upholstery spray or fabric spray paint for speed
Upholstery sprays can be the fastest route to a color refresh. Some products are formulated to keep fabric soft and the weave visible, which is exactly what you want if you’re aiming for “updated” rather than “painted.”
Best for: quick makeovers, evenly colored fabric, projects where you can ventilate well.
Tradeoff: overspray management is real, and some fabrics can feel rougher afterwardespecially nap fabrics.
3) Chalk-style paint “wash” (a diluted paint technique)
This is the method that made painted upholstery a mainstream DIY trend. You dilute chalk-style paint with water to create a washmore like tinting the fibers than frosting them. The key is thin coats, keeping fabric slightly damp as you work, and letting each coat dry thoroughly. Many DIYers seal the final finish (often with wax) to improve durability and soften the feel.
Best for: decorative chairs, farmhouse/cottage looks, classic silhouettes like wingbacks.
Tradeoff: texture changes are common, and thick paint layers can crack or feel stiff.
Tools & Materials Checklist
Gather your supplies before you start. Mid-project store runs are how “Saturday DIY” becomes “three-week saga.”
- Vacuum with upholstery attachment
- Lint roller and soft brush (for crumbs you don’t want to meet again)
- Mild upholstery cleaner (or gentle soap and water, used sparingly)
- Drop cloths/plastic sheeting and painter’s tape
- Spray bottle (for misting fabric during certain methods)
- Paint choice: fabric paint, upholstery spray, or chalk-style paint
- Optional: fabric medium (helps flexibility with some paints)
- Soft bristle paintbrushes (a few sizes) and small detail brush
- Fine sanding sponge/block (if your method calls for smoothing between coats)
- Protective gloves, mask/respirator for spray methods, and good ventilation
- Optional sealant: wax or fabric-safe topcoat (method-dependent)
Step-by-Step: How to Paint Upholstered Armchairs (The Reliable Workflow)
The steps below work as a general roadmap, with small tweaks depending on whether you’re using fabric paint, upholstery spray, or a chalk-style wash.
Step 1: Clean like you mean it
Vacuum thoroughly, including seams, tufts, and under cushions. Use a lint roller for pet hair. Spot-clean stains and let everything dry completely. Paint and grime don’t become friends; they become weird lumps.
Step 2: Protect what you’re not painting
Cover wood legs, nailhead trim, and nearby surfaces with tape and plastic. If your chair has a wood frame you plan to paint later, you can still protect it now to keep upholstery work clean and controlled.
Step 3: Test your method
Test color, absorption, and feel in a hidden spot. Check: coverage (does it sink in or sit on top?), texture (does it stiffen?), and dry rub (does color transfer once dry?).
Step 4: Apply thin coats (the golden rule)
Whether brushing or spraying, thin layers win. Work in manageable sections. Brush in the same direction as the fabric texture for a more even look, and dab carefully into seams, buttons, and tufting so you don’t end up with “surprise original color” hiding in creases.
Step 5: Keep fabric slightly damp (if using diluted paint techniques)
For chalk-style wash methods or certain acrylic approaches, lightly misting the fabric can help pigment move into the fibers more evenly. You’re aiming for “damp,” not “I could wring this out.”
Step 6: Let it dry fully
Dry time matters. Give each coat time to set before adding another. Rushing is how you get tacky spots, drag marks, and fingerprints that will haunt you like an unsent text at 2 a.m.
Step 7: Smooth between coats (only if needed)
If your fabric feels rough after drying, lightly smoothing between coats can improve the hand-feel. Go gently and evenlythis is a spa facial, not a demolition job. Vacuum the dust afterward.
Step 8: Build color gradually
Most projects take multiple coats, especially if you’re covering a pattern. Expect the first coat to look questionable. This is normal. Many great painted upholstered armchairs look messy halfway through. Trust the process, not your mid-coat panic.
Step 9: Seal (when your method requires it)
Some techniques benefit from a protective finish to improve durability and help the fabric feel less chalky or dry. Apply sealant sparingly and evenly, then allow cure time before heavy use. Always follow the product’s directions for safety and longevity.
Design Ideas That Make a Painted Armchair Look Custom
Once you realize you can recolor upholstery, the design possibilities open up fast. Here are a few crowd-pleasers that look intentional (not accidental):
Classic monochrome
Painting upholstery and the chair frame in the same color can create a modern, sculptural look. This is especially striking on wingbacks and barrel chairs.
Subtle pattern cover-up
If your chair has a loud pattern, use a method that builds opaque coverage in thin layers. Solid neutrals (warm whites, greige, charcoal) are forgiving and look expensive.
European grain-sack vibe
Try painted stripes on the back or cushion face. Keep it simple: two or three stripes with clean spacing reads “designer,” not “third-grade art class.”
Two-tone drama
Paint the inside back and seat one tone, and the arms/exterior another. It highlights the chair’s shape and makes even a thrifted armchair look curated.
Durability, Comfort, and Cleaning: The Honest Reality
Painted upholstered armchairs can be durable, but the experience depends on method and use. Here’s what to expect:
Comfort and texture
- Some finishes stay surprisingly fabric-like (especially certain fabric sprays and fabric paints).
- Some finishes feel firmernot necessarily uncomfortable, but different.
- Thick paint layers can feel stiff and may crack where fabric flexes the most.
Cleaning and maintenance
- Vacuum regularly to keep dust from dulling the finish.
- Blot spills quicklydon’t scrub like you’re trying to erase your mistakes.
- Use gentle cleaners and test first. Painted fabric can react differently than raw upholstery.
- Keep it out of harsh sun when possible; color fade is real for most pigments over time.
Pro tip: if your chair will live in a high-traffic zone (kids, pets, snack-based decision-making), consider using it as an accent piece or opting for a method with a softer, more flexible finish.
Common Mistakes (and How to Avoid the “Crunchy Chair” Outcome)
Mistake: Applying paint too thick
Thick coats sit on top, stiffen, and can crack. Fix it by diluting where appropriate, applying thinner layers, and building coverage gradually.
Mistake: Skipping fabric prep
Dust and oils reduce adhesion. Vacuum thoroughly and clean gently. Let the chair dry completely before paint touches it.
Mistake: Ignoring seams, piping, and tufting
Painted upholstery looks best when coverage is complete. Use a small brush to work pigment into folds and details so the “before” color doesn’t peek through like an unwanted opinion.
Mistake: Not respecting cure time
Dry-to-touch is not the same as cured. Give your chair time before heavy sitting, blankets, or white jeans that have never known fear.
When You Should NOT Paint Upholstered Armchairs
Painting is a fantastic optionuntil it isn’t. Skip paint and consider reupholstering, slipcovering, or replacing fabric when:
- The chair is a valuable antique or a sentimental heirloom you want to preserve perfectly.
- The upholstery is torn, sagging badly, or smells like it survived three concerts and a rainstorm.
- You need a daily-use chair to feel plush and unchanged in texture.
- The fabric is extremely delicate (silk-like) or deeply napped and you can’t risk roughness.
FAQ: Quick Answers About Painted Upholstered Armchairs
Will paint rub off on clothing?
With the right product, proper drying, and appropriate sealing (when needed), transfer can be minimal. Always do a rub test after curing: a clean white cloth, firm pressure, no mercy.
How many coats will I need?
It depends on the original fabric color and pattern, plus your product choice. Many projects land in the 2–4 coat range. Pattern cover-ups can take more.
Can I paint the wood frame too?
Absolutely. Many of the best transformations come from pairing fresh upholstery color with updated legs/arms in a complementary finish (matte black, warm wood tones, or a matching monochrome look).
Is this cheaper than reupholstery?
Often, yesespecially for large armchairs. But “cheaper” is only part of the equation: painting is also faster and less technically intimidating than full reupholstery.
Real-World Experiences: What DIYers Notice After Painting Upholstery (Extra Notes)
Here’s the part most tutorials don’t say out loud: the emotional arc of painting upholstered armchairs is basically a rom-com. You start excited, then you hit a dramatic misunderstanding (“Why does it look streaky?!”), then you work through it, and by the end you’re either in love or quietly Googling “how to reupholster a chair” at midnight. Totally normal.
Experience #1: The first coat looks like a mistake.
This is the most universal moment. The chair often looks blotchy, the original pattern may show through, and you’ll wonder if you just invented “abstract upholstery.” In reality, thin coats are doing their job. They’re tinting fibers and building coverage gradually. If you try to “fix” the first coat by slapping on a thick second coat immediately, you’re more likely to create stiffness than success. The calm move is to let it dry fully, then evaluate coverage in good light.
Experience #2: Texture changes are realbut not always bad.
Many painted chairs feel slightly firmer at first, especially with chalk-style methods. Over time, some finishes soften a bit with gentle use (think: breaking in a new pair of shoes, but less painful). On the other hand, certain spray methods and fabric paints can preserve softness surprisingly well. The best mindset is to treat your finished chair as a “new material”: still comfy, still functional, just not exactly the same as untreated upholstery.
Experience #3: Tufting and piping take patience.
The prettiest upholstered armchairs often have the most detailbuttons, tufting, trim, seams, folds. Those details also love to hide the old color. DIYers routinely report that the “secret sauce” is switching to a smaller brush for seams and working pigment in gently, rather than trying to flood the area with paint. It’s slower, but it’s how you avoid the polka-dot effect where every tuft becomes a tiny time capsule of the original fabric.
Experience #4: Dry time is where most people get impatient.
Upholstery holds moisture longer than a flat board. Even if the surface feels dry, deeper fibers may still be curing. If you sit too soon, you can compress paint layers before they’re ready, which may cause sticking, texture issues, or uneven sheen. Many successful projects treat the chair like fresh nail polish: “It’s dry,” you say, and the universe replies, “Is it, though?”
Experience #5: The finish looks better once the whole chair matches.
Half-painted upholstery can look rough simply because it’s half-painted. Once the entire chair is uniformseat, back, arms, and all those little creasesthe look snaps into place. DIYers often say the “wow moment” happens late, not early. That’s why planning your work in sections (and finishing what you start) matters more than perfect brush strokes on coat one.
Experience #6: Painted upholstered armchairs shine as accent pieces.
A painted armchair in a bedroom corner, home office, reading nook, or formal living space can be the perfect statement. Many makers note that painted upholstery is ideal when you want a chair to look tailored and styledespecially in rooms where it won’t be used like a daily lounge throne. If you want something you’ll flop into every night, choose a method known for softness (or save the chair-painting experiment for a less demanding seat).
Bottom line: painted upholstered armchairs are a legitimate design move when you choose the right chair, use thin coats, and respect drying and curing. Done well, it looks custom. Done hastily, it looks like you tried to frost a chair. Aim for custom.


