Table of Contents >> Show >> Hide
- Why a stump table works in almost any style
- What “natural” really means (and what it doesn’t)
- Choosing the right stump: size, species, stability
- Drying and moisture: the part everyone wants to skip (but shouldn’t)
- Bark on or bark off: the aesthetic vs. the reality
- DIY workflow: how a stump becomes a table
- Step 1: Level and plan for stability
- Step 2: Debark and clean (if going bark-off)
- Step 3: Sand in stages (don’t jump from “rough” to “perfect”)
- Step 4: Dust control (the unglamorous secret to a beautiful finish)
- Step 5: Check for insects and decide on a prevention plan
- Step 6: Decide what to do with cracks and checks
- Step 7: Choose a finish that matches your lifestyle
- Step 8: Apply finish in multiple thin coats
- Step 9: Protect your floors and improve stability
- How to style a natural stump side table without turning your home into a campsite
- Indoor vs. outdoor use: don’t treat them the same
- Buy vs. DIY: what you’re really paying for
- Common mistakes (and how to fix them)
- Care and maintenance: keep it pretty without babysitting it
- FAQ
- Conclusion: the easiest way to bring the outdoors in (without bugs as roommates)
- Real-world experiences: what people learn after living with a stump table (about )
A natural tree stump side table is the rare piece of furniture that can truthfully say,
“I used to be outside.” It’s equal parts décor and conversation starterlike a houseplant,
but sturdier and far less judgmental when you forget to water it.
Whether you buy one ready-made or DIY your own, a stump table brings warmth, texture, and a
one-of-a-kind silhouette into your space. No two are identical (because, shockingly, trees are
not mass-produced). Done right, it can look rustic, modern, Scandinavian, boho, or “I own a cabin
in my heart even if my zip code disagrees.”
Why a stump table works in almost any style
Natural wood has a built-in superpower: it softens a room. Hard edges and sleek surfaces are great,
but they can make a space feel a little “tech demo.” A tree stump side table adds organic shape,
visible grain, and tactile detailespecially end grain, which is basically wood’s fingerprint.
- It’s sculptural: Even a simple cylinder reads like art.
- It’s versatile: Nightstand, drink table, plant stand, pedestal, or extra seat (if you’re brave).
- It’s timeless: Wood + simple form rarely looks dated.
- It’s sustainable-ish: Especially when made from a salvaged or storm-fallen trunk.
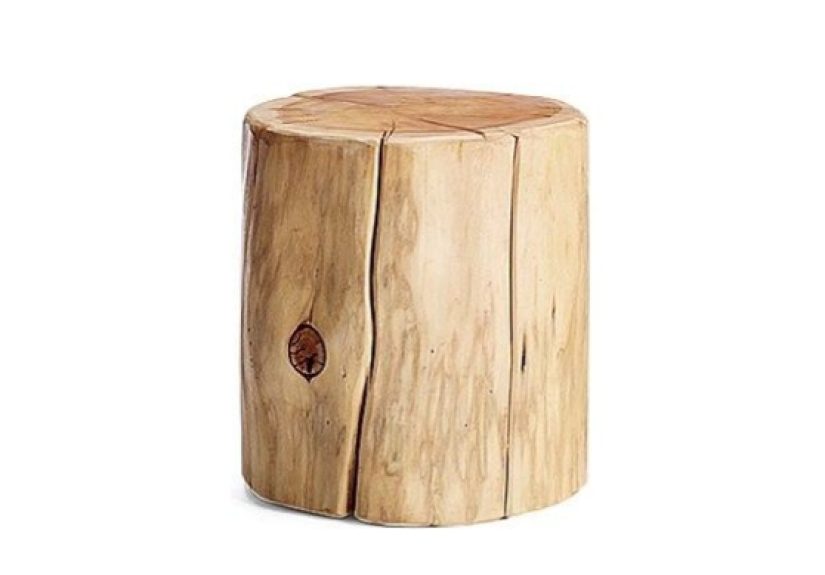
What “natural” really means (and what it doesn’t)
“Natural” can mean a few things in stump-table land. Some pieces are barely processed: debarked,
sanded, sealed, and left to show every knot, crack, and scar. Others are “natural-inspired” and
molded from concrete or resin to mimic wood (still cool, just not the same vibe).
In this article, we’re talking about the real deal: an actual stump (or thick log section) used as a
side table with minimal shapingcelebrating imperfections instead of hiding them under a glossy coat
so thick it could qualify as a phone screen protector.
Choosing the right stump: size, species, stability
A great stump table starts with the right chunk of wood. You’re looking for something that’s
structurally sound, reasonably dry, and sized for how you’ll use it.
Quick sizing guide
- Height: 18–24 inches works for most sofas and chairs. (Measure your seat height and aim close.)
- Diameter: 10–16 inches feels balanced in most living rooms; 16–20 inches can work as a statement piece.
- Weight: Heavier is usually steadierbut also more “oops, my back.” Plan accordingly.
What to avoid
- Soft, punky spots: If you can dent it with a fingernail, it’s not furniture yet.
- Active insect activity: Fresh frass (powdery dust), new exit holes, or movementhard pass until treated.
- Pressure-treated wood: Not what you want for indoor accent furniture.
- Severe rot: Character is charming; structural failure is not.
Drying and moisture: the part everyone wants to skip (but shouldn’t)
Wood moves as it dries. That movement is why stump tables crack, check, and sometimes warp.
The goal isn’t to eliminate movement (wood will always be wood), but to reduce the drama.
Here’s the key idea: wood intended for a heated indoor space generally needs to be drier than wood used
outdoors or in construction. Air drying can reduce moisture substantially, but for indoor furniture you’ll
often want a lower moisture content than “feels dry to the touch.”
Practical ways to tell if your stump is ready
- Use a moisture meter: An inexpensive pin-style meter is the easiest reality check.
- Watch for new cracking: Fresh checks widening quickly can mean it’s still drying fast.
- Weight test: If it keeps getting noticeably lighter week to week, moisture is still leaving.
- Time + environment: Indoors with airflow is better than outdoors where humidity swings.
If you’re DIY-ing, patience pays: let the stump dry in a sheltered, ventilated area. Elevate it off the floor,
rotate it occasionally, and don’t trap it in a plastic bag like it’s leftovers. (Wood needs to breathe. So do you,
especially when you get to the finishing step.)
Bark on or bark off: the aesthetic vs. the reality
Bark-on stump tables look wildly “forest chic,” but bark is also the part most likely to loosen, flake, and
shed crumbs like a pastry. Bark-off tables are easier to seal and maintain, and they age more predictably.
If you remove the bark
- It’s easier to sand smooth and seal evenly.
- You reduce the risk of bark separating later.
- You get a cleaner silhouette that fits modern décor.
If you keep the bark
- Stabilize it (loose bark needs to be reattached or consolidated).
- Seal thoroughly to minimize flaking and to help lock in dust.
- Expect some “nature confetti” over timeespecially in dry climates.
DIY workflow: how a stump becomes a table
Making a natural tree stump side table isn’t hard, but it can be time-consuming. Think of it like a spa day
for wood: exfoliate (sand), hydrate (finish), and send it back into the world glowing.
Step 1: Level and plan for stability
First, decide which face is the top. Many stumps aren’t perfectly squaretrees are not known for their
precision machining. If the top wobbles a glass, flatten it by sanding high spots or trimming carefully.
For the base, you can either flatten it the same way or add adjustable feet later.
Step 2: Debark and clean (if going bark-off)
A chisel and mallet can help pop bark off in sections, especially if the stump has been drying for a while.
Remove any loose cambium (the stringy layer under bark), dirt, and grit. Anything left behind becomes a
sanding nightmare and a finish adhesion problem.
Step 3: Sand in stages (don’t jump from “rough” to “perfect”)
Sanding is where the stump transforms from “yard debris” to “intentional décor.” Start coarse to remove tool marks
and uneven texture, then work up to smoother grits for a touch-friendly surface.
- Coarse (60–80 grit): leveling, removing rough patches, softening sharp edges
- Medium (100–150 grit): refining scratches, smoothing the sides
- Fine (180–220 grit): final smoothing before finishing
Pro tip: end grain drinks finish like it’s been hiking in the desert. Sanding it well helps you get a smoother final
surface and reduces the “why is my finish disappearing?” effect.
Step 4: Dust control (the unglamorous secret to a beautiful finish)
Vacuum thoroughly, then wipe with a tack cloth or a slightly damp microfiber cloth (depending on your finish system).
Dust left behind becomes bumps and specks that will haunt you foreveror at least until you re-sand.
Step 5: Check for insects and decide on a prevention plan
Any natural wood can be home to insects, especially if it was recently cut or stored outdoors. If you see signs
of wood-boring insects, don’t panicbut do take it seriously. Options include:
- Heat treatment: Kiln drying (or professional heat treatment) is highly effective.
- Borate treatments: Often used as preventative treatments on unfinished wood. Follow label directions carefully.
- Seal the wood: A proper film finish can reduce future egg-laying sites by closing up pores and crevices.
Important: many borate treatments work best on bare wood and may not penetrate well if the stump is already sealed.
If you’re unsure, consult local extension guidance or a pest professionalespecially if you’re seeing active infestation.
Step 6: Decide what to do with cracks and checks
Cracks are normal as rounds dry. You have three main approaches, and none of them are morally superior (despite what
the comment section of the internet may imply):
- Leave them: The “this is real wood” approach. Seal well to keep debris out.
- Fill them clear: Epoxy can stabilize and keep the look natural while preventing crumbs from moving in.
- Fill them decorative: Tinted epoxy or inlays can turn cracks into intentional design.
Step 7: Choose a finish that matches your lifestyle
The finish is where function meets aesthetics. If this table will hold drinks, plants, or that one friend who always
sweats condensation like it’s an Olympic event, durability matters.
| Finish Type | Look & Feel | Durability | Best For | Maintenance |
|---|---|---|---|---|
| Polyurethane (water- or oil-based) | Ranges from matte to gloss; forms a protective film | High (especially for water rings and everyday wear) | Drink tables, high-use spots, homes with kids/pets | Low; recoat if worn |
| Hardwax oil | Natural matte/satin; enhances grain without heavy plastic look | Medium–High (good, but depends on product and upkeep) | “Natural” aesthetic lovers; easy spot-repair fans | Moderate; refresh areas as needed |
| Penetrating oils (tung/linseed blends) | Warm, natural; soaks in | Medium (less water resistance than a film finish) | Low-traffic accent use; décor-only surfaces | Higher; periodic re-oiling |
| Wax-only | Soft sheen; very “raw wood” feel | Low | Decorative pieces that won’t see moisture | High; frequent touch-ups |
If you’re aiming for a truly natural stump side table that still survives real life, hardwax oil is a popular
sweet spot. If you want maximum protection, polyurethane is the tank of wood finishes.
Either way: read the product label, work in good ventilation, and consider appropriate respiratory protection
when sanding or applying finishes.
Step 8: Apply finish in multiple thin coats
End grain soaks up finish fast, especially on the top surface. Plan for multiple thin coats rather than one thick
coat (which can drip, bubble, or look uneven). Lightly sand between coats if the finish system recommends it, then
remove dust before recoating.
Also: cure time is not the same as “dry to the touch.” Many finishes need days to reach full hardness. If you put a
lamp on it too soon, congratulationsyou’ve invented modern art called “Permanent Base Ring.”
Step 9: Protect your floors and improve stability
- Felt pads: simple, fast, floor-friendly
- Adjustable feet: great for uneven floors and wobble control
- Hairpin legs or a small base: can lift the stump for a more modern profile
- Hidden casters: useful for heavier stumps (and for rearranging furniture without summoning help)
How to style a natural stump side table without turning your home into a campsite
The secret is contrast. Pair the stump’s rugged texture with something refined: a crisp linen shade, a ceramic vase,
a metal tray, or a sleek sofa. The stump becomes the warm anchor instead of the whole theme.
Easy styling formulas
- Modern: stump + black metal lamp + simple book stack
- Boho: stump + woven basket nearby + trailing plant (but use a saucer!)
- Scandi: stump + neutral candle + minimal ceramics
- Rustic farmhouse: stump + vintage-style lantern + textured throw
- Small-space friendly: stump + round tray to create a flat, stable surface for drinks
Indoor vs. outdoor use: don’t treat them the same
Indoors, your biggest enemies are water rings, scratches, and seasonal wood movement. Outdoors, add UV, rain, and
constant humidity swingsaka, the trifecta of “why is my finish peeling?”
If you want an outdoor stump table, use an exterior-rated topcoat designed for weather exposure and recoat as needed.
Better yet, keep the stump under cover (porch, screened room) and bring it inside during harsh seasons. Your future
self will thank you with fewer sanding sessions.
Buy vs. DIY: what you’re really paying for
Store-bought stump tables can be pricey, and it’s not just markup. You’re often paying for:
drying time (or kiln drying), careful sanding, finish consistency, and quality control so it doesn’t crack into
three separate stools after one winter.
DIY can be less expensive and more personal, but you’ll “pay” in time and elbow grease. If you love hands-on projects,
DIY is satisfying. If you want instant results, buying is basically outsourcing the sanding therapy.
Common mistakes (and how to fix them)
1) The table wobbles
Fix it with adjustable feet, a flatter base, or a discreet shim. If you plan ahead, leveling the base early saves headaches.
2) The top feels rough after finishing
That’s raised grain or finish texture. Lightly sand with a fine grit (per your finish directions), remove dust, and apply
another thin coat.
3) The finish looks cloudy or streaky
Usually application issues (too thick, too humid, not enough dry time). Let it cure, then sand back and recoat thinly.
4) The stump keeps cracking
Some cracking is normal. If cracks are growing fast, the wood may still be drying. Give it time, stabilize with epoxy if
needed, and avoid sealing one side heavily while leaving the other raw (uneven moisture exchange can increase stress).
Care and maintenance: keep it pretty without babysitting it
- Use coasters if your finish is oil/wax or if you’re not sure how sealed it really is.
- Lift, don’t drag (yes, even if it’s “just a few inches”).
- Dust gently with a soft clothavoid harsh cleaners that can haze finishes.
- Refresh as needed: hardwax oils often allow easy spot repairs; poly may need a light scuff and recoat.
FAQ
Is a tree stump side table hygienic for indoors?
Yesonce properly cleaned, dried, and sealed. Sealing is what turns porous wood into a wipeable surface and helps keep
dust and debris from living in the grain.
Will it crack no matter what?
Many rounds crack as they dry, and some will continue to move slightly with seasonal humidity changes. You can minimize
cracking with proper drying and balanced finishing, but a few checks are part of the charm.
What’s the best finish for a stump table used daily?
For heavy daily use, a durable protective finish (often polyurethane) is a common choice. For a more natural look with
simpler repairs, hardwax oil is popularjust commit to light maintenance over time.
Can I use a stump table in a bathroom?
You can, but treat it like a high-humidity environment: seal thoroughly on all sides and keep standing water off it.
A tray on top helps protect the surface from wet items.
Conclusion: the easiest way to bring the outdoors in (without bugs as roommates)
A natural tree stump side table is proof that great design doesn’t have to be complicated. Choose solid wood, respect the
drying process, sand thoughtfully, and finish for your real life (not your fantasy life where nobody spills anything).
The result is a functional piece that feels warm, grounded, and uniquely yoursbecause it literally grew that way.
Real-world experiences: what people learn after living with a stump table (about )
Let’s talk about the part you don’t see in perfectly staged photos: the lived-in experience. Not “I did this personally”
(I’m a keyboard with ambition), but the patterns that show up again and again when real homeowners bring a natural stump
side table into their space.
First, everyone underestimates weight. A solid wood stump is basically a friendly boulder with better aesthetics.
People love the stabilityuntil they decide to “just move it a little” to vacuum and discover that “a little” requires
a deadlift mindset. The happiest stump owners usually add felt pads or discreet casters early. It’s not cheating; it’s
ergonomics.
Second, there’s the “finish reality check.” In the early days, many people choose a super-natural lookoil and wax,
minimal film, barely-there sheen. It’s gorgeous. It’s also the finish equivalent of wearing suede shoes to a BBQ.
The first cold glass leaves a ring, and suddenly the table has a memoir. Folks who use their stump daily often pivot
toward a tougher topcoat or at least start keeping a tray on top. The tray move is underrated: it creates a flat surface,
adds protection, and lets you swap styles seasonally without refinishing anything.
Third, cracks become personality. At the beginning, a new check can feel like failure“Did I dry it wrong? Did I doom
this table?” But over time, most people start treating cracks like character lines. Some leave them alone. Others fill
them clear to stop crumbs from collecting. And a few go full artist mode with tinted epoxy, turning a split into a design
feature that guests ask about every single time. (If your table becomes a conversation starter, you’re allowed to act
like this was your plan all along.)
Fourth, stump tables change how a room feels. People describe them as “warming up” a space instantlyespecially in rooms
with lots of hard surfaces (tile, glass, metal). The wood grain adds visual movement, and the irregular shape breaks up
straight lines. In small apartments, a stump table often becomes the hero piece: minimal footprint, maximum presence.
In larger rooms, it reads as an intentional accent that keeps the space from feeling too showroom-perfect.
Finally, there’s a quiet satisfaction to owning something that’s genuinely one-of-one. A stump side table doesn’t look
like it came off an assembly line because it didn’t. Even purchased versions still carry natural variationgrowth rings,
knots, tiny imperfections. That uniqueness is why people hang onto them for years, moving them from living room to bedroom
to reading nook as styles change. The table adapts because “natural” never goes out of style.


