Table of Contents >> Show >> Hide
- The Design Brief: Quiet, Strong, and Easy to Move
- Why Solid Walnut? Beauty, Strength, and a Little Humility
- Planning the Bed: Size, Support, and Joinery Choices
- Lumber Prep: The Unsexy Step That Makes Everything Better
- Building the Frame: Rails, Legs, and a Connection That Won’t Quit
- Headboard Choices: Minimalist Slab or Frame-and-Panel
- Slats and Center Support: Where Comfort Meets Structural Reality
- Sanding and Finish: Making Walnut Pop Without Looking Plastic
- Assembly Day: The Moment of Truth (and the Squeak Audit)
- Cost and Time: The Honest Math
- Common Mistakes (I Made Some So You Don’t Have To)
- Final Thoughts: Why This Bed Was Worth It
- Extra: of Real Build Experience (The Stuff You Only Learn Mid-Project)
- SEO Tags
I didn’t wake up one morning and think, “Today, I will casually build a solid walnut bedframe like some kind of woodland wizard.”
I woke up because my old bed squeaked like a haunted floorboard every time I rolled over. Also, it wobbled. Also, it had the structural confidence of a folding chair
at a backyard barbecue. So… I did what any reasonable person would do: I decided to build a bed out of walnut, the wood equivalent of putting on a tuxedo to take out
the trash.
This is the story of my DIY solid walnut bedframe: the design choices, the joinery decisions, the “I can’t believe that actually lined up” moments,
and the hard-won lessons that made the final result feel less like a project and more like a piece of furniture I’ll want to keep.
If you’re planning a walnut bed frame build, I’ll walk you through a realistic approachstrong, quiet, and built to survive moves without requiring
a crane or a divorce lawyer.
Safety note: Beds are load-bearing furniture. If you’re new to woodworkingor you’re a teenbuild with a capable adult/mentor, use proper protective gear,
and follow the safety instructions for every tool and finish you use. A bed should be “heirloom quality,” not “emergency room adjacent.”
The Design Brief: Quiet, Strong, and Easy to Move
Before touching a board, I wrote down what I wanted this bed to do. Not “look nice,” because that’s assumedthis is walnut. Walnut always looks like it has a skincare
routine. I mean the practical stuff:
- No squeaks (or at least no squeaks that can be heard from space).
- Knock-down friendly so it can be disassembled for moving.
- Strong rails that won’t sag over time.
- Real mattress support with slats and a center beam (especially for queen/king sizes).
- Wood movement respected, because walnut is classy, not magical.
A lot of DIY bed builds look great on day one and then slowly develop “character” (read: looseness) because the joinery and hardware weren’t chosen with real-world
forces in mind. Beds get racked, dragged, sat on, flopped into, and occasionally used as trampolines by tiny humans who do not believe in physics.
The joinery has to handle all of that.
Why Solid Walnut? Beauty, Strength, and a Little Humility
Walnut is one of those woods that makes even a simple design feel expensive. It machines well, finishes beautifully, and has a rich color that can read modern or
traditional depending on the details. It’s also strong enough for structural furniture when properly designed.
But walnut moveslike all solid wood
A bedframe is basically a long rectangle that wants to stay square forever while humidity tries to turn it into interpretive dance. Solid wood expands and contracts
across the grain as moisture changes, and long parts (like side rails) need to be designed so they don’t split, bow, or force joints to fail.
This matters even more with a clean, modern bedframe where gaps and alignments are visible.
Bonus: walnut and responsible sourcing
If you care about where your material comes from (I do), walnut has a solid reputation in U.S. hardwood forestry, and there’s published data showing growth and harvest
trends that support responsible sourcing conversations. That doesn’t mean “buy anything, no questions,” but it’s reassuring when you’re investing in premium lumber.
Planning the Bed: Size, Support, and Joinery Choices
My first big decision wasn’t “mid-century” versus “farmhouse.” It was: How will this bed come apart? If you build a bed as one glued box,
you’ll eventually try to rotate it through a doorway and briefly consider living outside instead.
Option 1: Traditional bed bolts (rock-solid, classic)
Traditional bed bolts are popular for a reason: they pull rails tight to posts and can be re-tightened over time. They’re also designed specifically for
knock-down furniture, which is exactly what a bed should be.
The main drawback is layout and drilling accuracybecause “close enough” becomes “why is the bed shaped like a parallelogram?”
Option 2: Bed rail brackets (fast, hidden, and practical)
If you want a clean look with hidden hardware and easier installation, bed rail bracket systems can be a great choice.
They’re commonly used in DIY plans and professional builds because they assemble quickly, hold tight, and make moving less dramatic.
I leaned into this approach because it fit my “strong + sane” theme.
Option 3: Hybrid knock-down joinery (slick, advanced, very satisfying)
There are also clever modern approaches that combine slip tenons with hidden bolts or plates, giving you the clean look of joinery with the serviceability of
hardware. It’s elegant, and it can be incredibly strongbut it’s also more complex to execute accurately.
I love this approach in theory, and I borrowed parts of the thinking even if I didn’t go full “hidden wizardry” on my first walnut bed.
Mattress support: slats, ledgers, and a center beam
A bedframe isn’t just rails and postsit’s a support system. The mattress doesn’t care how pretty your walnut is; it cares whether it’s supported every night.
For anything bigger than a twin, plan for:
- Side ledgers/cleats (inside the rails) to carry slats.
- Evenly spaced slats appropriate for your mattress type.
- A center beam with at least one center support leg for queen/king sizes.
This is also where squeaks are born. Slats rubbing rails, fasteners loosening, unsupported spans flexingevery tiny movement becomes a sound effect at 2:00 a.m.
My rule: anything that touches should either be fixed firmly or separated cleanly.
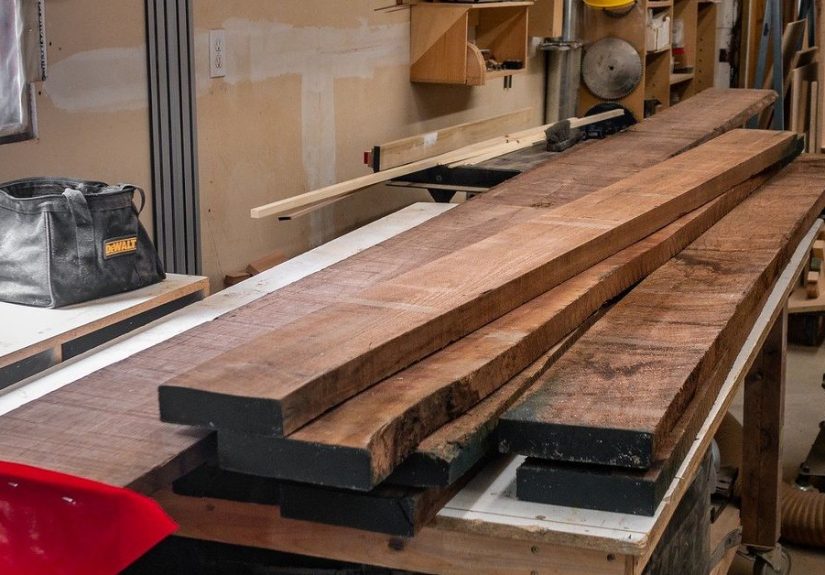
Lumber Prep: The Unsexy Step That Makes Everything Better
Walnut is not a “grab it from the rack and start building” material if you want tight joinery. I treated lumber prep like a project stage, not a chore:
acclimate, mill, rest, and re-check.
Acclimation: letting the wood calm down
Wood adjusts to your shop’s humidity. If you machine everything immediately, then the boards move, and suddenly your perfectly aligned rails have a new hobby:
being slightly twisted. I let the walnut acclimate and tried to keep it stickered and supported so it stayed as straight as possible.
Milling strategy: stable parts win
Bed rails are long, and long boards love revealing hidden tension the moment you remove material. My approach was conservative:
mill in stages, avoid chasing perfection in one pass, and prioritize straightness and consistent thickness over aggressive material removal.
Building the Frame: Rails, Legs, and a Connection That Won’t Quit
The heart of a DIY hardwood bed frame is the rail-to-leg connection. This joint takes the stress of racking forces (side-to-side movement)
and the vertical load from the mattress and sleepers. If this connection fails, the rest of the bed becomes modern art.
Legs/posts: keep it clean, keep it square
I kept the leg design simple. Walnut doesn’t need a bunch of fancy shaping to look intentional. Clean lines also make it easier to keep everything square,
which is the difference between “fine furniture” and “why does the mattress slide toward the window?”
Rails: thickness matters more than you think
Side rails are not the place to get cute with thin stock. Thicker rails resist flex and hold hardware more securely. I aimed for rails that felt stout in hand,
with enough internal height to mount a ledger and still leave good “meat” for hardware and long-term durability.
Hardware placement: the quiet engineering
Whether you use bed bolts or rail brackets, alignment is everything. The goal is a joint that pulls tight without forcing the wood to twist. I dry-fit, marked
reference faces, and treated the process like installing a door: you want smooth assembly, repeatability, and no weird stress when tightened.
One underrated trick: build in adjustability. Wood moves, floors aren’t level, and houses settle. A bed that can be re-tightened and fine-tuned
stays quiet longer. This is why knock-down hardware is so common in quality bed builds.
Headboard Choices: Minimalist Slab or Frame-and-Panel
I went back and forth on the headboard. A thick walnut slab headboard looks incredible, but it can be heavy, expensive, and more likely to cup if not designed well.
A frame-and-panel headboard is more traditional and handles wood movement more gracefully.
Frame-and-panel logic (and why it’s smart)
Frame-and-panel construction lets the panel “float” within the frame, expanding and contracting without splitting. It’s a classic approach for a reason.
If you want a headboard that stays stable across seasons, this style is hard to beat.
In the end, I leaned simpler: a clean-lined headboard that matched the bedframe and didn’t require turning my build into a six-month woodworking opera.
You can always add more design later; fixing structural mistakes is less fun.
Slats and Center Support: Where Comfort Meets Structural Reality
A gorgeous bedframe that sags is just an expensive hammock. The support system matters as much as the joinery.
I used a ledger along the inside of each side rail to support slats, then added a center beam to reduce span.
Spacing and squeak control
Slat spacing depends on the mattress type and manufacturer recommendations. Foam mattresses often want closer spacing than traditional spring mattresses.
I also made sure the slats sat flat and didn’t rock on high spotsbecause that micro-movement is squeak fuel.
Center beam: the insurance policy
If you’re building a queen or king, a center beam is not “optional if you’re feeling optimistic.” It’s what keeps the middle from slowly drooping over time.
I treated it like structural framing: straight, stable, and supported where it meets the floor.
Sanding and Finish: Making Walnut Pop Without Looking Plastic
Walnut is famous for taking a finish beautifully, but it’s also easy to overdo. I didn’t want the bed to look like it had been dipped in a shiny candy shell.
I wanted a finish that felt like woodwarm, tactile, and durable enough for real life.
My finishing mindset: test first, commit later
Walnut can darken and mellow over time, and different finishes shift the tone. Before finishing the whole bed, I tested on offcuts.
That single step saved me from the classic DIY regret: “Why does it look orange now?”
Durability considerations for a bed
Bedframes get scuffed by vacuums, shoes, and the occasional late-night toe collision. A finish that’s easy to repair is a win.
Wipe-on film finishes can be refreshed; some hardwax oils are spot-repair friendly. The “best” finish is the one you can live withand maintainwithout a meltdown.
Assembly Day: The Moment of Truth (and the Squeak Audit)
Final assembly is where your planning either pays off or laughs at you. I assembled the frame in the room where it would live (because moving a full walnut bedframe
through a hallway is a CrossFit workout nobody asked for). I tightened hardware gradually, checked for square, and then did my favorite technical test:
I sat on the edge and bounced like I was trying to summon a squeak demon.
When everything stayed quiet, I felt an unreasonable amount of pride. Like I’d personally defeated gravity.
Cost and Time: The Honest Math
Walnut isn’t cheap, and a bed uses a lot of board footage. The cost varies wildly depending on your region, your lumber source, and whether you choose a headboard
design that requires extra thickness or panels. Hardware, finish, and slats add up too.
Time-wise, I treated this like a “weekends and evenings” build with breaks for measuring twice, measuring again, and then staring at the parts until they confessed
their true dimensions. If you rush a bed build, it will remind you every nightaudibly.
Common Mistakes (I Made Some So You Don’t Have To)
1) Underbuilding the rails
Thin rails look sleek until they start flexing. A bed needs stiffness. If your rails feel “light,” your bed will eventually feel “sad.”
2) Ignoring wood movement in wide parts
If you’re doing wide headboard panels or broad surfaces, plan for seasonal expansion/contraction. Frame-and-panel methods exist because wood has opinions.
3) Treating mattress support as an afterthought
Your mattress support system is half the bed. Strong ledgers, sensible slat spacing, and a center beam can be the difference between “luxury sleep” and
“why do I feel like I’m sliding into the middle?”
4) Skipping test fits
Dry-fitting isn’t busywork. It’s how you find problems while they’re still fixable. Once the finish is on, you’re no longer “adjusting,” you’re “repairing.”
Final Thoughts: Why This Bed Was Worth It
Building a DIY solid walnut bedframe is a big project, but it’s one of the most satisfying pieces of furniture you can make.
It combines structure, precision, aesthetics, and real daily use. And unlike a decorative shelf, a bed will absolutely tell you if you cut corners.
The payoff is waking up in something you builtsomething quiet, sturdy, and tailored to your space. Also, you’ll become the kind of person who looks at other beds
and silently judges their joinery. Welcome to the club. We have sawdust everywhere.
Extra: of Real Build Experience (The Stuff You Only Learn Mid-Project)
Here’s the part nobody puts in the glossy “final reveal” photos: the experience of building a walnut bedframe is equal parts craftsmanship and emotional management.
Walnut is forgiving in the sense that it looks good even when you’re sweating, but it’s unforgiving when you assume it will behave like construction lumber.
The first time I dry-fit my rails to the legs, I learned an important truth: long parts magnify tiny errors. A barely noticeable out-of-square cut becomes a visible
gap when the rail meets the post, and that gap will stare at you every time you walk into the room. My fix wasn’t dramaticjust slow, methodical refinement, working
from reference faces and checking alignment like I was calibrating a spaceship.
The second lesson was about sound. I used to think squeaks were just “what beds do.” Nope. Squeaks are usually friction plus movement.
If two parts can rub, they will rub. If hardware can loosen, it will loosen. During assembly, I found one tiny spot where a slat edge kissed the ledger at a weird
angle. It wasn’t a big structural problem, but it was a guaranteed noise problem. I took a minute to true the contact point, re-seat the slat, and the squeak
disappeared. That five-minute adjustment was worth more than any fancy design flourish, because quiet is the real luxury.
The third lesson: finishing walnut is basically a personality test. If you’re impatient, walnut will tempt you into skipping grits or rushing cure time because it
already looks pretty. But the finish is where “nice project” becomes “legit furniture.” I tested finishes on scraps and realized that what looked perfect under shop
lighting looked completely different in bedroom light. The winner for me wasn’t the shiniest or the darkestit was the one that made the grain look deep while still
feeling like wood when I touched it. Also: cure time matters. I learned to treat “dry to the touch” as a lie that finish tells when it wants you to make fingerprints.
Fourth lesson: plan the move before you need the move. I practiced disassembly once after the bed was finished (carefully, like I was handling a sleeping cat).
That’s when I confirmed the hardware choice was right: the bed came apart predictably, and it went back together without drama. I also labeled a couple of parts
discreetly on the inside facesbecause future me deserves kindness. The final result is a bed that feels heavy in the best way: stable, grounded, and quiet.
Every time I change the sheets, I notice the little detailsthe crisp edges, the warm walnut tone, the way the frame doesn’t rack or protest. And yes, I’m proud of
it. I built a bed. Out of walnut. Like a slightly tired, extremely satisfied adult.


