Table of Contents >> Show >> Hide
- What Makes This Chili Low-Calorie and Fat-Free (Without Being Sad)?
- Low-Calorie, Fat-Free Vegan Vegetable Chili (Oil-Free)
- Low-Calorie Toppings That Keep It Vegan and “No Added Fat”
- How to Keep Calories Low Without Losing the Chili Vibe
- Nutrition Notes (Estimated)
- Make It Yours: Variations and Substitutions
- Storage, Freezing, and Meal Prep
- Common Mistakes (and How to Fix Them Fast)
- of Real-World Experiences and Tips People Run Into With This Chili
- Conclusion
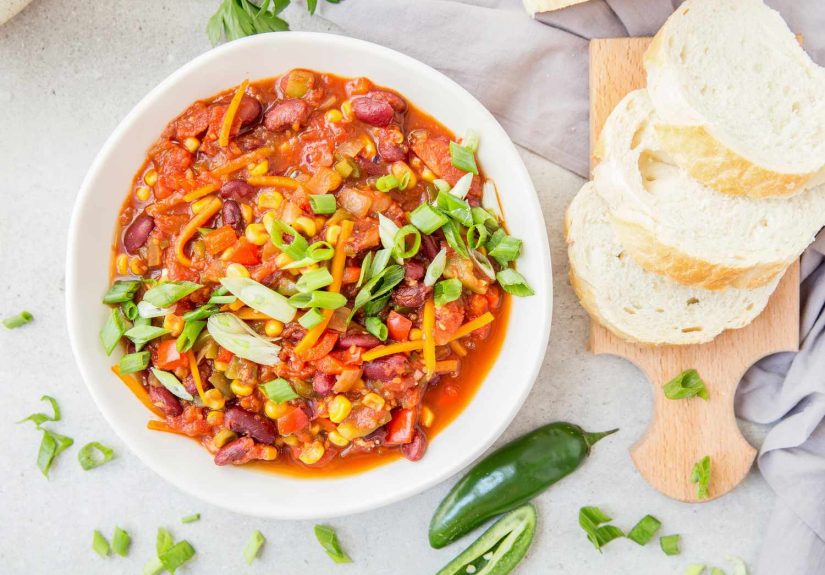
Chili season is basically an excuse to eat a big, cozy bowl of something spicy while pretending it’s “for warmth.” (Sure. Also because it tastes amazing.) This version is a low-calorie, fat-free vegan vegetable chili that’s big on flavor, heavy on veggies, and light on everything your sweatpants complain about.
Quick reality check: “fat-free” in home cooking usually means no added fatso we’re skipping oil, vegan butter, and other sneaky drizzle situations. Beans and veggies can contain tiny, naturally occurring amounts of fat, but the recipe is built to be oil-free and as low-fat as possible while still tasting like a real-deal chili you’d actually want to eat on purpose.
Below you’ll get: the why (flavor science, but make it fun), the how (step-by-step), the what-if (swaps and spice-level control), and the meal-prep magic (because tomorrow-you deserves nice things).
What Makes This Chili Low-Calorie and Fat-Free (Without Being Sad)?
1) We build flavor without oil
Oil usually helps sauté vegetables and carry flavors. We replace that with a simple trick: water- or broth-sauté. You’ll start with onions, peppers, and aromatics, adding splashes of broth as needed. You still get the sweet, mellow basejust without the extra calories.
2) We use vegetables like they’re the headliner
This isn’t “beans wearing a tomato suit.” We load up on low-calorie vegetables (think zucchini, mushrooms, carrots, celery, bell peppers) to add volume, texture, and that “I ate a whole bowl and somehow it was still light” feeling.
3) We thicken it the smart way
Instead of adding oil, cheese, or high-calorie thickeners, we use one of the best chili hacks: blend a small portion of beans and veggies right in the pot. You get a rich, velvety texture that tastes like it simmered all dayeven if it didn’t.
4) We keep sodium adjustable
Chili can go salty fast (canned beans + tomatoes + broth). This recipe lets you control sodium by rinsing beans, choosing low-sodium canned tomatoes/broth, and seasoning at the end so you don’t overshoot early.
Low-Calorie, Fat-Free Vegan Vegetable Chili (Oil-Free)
Yield: 6 hearty bowls
Time: ~45 minutes (10 prep, 35 simmer)
Diet notes: Vegan, oil-free, no added fat, high-fiber, naturally dairy-free
Spice level: Adjustable (from “mild and friendly” to “hello, I am a dragon”)
Ingredients
- 1 large onion, diced
- 1 large bell pepper (any color), diced
- 2 carrots, diced small
- 2 celery stalks, diced
- 3–4 cloves garlic, minced
- 8 oz mushrooms, chopped (cremini or white)
- 1 medium zucchini, diced
- 1 (28 oz) can crushed tomatoes (or diced tomatoes)
- 1 (15 oz) can tomato sauce (optional, for extra body)
- 2 (15 oz) cans beans, rinsed and drained (black + kidney is great)
- 1 (15 oz) can pinto beans, rinsed and drained (or chickpeas if you want a twist)
- 3 cups low-sodium vegetable broth (or water + bouillon to taste)
- 2 tbsp chili powder
- 2 tsp ground cumin
- 1 tsp smoked paprika (optional but highly recommended)
- 1 tsp dried oregano
- 1/2 tsp onion powder (optional)
- 1/4–1/2 tsp cayenne or chipotle powder (optional, for heat)
- 1–2 tbsp tomato paste (optional, boosts depth without adding fat)
- 1 tbsp cocoa powder (optional, unsweetened; adds “mystery richness”)
- 1 tbsp lime juice (or apple cider vinegar)
- Salt and black pepper, to taste
Optional veggie add-ins (choose 1–3)
- 1 cup corn (frozen is fine)
- 1–2 cups chopped spinach or kale (stir in at the end)
- 1 cup cauliflower rice (adds volume, barely any calories)
- 1 diced sweet potato (slightly higher calories, still very wholesome)
Step-by-step Instructions
- Start the flavor base (no oil, no problem).
Put a large pot over medium heat. Add onion, bell pepper, carrots, and celery with 3–4 tablespoons broth. Stir for 3–4 minutes. If things stick, add another splash of broth and scrape up the browned bits (that’s flavor, not failure). - Add garlic + spices to “wake them up.”
Add garlic, chili powder, cumin, smoked paprika, and oregano. Stir for 30–60 seconds. If the pot looks dry, add a tablespoon of broth. You’re aiming for fragrant, not scorched. - Veggie bulk time.
Stir in mushrooms and zucchini. Cook 4–5 minutes, adding broth as needed, until mushrooms soften and release liquid. - Build the chili body.
Add crushed tomatoes, tomato sauce (if using), beans, and broth. Add tomato paste and cocoa powder (if using). Stir well. - Simmer for flavor.
Bring to a gentle boil, then reduce to a simmer. Cook 20–25 minutes, stirring occasionally. Chili gets better as it hangs outlike a good playlist. - Thicken like a pro (still fat-free).
Use an immersion blender to blend about 1–2 cups of chili directly in the pot (or carefully scoop some into a blender and return it). This makes it thicker and richer without adding anything fancy. - Finish and balance.
Stir in lime juice (or vinegar). Taste. Now add salt, pepper, and optional heat (cayenne/chipotle) little by little until it tastes like you want to text someone about it. - Serve.
Ladle into bowls. Add toppings (see below). Accept compliments as your new love language.
Low-Calorie Toppings That Keep It Vegan and “No Added Fat”
Toppings are where healthy chili goes to accidentally become a nacho situation. Here are low-calorie, fat-free-friendly options:
- Fresh cilantro + green onions
- Diced tomatoes or salsa
- Pickled jalapeños (big flavor, tiny calories)
- Shredded lettuce (sounds weird, tastes fresh)
- Extra lime wedges
- Fat-free plant yogurt (if you can find one) or a blended “cashew-free” tofu-lime cream
Want a “cheesy” vibe without added fat?
Mix nutritional yeast with a little salsa or tomato sauce and spoon it on top. It’s not identical to cheese, but it scratches the “savory topping” itch.
How to Keep Calories Low Without Losing the Chili Vibe
Choose beans wisely (and portion smart)
Beans are the heart of vegan chili, but they do add calories. The trick is balance: use 2–3 cans of beans total for protein and fiber, then let vegetables carry the volume. If you want it even lighter, reduce beans slightly and add extra mushrooms, zucchini, and cauliflower rice.
Use the right tomato combo
Crushed tomatoes give body. Diced tomatoes give texture. Tomato paste boosts umami. Mixing them is the difference between “pretty good” and “why is this so good?”
Spice layering = flavor without calories
Chili powder + cumin + smoked paprika + oregano creates a deep base. Add chipotle (smoky heat) or cayenne (sharp heat) only if you want the burn. If you go too spicy, add more tomatoes or a squeeze of lime to rebalance.
Nutrition Notes (Estimated)
Exact nutrition depends on brands and portions, but a typical bowl of this low-calorie vegan vegetable chili lands around:
- Calories: ~220–300 per serving
- Fat: ~0–2g (no added oil; mostly trace amounts from whole foods)
- Fiber: often 10g+ per serving (beans + veggies = fiber jackpot)
- Protein: often 10–15g per serving (depending on bean blend)
Tip: For a truly accurate label-style breakdown, plug your exact ingredients into a nutrition calculator using your specific products.
Make It Yours: Variations and Substitutions
For a “meaty” texture (still vegan + oil-free)
- More mushrooms (chop fine for a crumble vibe)
- Cooked lentils (swap 1 can of beans for 1.5 cups cooked lentils)
- Riced cauliflower (adds bulk and thickness)
If you hate mushrooms (it’s okay, we can still be friends)
Swap mushrooms for extra zucchini, chopped eggplant, or more bell pepper.
Slow cooker method
Water-sauté onions/peppers/garlic in a pan first for best flavor (or skip if you must). Add everything to the slow cooker and cook 6–8 hours on low or 3–4 hours on high. Blend a portion at the end to thicken.
Instant Pot method
Use sauté mode with broth splashes for onions/peppers/garlic + spices. Add the rest, cook 10 minutes high pressure, quick release, then blend a portion to thicken.
Storage, Freezing, and Meal Prep
- Fridge: 4–5 days in a sealed container.
- Freezer: 2–3 months. Freeze in single portions so you can grab-and-go.
- Reheat: Stovetop or microwave. Add a splash of water/broth if it thickens too much.
Chili often tastes even better the next day because the spices have time to mingle like they’re at a party. A delicious, delicious party.
Common Mistakes (and How to Fix Them Fast)
“My chili is watery.”
- Simmer uncovered for 10 more minutes.
- Blend 1–2 cups of chili to thicken.
- Add 1–2 tablespoons tomato paste.
“My chili tastes flat.”
- Add a pinch more salt (carefully).
- Add lime juice or vinegar for brightness.
- Add smoked paprika or a tiny bit of chipotle for depth.
“I made it too spicy. Help.”
- Add more tomatoes or broth.
- Stir in extra beans/veggies if you have them.
- Serve with something cooling (lime, chopped cilantro, or a dollop of fat-free plant yogurt if available).
of Real-World Experiences and Tips People Run Into With This Chili
When people try a low-calorie, fat-free vegan vegetable chili recipe for the first time, the most common surprise is this: the bowl looks the same size as “regular” chili, but it feels lighter afterward. That’s the veggie volume doing its job. A big pot packed with mushrooms, zucchini, peppers, and carrots can feel like you’re eating a feasteven though the calorie math stays friendly.
Another shared experience: the flavor improves dramatically on day two. Fresh chili can taste great, but after a night in the fridge, the cumin and chili powder settle in, the tomatoes mellow, and the whole pot becomes more cohesive. People who meal prep often end up labeling the container “Tuesday lunch” and then mysteriously “accidentally” eating it Monday night. (Science has not explained this.)
Texture is where most home cooks tinker. Some people want chili that’s spoon-thick; others prefer it more like a soup. If you land in the “I want it thicker” camp, blending a portion of the pot tends to be the turning point. It’s also an easy confidence boosterbecause suddenly your oil-free chili feels like it has that slow-simmered, restaurant-style body. If you don’t have a blender, mashing beans with the back of a spoon works too. It’s more rustic, but chili is not here to judge you.
Spice level is another “choose your own adventure” moment. A lot of folks start conservative (mild chili powder, no cayenne), then realize the pot can handle more personality. A common strategy is to keep the base mild and offer heat at the table: chipotle flakes, hot sauce, diced jalapeños. That way, anyone who likes it gentle can stay comfortable, and anyone who likes living dangerously can make their own bowl feel like a spicy dare.
There’s also the “bean situation.” Some people rinse beans every time because it helps reduce sodium and makes the flavor cleaner; others skip rinsing and then wonder why the chili tastes oddly salty or “canned.” If you’re cooking for a crowd, rinsing usually wins because it gives you more control over seasoning. And if beans make you feel a little… musically talented later, people often notice that rinsing helps, plus it keeps the chili broth from getting starchy.
Finally, the most consistent experience is how customizable this recipe is. People swap in whatever vegetables they need to use upspinach that’s on its last good day, a bell pepper that’s getting wrinkly, carrots that have been “in the drawer” since the beginning of time. Chili is forgiving like that. It’s a one-pot rescue mission that still tastes intentional, which is honestly the best kind of cooking.
Conclusion
This low-calorie, fat-free vegan vegetable chili proves you don’t need oilor heavy toppingsto make a bowl that feels comforting and satisfying. With smart flavor layering, loads of vegetables, and a simple thickening trick, you get a chili that’s meal-prep friendly, budget-friendly, and genuinely delicious.
Make a big pot, portion it out, and enjoy the rare joy of having leftovers you actually look forward to. That’s not just dinner. That’s a life upgrade.