Table of Contents >> Show >> Hide
- What a Whole House Fan Actually Does (and When It’s Worth It)
- Plan Before You Cut: Sizing, Venting, and Safety
- Pick your fan style: propeller vs. ducted/insulated
- Size the airflow (CFM) with one of two practical methods
- Attic venting: the part people underestimate (and regret)
- Window intake area: open more than one window
- Combustion safety (read this twice)
- Permits, structural framing, and electrical: don’t “wing it”
- Tools and Materials Checklist
- Step-by-Step: Installing a Whole House Fan (High-Level but Realistic)
- 1) Choose the location (comfort + practicality)
- 2) Confirm attic venting before installation
- 3) Lay out and cut the ceiling opening
- 4) Frame the opening (and protect the structure)
- 5) Install the fan housing or ducted plenum
- 6) Air seal and restore insulation around the install
- 7) Wire the fan safely (or hire this out)
- 8) Install the grille and verify damper operation
- 9) Test operation the smart way
- How to Use a Whole House Fan for Maximum Comfort
- Common Installation Mistakes (and How to Avoid Them)
- Costs, Comfort, and Realistic Expectations
- Experience Notes: What Homeowners Commonly Run Into (and What They Wish They’d Known)
- Conclusion
- SEO Tags
If you’ve ever walked upstairs in July and felt like you just opened the oven to check on a pizza, you already understand the appeal of a whole house fan. This isn’t “a fan, but bigger.” It’s a simple (and surprisingly powerful) way to flush hot indoor air out through the attic and pull cooler outdoor air in through open windowsespecially in places with cool evenings.
Done right, a whole house fan can make your home feel fresher, cooler, and less dependent on AC. Done wrong, it can be noisy, underpowered, orworst casecreate safety issues with combustion appliances. This guide walks through planning, sizing, venting, safety checks, and installation basics in a practical, step-by-step way (with fewer “hand-wavey” tips and more “here’s the math”).
What a Whole House Fan Actually Does (and When It’s Worth It)
A whole house fan is typically installed in the ceiling (often in a central hallway) or as a ducted unit in the attic. When you turn it on with several windows open, it creates a controlled “wind tunnel” through your home: outdoor air comes in through windows, warm indoor air rises, and the fan pushes that hot air into the attic where it exits through attic vents.
Best climates and best seasons
Whole house fans shine when nights (and early mornings) are noticeably cooler than afternoons. Think: spring and fall, or dry climates where evening temps drop. In hot-humid climateswhere nights stay warm and sticky the fan may still help with fresh air, but it won’t feel as “magical,” and it can pull in humidity that makes the house feel clammy.
Whole house fan vs. attic fan vs. “whole-house ventilation”
- Whole house fan: cools the living space by replacing indoor air quickly.
- Attic fan: focuses on cooling the attic itself; it doesn’t intentionally pull air through your rooms.
- Mechanical whole-house ventilation: is an indoor air quality system (often continuous or scheduled), designed around standards and measured airflownot “blast the house with outside air for 20 minutes.”
Bottom line: A whole house fan is primarily a comfort and “night flush” cooling tool. It can also improve freshness, but it’s not the same thing as a code-designed ventilation system for indoor air quality.
Plan Before You Cut: Sizing, Venting, and Safety
Pick your fan style: propeller vs. ducted/insulated
Traditional propeller fans move a lot of air fast. They can also sound like a small aircraft taxiing for takeoff especially on high speed. Ducted or insulated-damper styles are often quieter and can reduce the “open hole in the ceiling” problem that older fans had (heat loss in winter and heat gain in summer). If you want something you’ll actually run through the night, quieter designs usually win the popularity contest.
Size the airflow (CFM) with one of two practical methods
Fan capacity is measured in CFM (cubic feet per minute). Bigger isn’t always betterbecause more airflow demands more attic venting and more open-window intake area. But too small is disappointing: you’ll run it longer, get less cooling, and wonder why your friend’s fan “works better.”
Method A: Air changes per hour (ACH) (more accurate)
A common sizing approach uses ACH, which is how many times per hour the home’s air is replaced:
ACH = (60 × CFM) ÷ House Volume
For intermittent “quick cool-down” whole house fans, many designs aim roughly 10–30 ACH. Quieter insulated-damper styles are often sized closer to ~5 ACH for longer run times. A practical minimum is usually about 5 ACH.
Example: 2,000 sq ft home with 8 ft ceilings
- House volume ≈ 2,000 × 8 = 16,000 cubic feet
- For 20 ACH: CFM ≈ (20 × 16,000) ÷ 60 ≈ 5,333 CFM
- For 5 ACH: CFM ≈ (5 × 16,000) ÷ 60 ≈ 1,333 CFM
Method B: CFM per square foot (fast rule of thumb)
Many installers use a quick rule of thumb around 2–3 CFM per square foot of conditioned floor area, then choose a multi-speed model so you can run it quieter when you want and faster when you need a quick purge. Use the rule-of-thumb as a starting point, then sanity-check it with ACH (especially if your ceilings are higher than 8 feet).
Attic venting: the part people underestimate (and regret)
Your fan can only move as much air as your attic can exhaust to the outdoors. If the attic can’t breathe, your fan gets “choked,” performance drops, and you risk moisture/heat issues.
A widely used guideline is:
Net Free Vent Area (NFVA) ≈ 1 sq ft per 750 CFM
“Net free” is the key phrase. Screens, louvers, and grilles reduce effective open area. If your vents have insect screens, you may need significantly more total vent area to achieve the required NFVA.
Venting example: 5,333 CFM fan
- Required NFVA ≈ 5,333 ÷ 750 ≈ 7.1 sq ft (net free)
- If screens/louvers cut effective area roughly in half, you might need ~14 sq ft of “labeled” vent area to get ~7 sq ft net free.
Also note: “normal” attic ventilation rules (like the 1/150 or 1/300 ratios you’ll hear about) are not the same as what a whole house fan demands during operation. A whole house fan can require several times more exhaust area than a typical passive setup.
Window intake area: open more than one window
Whole house fans pull serious airflow. If you crack one tiny window and expect the fan to do the rest, you’ll create strong suction at that single opening (and a lot of noise). Open multiple windows a few inches each, ideally in the rooms you want to cool first. You get smoother airflow, better comfort, and fewer “door slams from nowhere.”
Combustion safety (read this twice)
Whole house fans can depressurize a home. If you have fuel-burning appliances that use indoor air for combustion (some older water heaters, furnaces, fireplaces), depressurization can cause backdraftingpulling combustion products (including carbon monoxide) into the living space. This is serious.
- Always operate with enough windows open for makeup air.
- Pay extra attention if you have atmospheric-draft appliances or a fireplace.
- If you’re unsure, get a combustion-safety evaluation from a qualified HVAC pro before installing/using a whole house fan.
- Make sure you have working carbon monoxide alarms.
Permits, structural framing, and electrical: don’t “wing it”
Many areas require a permit for cutting/framing a ceiling opening and adding a new switched electrical load. Cutting a ceiling joist can be structural, depending on layout. Electrical work must follow code and manufacturer instructions. If you’re not fully comfortable with framing and wiring, the smartest “DIY” move is hiring a pro for the parts that can bite.
Tools and Materials Checklist
Your exact list depends on fan type (ceiling-mounted vs. ducted), but here’s a realistic baseline:
- Stud finder, measuring tape, pencil/marker
- Drywall saw or oscillating multi-tool; utility knife
- Drill/driver, bits, screws, construction adhesive (optional)
- 2x lumber for framing/blocking, joist hangers (as needed)
- Caulk or foam sealant for air sealing; weatherstripping where applicable
- Insulation materials to restore/maintain attic insulation depth
- Electrical supplies per manufacturer (switch/timer, cable, junction box, staples, strain relief)
- Safety gear: eye protection, gloves, respirator/dust mask, headlamp
Step-by-Step: Installing a Whole House Fan (High-Level but Realistic)
1) Choose the location (comfort + practicality)
Most ceiling-mounted installations place the grille in a central hallway ceiling near bedrooms, so you can flush warm air out at night. Consider:
- Access: You need attic access above the spot for framing and wiring.
- Clearance: Avoid obstructions like ducts, plumbing vents, recessed lights not rated for insulation contact, and complex wiring runs.
- Air path: Pick a location that can “pull” air from multiple rooms when windows are opened.
- Noise: Avoid placing directly above a bed unless you’re choosing a quieter ducted/insulated unit.
2) Confirm attic venting before installation
This is the “measure twice, sweat once” moment. Estimate your fan CFM, calculate required NFVA, and compare that to what your attic vents can realistically provide. If you need more venting, plan that upgrade nowbecause installing the fan first and venting later usually means you live through a loud, underperforming summer while you “get around to it.”
3) Lay out and cut the ceiling opening
Use the manufacturer’s template or rough opening dimensions. In the attic, confirm joist spacing and location. Drill a small pilot hole at a corner to confirm alignment, then cut from below. Expect dust. Lots of dust. The attic has been saving it for you like a retirement fund.
4) Frame the opening (and protect the structure)
Many fans fit between joists. If yours does notand the install requires modifying framingdo not guess. Proper header framing and load transfer matters. The goal is a solid, square opening that won’t vibrate, squeak, or slowly crack your drywall over time.
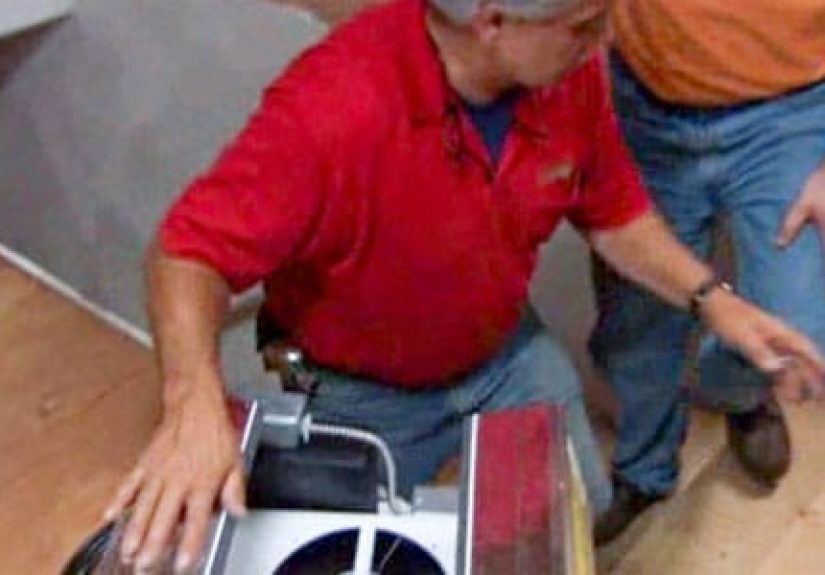
5) Install the fan housing or ducted plenum
For ceiling-mounted units, you’ll secure the housing to framing. For ducted systems, you’ll mount the fan in the attic and connect ducting to the ceiling grille/plenum. In both cases:
- Use vibration isolation where the manufacturer recommends it.
- Keep the assembly square so shutters/dampers open and close smoothly.
- Seal gaps between housing and framing to prevent attic air leakage.
6) Air seal and restore insulation around the install
One classic complaint about older whole house fans is that they turn into a “winter leak” because the ceiling opening becomes a weak spot in the thermal envelope. Better designs include insulated dampers, but you still want good air sealing around the perimeter, plus insulation continuity in the attic as much as possible.
If your unit uses a removable winter cover, label it and store it somewhere you’ll actually find it again. (If you bury it behind holiday decorations, it will re-emerge in the year 2031.)
7) Wire the fan safely (or hire this out)
Whole house fans often use a dedicated switch, a multi-speed controller, and/or a timer. Follow the manufacturer’s wiring diagram. Turn off power at the breaker. Use proper junction boxes, cable protection, and strain relief. If electrical work makes you uneasy, hiring a licensed electrician is usually money well spentespecially for anything involving new circuits or attic junctions.
8) Install the grille and verify damper operation
The grille is what you’ll see every day, so take your time aligning it. Confirm that shutters/dampers open fully and close tightly. A damper that sticks open can leak air and invite attic smells (and the occasional adventurous bug).
9) Test operation the smart way
- Open multiple windows several inches (start with 3–6 windows, then adjust).
- Turn the fan on low first. Listen for rattles or shutter chatter.
- Walk the house and feel airflow. If doors slam or whistles happen, open additional windows.
- Check the attic: you should feel strong exhaust at vents, not pressure “ballooning” the attic.
- If you have combustion appliances, take safety seriouslyif there’s any doubt, stop and get a professional evaluation.
How to Use a Whole House Fan for Maximum Comfort
Use it when outdoor air is cooler than indoor air
The ideal routine is “night flush” cooling:
- In the evening, when outdoor temperature drops below indoor temperature, open windows and run the fan.
- Use higher speed for a quick purge (15–30 minutes), then lower speed for ongoing comfort.
- In the morning, shut the fan and close windows/blinds to keep cool air inside as the day heats up.
Pair it with ceiling fans for the comfort multiplier
A whole house fan changes the air. Ceiling fans change how the air feels on your skin. Used together, you can often stay comfortable at a higher thermostat settingor delay turning on AC entirely on mild nights.
Know when not to use it
- During wildfire smoke events or poor outdoor air quality days (unless you have a filtration strategy).
- When outdoor humidity is high and the indoor air already feels muggy.
- If you can’t open enough windows safely (security, pets, storms)consider window locks/stops that allow partial opening.
Common Installation Mistakes (and How to Avoid Them)
Mistake: Not enough attic venting
Symptoms include loud operation, weak airflow through rooms, and a “pressurized attic” feeling. Fix: add attic venting and confirm NFVAnot just vent count.
Mistake: Choosing the wrong fan type for your noise tolerance
If you buy a high-powered propeller fan but you hate noise, you’ll “forget” to use itjust like that exercise bike that’s now a coat rack. Consider multi-speed and quieter ducted/insulated designs if nighttime operation matters.
Mistake: Ignoring combustion safety
This is not a “maybe later” detail. If your home includes atmospheric-draft appliances or a frequently used fireplace, treat safety evaluation as part of the installlike brakes on a car, not like optional seat warmers.
Mistake: Leaving a leaky, uninsulated opening
Air seal around the housing, make sure the damper closes well, and maintain insulation levels. This keeps your fan from becoming a year-round energy penalty.
Costs, Comfort, and Realistic Expectations
Whole house fans can be a cost-effective comfort upgrade, but expectations should match your climate and home layout. In the right conditions, they can pull out the day’s stored heat from ceilings, walls, and furnishings and replace it with cooler air, making the whole home feel less “heat-soaked.”
Realistically, you’ll get the best results when:
- Nights cool off enough to provide a meaningful temperature drop.
- Your attic venting is ample (NFVA sized to your fan).
- You have a workable window-opening plan for airflow.
- Your fan choice matches your noise tolerance and usage style.
Experience Notes: What Homeowners Commonly Run Into (and What They Wish They’d Known)
The most consistent “I didn’t expect that” moment is the dust. Cutting a ceiling opening is not delicate work, and drywall dust has a special talent for finding its way into places it shouldn’t belike the one drawer you didn’t tape shut because you thought it would “probably be fine.” People who have the smoothest installs usually do three things: they hang plastic, they run a shop vac while cutting, and they accept that vacuuming is part of the project, not an afterthought.
The second surprise is how much attic venting matters in real life. Many homeowners buy the fan first, install it, flip it on, and feel… underwhelmed. The fan is running, sure, but the house doesn’t “flush” the way they imagined. When they later add ridge/soffit/gable venting (or correct blocked intake vents), the same fan suddenly feels twice as powerful. The lesson people repeat is simple: “Vent math isn’t optional.” If the attic can’t exhaust air easily, the fan can’t do its job.
Noise is the third big themeand it’s not just the motor. People often report that the loudest part is actually vibration, grille rattle, or shutter clatter. A careful installer takes time to square the housing, tighten fasteners properly, and use vibration isolation when recommended. Another common “wish I knew” is that multi-speed control changes everything: homeowners who run high speed for 15 minutes (quick purge) and then drop to low overnight tend to feel happier than those who only have one speed and either tolerate the roar or turn it off.
Window strategy is where the fan stops being “a gadget” and becomes a routine. Many people start out opening one big window, then wonder why the airflow feels aggressive in one spot and nonexistent elsewhere. Over time, they learn to open several windows a few inches, usually on the shaded side of the home, and to “assign” certain windows to certain rooms. Some even add inexpensive window stops so they can leave windows cracked safely while sleeping. Once a household finds its pattern, the fan becomes a habit: dinner finishes, outdoor air cools off, windows crack open, fan runs, house resets.
Finally, experienced users talk a lot about the “shoulder season win.” Even if summer humidity limits use, spring and fall can be perfect. The fan clears stale indoor air, resets the house temperature after a warm day, and makes the home feel lively without turning on cooling equipment. The homeowners most satisfied with whole house fans aren’t always the ones who use them every single summer nightthey’re the ones who use them correctly when conditions are right, and who built the system (venting, controls, sealing, and safety checks) so it’s easy and safe to use.
Conclusion
Installing a whole house fan is one of those projects where planning is half the job: size the fan realistically, confirm attic venting, take combustion safety seriously, and choose a fan style you’ll actually enjoy using. Do that, and you get a home that cools down faster at night, smells fresher, and feels less like it’s storing heat in the drywall just to annoy you later. (Yes, walls can be petty like that.)


