Table of Contents >> Show >> Hide
- Know Your Peas: Snap vs. Snow vs. Shelling
- When to Plant Peas for the Best Harvest
- Where to Plant Peas: Sun, Soil, and Spacing That Actually Works
- How to Plant Peas Step-by-Step
- Trellising Peas: Support = Cleaner Pods + Easier Harvest
- Pea Plant Care: Watering, Feeding, and Maintenance
- Common Pests and Problems (and How to Handle Them)
- Harvesting Peas: Timing Is Everything
- How to Keep Peas Producing Longer
- Growing Peas in Containers (Yes, It Works)
- Pea Growing Troubleshooting: Quick Fixes
- Wrap-Up: The Pea Plan That Rarely Fails
- Real-World Pea-Growing Experiences (The Helpful, Slightly Funny Kind)
Peas are the overachievers of the cool-season garden: they grow fast, taste like spring, and (politely) help improve soil by working with beneficial bacteria to capture nitrogen. They’re also one of the few vegetables that can make you feel like a gardening genius in about two monthsno cape required, but a snack while you harvest is strongly encouraged.
In this guide, you’ll learn exactly how to grow peas successfullyfrom choosing the right type (snap, snow, or shelling) to planting, trellising, watering, troubleshooting, and harvesting at peak sweetness. By the end, you’ll know how to keep your pea patch productive longer and how to avoid the classic mistakes that turn “crisp pods” into “stringy sadness.”
Know Your Peas: Snap vs. Snow vs. Shelling
“Peas” isn’t one-size-fits-all. Picking the right type makes everything easierespecially harvest timing.
- Snap peas have thick, crunchy edible pods and sweet peas inside. You eat the whole thingpod and all.
- Snow peas have flat, tender edible pods and are harvested before the peas inside swell. They’re stir-fry royalty.
- Shelling (garden) peas are grown for the peas inside; the pods are typically too fibrous to eat.
You’ll also see bush (shorter, more compact) and vining (taller, climbing) varieties. Bush types can be easier in small spaces, while vining types often produce over a longer window when supported well.
Quick variety strategy (so you don’t overthink it)
- Small garden or containers: pick a compact/bush pea and add a simple support.
- Maximum harvest + easier picking: pick a vining pea and trellis it.
- Humidity or disease-prone area: choose varieties labeled disease-resistant (especially for powdery mildew).
When to Plant Peas for the Best Harvest
Peas thrive in cool, moist weather. Translation: peas are happiest when you’re still wearing a light jacket (or at least considering it). The goal is to get them growing early enough to produce before heat shuts them down.
Spring planting (the classic move)
Plant peas as soon as the soil can be worked and is cool but not soggy. Many guides suggest planting when soil temperatures are roughly in the low-to-mid 40s °F and above. Early planting usually means better yields and sweeter pods.
Fall planting (the “bonus round”)
In many regions, you can also plant peas for a fall cropespecially if you can give them enough time to mature before a hard freeze. Choose early-maturing varieties, and plan backward from your typical first frost date.
Heat reality check
Pea plants commonly slow down or stop flowering when temperatures climb into the mid-80s °F. Once consistent heat arrives, peas may fade, and that’s normal. The gardening flex is planning for it (succession sowing and shade tricks help).
Where to Plant Peas: Sun, Soil, and Spacing That Actually Works
Light
Full sun is idealaim for at least 6 hours a day. In warmer climates, a little afternoon shade can help extend the harvest by keeping plants cooler.
Soil
Peas do best in well-drained soil. If your soil holds water like a sponge that refuses to let go, peas can struggle with root problems. Loamy soil is the dream, but peas can do well in many soil types if drainage is decent.
- Target soil pH: roughly 6.0 to 7.5 is a commonly recommended range.
- Prep the bed: mix in compost or well-rotted organic matter before planting.
- Fertilizer caution: skip “weed-and-feed” products and avoid heavy nitrogen fertilizer (it can encourage leaves over pods).
Spacing (the difference between “lush” and “mildew party”)
Most home-garden guidance lands in a similar zone:
- Seed depth: about 1 to 1½ inches deep.
- Seed spacing: about 1 to 2 inches apart (depending on variety and method).
- Row spacing: commonly 18 to 24 inches between rows for airflow and access.
Airflow matters. Crowded peas can be more prone to foliar disease, and harvesting becomes a treasure hunt nobody asked for.
How to Plant Peas Step-by-Step
- Pick a spot with sun and well-drained soil. Remove weeds nowpeas don’t love root competition.
- Loosen the soil to improve drainage and root growth. Mix in compost.
- Make a trench about 1 inch deep (up to 1½ inches if soil is light and dries quickly).
- Drop seeds roughly 1–2 inches apart, then cover and gently firm the soil.
- Water in thoroughly, then keep soil evenly moist (not swampy) during germination.
- Install support early for vining peasbefore roots spreadso you don’t accidentally turn planting day into “root disturbance day.”
Should you start peas indoors?
Usually, no. Peas prefer to be direct-sown because they can be sensitive to root disturbance. If you do start them indoors, use biodegradable pots or minimize transplant shock and move them out very young.
Trellising Peas: Support = Cleaner Pods + Easier Harvest
Vining peas climb using tendrils, and they climb enthusiastically. A trellis keeps vines off the ground, improves airflow, helps reduce disease pressure, and makes picking way easier (your back will send a thank-you note).
Simple trellis ideas
- Netting on stakes: fast and effective for long rows.
- Wire fence panel: sturdy and reusable.
- String trellis: great for a tidy look, especially in raised beds.
- “Pea teepee”: fun for kids, functional for compact plantings.
Even many bush peas benefit from light support to keep pods clean and reduce flopping, especially after a heavy rain.
Pea Plant Care: Watering, Feeding, and Maintenance
Watering
Peas like consistent moistureespecially during flowering and pod fill. A common guideline is about 1 inch of water per week from rain or irrigation, and in drier or warmer stretches, they may need closer to 1–2 inches weekly. The trick is steady moisture without waterlogged soil.
- Water at the base to keep foliage drier and discourage disease.
- Mulch helps hold moisture and keeps soil cooler as spring warms up.
- Check before you water: if the soil is moist an inch down, you can often wait.
Fertilizing
Peas generally don’t need heavy fertilizingespecially nitrogen. If your soil is decent and you added compost, you may be set. If you do fertilize, consider a balanced or lower-nitrogen approach and follow label directions. Too much nitrogen can lead to gorgeous vines… and a disappointing pod count.
Weeding and cultivating
Weed early, weed gently. Pea roots are relatively shallow, so aggressive hoeing can do more harm than good. Light cultivation, hand-pulling, and mulch are usually the best trio.
Common Pests and Problems (and How to Handle Them)
Aphids
Aphids can cluster on tender growth and may spread viruses. First steps: blast them off with a strong stream of water, encourage beneficial insects (lady beetles, lacewings), and use insecticidal soap if neededalways following the product label.
Powdery mildew
Powdery mildew often shows up as a white or grayish coating on leaves and can reduce plant vigor. It’s favored by conditions like warm, dry days and cool, damp nights. The best defense is prevention:
- Choose resistant varieties when possible.
- Give peas sun and airflow (don’t crowd them).
- Water consistently and avoid excess fertilizer that pushes tender growth.
- Remove badly infected plant material and clean up debris at season’s end.
Root and stem issues
If plants yellow, stall, or collapse, drainage is often the culprit. Peas don’t like “wet feet.” Improve soil structure with organic matter, avoid overwatering, and don’t plant peas in the same spot year after year.
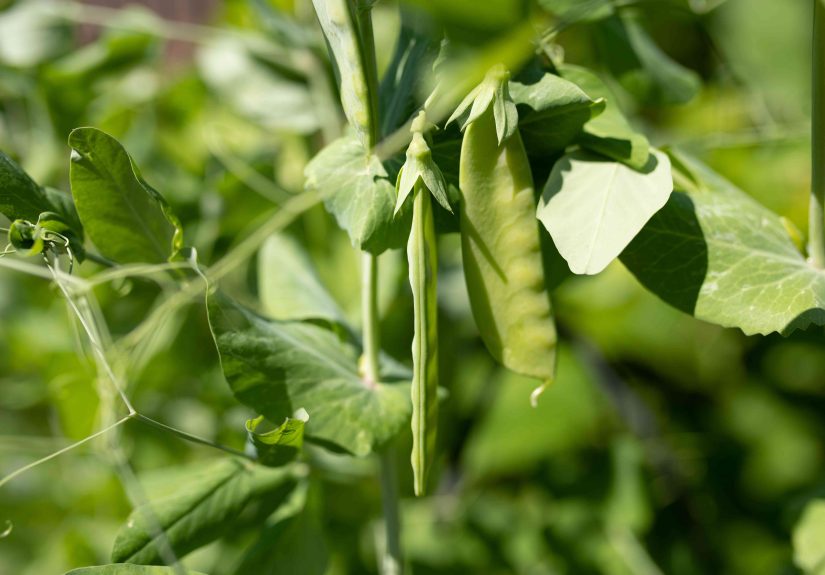
Harvesting Peas: Timing Is Everything
Peas reward frequent picking. The more you harvest, the more the plant is encouraged to keep producingkind of like your favorite podcast, but edible.
When to harvest each type
- Snow peas: pick when pods are still flat and tender, before peas noticeably swell.
- Snap peas: pick when pods look plump and crisp, while still bright green and tender.
- Shelling peas: pick when pods are full, but harvest before peas turn starchy.
Many guides recommend harvesting every couple of days during peak production. Hold the vine with one hand and pull the pod with the other to avoid snapping stems.
Storage and sweetness tips
Peas are sweetest soon after picking, and sugars start converting to starch fairly quickly. Refrigerate them promptly. If you have a big harvest, freezing is a great way to lock in flavorespecially for shelling peas.
How to Keep Peas Producing Longer
1) Succession plant
Instead of planting all at once, sow a new short row every week for a few weeks in early spring. This staggers harvest and helps you avoid a single “pea tsunami” week followed by nothing.
2) Keep them cool
As the season warms, mulch to cool the soil and maintain moisture. In warmer regions, planting where peas get afternoon shade can extend production.
3) Pick frequently
Overmature pods can signal the plant to slow down. Harvest on schedule and keep the plant in “making pods” mode as long as conditions allow.
Growing Peas in Containers (Yes, It Works)
Peas can grow well in large containers, especially compact varieties. Use a pot with excellent drainage, quality potting mix, and a small trellis for support. Containers dry out faster than in-ground beds, so check moisture more oftenespecially on breezy days.
Pea Growing Troubleshooting: Quick Fixes
- Lush leaves, few pods: too much nitrogen, too much heat, or not enough sunlight.
- Yellowing plants: waterlogged soil, poor drainage, or natural end-of-season decline when it heats up.
- Powdery coating on leaves: powdery mildewimprove airflow, avoid excess fertilizer, use resistant varieties.
- Small harvest window: try succession planting, trellis vining types, and harvest frequently.
Wrap-Up: The Pea Plan That Rarely Fails
If you remember nothing else, remember this: peas want cool weather, consistent moisture, and a little support. Plant early, keep soil well-drained, trellis the climbers, and harvest often. Do that, and peas will happily turn your garden into a crunchy green snack bar.
Real-World Pea-Growing Experiences (The Helpful, Slightly Funny Kind)
Below are a few experience-based lessons that come up again and again in home gardens. Think of these as “composite stories” built from common pea-growing wins and facepalmsso you can skip the facepalm part and go straight to the peas.
Experience #1: The “I’ll Plant Them Next Weekend” Trap
A lot of pea heartbreak begins with a perfectly reasonable sentence: “I’ll plant them next weekend.” The problem is that peas are timing-sensitive. One week can be the difference between a long, sweet harvest and plants that hit heat stress right as they start flowering. Gardeners who plant as soon as the soil is workable often get pods earlier and longer. The “next weekend” plan frequently turns into “wow, it got hot fast,” and then peas act like dramatic actors exiting the stage.
The fix: treat peas like you treat concert ticketswhen it’s time, it’s time. Keep seeds ready, prep the bed early, and plant promptly when conditions allow.
Experience #2: The Late Trellis Regret
Here’s a classic: peas are planted, they sprout, everything looks adorable… and then vines start grabbing anything nearby like a tiny green octopus. At this point, many gardeners realize they still haven’t installed the trellis. Trying to shove stakes into the ground after roots have spread can damage plants, slow growth, and (if you’re unlucky) turn your neat row into a tangled vine situation that resembles a garden sitcom.
The fix: put the trellis in at planting timeor at least before vines start reaching. Even a quick netting-on-stakes setup makes a big difference and keeps pods cleaner.
Experience #3: The “More Fertilizer = More Food” Myth
It’s tempting to “feed” peas like you’d feed heavy-producing summer crops. But peas don’t usually need a nitrogen-heavy buffet. One common experience is incredibly lush vines with loads of leavesand far fewer pods than expected. Gardeners often describe it as “a beautiful green wall… with no snacks.”
The fix: start with compost and go easy on fertilizer, especially nitrogen. If you fertilize at all, keep it balanced and modest. Peas are not trying to become a houseplant; they’re trying to make pods.
Experience #4: The Powdery Mildew Surprise
Powdery mildew can sneak in late in the season, especially when days warm up and nights stay cool and damp. A common pattern: peas look great for weeks, then leaves develop that dusty coating, plants slow down, and harvest drops. Many gardeners find that crowded plantings or poor airflow make it worse, and that resistant varieties can be a game-changer in repeat-problem areas.
The fix: space peas for airflow, water at the base, and consider resistant varieties next season. Also, clean up plant debris at the end of the season so problems don’t “winter over” and return like an unwanted sequel.
Experience #5: The Harvest Timing “Aha!” Moment
New pea growers often wait too long to harvest, expecting pods to get bigger and better. Then pods get tough, peas get starchy, and the flavor isn’t as sweet. The “aha!” moment usually comes when someone picks earliersnow peas while flat, snap peas while crisp, shelling peas while plump but still tenderand realizes the best peas are the ones you eat quickly (preferably standing in the garden like a happy raccoon).
The fix: harvest frequentlyevery couple of days during peak production. Picking often encourages more pods and keeps quality high.
Experience #6: The “Peas as a Seasonal Starter” Win
One of the best pea experiences is using them as the opening act of the garden year. Gardeners plant peas early, enjoy a big spring harvest, and then follow peas with a heat-loving crop (like beans or squash) once the vines decline. This “seasonal handoff” keeps beds productive without fighting the weather. It’s a calm, efficient rotationand it feels like you planned everything (even if you only planned half of it).
The big takeaway from all these experiences: peas are easy when you work with their preferences instead of asking them to perform in summer heat. Plant early, support the vines, keep moisture steady, and pick like you mean it.