Table of Contents >> Show >> Hide
- What “hydro dipped” means (and why it looks expensive)
- Main supplies checklist (choose your method)
- Before you dip: prep that makes or breaks the finish
- Method 1: Spray-paint water marbling hydro dip (the classic)
- Method 2: Hydrographic film (the “wow, you bought that?” finish)
- Sealing and protecting your hydro dipped finish
- Design ideas that look intentional (not accidental)
- Planting and styling tips (so your pot doesn’t outshine your plant)
- Safety and cleanup (the not-fun part that saves your lungs and your sink)
- Time and cost snapshot
- FAQ
- Will hydro dipped paint hurt my plants?
- Can I hydro dip over an old pot with chipped paint?
- Do I have to use a base coat?
- Why does my spray paint clump on the water?
- Can I do this indoors if I open windows?
- What if I only want a subtle marbled edge?
- How do I keep the pattern consistent across multiple pots?
- Experience-based lessons DIYers swear by (read this before your “oops” moment)
- Conclusion
If your plant pots are currently giving “free hotel pen” energy (basic, forgettable, slightly sad), hydro dipping is the glow-up.
It’s the DIY trick that makes a $3 pot look like it came from a boutique where everything is “artisan” and somehow also “limited edition.”
The best part? You don’t need a fancy tank or a mad-scientist garagejust a little prep, a bucket of water you’ll never emotionally recover from,
and the willingness to get paint on at least one thing you didn’t mean to paint.
This Hometalk-style project is all about big impact with simple tools: swirling marble patterns, bold color combos, and finishes that look complicated
(while you casually pretend you planned it that way the entire time).
What “hydro dipped” means (and why it looks expensive)
“Hydro dipping” is a broad term for transferring paint or printed patterns onto an object using water as the middleman. For flower pots, there are two
popular DIY routes:
-
Spray-paint water marbling: You spray paint onto the surface of water, swirl it, and dip your pot through the floating paint film.
This is the easiest, most beginner-friendly methodand the one most people mean when they say “hydro dip” in DIY land. -
Hydrographic film dipping: A printed film floats on the water, gets activated, and wraps onto your item. This looks ultra-professional,
but requires more specific supplies and a bit more technique.
In this guide, you’ll get both methods, plus the prep and sealing steps that keep your masterpiece from peeling the first time you water a thirsty fern.
Main supplies checklist (choose your method)
For spray-paint water marbling
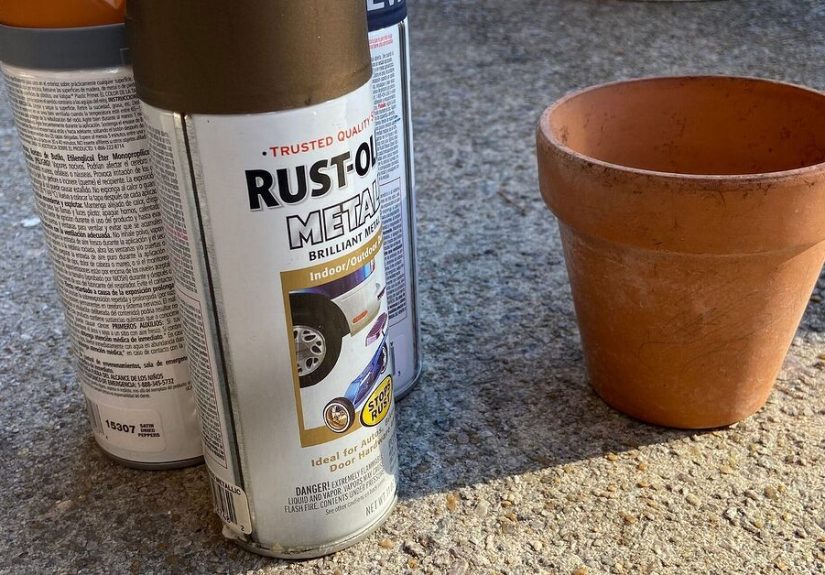
- Flower pots (terracotta, ceramic, plastic, or concrete)
- Spray paint (2–4 colors works great; include one high-contrast color for drama)
- Primer (especially important for terracotta, glossy ceramic, and some plastics)
- A base coat spray paint color (often white, black, or a matching neutral)
- A large bucket, storage tote, or disposable bin (deep enough to dip your pot)
- Painter’s tape (optional for clean lines or “dipped” sections)
- Gloves, drop cloth/cardboard, and old clothes you don’t like that much
- Skewer/chopstick/old fork for swirling patterns
- Clear coat sealer (matte, satin, or gloss; outdoor-rated if needed)
For hydrographic film dipping
- Hydrographic film (pattern of your choice)
- Activator (made for the film you’re using)
- Primer + base coat (film needs a good base color to pop)
- Masking materials (tape, plugs, or putty for areas you don’t want coated)
- Clear coat topcoat (this is what gives durability and shine control)
Before you dip: prep that makes or breaks the finish
Hydro dipping is 30% art and 70% “why is this peeling?” prevention. The pattern is the fun part, but prep is what makes it last.
If you do only one “boring” step, do this section.
Pick the right pot (yes, it matters)
- Terracotta: Very porous, which is great for plantsbut it can drink paint like it’s at happy hour. Seal/prime first for better coverage.
- Plastic: Needs a primer that bonds to plastic, or the finish can scratch off easily.
- Glazed ceramic: Slick surface. Light sanding + primer helps paint grip.
- Concrete: Usually takes paint well, but dust must be cleaned off thoroughly.
Clean it like you’re about to eat off it (but please don’t)
Wash pots with warm water and mild dish soap, then let them dry completely. Oils, dust, and factory residue can cause fish-eye spots,
patchy adhesion, or areas where paint simply refuses to participate.
Light sanding: the underrated hero
If the pot is glossy or has rough bumps, lightly scuff sand with a fine-grit sandpaper. You’re not carving a statueyou’re just giving paint
something to hold onto.
Prime and base coat (especially for terracotta)
Prime first, then apply a base coat color. The base coat is what shows through the hydro pattern, so choose it intentionally:
white makes colors bright, black makes them bold, and neutrals keep things classy.
Let the base coat dry fully. If it’s still tacky, dipping can smear it, and then you’ll have a “marbled” effect that looks less like art and more like regret.
Method 1: Spray-paint water marbling hydro dip (the classic)
This is the method most DIYers love because it’s fast, chaotic in a fun way, and forgiving. Every dip is differenteven if you try to copy yourself.
(Which is great, because copying yourself is exhausting.)
Step-by-step directions
-
Set up outside (seriously).
Lay down cardboard or a drop cloth. Wind is your enemy, and overspray is your unwanted roommate. -
Fill your dipping container with water.
Room-temp water typically works well. You want enough depth to dip the area you plan to cover. -
Plan your “dip zone.”
Decide if you’re dipping the bottom half, a diagonal section, or almost the whole pot. Painter’s tape can create crisp lines if you want a clean border. -
Spray paint onto the water surface.
Hold the can a reasonable distance from the water and spray short bursts. Start with one color, then add others.
Aim for the center or build ringseither way works. -
Swirl (lightly).
Use a skewer or chopstick to gently swirl the floating paint into a marbled pattern. A little goes a long way. Over-swirling can turn it muddy. -
Dip the pot slowly at an angle.
Lower the pot into the water with a steady motion. An angled entry helps reduce trapped air and weird blank spots.
Rotate slightly as you dip if you want more wraparound coverage. -
Clear the surface before pulling out.
Before you lift the pot back through the paint film, use a scrap of cardboard to sweep leftover floating paint to one side.
This helps prevent a second, unwanted layer from sticking in random globs. -
Lift, drip, and dry.
Let excess water drip off. Set the pot on a protected surface to dry completely. -
Repeat if needed.
If you want more coverage, you can dip again after the first layer dries. New patterns layer beautifully if you keep your color palette consistent.
Pro tips for cleaner swirls and fewer “paint boogers”
- Shake the cans well. Poorly mixed spray paint tends to spit, clump, and generally act like it has a grudge.
- Work fast once paint hits water. Spray paint can start skinning over quickly, especially in heat, wind, or low humidity.
- Use fewer colors at first. Two colors plus a metallic accent often looks more high-end than five colors that blend into brown.
- Test on a cheap pot. Different spray paints behave differently on water. A quick test dip saves frustration later.
- Keep a “cleanup stick.” A spare skewer helps you pull away blobs before they land on your pot like a surprise topping.
Troubleshooting: common problems and quick fixes
- The paint sinks or breaks apart.
- Try a different spray paint, spray shorter bursts, and avoid blasting the water. Some formulas float better than others.
- My pattern looks dull or muddy.
- Use higher-contrast colors, swirl less, and don’t overload the surface with paint. A clean base coat (often white) also helps.
- It’s peeling or scratching easily.
- That’s usually a prep issue: clean + sand + prime, then seal with a clear coat after dipping and full drying.
- I got random bald spots.
- Dip at an angle and move steadily. Also, avoid touching the pot right where you want the cleanest patternfinger oils can repel paint.
- My pot has big drips or thick ridges.
- You likely picked up extra film on the way out. Sweep the water surface before lifting the pot out, and use lighter paint layers.
Method 2: Hydrographic film (the “wow, you bought that?” finish)
Hydrographic film is what many commercial shops use for helmets, car trim, tumblers, and… yes, you can absolutely do it on planters if you seal and topcoat well.
The film floats on water, then an activator dissolves the carrier so the printed ink pattern can wrap around your item.
When film makes sense for flower pots
- You want a specific pattern (wood grain, leopard, geometric, florals) rather than random marbling
- You’re making a matched set and want consistency across pots
- You already have film/activator from other projects and want to use it up
Film dipping overview
- Prep, clean, sand, and prime the pot as usual.
- Apply a smooth base coat (this color affects how the film looks).
- Float the film on the water and let it hydrate (follow the film’s timing instructions).
- Spray activator evenly (this is the “don’t wing it” moment).
- Dip the pot through the activated film at a steady angle.
- Rinse residue after dipping (per film instructions), let dry fully, then clear coat.
If you’re new to film dipping, start with a smaller pot or a cheap plastic nursery pot. Your first attempt is basically a practice roundlike a test pancake.
You eat it anyway, but you don’t brag about it.
Sealing and protecting your hydro dipped finish
Paint alone is not a durable outdoor finish. Sun, water, and friction will wear it downespecially on pots that get moved around, bumped, and watered often.
A clear coat is what turns “pretty” into “pretty for more than a week.”
Choose the right topcoat
- Indoor pots: Clear acrylic spray sealer is usually enough.
- Outdoor pots: Use an outdoor-rated clear coat. UV protection helps reduce fading, and moisture resistance helps prevent peeling.
- Matte vs gloss: Matte hides minor imperfections. Gloss makes colors pop and looks more “ceramic.” Satin is the safe middle child.
Seal the inside (optional, but smart for painted pots)
If you paint the inside rim or interior, sealing can help protect the finish from constant moisture. If your plant is in a nursery pot inside the decorative pot,
you can skip sealing the interior and still get great longevity.
Design ideas that look intentional (not accidental)
Hydro dipping can go from “gallery vibe” to “kids’ birthday party table” depending on color choices. If you want a more grown-up look, try these:
- Neutral marble: White + charcoal + a touch of gold or copper
- Desert modern: Sand + terracotta + muted sage
- Ocean swirl: Navy + teal + white
- Monochrome: Three shades of the same color for a subtle, high-end gradient
- Half dip + clean top: Mask the top third for a crisp line and a modern “color block” look
- Metallic accent band: Add a thin metallic stripe after dipping for a finished, designed look
Planting and styling tips (so your pot doesn’t outshine your plant)
Keep drainage functional
Don’t clog drainage holes with thick paint. If needed, poke the hole clear after painting. A pretty pot that turns into a swamp is not a win for anyone.
Style in odd numbers
Group pots in threes or fives for an easy “designer shelf” look. Mix heights (a plant stand, a stack of books you swear you’ll read, or a riser)
so everything isn’t sitting at the same level like a mugshot lineup.
Safety and cleanup (the not-fun part that saves your lungs and your sink)
- Ventilation matters: Spray paint and clear coats should be used outdoors or in a very well-ventilated area.
- Wear gloves: Your hands will otherwise become a limited-edition art print.
- Protect surfaces: Overspray travels. It’s basically paint’s cardio routine.
- Dispose responsibly: Don’t pour paint sludge down drains. Let solids dry/cure and follow local disposal guidance.
Time and cost snapshot
- Active DIY time: About 30–60 minutes for a small batch (not counting drying)
- Drying time: Plan for several hours to overnight before sealing, depending on humidity and paint type
- Typical cost: Often $10–$25 in paint/sealer if you’re starting from zero, less if you already have supplies
- Best way to save money: Buy a few pots at once and do a “dipping session” so your paint and setup work harder for you
FAQ
Will hydro dipped paint hurt my plants?
Once fully dry and sealed, the paint is on the outside of the pot and generally won’t affect plants. If you’re concerned, keep plants in nursery pots
and use the hydro dipped pot as a decorative cover.
Can I hydro dip over an old pot with chipped paint?
You can, but you shouldn’t skip prep. Scrape loose paint, sand edges smooth, clean thoroughly, and prime so the new finish has a stable surface.
Do I have to use a base coat?
Technically no, but practically yes. A base coat makes the final pattern look intentional and helps adhesionespecially on porous terracotta or slick ceramic.
Why does my spray paint clump on the water?
Some formulas skin over faster, especially in hot, windy, or very dry conditions. Try shorter bursts, work faster, and test a different brand or finish.
Can I do this indoors if I open windows?
It’s not recommended. Even with windows open, spray paint fumes and overspray can linger and travel. Outdoor setup is safer and easier to clean.
What if I only want a subtle marbled edge?
Dip just the bottom inch or two, or do a quick partial dip at a steep angle. Subtle details often look the most “expensive.”
How do I keep the pattern consistent across multiple pots?
Use the same base coat, limit your paint colors, and keep your dipping motion similar. For maximum consistency, consider hydrographic film instead of marbling.
Experience-based lessons DIYers swear by (read this before your “oops” moment)
Here’s the stuff people usually learn after they’ve already sacrificed one pot to the DIY godsshared as “experience notes” so your first batch looks like a win,
not a science fair project that got rained on.
First: your environment is part of the supply list. A calm day matters. Wind doesn’t just mess up spray paintit literally changes the dip.
A gust can push floating paint into thick ridges, and then your pot comes out wearing a crunchy paint sweater. If you can, set up in a sheltered spot:
near a wall, behind a fence, or inside an open garage with the door fully up (still ventilated, still protected).
Second: the best-looking pots usually use fewer colors than you think. There’s a moment where you’re holding a third or fourth can and your brain says,
“One more color will make it even cooler.” Sometimes, yes. But often it’s the path to the dreaded muddy swirl. Two colors plus a metallic accent? Almost always a hit.
A tight palette makes even a wild marbled pattern look intentionallike you chose it on purpose, not like you accidentally dipped your pot in a cosmic milkshake.
Third: base coat quality shows through. If your base coat is patchy, the hydro dip doesn’t magically fix itit highlights it.
The smoothest results tend to come from light, even coats with enough dry time in between. Rushing the base coat is like skipping primer on a wall and then being shocked
when the paint looks weird. (We’ve all been there. The wall still judges you.)
Fourth: the “sweep the surface” step is not optional. A lot of first-timers dip, pull the pot back out through the paint film,
and wonder why they got thick blobs or a second ghost pattern. Sweeping the remaining paint away before lifting the pot is the difference between “marbled”
and “marbled… plus a surprise layer of chaos.”
Fifth: topcoat patience pays rent. If you clear coat too soon, you can trap solvents, soften the pattern, or get a cloudy finish.
Let the dipped layer dry thoroughly, then do multiple light clear coats instead of one heavy one. Heavy coats love to drip, and drips love to become permanent.
Finally: batch your projects. The mess is the same whether you dip one pot or five. Once your setup is out, do a mini “pot makeover day.”
Try one bold pot, one neutral pot, and one experimental pot. Worst case, the experimental one becomes a “patio pot” and nobody asks questions.
Best case, you discover a combo so good you start looking around your house for other things you can dipbecause that’s how hydro dipping gets you.
Conclusion
Hydro dipped flower pots are the kind of DIY that rewards you instantly: quick transformation, high-end vibe, and just enough unpredictability to keep it fun.
Whether you go the classic spray-paint marbling route or try hydrographic film for a more controlled pattern, the key is simple:
prep well, dip confidently, and seal like you want it to survive real life.
Pick a color palette you love, start with one practice pot, and then go make your plant corner look like it has a stylist.
Your plants may not say thank you, but they’ll definitely pose better.