Table of Contents >> Show >> Hide
- Know Which Type of Mr. Coffee Maker You Have
- Before You Brew for the First Time
- How to Use a Standard Mr. Coffee Maker
- How to Use a Programmable Mr. Coffee Maker
- How to Use Special Mr. Coffee Features
- How Much Coffee Should You Use?
- Best Practices for Better Coffee
- How to Clean a Mr. Coffee Maker
- Common Problems and Fixes
- Real-Life Experience: What Using a Mr. Coffee Maker Actually Feels Like
- Conclusion
If your morning personality does not fully load until coffee happens, you are in good company. Mr. Coffee machines have been saving groggy households for decades, but not every model works exactly the same way. Some are beautifully basic. Some let you program tomorrow’s happiness tonight. Some add features like Strong Brew, Small Batch, water filtration, auto-pause, or an automatic cleaning cycle. The good news is that once you understand the basic workflow, most Mr. Coffee makers are easy to use. The better news is that you do not need a barista certificate, a chemistry degree, or a violin soundtrack in the background.
This guide walks through how to use a Mr. Coffee maker step by step, including standard drip models, programmable machines, and extra features you might see on newer units. You will also learn how much coffee to use, how to clean the machine, and how to troubleshoot the annoying little problems that can turn “good morning” into “why is the counter wet?”
Know Which Type of Mr. Coffee Maker You Have
Before you start pressing buttons like you are launching a spaceship, figure out which category your machine falls into. Most Mr. Coffee home brewers fit into one of these groups:
1. Standard drip coffee maker
This is the straightforward version. Add water, add coffee, press brew, and wait for the house to smell more hopeful.
2. Programmable coffee maker
These models usually include a clock and a Delay Brew or Brew Later feature so you can set the machine in advance.
3. Feature-rich models
Some machines add extras like Strong Brew, Small Batch settings, a freshness timer, water filtration, auto pause, or an automatic cleaning cycle.
4. Thermal carafe models
These are designed to keep coffee hot in an insulated carafe instead of relying only on a warming plate. Great for people who pour one cup now and another after answering 17 emails they wish did not exist.
Before You Brew for the First Time
If the machine is brand new, do not jump straight to coffee grounds. Give it a quick setup first.
- Remove all packaging, stickers, and protective inserts.
- Wash the carafe, lid, brew basket, and reusable filter if your model includes one.
- Run one cycle with plain water and no coffee to rinse the inside.
- Install the water filter if your model has one.
- Set the clock if the machine is programmable.
This first rinse is boring, yes, but it helps remove any manufacturing dust or packaging residue. Think of it as the coffee maker equivalent of stretching before exercise, except much easier and with fewer lunges.
How to Use a Standard Mr. Coffee Maker
A standard Mr. Coffee maker is all about the basics: water, grounds, basket, brew. Here is the simple step-by-step process.
Step 1: Fill the water reservoir
Lift the lid and pour cold water into the reservoir. Use the markings on the machine or carafe as your guide. Keep in mind that many coffee makers measure “cups” as 5- to 6-ounce machine cups, not giant coffee-shop mugs the size of a flower vase.
Step 2: Insert the filter
Place a paper filter in the brew basket if your model uses one. If your machine came with a reusable nylon or permanent filter, insert that instead. Do not stack both unless your manual says otherwise. Coffee makers are helpful, but they do not enjoy identity crises.
Step 3: Add ground coffee
For most drip brewing, start with about 1 to 2 tablespoons of ground coffee for every 6 ounces of water. If you prefer a practical starting point, 1 tablespoon per machine cup gives a balanced everyday brew, while 1.5 to 2 tablespoons per cup makes it stronger and bolder.
Use a medium grind for drip coffee. Grounds that are too fine can slow the flow and create bitterness. Grounds that are too coarse can lead to weak coffee that tastes like it merely waved at the beans from across the room.
Step 4: Place the empty carafe on the warming plate
Make sure the carafe is centered properly. If it is crooked or not fully seated, some machines will drip, pause, or make a mess dramatic enough to ruin a countertop and a mood.
Step 5: Start brewing
Press the Brew or On button. Water will heat, move through the grounds, and drip into the carafe. That is the whole magic trick.
Step 6: Pour and enjoy
Once brewing is finished, pour your coffee and enjoy it. If your model has Pause ’N Serve or Grab-a-Cup Auto Pause, you can often remove the carafe briefly during the brew cycle for a quick cup. The keyword there is briefly. Do not wander off to answer a text, reorganize your pantry, and ponder your life choices while the machine continues dripping.
How to Use a Programmable Mr. Coffee Maker
Programmable models follow the same basic brewing steps, but they add one very civilized feature: you can tell the machine to make coffee before your brain fully boots up.
Set the clock first
If the display is blinking like it just woke up from a nap, set the current time. Most models use Hour and Minute buttons, sometimes paired with a Set, Clock, or Program button.
Load water and coffee the night before
Add the water to the reservoir and the coffee grounds to the filter basket before bed. Keep the carafe in place and make sure the lid is closed properly.
Use Delay Brew or Brew Later
Press the Delay Brew, Brew Later, or Program button, depending on your model. Then set the time you want brewing to begin. On some machines, you will confirm with the same button. On others, the indicator light turns on to show the schedule is active.
Wake up to coffee that already understands the assignment
Once the programmed time arrives, the machine starts brewing automatically. That means your future self gets coffee with almost no effort, which is the kind of teamwork every household deserves.
How to Use Special Mr. Coffee Features
Not every Mr. Coffee maker includes these features, but if yours does, here is how they generally work.
Strong Brew
This setting extends or adjusts the brewing process to create a bolder cup. Use it when regular brew tastes too mild, especially if you like dark roast or add milk.
Small Batch or 1–4 Cup Setting
This option helps improve extraction when you are making a smaller amount. Without it, a tiny batch can brew too quickly and taste thin. If you are brewing just a few cups, this setting is worth using.
Grab-a-Cup Auto Pause or Pause ’N Serve
This lets you remove the carafe during brewing for a fast cup before the cycle ends. Return the carafe promptly so the basket does not overflow. Coffee on the counter is not a tasting note.
Water filtration
Some Mr. Coffee models include a water filter system designed to reduce chlorine taste in the water. If your model has this feature, install and maintain the filter according to the instructions. Better water usually means better coffee, which is not flashy advice but is annoyingly true.
Automatic Cleaning Cycle
If your machine includes an auto-clean button or cleaning cycle, use it for deep maintenance. It simplifies descaling and helps remove mineral buildup inside the brewer.
Freshness timer and keep-warm settings
Some programmable models track how long ago the coffee was brewed and let you adjust warming time. This is helpful if your household treats one pot of coffee like an all-morning group project.
How Much Coffee Should You Use?
This is the part many people “eyeball,” which is a charming tradition until the coffee tastes like sadness or rocket fuel. Start with this basic rule:
- Mild coffee: 1 tablespoon per 6-ounce machine cup
- Balanced coffee: 1.5 tablespoons per 6-ounce machine cup
- Strong coffee: 2 tablespoons per 6-ounce machine cup
Here are some easy examples:
- 4 cups: 4 to 8 tablespoons
- 8 cups: 8 to 16 tablespoons
- 12 cups: 12 to 24 tablespoons
If that range looks wide, it is because taste is personal. Start in the middle and adjust. Also remember that fresh grounds, filtered water, and the right grind often improve flavor more than simply dumping in extra coffee like a heroic but misguided pirate.
Best Practices for Better Coffee
Using a Mr. Coffee maker is easy. Using it well is even better. These habits make a real difference:
Use fresh, cold water
Fresh water helps the machine brew cleaner-tasting coffee. If your tap water tastes off, use filtered water.
Choose the right grind
Drip coffee makers work best with a medium grind. Powdery espresso-fine coffee can clog filters or create bitterness.
Do not leave old grounds sitting in the basket
Empty the basket after brewing. Old wet grounds can get funky fast, and “funky” is excellent for music but not for breakfast.
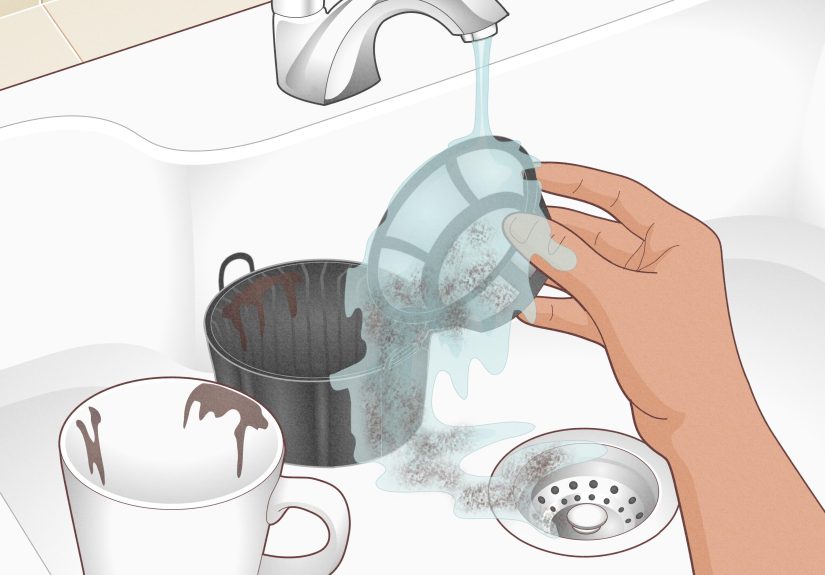
Wash removable parts regularly
The carafe, lid, filter basket, and reusable filter should be washed often. Coffee oils build up over time and can affect flavor.
Clean the machine on schedule
Mr. Coffee recommends regular cleaning, and that matters more than many people realize. A dirty coffee maker can brew slower, taste worse, and act older than it is.
How to Clean a Mr. Coffee Maker
Cleaning is not glamorous, but it is one of the biggest differences between “pretty good coffee” and “why does this taste like burnt rainwater?”
Daily or frequent cleaning
- Discard used grounds and paper filters after every brew.
- Wash the carafe, lid, brew basket, and reusable filter with warm, soapy water.
- Wipe the exterior if splashes or oils build up.
Deep cleaning and descaling
Mr. Coffee advises regular deep cleaning, often every 40 to 80 brews depending on your use and water conditions. If your model has an automatic cleaning cycle, use that function. If not, a vinegar-and-water solution is the classic method.
- Empty the machine and remove old grounds.
- Fill the reservoir with a vinegar-and-water mixture.
- Run the cleaning cycle or brew cycle.
- Discard the solution.
- Run 2 to 3 fresh-water cycles to rinse thoroughly.
If you use a charcoal or water filter, check whether it should be removed during descaling and replaced afterward. Removable components should also be washed separately and dried well before reassembly.
Common Problems and Fixes
The coffee tastes weak
Use a little more coffee, make sure your grind is medium, and try a Strong Brew or Small Batch setting if your model has one.
The coffee tastes bitter
Use less coffee, check that the grind is not too fine, and clean the machine if buildup is affecting flavor.
The machine brews slowly
Mineral scale is often the culprit. Run a cleaning cycle or descale with vinegar and water.
The basket overflows
Check that the carafe is seated correctly, do not overfill the filter with grounds, and avoid leaving the carafe out too long during auto pause.
The coffee is not hot enough
Warm the carafe with hot water before brewing if you like, keep the lid closed, and pour soon after brewing. On programmable models, review keep-warm settings if available.
The timer is confusing
You are not alone. Re-set the clock, then program the brew time again slowly. If the indicator for Delay Brew or Brew Later is not active, the machine may simply be waiting for you to confirm the schedule.
Real-Life Experience: What Using a Mr. Coffee Maker Actually Feels Like
Living with a Mr. Coffee maker is often less about mastering a machine and more about building a small ritual that makes mornings feel less chaotic. In real-world use, the biggest lesson is that consistency beats complexity. Most people do not need a thousand settings. They need a machine that can be loaded in a minute, brewed without drama, and cleaned without requiring a support group.
One of the most common experiences people have with a standard Mr. Coffee maker is discovering that the biggest improvement comes from tiny adjustments. The first pot might be too weak. The next one might be too strong. But after a few brews, you usually find your sweet spot. Maybe it is one and a half tablespoons per cup. Maybe it is a slightly fuller scoop. Maybe it is using filtered water instead of tap water that tastes like the plumbing system wrote a memoir. Once you dial it in, the machine becomes less of an appliance and more of a dependable habit.
Programmable models change the experience in a different way. They are not just convenient; they remove one decision from the morning. That sounds small until you realize how many people begin the day half awake, looking for their phone while already late. Setting Brew Later the night before can feel oddly luxurious, even though the process only takes a minute. Waking up to the smell of coffee is one of those tiny life upgrades that makes the kitchen feel calmer and the day feel slightly more under control.
Feature-heavy models also teach you which extras matter to you and which are just nice marketing in a shiny outfit. Strong Brew is genuinely useful for people who like a bolder cup or who add cream and sweetener. Small Batch helps if you only brew for one or two people and do not want watery coffee. Auto Pause is great, but only if you remember to put the carafe back quickly. Almost everyone learns that lesson exactly once.
Cleaning is where experience becomes wisdom. Many users do not realize how much better their coffee tastes after descaling the machine. Over time, you can get used to slightly dull coffee without noticing the machine is the problem. Then you clean it properly, brew the next pot, and suddenly remember that coffee is supposed to taste alive. The same goes for washing the carafe and basket thoroughly. Old coffee oils can sneak into fresh brew like uninvited guests.
Another common experience is learning that “easy to use” does not mean “zero maintenance.” A Mr. Coffee maker is simple, but it still rewards attention. Fresh grounds, a clean basket, the right amount of water, and regular cleaning make the difference between a machine that lasts and one that starts acting suspicious after a few months. In daily life, the best results usually come from a boring but effective routine: fill, measure, brew, empty, rinse, repeat. It is not glamorous, but neither is running out of coffee before a morning meeting, and one of those is definitely worse.
In the end, using a Mr. Coffee maker well is not about perfection. It is about finding a setup that fits your taste and your schedule. Once you do, the machine becomes one of the most quietly useful tools in the kitchen. It sits there, unbothered, making your day better one pot at a time.
Conclusion
Learning how to use a Mr. Coffee maker is mostly about understanding the basics and then matching them to your model. Standard machines are wonderfully simple: add water, add coffee, press brew. Programmable models give you the extra convenience of setting tomorrow’s pot in advance. Feature-rich versions can improve flavor, handle smaller batches, and make maintenance easier. No matter which one you own, the formula for great results stays the same: use fresh water, measure your coffee well, keep the machine clean, and pay attention to the features you actually use.
In other words, you do not need to overcomplicate your coffee routine. A Mr. Coffee maker is built to be practical, reliable, and friendly to people who would prefer not to solve equations before caffeine. Treat it well, and it will return the favor one cup at a time.


