Table of Contents >> Show >> Hide
- Before You Start: Quick Checklist (So You Don’t Get Stuck in Setup Limbo)
- Way #1: Add Your Cash App Card to Apple Pay (Then Spend via Apple Pay)
- Way #2: Move Cash App Money Into Apple Cash (So It Becomes an Apple Wallet Balance)
- Fees, Timing, and Limits (Because “Instant” Usually Means “Not Free”)
- Best Practices and Safety Tips (A.K.A. Don’t Hand Your Wallet to a Stranger)
- FAQ: Quick Answers to Common “Wait…What?” Questions
- Common Experiences (500+ Words): What People Run Into When Moving Cash App to Apple Pay
- Conclusion
You’d think in 2026 your money could teleport from one app to another like it’s riding a tiny hoverboard.
But when it comes to Cash App and Apple Pay, your cash sometimes takes the scenic route.
The good news: you can still get your Cash App funds into the Apple ecosystem with two reliable, totally legit methods.
First, a quick (important) reality check: Apple Pay is mainly a payment method, not a bank account.
You don’t “store money in Apple Pay” the same way you store money in Cash App. What people usually mean is:
either (1) “I want to pay with Apple Pay using my Cash App money,” or (2) “I want my Cash App money in Apple Cash
(the balance inside Apple Wallet) so I can spend or send it.”
This guide covers both goals with two step-by-step ways:
Way #1 adds your Cash App Card to Apple Pay so you can spend via Apple Pay,
and Way #2 moves money into Apple Cash so it behaves like an Apple Wallet balance.
Before You Start: Quick Checklist (So You Don’t Get Stuck in Setup Limbo)
- You need a Cash App Card (Cash Card) if you want to use Way #1 (or the “debit-card shortcut” inside Way #2).
- Make sure your iPhone is updated (Wallet features and card verification behave better on current iOS).
-
Know your goal:
- Spend in stores/apps with Apple Pay → Way #1 is usually the fastest.
- Move money into Apple Cash (to send via iMessage/Wallet or keep it as Apple Cash balance) → Way #2.
-
Apple Cash availability: Apple Cash is primarily a U.S. feature, and identity/age rules can apply.
If Apple Cash isn’t available on your device, you may still use Apple Pay with cards (Way #1), but you won’t be able to hold an Apple Cash balance.
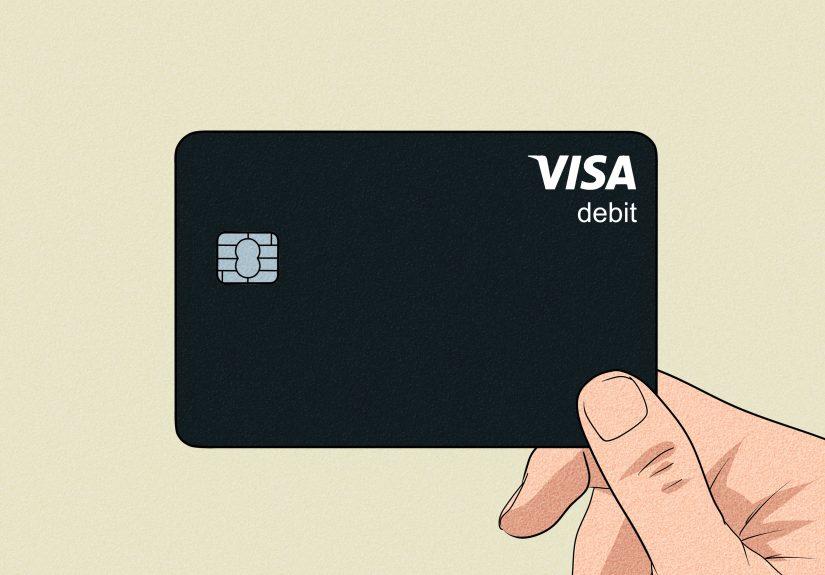
Way #1: Add Your Cash App Card to Apple Pay (Then Spend via Apple Pay)
This is the simplest “transfer” because you’re not actually moving money into Apple Pay.
You’re adding your Cash App Card to Apple Wallet, then selecting it at checkout when you use Apple Pay.
Your purchase pulls funds from your Cash App balance (or linked sources) exactly like using the physical Cash Card.
Step-by-Step: Add Cash App Card to Apple Pay (From Cash App)
- Open Cash App.
- Tap the Money tab (your balance area).
- Select the Cash Card (the card shown near the top).
- Tap Add to Apple Pay.
- Follow the prompts in Apple Wallet to confirm and finish.
Step-by-Step: Add It From Apple Wallet (If You Prefer Wallet-First)
- Open the Wallet app on your iPhone.
- Tap the + (Add) button.
- Select Debit or Credit Card, then tap Continue.
- Scan your Cash App Card (if available) or enter details manually.
- Complete verification if your issuer requests it (this can be a text, call, or in-app confirmation).
How to Use It (The Fun Part Where You Actually Pay)
- In stores: Double-click the side button, authenticate (Face ID/Touch ID/passcode), and hold near the reader.
- In apps/sites: Choose Apple Pay at checkout and select your Cash App Card if it’s not already the default.
- Pro tip: If you want Cash App to be your default Apple Pay card, set it as the default in Wallet settings.
When Way #1 Is the Best Choice
Pick this method if your goal is mostly “I want to pay with Apple Pay, but my money is in Cash App.”
It’s quick, usually doesn’t require waiting for bank transfers, and it keeps everything simple.
Think of it like putting your Cash Card in Apple Wallet’s “front pocket.”
Common Issues (And How to Fix Them Without Throwing Your Phone)
-
“Card Not Added” error: Confirm your iOS is updated, your region settings are correct, and you’re signed in to iCloud.
If verification fails, you may need to retry and complete issuer verification. - Verification code problems: Only use the official prompts inside Wallet/Cash App. Never share codes with anyone who contacted you first.
- Declines at checkout: Check Cash App balance, card status (locked/unlocked), and whether the merchant category is supported.
Way #2: Move Cash App Money Into Apple Cash (So It Becomes an Apple Wallet Balance)
If you specifically want your money to live as an Apple Cash balance (the Apple Wallet card that can send/receive money and spend with Apple Pay),
you’ll use this route. It has more stepsbut it also gives you that “real Apple Wallet balance” experience.
The basic idea is:
Cash App → (bank/debit rail) → Apple Cash → spend/send via Apple Pay.
In plain English: you move money out of Cash App, then add it to Apple Cash.
Step 1: Set Up Apple Cash (If You Haven’t Yet)
- Open Settings on iPhone.
- Tap Wallet & Apple Pay.
- Turn Apple Cash on and follow the setup prompts.
- Open Wallet and confirm you see an Apple Cash card.
Step 2: Get Your Cash App Funds “Addable” to Apple Cash
You have two common sub-options here. Choose the one that matches how you keep your money:
if you already have a bank account linked to Cash App, Option A is straightforward; if you mainly use Cash Card, Option B can be convenient.
Option A (Most Common): Cash Out from Cash App to Your Bank (Then Add to Apple Cash)
- Open Cash App and tap your balance on the Money tab.
- Tap Cash Out.
- Select an amount.
-
Choose transfer speed:
- Standard (often free, typically 1–3 business days)
- Instant (faster, but usually has a fee that varies by transfer)
- Confirm the transfer and wait for the funds to land in your bank account.
-
Once the money is in your bank, open Wallet > tap Apple Cash > Add Money,
enter the amount (note: Apple Cash commonly has a minimum add amount), and confirm.
Example: If you cash out $200 from Cash App using Standard transfer, you might wait a couple business days, but you usually avoid the instant fee.
If you choose Instant transfer, you get speed, but you’ll see the fee before confirmingso no surprise “gotcha” later.
Option B (Convenient If You Use Cash Card): Add Your Cash Card to Wallet, Then Use It to Add Money to Apple Cash
If your Cash Card is already in Apple Wallet (Way #1), you can often use it as the debit card source when adding money to Apple Cash.
This can feel like “Cash App → Apple Cash” even though, behind the scenes, it’s still moving through card rails.
- Make sure your Cash App Card is added to Apple Wallet (follow Way #1 steps).
- Open Wallet and tap Apple Cash.
- Tap … (More) or Card Details, then choose Add Money.
- Enter the amount (Apple Cash typically enforces a minimum add amount).
- Select your Cash App Card as the payment method if prompted.
- Authenticate and confirm.
Heads-up: Even when this works smoothly, you’re still subject to limits, identity verification rules, and card eligibility rules.
If Apple Cash asks you to verify identity, do itApple Cash features can be restricted until verification is complete.
Step 3: Spend Apple Cash Using Apple Pay
Once your money is in Apple Cash, it’s immediately positioned for Apple Pay life:
you can pay in stores/apps using Apple Pay, send money in Messages, or keep it in your Apple Cash balance.
In Wallet, choose Apple Cash at checkout (or set it as the default if that’s your vibe).
Fees, Timing, and Limits (Because “Instant” Usually Means “Not Free”)
The costs depend on which rails you use. Here’s the practical breakdown most people care about.
Always confirm the exact fee shown in-app before you tap “Confirm,” because fee structures can vary by transfer type and provider.
Cash App: Standard vs Instant Cash Out
- Standard transfers are commonly free and often arrive in about 1–3 business days.
- Instant transfers arrive faster but usually include a fee (often shown as a percentage with a minimum fee).
Apple Cash: Adding Money and Moving It Out
- Add Money minimums/limits can apply (commonly a minimum add amount, plus per-transaction and weekly caps).
-
Instant Transfer from Apple Cash (to an eligible debit card) typically carries a fee, while
bank transfers often take 1–3 business days and may be free.
Reality Check Scenario
If you’re trying to move $500 from Cash App into Apple Cash in under an hour, you’ll likely be using an “instant” option somewhere along the chain.
That convenience is exactly what fees are charging rent for.
If you can wait, the standard routes are usually cheaper (your patience may be rewarded with extra dollars that can buy actual tacos).
Best Practices and Safety Tips (A.K.A. Don’t Hand Your Wallet to a Stranger)
- Use official in-app support only (Cash App help center + Apple Support). Random “support numbers” online are a scam magnet.
- Never share one-time passcodes or verification texts with anyoneeven if they claim they’re “support.”
- Turn on security features like Face ID/Touch ID for both apps and keep your device passcode enabled.
- Double-check the card you’re using in Apple Pay before you tap to pay (Wallet makes it easy to pick the wrong card when you’re in a hurry).
- Watch transfer timing around weekends/holidays“business days” does not include Saturday, Sunday, or federal holidays.
FAQ: Quick Answers to Common “Wait…What?” Questions
Can I transfer Cash App balance directly to Apple Pay?
Usually, no direct one-tap “Cash App → Apple Pay balance” transfer exists because Apple Pay isn’t a single stored balance.
The practical workarounds are: add Cash Card to Wallet (Way #1) or move money into Apple Cash (Way #2).
What’s the difference between Apple Pay and Apple Cash?
Apple Pay is the checkout technology (tap-to-pay). Apple Cash is a stored balance/card inside Wallet that can hold money, send money, and spend with Apple Pay.
If your goal is “a balance in Wallet,” you’re talking about Apple Cash.
Why is my transfer pending?
Transfers can be delayed for verification, banking processing windows, network issues, or limits. Check the status in Cash App/Wallet and confirm your linked bank/card details.
If it’s beyond the stated time window, contact official support through the app.
Do I need a bank account for this?
Not always. Way #1 can work without moving money to a bank (you’re just using your Cash Card via Apple Pay).
Way #2 often uses a bank account or an eligible debit card to fund Apple Cash.
Common Experiences (500+ Words): What People Run Into When Moving Cash App to Apple Pay
If you’ve ever tried to “transfer Cash App to Apple Pay” and felt like you accidentally enrolled in a minor in digital finance,
you’re not alone. Most people’s experience falls into one of two camps: the “That was weirdly easy” camp, and the “Why is my phone doing this to me?” camp.
Here are real-world patterns users commonly reportplus what tends to fix them.
1) The Apple Pay vs Apple Cash confusion is the #1 speed bump.
Many people start out thinking Apple Pay is a wallet with a single balance. Then they open Wallet and realize it’s more like a fancy card holder.
The “aha” moment usually comes when someone discovers Apple Cash exists and says, “Ohhhh, that is the balance part.”
Once you decide whether you want to pay with your Cash Card (Way #1) or hold money in Apple Cash (Way #2), everything gets simpler fast.
2) Adding the Cash App Card to Wallet is often smooth…until it isn’t.
A common experience: you tap “Add to Apple Pay,” the animation looks promising, and thenbam“Card Not Added.”
When that happens, most successful fixes are surprisingly boring: updating iOS, signing out/in to iCloud, confirming region settings, or retrying the add flow.
People also report that attempting the add from the Cash App side works better than starting inside Wallet (or vice versa).
The important lesson: errors here aren’t proof it’s impossible; they’re usually proof that verification didn’t fully complete.
3) Transfers feel “instant” in one app but “pending” in another.
This is where expectations meet banking reality. Cash App might show a transfer sent, but the receiving bank or card network may still be processing it.
Users often notice delays on weekends or late evenings, then see the transfer land the next business day.
The most frustration comes from the phrase “1–3 business days,” which feels like a polite way of saying, “It’ll arrive when it arrives.”
Practically, if timing matters (rent, a time-sensitive purchase, a friend waiting on you), people learn to initiate transfers earlier than they think they need to.
4) Fees become the surprise villainunless you plan ahead.
Many users report the same pattern: they choose the fastest option because they’re in a hurry, then notice a fee.
The fee usually isn’t hidden; it’s just easy to overlook when you’re speed-tapping.
The best “experienced user” habit is pausing on the confirmation screen and reading it like it’s the final question on a math test:
amount, delivery speed, fee, and destination. If you want to minimize fees, the shared wisdom is simple:
use standard transfers when you can, and save “instant” for moments when time is worth more than a few dollars.
5) Apple Cash setup can trigger identity checks at the worst possible time.
A classic experience: someone finally decides to move money into Apple Cash, taps around Wallet, and suddenly gets prompted to verify identity.
That can stop the process until verification is complete.
People who have the smoothest experience usually set up Apple Cash before they urgently need itkind of like testing your flashlight before a blackout.
If you’re planning to use Apple Cash regularly, getting setup and verification done early makes future transfers feel dramatically easier.
6) The “best method” changes depending on your lifestyle.
Users who mainly shop with Apple Pay and just want to spend their Cash App funds tend to love Way #1 because it’s quick and checkout-focused.
Users who split bills in iMessage, send money to family, or want a Wallet-based balance tend to prefer Way #2 because Apple Cash integrates neatly into Apple’s ecosystem.
The experienced takeaway is: don’t force a method that doesn’t match your habits. Pick the path that makes your everyday payments smoother.
At the end of the day, transferring Cash App to Apple Pay is less about one magic button and more about choosing the right “bridge.”
Once you know which bridge you’re crossingCash Card in Apple Pay, or Cash App funds into Apple Cashthe process stops being mysterious and starts being routine.
And routine is the ultimate flex in personal finance.
Conclusion
If you want the fastest “Cash App to Apple Pay” win, add your Cash App Card to Apple Wallet and start paying with Apple Pay (Way #1).
If you want your money to behave like a Wallet balance you can send and spend, move funds into Apple Cash (Way #2) using a bank transfer or an eligible debit-card funding route.
Either way, keep an eye on fees, move early when timing matters, and stick to official in-app support if anything looks off.


