Table of Contents >> Show >> Hide
- Why Tie the Side of a Shirt?
- Best Shirts for a Side Tie
- How to Tie the Sides of a Shirt: 8 Steps
- How to Tie Both Sides of a Shirt
- How to Tie a Button-Down Shirt on the Side
- Styling Ideas for a Side-Knot Shirt
- Common Mistakes to Avoid
- Fabric Tips: What Works Best?
- How to Keep Your Shirt From Stretching Out
- Experience Notes: What I Learned From Tying the Sides of Different Shirts
- Conclusion
A shirt can be loyal, comfortable, and still a little too boxy for the outfit you had in mind. That is where the side-tie trick comes in. Learning how to tie the sides of a shirt is one of the easiest no-sew styling hacks for turning a loose T-shirt, button-down, or oversized top into something more fitted, flattering, and intentional. No sewing machine. No scissors. No dramatic “I ruined my favorite shirt” moment.
The beauty of a side knot is that it changes the shape of your shirt without permanently changing the shirt itself. You can make a long tee look cropped, define your waist, balance wide-leg jeans, add shape over a skirt, or rescue an outfit that feels a little too “laundry day chic.” Whether you are styling a basic cotton T-shirt, a soft jersey tee, a flannel, a button-up, or a beach cover-up, the method is simple: gather, twist, wrap, tuck, and adjust.
This guide walks you through how to tie the sides of a shirt in 8 steps, plus styling ideas, fabric tips, mistakes to avoid, and real-life experience notes from trying this trick with different shirts and outfits.
Why Tie the Side of a Shirt?
Tying a shirt on the side is a small styling move with a surprisingly big payoff. It helps create a cleaner silhouette, especially when a shirt is too long, too wide, or awkwardly loose around the waist. A side knot also adds asymmetry, which makes even a plain white tee look more styled than simply tucked in.
Unlike a full tuck, a side knot does not add bulk inside your waistband. Unlike cropping with scissors, it is completely reversible. And unlike complicated fashion hacks that require three mirrors and the patience of a saint, this one usually takes less than a minute once you get the hang of it.
Best Shirts for a Side Tie
Before jumping into the steps, choose the right shirt. The side-knot method works best with shirts that have enough extra fabric to gather at the hem. A fitted baby tee may not give you much to work with, while an oversized T-shirt is practically begging for a stylish little knot.
Great options include:
- Oversized cotton T-shirts: Easy to twist and perfect for casual outfits.
- Soft jersey tees: Stretchy, comfortable, and forgiving for beginners.
- Button-down shirts: Great for a polished front or side knot.
- Flannel shirts: Ideal for fall outfits, jeans, leggings, or boots.
- Linen shirts: Breezy and stylish, though they may wrinkle more easily.
- Long tank tops: Useful for summer looks and gym-to-brunch styling.
Thicker shirts can still be tied, but the knot may look bulky. Thin, drapey fabrics create a neater knot, while structured cotton creates a more casual, lived-in look.
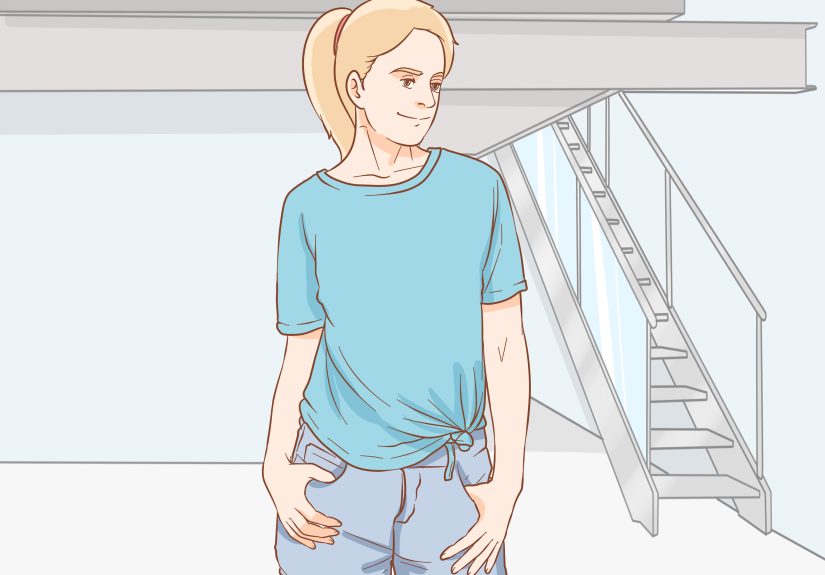
How to Tie the Sides of a Shirt: 8 Steps
Step 1: Start With a Shirt That Has Extra Length
Put on the shirt and check how much fabric you have near the hem. For the cleanest side knot, the shirt should reach at least a few inches below your natural waist. If it falls around your hips or lower, even better. The extra fabric gives you enough material to twist and secure the knot without pulling the shirt too tight across your chest or shoulders.
Stand in front of a mirror and decide where you want the knot to sit. Most people place it slightly above the hipbone, either on the left or right side. This creates a flattering diagonal line across the waist. If you want a more cropped look, place the knot higher. For a relaxed look, keep it lower near the hip.
Step 2: Smooth the Shirt Down
Before gathering fabric, smooth the front and back of the shirt with your hands. This helps prevent weird bunching, twisting, or surprise wrinkles that appear exactly when you are trying to look effortlessly stylish. The goal is not perfection; the goal is controlled casual. There is a difference, and your mirror knows it.
If you are wearing high-waisted jeans, shorts, or a skirt, make sure the waistband is sitting where you want it. The side tie will usually draw attention to that area, so it helps to adjust your bottoms first.
Step 3: Gather Fabric on One Side
Choose the side where you want the knot. Use one hand to gather the extra fabric from the front and side seam of the shirt. Pull in enough fabric so the shirt starts to fit closer around your waist, but do not yank so hard that the neckline shifts or the opposite sleeve rides up.
For a casual T-shirt, gather the fabric into a small “tail.” For a button-down shirt, unbutton the bottom two or three buttons first, then gather one side panel and the opposite front panel toward your chosen side. With button-downs, the knot often looks better when it is slightly forward rather than directly on the side seam.
Step 4: Twist the Fabric Into a Rope
Once you have gathered enough fabric, twist it into a short rope. Twisting is the secret to a secure side knot. If you skip this step and simply tie loose fabric, the knot may look floppy, lumpy, or like it gave up halfway through the day.
Twist gently but firmly. Cotton can handle a bit of structure, but delicate fabrics such as silk, rayon, or thin linen should not be pulled too hard. If the fabric starts to strain, loosen your grip. Stylish is good. Stretching your shirt into a sad accordion is less good.
Step 5: Wrap the Twisted Fabric Around Two Fingers
Hold the twisted fabric tail and wrap it around two fingers to create a loop. This gives your knot a rounded shape and makes it easier to pull the fabric through. Think of it like tying a tiny bun at the side of your shirt.
If the shirt is very long, you may need to wrap the fabric once and then tuck the extra tail into the loop. If the shirt is shorter, one simple loop may be enough. The trick is to keep the knot compact so it looks intentional rather than bulky.
Step 6: Pull the Tail Through the Loop
Take the end of the twisted fabric and pull it through the loop you created. Tighten the knot slowly. Do not pull it as tight as possible right away, because you may want to adjust the placement, crop level, or drape.
For a softer look, leave the end of the fabric visible. For a cleaner look, tuck the tail under the knot or into the inside hem of the shirt. This hidden-knot effect works especially well when you want the shape of a tied shirt without the knot being the star of the outfit.
Step 7: Adjust the Drape
Now comes the styling magic. Gently pull the fabric around the waist so the shirt lies smoothly. Adjust the neckline, sleeves, and back hem. If the knot made the shirt too tight across the front, loosen it slightly. If the back looks baggy, pull a little more fabric toward the knot and retighten.
Look at the diagonal line from the opposite side of the shirt down toward the knot. A nice side tie usually creates a soft angle across the torso, which can make the outfit feel more balanced. This is especially helpful with wide-leg pants, midi skirts, biker shorts, or high-waisted denim.
Step 8: Secure It for All-Day Wear
If the knot feels sturdy, you are done. If the fabric is slippery or the shirt keeps loosening, use a small clear elastic, mini hair tie, or safety pin hidden inside the knot. This is a helpful trick for rayon, satin, silk-like polyester, or oversized shirts that refuse to behave in public.
For delicate shirts, avoid sharp pins unless you can place them through a seam or hidden area. You can also tuck the knot under the hem to keep it from moving. Give the shirt a gentle tug test before leaving the house. If it survives the tug test, it can probably survive errands, coffee, and at least one dramatic reach for something on the top shelf.
How to Tie Both Sides of a Shirt
If you want a bolder look, you can tie both sides of a shirt instead of just one. This works best with oversized tees, festival tops, beach cover-ups, or shirts you wear over a fitted tank or sports bra. Gather fabric at both side seams, twist each side into a rope, and tie a small knot on each hip.
The double-side-tie method creates a cinched shape and can make a long shirt look more like a custom top. Keep both knots even unless you are intentionally going for an asymmetrical look. If one knot sits higher than the other, the shirt may twist around your body as you move.
How to Tie a Button-Down Shirt on the Side
A button-down shirt offers more structure than a T-shirt, which makes the side knot look polished and slightly dressier. Start by unbuttoning the bottom two or three buttons. Pull the two front tails toward one side, cross them once, and tie them into a simple knot. If the tails are long enough, tie a second knot for security.
For a casual weekend outfit, pair a side-tied button-down with straight-leg jeans and sandals. For a more elevated look, wear it with a slip skirt, tailored shorts, or wide-leg trousers. The knot adds shape, while the collar keeps the outfit from looking too relaxed.
Styling Ideas for a Side-Knot Shirt
With High-Waisted Jeans
This is the classic combination for a reason. A side-tied T-shirt with high-waisted jeans creates an easy waistline without needing a full tuck. Add sneakers for a casual look or heeled sandals when you want the outfit to feel more pulled together.
With a Midi Skirt
A loose shirt can sometimes overwhelm a midi skirt. Tying the shirt at the side shortens the top visually and highlights the waist. Try this with a cotton tee and a satin skirt for a mix of casual and dressy textures.
With Leggings or Biker Shorts
An oversized T-shirt tied at the side gives shape while still keeping coverage. Keep the knot low if you want more length in the back, or higher if you are going for an athletic, cropped look.
Over a Dress
Layer a shirt over a fitted dress and tie it at the side to create the illusion of a skirt-and-top outfit. This is a smart way to restyle a simple tank dress or make a sleeveless dress feel more casual.
Common Mistakes to Avoid
The biggest mistake is pulling too much fabric too tightly. A side knot should shape the shirt, not strangle it. If the fabric around your chest, arms, or neckline starts shifting, loosen the knot and gather less material.
Another mistake is tying delicate fabric without testing it first. Some materials crease easily or show stress marks. If the shirt is expensive, fragile, or sentimental, try a gentle tuck or use a small elastic instead of a hard knot.
Finally, avoid making the knot too large. A bulky knot can create a strange lump under jackets or cardigans. If the shirt is thick, create a looser twist and tuck the extra fabric inside the hem instead of tying a full knot.
Fabric Tips: What Works Best?
Cotton and cotton blends are the easiest for beginners because they hold a knot well. Jersey knit tees are soft and flexible, which makes them comfortable for casual side knots. Linen looks beautiful tied, but it wrinkles quickly, so embrace the relaxed look. Flannel creates a chunkier knot, which works well for fall outfits but may feel bulky under outerwear.
Silky fabrics can look elegant, but they often slip loose. Use a hidden elastic or small knot to keep them secure. Stretch fabrics are comfortable, but repeated tight knotting can affect shape over time, so avoid pulling them too aggressively.
How to Keep Your Shirt From Stretching Out
If you tie the same shirt often, give the fabric a little care. Untie the knot before washing so the shirt does not dry with a twisted shape. Wash printed tees inside out, use cold water when appropriate, and avoid high heat if you want to preserve stretch and color. Lay delicate shirts flat or dry them according to the care label.
When removing a tight knot, do not yank it open. Loosen the loop first, then unwind the fabric. This helps protect the hem and side seams. A shirt is not a gym resistance band, even if it has been through a lot with you emotionally.
Experience Notes: What I Learned From Tying the Sides of Different Shirts
The first thing you notice when experimenting with side-tied shirts is that every shirt has a personality. Some shirts cooperate immediately, like they have been waiting their whole life to become a cute weekend outfit. Others act like you have personally offended them by asking for a knot. The difference usually comes down to fabric, length, and how much extra room the shirt has around the waist.
Oversized cotton T-shirts are the easiest starting point. They give you plenty of fabric to gather, and the knot usually stays in place. I have found that graphic tees look especially good with a side knot because the knot adds shape without hiding the design completely. If the graphic sits low on the shirt, a higher side knot can distort the print, so it is better to tie the knot slightly lower near the hip.
Soft jersey shirts are comfortable but can be sneaky. They stretch easily, which makes them simple to tie, but if you pull too hard, the shirt may look uneven. The best approach is to gather more fabric gently instead of stretching a small section tightly. A relaxed twist gives a smoother result and keeps the shirt from clinging in odd places.
Button-down shirts feel more sophisticated when tied, but they need a little patience. If you button too far down before tying, the knot may sit awkwardly. If you unbutton too much, the front can open more than you planned. The sweet spot is usually leaving the middle buttons closed and opening only the bottom two or three. That way, the shirt still looks polished but has enough fabric to knot naturally.
Flannel shirts are fun but bulky. A side-tied flannel over a tank top can look relaxed and cozy, especially with jeans or leggings. However, a full double knot can become large quickly. A single knot or half knot usually looks better. With flannel, the goal is “cool autumn layering,” not “tiny fabric pumpkin attached to my hip.”
Linen shirts create one of the prettiest side-tie looks because the fabric drapes naturally. The downside is wrinkles. The upside is that linen already has a relaxed texture, so the wrinkles look intentional. A side-tied linen shirt over shorts or a skirt is an easy summer outfit that feels breezy without looking sloppy.
The most useful lesson is to adjust the rest of the outfit after tying the knot. A side knot changes proportions. Sometimes the jeans need a belt. Sometimes the sleeves look better rolled. Sometimes the knot should move one inch forward or backward. Tiny changes make a big difference. The mirror test is simple: if the outfit looks balanced from the front, side, and back, the knot is working.
Another practical tip is to keep a small clear elastic nearby. It is especially helpful for slippery fabrics or shirts that are not quite long enough for a secure knot. Gather the fabric, wrap the elastic around it, then tuck the little tail under the hem. This creates the look of a knot without forcing the fabric into one.
Most importantly, side-tying a shirt should feel easy. It is not about creating a perfect fashion-editor knot every time. It is about making your clothes work harder for you. One shirt can become casual, fitted, cropped, beachy, polished, or playful depending on how and where you tie it. That is the kind of wardrobe math I can support.
Conclusion
Learning how to tie the sides of a shirt is a simple skill that can completely change the way your clothes fit and feel. With just a twist and a knot, you can define your waist, shorten an oversized tee, modernize a button-down, or add personality to a basic outfit. The best part is that the method is flexible. You can tie one side, both sides, hide the knot, show the knot, keep it loose, or make it cropped depending on your style.
Start with a shirt that has enough length, gather the fabric gently, twist before tying, and adjust the drape until it feels balanced. Once you practice a few times, the side-knot shirt trick becomes one of those tiny wardrobe habits that saves outfits on busy mornings. It is quick, free, reversible, and far less dramatic than attacking your shirt with scissors. Your closet loves that kind of restraint.
Note: This article is written as original, publish-ready content and synthesizes practical styling, shirt-care, and fashion guidance from reputable style and apparel-care resources.