Table of Contents >> Show >> Hide
- Before You Start: The Safety Stuff (Yes, This Part Matters)
- Wire Stripping 101: What You’re Actually Trying to Achieve
- Know Your Wire: Solid vs. Stranded (And Why It Changes Your Technique)
- The Best Method: How to Strip Wire With a Wire Stripper
- How to Strip a Wire Without a Wire Stripper
- Special Cases: Stripping Different Types of Wire and Cable
- Common Mistakes (And How to Fix Them)
- How to Choose the Right Wire Stripper (So This Gets Easier Forever)
- Quality Check: A 10-Second Inspection That Prevents 10 Hours of Annoyance
- Troubleshooting: Why Won’t the Insulation Come Off Cleanly?
- Real-World Experiences: What People Actually Learn After Stripping a Lot of Wire (500+ Words)
Stripping wire is one of those “small” skills that shows up everywhere: replacing a light fixture, installing a
smart switch, fixing a lamp cord, wiring speakers, building a DIY LED setup, or doing electronics projects. And
even though it sounds like something a superhero does to a bank vault, wire stripping is really just removing
insulation cleanly so the metal conductor can make a solid connection.
The trick is doing it without damaging the copper (or aluminum) underneath. Nick the conductor and you’ve
basically created a tiny “break here” linelike perforated paper, but for electricity. So let’s do this the right
way: safely, neatly, and with minimal drama.
Before You Start: The Safety Stuff (Yes, This Part Matters)
If the wire is part of a household circuit (outlet, switch, light fixture, junction box), treat it like it’s live
until you’ve confirmed it’s not. Turn off the breaker, unplug devices, and verify power is off with an appropriate
tester. If you’re not confident, get a licensed electricianthere’s no trophy for “boldly guessed the breaker.”
- Work only on wire that’s disconnected from power (unplugged or breaker off and verified).
- Wear eye protection (tiny bits of insulation love surprise flights).
- Use sharp tools (dull blades = more force = more slips).
- When in doubt, don’t DIY mains wiring. Practice on scrap wire first.
Wire Stripping 101: What You’re Actually Trying to Achieve
A well-stripped wire has:
- The right amount of bare conductor exposed (not too short, not “copper spaghetti”).
- No nicks, cuts, or missing strands (especially on stranded wire).
- Insulation that ends cleanly, without ragged edges.
- A conductor that fits the connector/terminal properly and tightens down securely.
How Much Insulation Should You Remove?
It depends on the connection. Many devices and connectors specify a strip length (often printed on the device,
included in instructions, or built into the connector design). As a general rule:
- Electronics terminals / small screw terminals: about 1/4–3/8 inch (6–10 mm).
- Crimp terminals: strip to match the barrel depth (follow the terminal’s spec).
- Wire nuts / twist-on connectors: commonly around 1/2–3/4 inch (12–19 mm), but follow the connector’s directions.
- Push-in connectors: often have a strip gauge or markinguse it.
The goal is simple: enough bare metal to make full contact, but not so much that exposed conductor sticks out
beyond the connector or terminal.
Know Your Wire: Solid vs. Stranded (And Why It Changes Your Technique)
Solid Wire
Solid wire is a single metal core. It strips cleanly and is common in household wiring (like 14 AWG or 12 AWG
copper for many residential circuits). It’s easier to strip, but easier to nick if you choose the wrong notch or
squeeze like you’re trying to crush a walnut.
Stranded Wire
Stranded wire is made of many fine strands twisted together. It’s common in cords, automotive wiring, speakers,
and many electronics projects. The big risk here is cutting off strands, which reduces the wire’s effective
capacity and makes connections weaker.
Quick AWG Tip
In American Wire Gauge (AWG), the bigger the number, the smaller the wire. So 22 AWG is thinner
than 14 AWG. This matters because wire strippers use gauge-labeled slotschoose the wrong one and you’ll either
barely scratch the insulation or accidentally “strip” the copper too.
The Best Method: How to Strip Wire With a Wire Stripper
If you own a wire stripper, congratulationsyou’ve already chosen the path of least suffering.
There are two common types: manual notch-style strippers and self-adjusting/automatic strippers.
Both can produce clean results when used correctly.
Method A: Manual Notch-Style Wire Strippers (The Classic)
- Choose the right slot for your wire gauge (AWG). If you’re unsure, start with a slightly larger slot and test on scrap.
- Measure your strip length. Many strippers have a strip-length guide. You can also mark the insulation lightly with a pencil or eyeball it carefully.
- Insert the wire so the section you want to remove is centered in the jaws.
- Squeeze the handles gently but firmlyjust enough to cut the insulation, not the conductor.
- Pull the insulation off in one smooth motion. If it fights you, don’t yank like you’re starting a lawn mower; adjust pressure or slot size.
- Inspect the conductor. Look for nicks (solid wire) or missing strands (stranded wire). If damaged, cut and re-strip.
Pro Tip: The “Gentle Squeeze” Is Not Optional
Too much pressure is the #1 reason wires get nicked. You want the jaws to score the insulation and release it,
not chew into the metal. Think “firm handshake,” not “hydraulic press.”
Method B: Self-Adjusting / Automatic Wire Strippers
Automatic strippers clamp and pull insulation off in a single squeeze. They’re great for repetitive stripping and
mixed gaugesespecially for stranded wire and DIY projects with lots of leads.
- Set strip length using the built-in stop (if your tool has one).
- Insert the wire fully into the jaws.
- Squeeze the handles. The tool grips the conductor, scores the insulation, and removes it.
- Check the result and adjust length or tension if needed.
If automatic strippers are leaving little insulation “collars,” you may need to adjust tension, ensure the wire is
fully seated, or clean the jaws. (Yes, tools have hygiene too.)
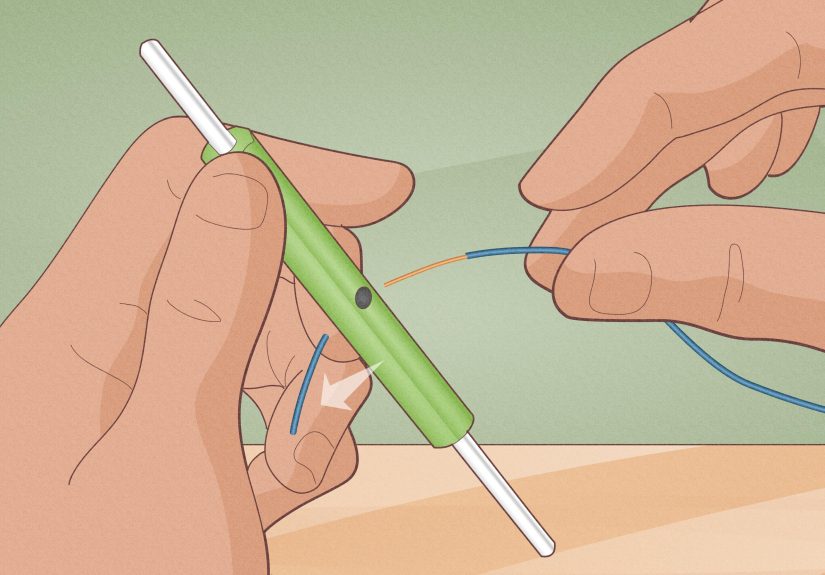
How to Strip a Wire Without a Wire Stripper
No stripper? No problemas long as the wire is safely disconnected from power and you work slowly.
These methods are best for small repairs, low-voltage projects, and “I swear I own tools but they’re all in the other drawer” moments.
Option 1: Scissors (Surprisingly Effective, If You’re Careful)
Many scissors can score insulation near the pivot where the blades are strongest and easiest to control.
- Open the scissors slightly and place the wire near the pivot area.
- Apply light pressure so the blades bite the insulation without cutting the conductor.
- Rotate the wire to score the insulation all the way around.
- Pull off the insulation with your fingers or pliers.
This is one of those techniques where “less pressure” is the entire secret. If you hear a crunchy metal sound,
you’ve gone too far.
Option 2: Utility Knife (Best for Cables and Tough JacketsAlso the Most Slip-Prone)
A utility knife can work, but it demands patience. The goal is to score the insulation, not carve
your initials into the copper.
- Stabilize the wire on a flat surface (or hold it with a clamp).
- Lightly score around the insulation at your desired strip length. Don’t press hard.
- Bend the wire slightly at the score line to help the insulation crack.
- Slide the insulation off with your fingers or pliers.
If you’re stripping the outer jacket of a multi-conductor cable (like a cord), a knife can help start the cutbut
go shallow. Cutting too deep can nick inner conductors, which is exactly the kind of “tiny problem” that becomes
a big problem later.
Option 3: Needle-Nose Pliers (For a “Grip, Twist, Pull” Approach)
With pliers, you’re basically creating a controlled tear line in the insulation:
- Grip the insulation lightly at your strip point.
- Twist slightly to break the insulation’s hold.
- Pull the insulation off. If it won’t budge, try scoring first with a knife or scissors.
This works best on softer insulation and larger wires. On very small wires, you’re more likely to damage strands
unless you’re extremely gentle.
Option 4: The “Two-Cut” Method With Wire Cutters (Use With Caution)
Some people use diagonal cutters (dikes) to score insulation. This is riskier than a proper stripper because the
cutting edges are designed to bite through metal. If you do it at all, treat it like defusing a movie bomb:
steady hands, minimal pressure.
- Close the cutters lightly on the insulation where you want to strip.
- Rotate slightly to score around (do not fully cut).
- Pull the insulation off carefully.
If you nick the conductor even once, cut the end off and redo it. “It’s probably fine” is not a wiring strategy.
Special Cases: Stripping Different Types of Wire and Cable
Stripping Speaker Wire (Usually 16–22 AWG Stranded)
- Use a stripper slot that matches the wire gauge.
- Don’t twist the conductor into a tight rope unless your connector calls for ittoo much twisting can make it hard to insert.
- For spring-clip terminals, keep the end neat and compact.
Stripping Lamp Cord / Zip Cord
Lamp cords often have two conductors joined side-by-side. Many have a “ribbed” side to identify neutral.
Separate the two conductors first, then strip each end carefully. If the insulation is soft, a quality stripper
makes this dramatically easier.
Stripping Very Small Electronics Wire (Like 24–30 AWG)
This is where cheap strippers and heavy hands go to ruin friendships. Use precision strippers if possible. If not:
- Use the correct tiny gauge slot.
- Reduce squeeze pressure.
- Inspect for missing strands under good light.
Stripping the Outer Jacket of Cable
Removing the outer sheath (as opposed to stripping individual conductors) is a different job. Cable rippers,
jacket strippers, or carefully controlled knife cuts are commonly used. The main rule: avoid damaging the
insulation of the wires inside. If inner insulation gets nicked, cut back and redo.
Common Mistakes (And How to Fix Them)
Mistake 1: You Nicked the Conductor
Fix: Cut the wire back to clean metal and re-strip. A nicked conductor is weaker and more likely to break later,
especially if the connection gets moved around.
Mistake 2: You Removed Too Much Insulation
Fix: Trim the wire and strip again to the correct length. Exposed conductor outside a connector is a safety and
reliability issue.
Mistake 3: You Didn’t Remove Enough
Fix: Strip a tiny bit more. Some terminals will “grab” insulation instead of conductor if you don’t expose enough
metal, leading to loose connections and heat buildup.
Mistake 4: You Cut Off Strands
Fix: Same solutioncut back and redo. Missing strands can reduce performance, especially in applications that
draw more current.
How to Choose the Right Wire Stripper (So This Gets Easier Forever)
If you do even a handful of wiring projects a year, a solid wire stripper pays for itself in saved time and fewer
do-overs. Here’s what to look for:
- Clear gauge markings (AWG) and a comfortable grip.
- Sharp, well-aligned stripping holes that don’t leave ragged insulation.
- Built-in cutter for copper wire (not for hardened steelyour tool deserves better).
- Optional strip-length stop for consistent results.
- Self-adjusting automatic style if you strip lots of varied gauges or stranded wires.
Quality Check: A 10-Second Inspection That Prevents 10 Hours of Annoyance
Before you connect anything, check:
- Is the copper smooth and unscarred?
- Are all strands present (for stranded wire)?
- Is the strip length correct for the terminal/connector?
- Is any bare wire exposed outside where it will be clamped or covered?
If the answer to any of those is “ehhh… maybe,” redo it. Wire is cheaper than troubleshooting.
Troubleshooting: Why Won’t the Insulation Come Off Cleanly?
- Wrong gauge slot: Try the next size up/down and test on scrap.
- Dull tool: Replace or upgraderagged stripping usually gets worse, not better.
- Weird insulation: Some jackets are tougher; a self-adjusting stripper or a different tool style may help.
- Too much force: Back off pressure and try a gentler score-and-pull.
Real-World Experiences: What People Actually Learn After Stripping a Lot of Wire (500+ Words)
Anyone can strip one wire. The real education starts around wire number twentyright after you mutter,
“Why is this so hard?” and the universe replies, “Because you’re squeezing like you’re angry at it.”
In workshops, DIY forums, and job sites, the same lessons come up again and again, and they’re surprisingly
practical.
First: people learn that wire stripping is mostly about feel. On notch-style strippers, there’s a sweet
spot where the insulation is cut but the conductor is untouched. Beginners often clamp down too hard because they
assume the tool is “smart” and will stop automatically. It won’t. Once you get the hang of a gentle squeeze,
stripping becomes almost effortlessand the number of “mystery breaks” in the wire later drops to nearly zero.
Second: experienced DIYers become obsessed (in a healthy way) with strip length. Too short and the terminal
barely bites metal. Too long and you’ve got exposed copper peeking out like it’s trying to photobomb your
connection. People who build electronics or wire lots of fixtures often end up using the strip-length stop on
their strippers, or they’ll mark a consistent length on their workbench. It sounds fussy until you realize it
prevents loose connections and saves time when you’re stripping multiple conductors.
Third: stranded wire teaches humility. With solid wire, you can nick it and still sometimes “get away with it”
for a whileuntil movement, vibration, or bending finds that weak point. With stranded wire, missing strands are
more obvious right away: the conductor looks thinner, frayed, or uneven. People who work with speaker wire, lamp
cords, or automotive wiring often develop a habit of inspecting the end under bright light before making a
connection. It’s a small ritual that prevents a lot of intermittent problems later (the worst kind, because they
disappear the moment you try to show someone).
Fourth: the “no wire stripper” methods are best treated as emergency backups, not a lifestyle. Yes, scissors can
work. Yes, a utility knife can work. But the difference between “worked once” and “works reliably every time” is
huge. People who do occasional repairs often end up buying a decent wire stripper after the third time they
accidentally nick a conductor with scissors and have to trim and retry. It’s not about being fancyit’s about
reducing frustration and making the work more repeatable.
Finally: the most common “experience-based” advice is also the simplest: practice on scrap wire. Stripping
a few spare pieces lets you test the right gauge slot, learn how much pressure you need, and see what a clean
strip looks likewithout the stress of doing it inside a cramped electrical box or on a wire that’s barely long
enough to reach the terminal. Once someone practices, their speed improves, their strips look cleaner, and they
stop treating wiring like it’s mysterious. It’s not mysteriousjust precise.
If you take one takeaway from all these real-world lessons, make it this: wire stripping is a tiny skill with
outsized impact. Clean strips lead to solid connections, and solid connections lead to fewer headaches. And fewer
headaches lead to a happier youwhich is, frankly, the best kind of circuit completion.


