Table of Contents >> Show >> Hide
- What “Good” Firewood Storage Actually Means
- Seasoning vs. Storing: Know Which Job Your Woodpile Is Doing
- The Dos: How to Store Firewood Outdoors the Right Way
- Do pick the right location: sun, breeze, and drainage
- Do keep it off the ground (seriously, every inch counts)
- Do stack for airflow, not for aesthetics
- Do cover the top, not the sides
- Do think about distance from your house (pests and fire safety)
- Do rotate your supply: “oldest first” keeps the pile healthier
- Do split wood to speed drying
- Do use a moisture meter (and use it correctly)
- Do keep it local: don’t transport firewood long distances
- The Don’ts: Firewood Storage Mistakes That Backfire
- Bonus: Small Setup Examples You Can Copy
- Quick Troubleshooting: If Your Wood Still Won’t Burn Well
- Conclusion: Store Smart, Burn Better
- Real-World Experience: of “I Learned This the Hard Way”
If you’ve ever tried to light a fire with damp logs that hiss like an angry cat and smoke like a teenager’s first grill attempt, you already know the truth: firewood storage is not optional. It’s the difference between a cozy evening and a backyard fog machine that makes your neighbors text, “Everything okay over there?”
Storing firewood outdoors isn’t complicated, but it is weirdly easy to mess up. The goal is simple: keep your wood dry enough to burn cleanly, while still giving it enough airflow to keep drying. Ohand don’t accidentally create a luxury condo complex for termites, ants, mice, and that one raccoon who looks like he pays rent.
What “Good” Firewood Storage Actually Means
Proper outdoor firewood storage does three big things:
- Reduces moisture so your wood burns hotter and with less smoke.
- Prevents rot and mold by avoiding constant dampness.
- Discourages pests (and helps keep them from migrating toward your house).
Here’s the benchmark most pros use: firewood burns best when moisture content is under 20%. That’s not a random numberbelow that point, wood lights easier, produces more heat, and creates fewer emissions (and less creosote in chimneys). If you’ve never used a moisture meter, don’t worrywe’ll get to that.
Seasoning vs. Storing: Know Which Job Your Woodpile Is Doing
People say “store firewood” when they really mean one of two things:
1) Seasoning (drying green wood)
Fresh-cut wood is basically a sponge wearing a tree costume. Seasoning is the process of letting it dry long enough to burn efficiently. This usually means splitting it and stacking it in a breezy, sunny spot for months.
2) Keeping seasoned wood dry
Once it’s dry, your job is to keep it that wayespecially through rain, snow, and the kind of humidity that makes your hair believe in new religions.
Same storage principlesjust different urgency. Green wood needs maximum airflow. Seasoned wood needs protection from repeated wetting. Either way, your woodpile should never be a soggy, ground-hugging blob.
The Dos: How to Store Firewood Outdoors the Right Way
Do pick the right location: sun, breeze, and drainage
Choose a spot that gets sun and wind. Sun helps drive moisture out; wind carries it away. Also: avoid low areas where water pools. If your woodpile is sitting in a puddle, you’re not seasoning firewoodyou’re making a very slow soup.
- Best spot: slightly elevated ground, good sun exposure, natural airflow.
- Avoid: under thick tree canopy, beside dense shrubs, or anywhere that stays damp.
Do keep it off the ground (seriously, every inch counts)
Ground contact is the #1 way wood turns into punky, buggy sadness. Elevate your stack so air can move underneath and ground moisture can’t wick into the logs.
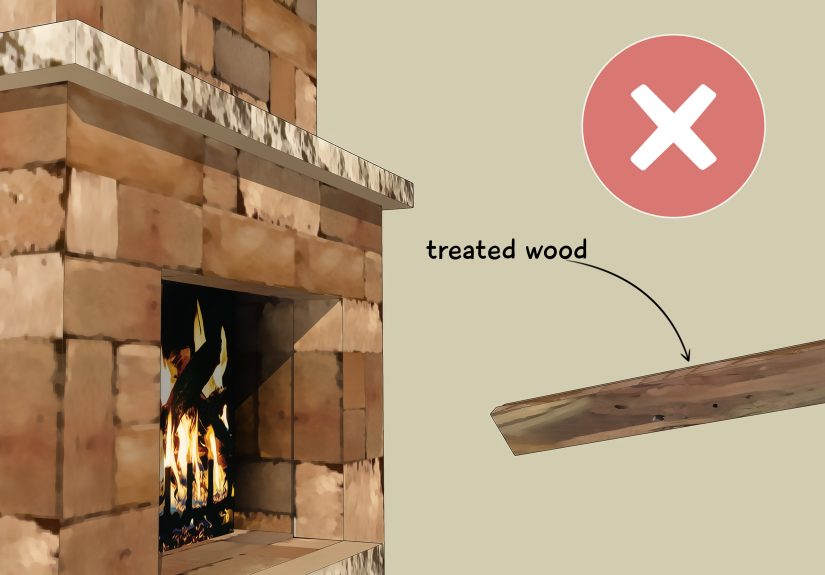
- Use pallets, pressure-treated runners, bricks, cinder blocks, or a firewood rack.
- If you want extra credit: put a layer of gravel under the base to improve drainage.
Do stack for airflow, not for aesthetics
Yes, a perfectly aligned woodpile looks amazing. But airflow is the real MVP. Stack in a way that lets air pass through the rows and across the ends of logs (where moisture escapes fastest).
Good stacking options:
- Single row (best for drying): one log deep, long row, lots of wind access.
- Multiple rows with spacing: leave a few inches between rows.
- Crisscrossed ends (“end caps”): helps stability and reduces collapse risk.
Keep stacks stable. If your woodpile falls over, it won’t just bruise your egoit can injure people, smash toes, and turn into a damp heap that dries poorly.
Do cover the top, not the sides
The outdoor storage sweet spot is: rain protection on top + open sides for ventilation. Covering the whole pile like a burrito traps moisture. That’s how you get moldy, musty wood that burns like wet cardboard.
Cover options that work:
- A sheet of metal roofing weighed down on top.
- A tarp that covers only the top third to half, leaving sides open.
- A woodshed or lean-to roof with generous overhang.
Pro move: slope the cover so water runs off instead of pooling. Standing water on a tarp is basically an invitation for leaks and sagging.
Do think about distance from your house (pests and fire safety)
Convenience says, “Stack it right by the back door.” Reality says, “That’s how you invite termites to a house party they never leave.” Many safety and wildfire-prep guidelines recommend keeping combustible piles away from structures, and some local codes or fire officials specify minimum distances.
A practical approach:
- Main supply: store it well away from the house (commonly 10–30 feet, depending on conditions and local guidance).
- Ready-to-burn batch: keep a small, rotating amount closer for conveniencejust not pressed against siding or piled on a deck.
Do rotate your supply: “oldest first” keeps the pile healthier
Firewood isn’t fine wine. It doesn’t get better forever. Rotate it.
- Stack new wood behind or to the side.
- Burn the oldest, driest wood first.
- Re-check anything that’s been sitting for a long timeespecially pieces near the bottom of the stack.
Do split wood to speed drying
Whole rounds dry painfully slowly. Splitting exposes more surface area and helps moisture escape. If you cut your own wood, split it as soon as you reasonably canthen stack it properly. Your future self (the one trying to light a fire in January) will be grateful.
Do use a moisture meter (and use it correctly)
Moisture meters are cheap, fast, and brutally honest. To get a useful reading:
- Split a log.
- Press the meter pins into the freshly exposed inner face (not the outside).
- Aim for 20% or less for easy lighting and cleaner burning.
Do keep it local: don’t transport firewood long distances
This one surprises people: even “clean-looking” firewood can carry invasive insects or diseases under bark or inside cracks. The safest move is to buy and burn locally (or use certified heat-treated bundles when required). It’s a simple habit that helps protect forests and neighborhoods.
The Don’ts: Firewood Storage Mistakes That Backfire
Don’t stack directly on soil, grass, or soggy organic matter
Soil and vegetation hold moisture, and they also create hiding places for insects. If your bottom layer is always damp, the whole stack suffers. Elevation isn’t a fancy upgradeit’s the basics.
Don’t wrap the whole pile like a gift
Full tarps wrapped tightly around the sides trap humidity. Your wood “sweats,” stays damp, and can grow mold. Cover the top, let the sides breathe, and keep airflow working for you instead of against you.
Don’t store firewood under decks, porches, or eaves
It seems smartalready covered, right? But enclosed or semi-enclosed spaces often have poor airflow and become pest magnets. They can also create a fire hazard, especially in wildfire-prone areas or where embers can accumulate. Keep combustible storage out from under structures unless you have a properly designed, code-compliant enclosure.
Don’t stack the pile tight against your house
Wood against siding is basically “wood-to-house contact,” and pests love that shortcut. Plus, any combustible stack right next to a home is a risk. Keep a gap, keep it away, and keep your foundation easier to inspect.
Don’t ignore your climate (it will not ignore you)
Storage advice isn’t one-size-fits-all. A stack that works in Arizona might fail spectacularly in coastal Maine. Adapt based on your biggest enemy:
- Rainy climates: prioritize a roof/cover and narrower stacks for airflow.
- Snowy climates: elevate higher and use a sloped cover so snowmelt runs off.
- Humid climates: maximize ventilation; avoid deep stacks and shady corners.
Don’t spray pesticides on firewood
It’s tempting. It’s also a bad idea. Chemicals can end up in your fire (and your lungs), and they don’t reliably solve the real problem: moisture and poor storage. If pests are a big concern, fix the storage setup, keep wood away from the house, and burn through older wood instead of letting it sit forever.
Bonus: Small Setup Examples You Can Copy
The “Weekend Warrior” setup (small yard, occasional fires)
- A 4-foot metal rack on pavers or gravel.
- Top cover only (rack cover or a small tarp).
- A second mini-rack near the door that holds 1–2 days of wood (rotated often).
The “Heat-All-Winter” setup (serious burners)
- Multiple single rows, elevated on pallets or runners.
- Rows oriented to catch prevailing wind.
- Metal roofing panels laid on top after the wood has had a good drying start.
- Clear labeling or stacking order so you burn oldest first.
The “Wet-Climate Survival” setup (rain, rain, and more rain)
- A simple woodshed/lean-to with a roof and open sides.
- Extra overhang to keep wind-driven rain off the stack.
- Higher elevation and strong drainage underneath.
Quick Troubleshooting: If Your Wood Still Won’t Burn Well
Problem: It smokes a lot and sizzles
That’s wet wood. Re-check moisture content on a freshly split face. Move the stack to a sunnier, breezier location if possible. Improve top coverage without closing the sides.
Problem: The bottom row is soft or crumbly
That’s usually ground moisture + poor airflow. Raise the stack higher, replace the worst pieces, and don’t store over vegetation.
Problem: Bugs everywhere
Some bugs are normal outdoors. The goal is to prevent a thriving colony next to your house. Keep wood away from structures, trim vegetation around the pile, and rotate stock so nothing becomes a long-term habitat.
Conclusion: Store Smart, Burn Better
The best way to store firewood outdoors can be boiled down to a simple formula: elevate + ventilate + cover the top + keep it safely placed. Do those four things consistently, and you’ll have wood that lights easily, burns cleaner, and doesn’t double as a pest hotel.
Treat your woodpile like a pantry item: keep it dry, organized, and rotated. Your fireplace (and your lungs) will thank you. And if your neighbors stop texting about “the smoke situation,” that’s just a bonus.
Real-World Experience: of “I Learned This the Hard Way”
The first time I tried to “store firewood outdoors,” I made a classic rookie move: I stacked it neatly right on the ground, then wrapped it in a tarp like I was protecting it from a zombie apocalypse. It looked impressivelike a survival bunker made of oak. It also produced the wettest, moldiest firewood I’ve ever seen. When winter arrived, my “ready supply” burned with all the enthusiasm of a damp sandwich.
Here’s what actually happened: the tarp trapped moisture inside, the ground fed moisture from below, and the entire pile turned into a humidity spa. The outside pieces looked fine, but the inner rows stayed stubbornly damp. When I finally split a log to test it, the moisture meter flashed a number so high it felt like the wood was still negotiating its exit from the tree.
The fix was annoyingly simple. I rebuilt the whole setup with cheap pallets and moved the stack to a spot that got afternoon sun and a steady breeze. Then I covered only the top with a piece of metal roofing I scavenged from a friend’s shed project. The difference was immediate. Within weeks, the ends of the logs started checking (those little cracks that are basically wood’s way of saying, “I’m drying!”). And the musty smell? Gone.
My second lesson was about location. I used to keep a big stack close to the house because convenience felt like the highest virtue. Then I noticed more insects near the foundationnothing dramatic, just enough to make me rethink the strategy. I moved the main pile farther out and kept only a small “working stack” closer, rotating it often. That gave me the best of both worlds: less pest pressure near the house, and no frantic snow-boot trips across the yard every time I wanted to add another log.
The third lesson was about weather arrogance. I thought a mild drizzle didn’t matter. It doesespecially when it happens repeatedly. In wetter stretches, I learned to keep the top cover in place and make sure it actually sheds water (a flat tarp is just a swimming pool with ambition). In snowy weather, I learned to elevate higher than I think I need to, because snowmelt always finds the lowest, most annoying place to collect.
The best part? Once you dial it in, outdoor firewood storage becomes low-maintenance. The wood dries, the pile stays stable, and fires become easier to start. Plus, there’s a weird satisfaction in walking past a well-stacked, properly covered pilelike you’ve solved one small part of adult life that nobody warned you would be weirdly technical.


